Lessons
Lesson Info
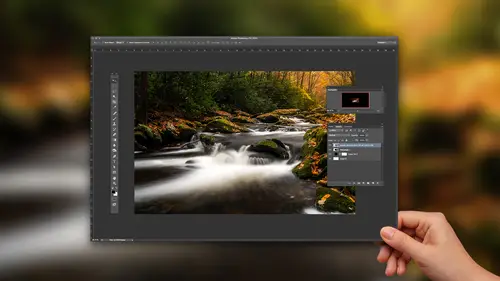
Replace Skies in Landscapes
All right, we're gonna start small, we're gonna build our way up. We'll start simple and here is a real simple, nice photo, just blah sky. It's interesting as I've kind of progressed in my shooting of landscapes, when I used to go somewhere I used to look at the weather and I would just say oh god, I hope it's clear, hope it's sunny, hope it's sunny, hope it's sunny. Look at the weather and if I saw clear was like okay, yes. And now I find myself looking for cloudy and stormy. Not necessarily gray, socked-in blah, but I want some clouds, I want some atmosphere. To me those take that to the next level. So again, nice photo, nice light, we do everything that we can, there's just not a could in the sky. So let's go ahead, we'll take that photo in Photoshop. And I could've made my job a little bit easier by selecting a cloud photo and bringing them in as layers, but we'll do this the hard way. I've got some clouds. So here's the key to skies, the key to skies to replacing a sky is you have...
to have similar conditions. And what I mean by that is I mean I can't take, I can't take, let's find a good photo as an example here, I can't take this photo, I can't take this photo and expect that the sky that I just had pulled up here, expect that that's gonna look good in it. I can't take a photo of a really blah, gloomy day with no sun and expect that that's gonna look good in it. So the very first thing is you have to set yourself up for success and you have to know the limits. The limits are blah cloudy day, you're not gonna be able to make it look sunny and put a great sky in it. So the best we can do are take some pretty good situations that we had and then hopefully make them great. So that's what I'm gonna look for in the photo that we have open right now. I think, I think we'll go with this one. Think we're gonna give this one a try. So I'll open up that one into Photoshop too. So remember, we're doing our simple example first, we'll build in complexity as time goes here. I'm gonna grab my quick selection tool and just make a quick selection of the sky. You can see down here I got some of that area down there, so I'm just hold down my option or alt key which puts it into subtract mode and subtract it away. Let's go to our sky, select all, copy. Come over here and we're gonna go edit, paste special, and I'm gonna choose paste into. 'cause remember I already have a selection active. So if I do paste into, it's gonna paste it right into that selection. Now things don't fit, so we'll go to free transform, size it down a little bit, kinda move it around. But we're doing pretty good, we lucked out on this one 'cause you can kinda see the sun's over here, right, if you look at where all the light on the clouds is and everything. And you can kinda see the sun is in this general direction for here. What I wouldn't want is I wouldn't wanna do this. It looks off. What's that? It makes no sense. Yeah, and somebody looking at it who doesn't know this, they won't be able to verbalize what's wrong, it's just something's off. Your eye is telling you something's off in it. So we wanna make sure that we flip that based on where the sun's gonna be. Can I just ask you while you're working on this, are you working or are both of these pictures already edited? Or are you working, I mean clearly they're edited, but would you do this then at the end of your editing? Correct, good question. So in the interest of time as we moved on so I could cover more things I kinda stopped editing from scratch. So yeah, this photo here prior already had the whites and blacks done to it. So as you're editing you're visualizing that you're going to add a sky, you kinda know what you're gonna add. Yeah, I'm gonna edit that photo as good as I can edit it and get it to a finished point. And then I'm gonna edit a sky as good as I can edit and then open those up together and see if I can merge them together. Okay, thank you. So I am, I'm gonna do all my editing first though. Okay. All right, so we got our sky placed in. And the last thing to do, and this actually works, if you set yourself up the right way for it, which is I'm not gonna try to place this cloudy sky over another cloudy sky that things look off, if you set yourself up right for it now you've got opacity where you can kinda blend it back in with the original photo. Which let's it take on a little bit of that color. You can go to hue saturation, command or control hue, I can make it lighter, I can make it darker. I don't really think I wanna make it darker, I think it kinda has a light, if you look at the original sky, it's got a lighter color to it as well here. But that's why I like the opacity method which is just to blend it. One of the things that I don't know if we mentioned this in the last class 'cause we had a free PDF to download for the last class, but one of the things I did is for this class at mattkphoto.com I have a pack of clouds and skies that you can place in. But I took five of them, this is one of them, and I put it into a free download for anybody that I guess buys Photoshop week here. So you get five of them and then I also put the foreground photo in there too if you ever wanted to practice with it. Cool. So that's part of it and then at Matt K Photo there's part of the bundle is there's a whole could, sky pack as well. All right, so that's one example. That's pretty easy, right? Pretty easy selection, nothing too crazy. Let's go close all these and let's go back over to Lightroom. So now let's go take a look at the next level of sky replacement. We're gonna take it up a notch. So I can go through the editing of this photo, it is super, super quick, I actually edited this photo on my other Creativelive classes, I haven't done what I'm about to do to it in another class before though. But I edited this photo, it's exactly what you've seen. Highlights, shadows, whites, blacks, get a little bit of warmth in there, maybe boost up the colors a little bit, crank up the sharpness. I'm gonna leave the vignette off for now, but nothing really too much more that I would do except maybe just straighten it a little bit. So before, after. So let's replace this sky, 'cause this was the morning, I was kinda disappointed. Like I was thinking it's a nice sunrise, it's a nice place, this is the place that I went to instead of the big reflection lake that everybody goes to thinking I was gonna get a better shot and I did not get a better shot. There was actually no place to set your camera up so I had to walk through the water and just set it up in the water. (chuckles) But I didn't have any sky, nothing like that. So we're gonna make the best out of it here. Get a little bit warmer there. So let's take that photo and a good sky to drop in on this sky. Remember, try to match, we've got some warmth, it's early morning. So you know what, I'm gonna open this one first in Photoshop and then I might take a couple of other cloud images into Photoshop and then I can experiment a little bit. So as far as clouds go, so I can tell you that's not gonna work, right? I can tell you that's not gonna work, like there's no way that and that go together. So you've gotta really go through, that's a possibility, that's a possibility. What do you say, that one or that one? First one. First one. This one? Okay. You guys choose. So let's go ahead and take that one in. All right, let's make our selection. Now we've got a little bit of a tricker selection, right? We've got trees. So option or alt key to subtract from the selection and then here is the magic. See this little refine edge button up there? We're gonna turn that on. I usually turn it on overlay mode, so that way I can see what's behind here, but here's the key 'cause there's a brush, obviously this is not selected well, all I have to do is brush. Look at that. I'll brush along the edge of the mountain, it'll kinda help me pick up any little areas that I missed. But just in case you guys didn't see it, that was the original selection, that's after. It's pretty cool. So let's click okay. So that gives me my selection and we will go Select all, copy. And then I'll go to edit, paste, paste into, and drop that in. It's gonna be too big, so. I mean, I'm not feeling it. Even if I reduce the opacity, I'm not feeling it. I'm sorry, I'm gonna have to veto your guys. We just wanted to see what it would look like. (laughs) You're being vetoed. I might try this, I wonder if this is the same one we used before. It's just a little bit less, it's just a little bit more muted on the brightness of the colors, which I think is what might work there. Come on. Any day. I'm just gonna drag and drop, there we go. So select all, copy, and undo back to my selection. Edit, paste special, paste into. And now let's see what we can get with this guy here. And by the way, I'll smush, I'm not a real big stickler with that. I'll stretch, it's a sky, it doesn't have to be perfectly sharp. And then we reduce the opacity, but I think that's gonna fit a little bit better. Light coming from over on this side, the light's coming from over here so that matches up pretty much. So we can play with it a little bit. I probably should've used, you know what was also hurting me on this one is I should've used the haze reduction brush or something on the mountain there, because that's kind of faded. But now, fun part, I gotta do it on the water. So let's go ahead and take our, oh, little trick for you here. I can't be on the cloud layer when I select, I gotta be on the photo layer. Oh, that was great. There we go. All right, and... So we'll get most of the way there, then we'll go back into refine edge and I'm just gonna brush. It gets pretty close, clean it up a little bit. Click okay. And we'll just do the same thing that we did before. So I still have it pasted or copied into memory, so edit, paste into. So now let's put it down there. So now what do I gotta do? Edit, transform. Not horizontal, but vertical. And then I'll go into free transform and kinda just try to get it to match up pretty close, reduce the opacity. Probably take it way down considerably for the reflection, 'cause the reflection's usually a little bit dark and a little bit more muted than everything else would be. So I can take it way down there, but pretty interesting for some of the things that we can do, especially those selection tools, that stuff's amazing. All right, and since I did come over from Lightroom for this photo, I could just hit file, save, head back over to Lightroom and now I can go back and I could do all the Lightroom stuff. It doesn't mean because I came back to Lightroom I can't do more Lightroom stuff. I could grab my brush and reduce the haze and stuff like that too. So that's our sky replacements. Again, simple to a little bit more complex. But if I can tell you guys anything, the key is gonna be the conditions need to match, the conditions need to match each other. If I were to replace that sky, I could probably replace it with maybe a muted version of this. I could probably reduce the opacity, that'd be fun. Here, let's do it really quick. All right, so that sky is obviously way too small. That's okay. Bigger, close it. I'm not gonna go crazy with the selection 'cause Drew's gonna get mad at me if I do. So I'm just make a super quick selection, I know I'm probably missing buildings and tops of buildings and all kinds of things here. But we'll call it. Go there. So remember, I already have the sky in here, so I'm not placing it in. Remember when you make a selection if you add a mask, whatever selected stays. So if I add a mask, my sky days, it obviously looks horrible, don't give me that look. I saw it, you're like. Take my opacity down, bring in a little bit of the original sky. I actually don't mind the original sky in this one which is why I didn't replace it, because it'd be an easy replace. I kinda like the crisp difference of the two. But if you absolutely had to drop in a different sky. But it works, you have dusk and you have that time of day that kinda match each other and so I think it works.
Class Materials
Bonus Materials with Purchase
Ratings and Reviews
Pamela Richardson
I would absolutely recommend this class. I really liked Matt's detailed explanations of each step that he was demonstrating, and his review of alternates for each step. I have been photographing landscapes for over 40 years, including the last 10 years in digital. I really appreciated Matt's clear demonstrations of how images can be improved, and am eager to apply his examples to my own work.