Lessons
Lesson Info
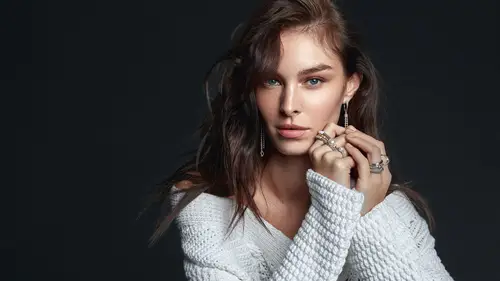
How to do a Global Dodge and Burn
I'm not going to do any healing today. It's not healing cars. I'm going to try to do the whole retouch of this image. I'm going to hell. We don't really have to hell. That's why I chose this image. Very good skin. If you don't believe me, well, then I don't like you. But if you don't believe me here, I think I mean, some things might be cleaned up, but it's okay, right? He's a very handsome do so with very great skin. I wish I had so skipping that on. We're going into the Dodge and Burn group, which is not a matter of you have to have their group. It's just that to keep everything organized. And now what I usually start with is the global adjustments. Because I want to set, you know, my story globally first and then go into and do the retouching part, which is like the cleaning up part. So now it's more like, as I said, the global and then later we are going to deal with, like a glass with that. Now, if I look at this image like this or like this, the first thing I noticed If I look at...
this, that the shot, that the shirt is very real bright. I mean, I know that it's like, you know, like, this is the actual color of the shirt. However, the problem with this is that perceptually it takes away from the face just ever so slightly and that that matters. So what? You would want to do it now It's better if you have, like, something like this when it works. Brilliant. Okay, what I would do. I was trying to position this not too awkwardly, is that Let's look over this image. So I have that one that part And I also feel like I hope you can also feel like this is just a bit too hot. I try to equalize it. Sometimes it's good. It depends on the aim, but it's good to have, like, this kind of role looking file. But if I want to go home or like advertising or, you know, like maybe fashion fashion is just a different advertising portrait, I like a bit like mawr into the neutral zones, and not this too big of a contrast. I like to create contrast with something else not, you know, in the face like you are hit with the life. So once again you guys knew this, your experts, but I just grab the lasso tool. It's a free hand, less it'll. This is actually, as you can see from the percentage up here. It's like 6.25%. It's a hassle black file, so it's very huge, So you have to set your feather accordingly. Most of times I think I just headed to and let's see if I have a zero know Yeah, this is this year Cool. The guys are doing very good job at creative life. They are very good, So I don't know how they let me in anyway, So I usually start with an 80 with a hassle, but fire if it doesn't work, I'm just going to change it later because I can, because I'm working with masks and masks are wonderful, right? You. Anyway, what I do is just free. Han armed is going to go through this on just as you can see with shirt on. This is what I get right? Very easy on dime in the global stuff. I'm just going to grab it curves most of the Times you will see me using curves as just having a mask, opening it up and just dragging. The MIT turns down or up because that's like the exposure is kind of like in the midterms, right? So I don't really want Teoh touch the actual blacks. And I don't really want to touch the actual white because that would modify the whole image into, like, OK, money wise and horrible blacks. So by staying in the middle, I'm staying kind of true to the whole image on, But it's not going to look like it has been touched up as much as if I were to do this. It's going great, right? It's just very different color. Or if I just do this, then then what you have. And sometimes it's desirable. What you have right now is like the contrast is too much of a difference, compact to the face compared to the neck and every area. They don't want to do that. However, if you have, you know the mid terms. It's not that much of a difference. What you probably is going to get when you are darkening. The image is like a a saturation effect. You can counter that later. We can counter. It is not a problem, but this is what we're going to do. And if I, as you can see if I do this it's very visible. However, doing glass and just doing, you know, like like differences like this. It's not too noticeable. And also, once again, mosques. Since I have this mask because I started with letter toe, I have the most. And now I'm trying to think of the things I know about first shop. And what I know about photo shop is that if you drag thief freehand last little next to you like the edge. Very edge of an image, what you get. I'm going to show you buy old clicking on the mosque is that you see, various this, this graduation, this father here, which is not desirable because that's going to show up on your image or could potentially show up. And also you want to apply it to that area too. So I just get a you. I just go into this. I just grab a brush 100% soft brush and I'm just as you can see, I can just repair this whole thing. No new problem, New time. And now Yeah, I have I have this image. Yeah. So this is just a before and after once again, Not a great I mean, no, a very visible thing. But that's what we're trying to achieve here to have, like, something that is not going to show up. One people's raid us, right? I'm just going to drink this out suits. It's not going to bother us. OK, so actually, that's what I'm noticing. Now I need to think about mawr. Of what else do I need to do? This is a portrait. You might have a different image. I brought this portrait because, um, it's a very long time to get into cars and stuff. Anything we have so many things to work with. It might confuse someone. And also, people are very interesting When it comes to portrait. They don't think that it could be properly colored. They don't really think that, you know, they are not really very well balanced on the issue. Give them like an environment, a portrait and they know what to do. Miss Internal when yet vignettes and stuff like that so they know their stuff, but this is a bit interesting for them. So now what I'm noticing, and I mentioned that that's too hot. So let's bring that up most of the times. What I do is just either II board, just like this, or go into like this luminous, and this is just going to give you and we created that. So you can create home to what is going to give you is like a map of what's very, very, very bright and very not a good. So we're the same feather and the same blaster toe. I'm just going to I could see like an edge here. Let's say like this is something that's not a very desirable for me. This is what I'm going to select now who looks like Terminator usually click out and just have another curves again. The mask. I'm sorry, the mask is that you can see it, and, uh, I just slightly bring this down. I try to be very slight with it, so not to create any edges or any anything noticeable. And also just keep in mind that I am dragging the MIT turns down. And if I have like very big highlights very big, like almost white points in the faith, and I direct down on the highlights it's going to show up. The difference is going to show up that I have the midterms down and those highlights are still. It's not going to look at natural because if you have, like maintenance down most of the time, so you have you have to have, like, a highlights down. Yeah, anyway, So that's what you do. That's what you have. Still, the thing is, I think it's still very hot. This'll image, and what we're going to do is we are going to kind of equalize the whole thing, and this is what happens. You know, when you have a stroke on an angle, this is just the usual thing. What I do, I just want to kind of equalize it and what you can do. Another curves layer with the Catholic everyone. I'm just going to eyeball it, how much I want to kind of like tone it down and what I like the whole image. But I'm concentrating on this area, right, because this is what I don't like, some concentrating on that area. So if I like it somehow like in this range? Let's say, then I'm still on the same layer. Still, my mosque is selected and I'm going to go into image. And there is this thing called apply image, which is just prior images is like this. You see the symmetry. You look at this image or with all the layers, and you can do that. You can do the same with a playmates to have what you see applied to like a new layer. In this case, we're going to apply the whole image. So just copying the image into the mosque by copying the whole image into the mosque. Since masks are black and white, we're going to have a black and white image in the mosque. Just a second. Just the default settings on apply image would be good. You have to remember that. Just go with the default. Now you can see a hair. I'm going to close this so it's not going to cause any problems. You can see here that we have, like a curbs layup with a mask with a black and white image in there. And it's what it's doing is that since why is going to make your adjustments show up on Black is going to make them go away where it's lighter. So on the highlights, it's it's turned down more and where its shadows its not because you remember we turned down the MIT tense, right? So just to show you what it did, it's like, Let's just assume in, Yeah, you can see Cool. Very good, Very good class. Yeah, this is what we have. But the thing is I since since this mask, as you can see, is not really black, where it's where it's in shadow. It's going to show up there just very slightly, but it's going to show up. It's darkening the whole image. I don't want that. So the cool new thing about photos show. I don't know when they introduced, maybe see six, not 666 I don't know the previous one which came before, See, See, What they did is that if you have like a group, so I'm just going to like Command G, which is going to group. The currently selected layer or layers against now is in a group. My can just basically apply a layer to the group, so by applying layer. I can, you know, further manipulate, then area Teoh have somewhere because if I were to draw on this and I could I could get my you know, I could do this. But the problem is that if I do that and I do something else, I can't go back. I have to recreate the whole thing. However, Wow. Yes, I figured it out. I know how for a shop. But if I If I don't do that, But I use this mask and I'm just going to inverted because I need a black one. Then I can say that. Okay, that's cool. I'm going to grab zero Hartness. Very big brush on. That's too big, actually. And just here is Mike and just apply to this general area right on. Nothing else. This is it, uh, hope it's visible that probably everyone can see it. Help. So this is actually how I would like equalizer face is what I would say thes are, as I said, some tricks, but also tricks that people use. So it's not just like, you know, being very flashy here. Yeah, that's very important. Now, while Magic Mouse. Well, now what? That we have that. Let's move on to other areas. The shirt for me is still very, very bright. Now what would I do now? I could go back into the previous layer, which is this one. Just show up this this one. But if I were to just put them it turns down Mawr or drag them down, it's going to show up. I showed you that it's going to show up so I could do something of a very feathered thing. Like I can grab a brush. I congratulate like Grady in Tool. I could make like, sort of 1/2 vignettes is what I would say. So I'm like going into another cars layer and just like okay, just concentrate on the shot. I wanted, for example, this dark right? So the things I could do, since now it's apply to the whole image. If that command I was going to invite it or I can just go in and click and inverted, I can either just grab like a again, a bigger brush. Why, it's keeping anyway, like a bigger brush. And you know, just the areas that that seemed Teoh bright and it's like a bit like painting. They are, you know, they're more talented than re touches are probably I can't paint anyway. But as retarded, what we have to do is like we have to sort of smooth out the edges. We have to make them disappear. And that's why we are constantly going like, back and forth with our commands, ease and controls these on then, you know, turning it on and off and just seeing well, it doesn't work it all what's going on? But I think it looks value. Okay, so I would say now we have the shirt down, we have the face down. The only question is, is there anything else that we want to do that's like a global adjustment to this whole thing? You know, the great thing is that now we have that down. So we are done with the very difficult part which is going to get, you know, mawr difficult if you have, like, a more complex image. But you see, it took us a long time to get here. I talk a lot. That's my problem. Yeah, the only thing I'm going to mention here, which is like more of a global thing Have you heard about luminosity? Masks? Yeah, Grace. Everyone stay up today. Here. Wow. Why am I here? Anyone want to come apparent? Do you think we don't know? Wow. So luminosity mask are like they look the same as, like, this mosque. And I'm not explaining it to you guys. I know you know that I'm explaining to everyone else this is like a luminosity mask because you have the certain luminosity is used as a mask, basically, in a certain way, info shop. So what you can do is like you can create, like, visible luminosity masks because limit because of mark is just a black and white layer. So what if what if I get up and we are going to need this for this image? But what if I go up here? Let's create, like, for example, a correct black and white, um, entry, which would be like this one as against This is white. So that's why the solid color works too. Yeah. Now we have a correct one. This is one luminosity mask. Now, what we need to decide is what we want to show up on this mask. If we want to show you want, you know, thinks like the highlights or the shadows to show up or in between we can grab another Kurds layer on top of this whole thing. And, you know, guys, just let me know if you can't see because I'm not moving my panels correctly. I'm just so in in this and I don't know what you see and not so we can just manipulate like, Okay, I want more highlights. That's really good. So I'm just trying to push this toe white, so it's going to be like, almost very full of visible when when it's a mosque. Okay, I don't want anything of this, this part and as you can see, it's it's getting like a shorter range or a narrower range is when I would say, I don't want these shadows so I can grab them to okay. And I I want like to have this more like this. Have the white. So this is basically I understand that it's again very evident, but just realize that you can create. You don't have to go through the same steps. You can create these masks using your perception on like, yeah, this is this is actually what I wanted to influence that part of the face, so that's cool. And now what you need to do is what I just talked to you in great detail. No great detail, but I showed you is You can go into any of your masks and just hit like image, apply image and just hit OK on the default settings because that's just emerge layer. So what you are seeing now is going to be applied to a mask, and that's a luminosity mask. Yea, also, you can do it another way, but that's something that everyone talks about it.
Ratings and Reviews
JIll C.
Viktor describes his method of organizing his Photoshop Layers for all the typical edits that he will apply to an edited portrait. He also clearly demonstrates the power of Curves Layers to make tiny, but useful edits to an image. This is definitely a class I will have to watch over and over to be able to take in all the subtleties of his process. On the sample image, each of the individual edits are hardly noticeable, but the cumulative effect is a dramatic improvement in what appeared to be a very good image to begin with. Mostly what I learned about high-end Retouching is that I have a lot to learn!
Mitch
Loved the class. Viktor teaches the why behind retouching techniques and encourages students to think about the image before applying techniques. One of the best online classes I've taken in a while.