Lessons
Introduction: Discussion On New Masking Module
14:50 2Editing Modules Overview
15:59 3Masking Module: Introduction To Masking
03:49 4Masking Module: Select Subject
05:51 5Masking Module: Select Sky
07:11 6Masking Module: Brush
04:48 7Masking Module: Linear Gradient
02:10 8Masking Module: Radial Gradient
04:01Masking Module: Color Range
05:09 10Masking Module: Luminance Range
04:12 11Masking Module: Depth Range using Depth Capture
04:49 12Combining Mask: Adding / Subtracting To A Mask
10:31 13Organizing Mask: Naming, Mask Order
03:44 14Creating Rimlights With Mask (All On Your Phone)
05:06 15Creating Great Social Post Directly From Lightroom Mobile
10:43 16Class Wrap Up
00:49Lesson Info
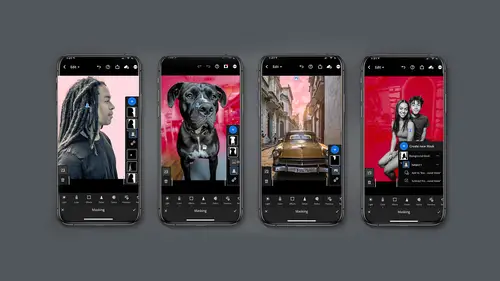
Masking Module: Select Subject
getting starting with masking. So the first one we're going to look at is select subject And oh do I love this. Keep in mind it's going to look a little different on the desktop but with select subject, what happens is the ai in Lightroom is going to determine what your subject is. And I'm gonna tell you, it does a phenomenal job reading all sorts of information, you know, animals, uh, inanimate objects like trucks for edges, difficult hair, edges. Now it's not always perfect, but it's a really, really great start. Select subject doesn't work for everything. And if the A I cannot find a subject you'll get this warning up that says, hey, couldn't find a subject to select. But that's okay because Lightroom gives you a bunch of other ways of selecting or creating a mask. And now I'd like to talk about too exciting features you can find in any mask. First here is the invert button and oh check this out. You can select the subject and then invert it and select the background. Super duper ha...
ndy. Just imagine what this allows you to do. You can change the contrast level of a background. You can change the blur, you can really bring your foreground up in prominence so quickly. The other thing I want to point out is see this little line here on the options that indicates. You can pull this out and get a longer name, which I kind of like sometimes. And then remember on the other side you can pull the mask icon out and have icons or full names. Let's take a look at select subject. I'm going to use this picture of a fire engine because this is great for select subject. So to start you just click on the masking icon and then you get this choice to click plus to add one and I'm gonna select select subject. The ai technology is going to do its job and it's gonna say great, there's your fire truck, isn't that great? So it's going to select the red fire truck. Now remember this is kind of hard to see right red on red. So if you click the three dots in the upper, upper right hand corner, you can change your overlay color. I'm going to go ahead and pick green. And now I'm on my mask. Now I'd like to adjust this truck but I can't see it. Don't worry. The minute you start doing your adjustments the mask will disappear. So I have light color effects detailed optics previous and reset. So I think what I'd like to do is bring up the clarity and the texture on this truck. So it gets a little sharper. Now often when you move clarity, your shadows will get a little blocked up. So I'm gonna go ahead and bring up the shadows just a bit and I'm gonna zoom in so I can see what I'm doing. Yeah, I think this is looking pretty good. Now I want to talk to you about the next part and please pay attention here. I'd like to select the background. So I have a choice, I can click uh the Okay check mark and confirm that initial mask and I can go to my masking icon again and start all over again and say great, I'd like to add a selection select subject, but this time I'm going to convert on the left hand side and I'm going to flip it. So now I have the background selected. Remember on this overlay, it will show me what is selected and maybe on this one, I'd like to take the clarity down. I e I'd like to reduce the sharpness of the background, thus making the truck stand out even more and then perhaps on this one I will take go to the color and I'll de saturate the background just a little bit. So the red truck pops. Now I'm gonna hit confirm. So now if you look at the masking, I have to mask, I have the background mask and I have the truck mask. But there's another way to do this also. And this can be a little confusing. So I just want to be really clear about that how I made the background mask as I selected a new mask, correct? Well, I'm gonna go ahead and click and long hold on that mask icon and I'm going to delete that. So I still have the truck mask, you can see that here. I'm going to click and hold that and I'm going to get this option to duplicate. So if I duplicate that mask, I now have doubled up the mask and its effect. But what I can do is if I click on the icon of the mask, look what shows up on the left hand side, I can now click invert and now I have inverted the mask. However, because I did duplicate it kept all those edits. So I may want to zero that out again and to zero out and edit you. Double click on the name and the slider will go back to original and so now I can do the texture move and the clarity moves so that the picture is now out of focus. Which way do you do? It doesn't matter. The big takeaway on this is if you duplicate a mask, it will also duplicate the edits you have made within that mask. Cool. Like to revisit again this notion that sometimes select subject can't actually pick a subject but then sometimes it does try to pick a subject and it looks like this doesn't come and uh come out very well. So you got to know while the technology is getting better and better. It's not always perfect. However, keep remembering every update the technology gets stronger and improved so don't give up on this particular image, you're probably better off with the select sky, check this out and again I'm going to change the interface so we can see it a little easier. At least you can get more of the image and keep in mind. You can always invert this, so maybe this would be your best bet. Now, it's a good time to cross over to select sky.
Class Materials
Bonus Materials with Purchase
Ratings and Reviews
Christian Alsider
This was a great class! easy to follow and the teacher was excited about what she was teaching