Lessons
Lesson Info
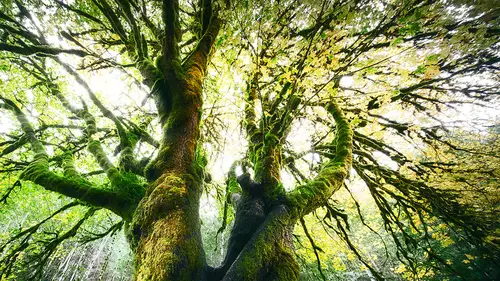
Luminosity Masks & Landscapes
So, here's a traditional landscape image. That, one of my biggest problems with landscape images is, especially when it comes to waterfalls, water is not blue, okay. But, it happens that way. Have you ever seen like a waterfall image that you do, just do a Google search on the images and just type in waterfall. I guarantee that the first like, within that set of 15 to 20 images that pops up, four or five of them are gonna have a blue waterfall. It looks like electricity running through landscape, and not actually like water. 'Cause water doesn't carry that blue color. The reason why that turned to blue is, if we think about things in terms of light balance, our camera can only capture one instance of color at a time that we tell it to capture. Now, if shooting in raw, hear me out, cause you can always change that light balance, but the idea is that it can only capture that one instance of color at any given time. That's why it's up to us to use our editing tools to manipulate those col...
ors in between. So when it's making its analysis of the colors in this image, depending on what colors it's favoring, the water might end up blue. Your snow, hopefully is gonna end up blue and not yellow. But snow in your images will end up blue. It just looks like this vibrant blue, and it shouldn't. If you do HDR, that's gonna look even worse. It's gonna look like someone dumped blue dye into your waterfall from the top to play a practical joke on you while you're editing you're going taking your pictures because that's the nature of your camera and how it captures that light and we start packing all that stuff together. So, when I'm looking at this photograph, I can automatically see, that those highlight areas have too much blue in them. But let's say, for instance, and this image doesn't necessarily show it, it's a really beautiful waterfall image, but if there was a sky up here that was blue, I probably wouldn't want that to be changed, but I'm definitely gonna want this to be changed here. So one of the ways I can do that, is I know, that looking at this image, what's the highlight? It's the waterfall. So, if I press control, alt, and 2, I now have a selection for all the highlight areas in my image based on what we know of traditional luminosity masking. So, if I were to take, for this one, let's say a hue saturation adjustment layer. If I press alt or option, I click on that mask, it's gonna look like a black and white photo, right. But what this black and white is telling me is that the areas that are the whitest white area within this mask are gonna get the brunt of the effect, or the most of the effect, and as it tapers back into these shadowy areas, that's not gonna get any effect at all. So we can see that, I'm gonna do something really horrible I would never say anyone do. Just hike up that saturation all the way. Now we can see where all that saturation is, where we're getting the bulk of that saturation from in the image. It's happening within those highlight areas, and it's not really happening back here, 'cause it's tapering off and it's transitioning off as it goes into the shadows, because we used the traditional luminosity mask. But here's the cool part, here's the kicker. If we click on this luminosity mask, whether we alt click on that mask, we alt click on it, we can see what it looks like, or option click on it, go to image, go to adjustments, and then go to levels, and drop this down. Watch what happens, okay. Stop like right there. We're now saying that that hue saturation adjustment layer can only touch the white parts. I was letting you think about it, okay. It can only touch the white parts of the image as they transition into the midtone part. It cannot touch this area of black. That hue saturation layer no longer will be able to effect this area, okay. It can only effect these areas. Now the really cool part about this, is because this is a hue saturation adjustment layer, and I'm trying to focus in, specifically on, the blue waterfall, if I were to move the midtone slider here, you see how I start to manipulate the contrast of that mask. We've gone from a mask that had a lot of contrast in it, meaning a lot of data between black and white, to basically have gray value in it, to no longer having gray value in it at all. Because we told those midtones, hey if you were a midtone area or if you were like a slightly gray area, now become black. Or, we can say hey, if you were a midtone area, now become more white and make that mask smaller. If we were to come in from the right hand side, we can now make white have more data in there, by pulling from the midtones as well, making that white area take on more of that midtone data and manipulate our midtones in between. So if I press enter on this, now when we see that saturation adjustment all the way up, see how it's only really affecting the blue waterfall? So, you know, you go into something like Adobe Camera Raw in Lightroom, and you try to target, even if you go into the HSL adjustment area, of Adobe Camera Raw in Lightroom, it will never show you what blue is. It will tell you how to move and manipulate blue, but if you take a color wheel on there and do the dorky, nerdy stuff that I do, and you tell blue to move, it's gonna take blue with it, it's gonna take magenta with it, and it's gonna take cyan with it. Because that's what comprises that color blue on that color wheel. It's a combination of many different things. So, if I were to go into the blue value of that hue saturation adjustment layer, or take my targeted adjustment tool, and click on one of those areas, that tells me that that's blue. Now, from here, I can drop the saturation in there, and even make that waterfall water lighter or darker, and stop dropping out the saturation of the blue that is within that waterfall. See the difference there now? It's a very precise and surgical way to even target colors in your image. I'm not, at this point, I'm not really even doing anything much with that luminosity value, at this point, I'm targeting the blue that's in the highlights of the image. On the flip side of that, because you have a mask, you can always use that mask on other things. And there's many ways that we can do that. We can do that with, by adding a curves adjustment layer to it, or any adjustment layer to that, and physically stealing that mask, or doing something called a clipping mask. So now, what if I wanted more things to happen to those highlight areas? If I were to take a curves adjustment layer, press alt or option on that curve, that little arrow down there means hey, I'm a curve, but I want to steal every property you have, I want to take your mask that you have, I want to take your opacity that you have, I want to take any blend if characteristics you have, I'm stealing it all because of that little arrow. And that's by alt or option clicking in between those two layers. So now, with this curve, I've got that highlight segregated and separated in the image. Not only am I working on the color of that image, I'm also working on the highlights of that imnage, or the shadows and the midtones of that image as well.
Ratings and Reviews
LeCompte
Great great great. What? You can do that? And easy Wow. Wait, you can do that too and so easy too? Wow! (ratta tat tat useful stuff)
Bhaven Jani
Amazing class, so top notch, to the point, and made easy to understand. Yes, luminosity masking is not an easy topic, it is complex, I have been using PS for several years and it still took me a while to get my head around it. But Blake Rudis makes it so engaging and intuitive to understand. And guess what, once you understand LM, you won't be able to edit images without using it. its so powerful. Thanks a ton for this class.
user e5ab02
I've been using PS for quite some time and have avoided this technique BECAUSE it's a bit tedious getting to the meat of what this tool can do. It is however well worth it. Blake has done a great job in presenting this and showing how it can best be used. He DOES NOT in ANY WAY SHAPE OR FORM seem overbearing or egotistical. On the contrary, he seems very approachable and is well aware that what he's teaching is a very dry subject and is trying to make it fun and graspable. Do NOT pay any attention to the reviewer above who says he is...that says so much about the reviewer's insecurities.