Lesson Info
16. Color Grading and Fixing
Lessons
Introduction
05:32 2Your Story Arch
12:28 3Creating a Shot List
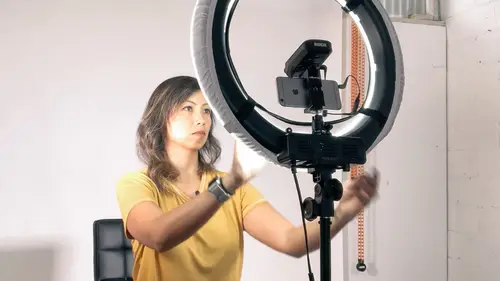
05:08 4Gear List
18:13 5Introduction to Location Shoot
01:51 6Mobile Filmmaking Gear
10:00 7Assessing the Location
09:42 8Setting Up the Interview
07:28Capturing the Interview
21:08 10Capturing B Roll
12:06 11Shooting Creatively
11:03 12Organizing Your Footage
02:21 13Culling Footage
10:30 14Shaping the Story
15:21 15Adding B Roll to the Edit
05:35 16Color Grading and Fixing
07:28 17Music
06:45 18Voice Over
04:31 19Exporting and Uploading
15:14Lesson Info
Color Grading and Fixing
So then I mentioned it earlier, but I When I shot the footage, it was shot in log. And so then I had to go into the different things. The different clips that we put in the time line and color agreed them. So we'll talk about how do you fix your footage? So remember how I had part of the gimbal that was in the shot? You know, how do you take that out? Um so fix the footage and then how to add back in the color because it was in log. Um, and I think that's it. So let's go to the IPhone and let's go into the grated. Um, so here, let's I think these ones don't have the color grading here, so you can see it's a little bit washed out. The way to add color is by going tapping on the clip itself, and I'm gonna go to the suitcase and then click edit, and then you see to the right, so I have color and effects selected on the bottom. So I have that selected there. So that gives you this menu here on the right. So I have, um so Lou effusion has different settings of ways. You could change the col...
or of your footage. But there's also this part where I think I was talking about Phil make has a D log. So in this film, it d log V to, um So what you could do is add that in. So if I tap that, you see if you could see that it added some color to it, and then you can say how much of it you want applied. Do you see the difference? So this is kind of adding the that's not showing updating. Did that get darker? Um, but yes. So you can choose how much of it you want to put in or apply to that footage. Um, So what I've done here, though, is I've downloaded other other lutz or look up tables. Um, so think of it as you know, how instagram has filters, basically, just adding filters in. And there's different looks, right, depending on the look and feel that you want for your film. So what I had here is, um oh, I deleted. So I have here. I think I applied, uh, me Go scrolls girl. I applied this, um X to 70 log, so we can see it's a little crazy. Um, it's a little too much. So I am going to dial that down a little bit to something that makes more sense. Right? Um, so that's how you add color back in. And then also, if I tap on that pallet on the top left, um, you can see that, um, there's this thing called original. So if I tap on that, this is where you can fix things that are too dark or to contrast the not enough contrast. You can make all those modifications here so you can make a brighter, darker kind of like when you're I didn't get photo. You know, this is where all of those basic edits are saturation. Um, and all of that. You can make all those corrections here, so that's always really cool to be able to control that. Yes. Just step back a second. Yellow. And can you explain again what log is for those who aren't familiar with that? Yeah, and the let long and look yeah, so log is like I mentioned earlier. It's a way to shoot in a, um in a in a mode that you're capturing mawr. Uh, more information. I guess that's the way to put it, Um, your so that you you when something's too bright, for example, you've lost that information of like of pixels or something's too dark. You can't recover that cause you don't have that information. So when you shoot in log, um, you're capturing more of that information on and then what a lot is or look up table. It's just a way to color grade. It's It's adding back in, um, the color that you took away because you shot in that way, if that makes sense, Um, yeah, I think that's the safest way to put it. So if you're a photographer, perhaps you would in photography. That might be like shooting and raw. Yeah, yeah, exactly. Yeah, yes, yes. So that exactly it's shooting in raw, and then you could make more modifications to it. And really, you'll have the blacks and the data of the like the dark, dark and the light lights. Anything you can manipulated as much difficult. Thank you. Yeah, it's a confusing topic. Um, and, um, it's tricky because so you'll see in a second. If I come out of this screen. You see, I have Here is the part that gets a little bit tedious because I have all of these clips that now need to be colored color, graded or corrected. Even I'm gonna have to go into each individual one and add the same thing in. Luckily, there's a short cut so I can copy and paste whatever it is that I apply to this one. So the way to do that is you tap on clip over here. Um, so clip and then you can say copy groups. Which parts of that clip do you want to copy? So these icons, this means, um I don't want to copy the position or the sound. I want to just copy these two. What? I made changes to the original and also to the filter. So I'm gonna uncheck those and then make sure those are still selected. I'm gonna hit copy and then say I want to put it on here, and then we go to clip, and I'm only gonna pace those two things. I'm gonna uncheck those, and they wanna hit paste and see it changes the color of that. So that's a little bit of ah, shortcut so that you're not, like going to set exact gets tedious. So that's one quick way to do it. Um, yes. So then I just went into each one of these, and I changed the colors. So, um, I'll turn things on and off so you can see the difference. So we go coloring effects so that I will show you, um, without with So, um and that's how you change the colors or fix things that are too dark or too bright. So let's say you've got stuff on your own. Currently that you ah, taped videoed, um, without the filmic app. So can you still do that stuff like in the native? Yeah. You can take even if you didn't shoot. Log, I think is what you're asking, right? And you just have regular footage that you shot with your phone. You can still apply some of those things to it. You can apply there like filters, you know, and then you can choose the amount. How? How much of that filter that you want apply? Yeah. You can totally still do that
Ratings and Reviews
Chrystelle Hadjikakou
Being a beginner in all things video, watching this live class left me excited to try out a lot of things on my iPhone, not to mention I learned loads. Cielo showed us the full process from shot listing to gear to preparing the shoot and then shooting and editing, which was very enlightening, also I want to thank the people who were on the chat, because sharing tips and tricks was great too! Thank you for the awesome work!
Linda
This class was great! Cielo offered really good information. It was probably more than I needed since I am a beginner, but it inspired me to try and use it for the simple reasons I took the course. But it also showed me what is possible and how I can eventually upgrade what I am doing. It's good for people who are really into photography and telling the story of entrepreneurs (which is so important these days) can use their photography skills to help business owners stand out whether it's your side hustle or main career.
Chaya Emily Baumbach
Cielo is a gifted lecturer who explains iPhone filmmaking clearly, easily and in a fun way. I love the way she explains the steps in making videos on our smartphones, along with equipment and app recommendations. So glad I purchased this class as it is immensely helpful to me, a newbie.