Lesson Info
12. Backgrounds
Lessons
Class Introduction
02:36 2Lens Choice for Macro Photography
06:14 3How to Use Extension Tubes
06:06 4Inexpensive Macro Tools
08:01 5Camera Settings
04:16 6Camera Support
07:05 7Shutter Releases
03:29 8Lighting
06:52Lesson Info
Backgrounds
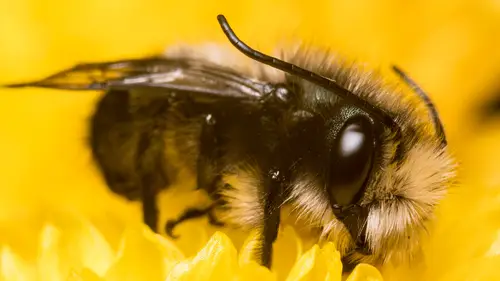
The last thing that I really have to show, to talk about, is your back ground. Macro photographers don't often think about the background. But the background is just as important as the foreground. If I show you some of these images that I took for demonstration purposes, oops, wrong collection, where are my collections? Down below, here we go. Look at what I've done with the background in each of these cases. I've made that background go away, disappear. I want that background to be blurry and soft, and not compete with the subject. That's important in your macro work. Just as it's important in your portrait work. Just as it's important in any of your photography. You have to pay attention to the background. So, how do we do that in macro. Well, let me bring ya'll over here and show you some of the tools that I use to make my background look gorgeous. One method, right here in the back I've got a, basically just a bar going across the back of this table. And this is called a C Stand. ...
And that doesn't really matter, just get a piece of wood and tape it on the wall, doesn't matter. But, I've got this black piece of paper here. And, I can now use that black piece of paper as what I would call an infinity background, or a cyclorama or something like that. And I can put my subject, or my object, right there. And now my background can just fade away away into darkness, or I can light that background up. Whatever I want to do. That's very cool and very inexpensive. Here's another background option. Colored paper. Go to your craft store and buy a buncha colored paper, and put that yellow behind the yellow flower. Or put the green behind the yellow flower. Or, print out a globe and photograph the globe through a little drop of water on your flower, and now the globe will be refracted in that drop. So I want to show you how to do this. I want to show you how to put a drop of water on to a flower, and then put that globe behind there, and you'll see how that globe is kind of coming through that flower, alright? And another cool thing about this the background is blue and green, so you'll see this blue green blurriness, and then that globe coming through that little water droplet. So I used colored paper all the time in my macro photography to make it look like a blue sky or green grass or whatever. So let's do that. So, I'm gonna find a flower here that has a nice basically a flat petal. Let's see here. Let's try to do that one. I think I'm just gonna yank this thing out. Hopefully this works. You know what, I might actually end up... Clamp, clamp, here, there we go. Oh yeah, look at that, excellent. Cool. So now I need to find a fla, a petal on the flower that will hold a drop of water, and I've got one there. Okay, now the next thing I'm gonna show you, to do this I'm using glycerin, okay, glycerin. You can find this, I've only really been able to find this online, I went shopping in a bunch of local stores in my hometown the other day and I didn't find glycerin. Fortunately, Creative Live had, Creative Live is awesome, they have everything. And I mix glycerin with a 50/50 mix with water. So this is half glycerin and half water. And this is a little spritzer bottle. And so sometimes when I'm shooting macro work, it's nice to have water droplets off of those flowers. So like, on this flower here, I would just... Let me grab a towel. You should always have towels when working with this glycerin, it's really sticky. It'll get your whole work area messy. So I just kinda spray here first to make sure it's spraying well, and I basically just mist it across the top of the flower. And you get nice little water droplets on that flower. And, I'll take a picture and show it inside of Lightroom, just so you all can see what that looks like. So I'll just, and I think I'm just gonna shoot handheld to speed things up. Okay, and I go back to Lightroom. Go back to my folder. Bingo. Okay. So, we'll take this picture so you guys can see with that, with that, what those water droplets look like. Hopefully they show up. Not perfect, but yeah, okay, great. You see the water droplets, really just adds another dynamic, another exciting feel to the image. It basically looks like it was taken outside, in nature. So, little spritzer. I paid $1.50 for that little spritzer, little glycerin, and water. So now what I want to do is I want to show you how to make a big 'ol drop of water. What I've got now is this, it's got a nice little tip on the end of the syringe. And it allows me to create little fine drops of water. These are great tools for you macro shooters. Pull this out of the way so I can step in. And I'm gonna try very carefully, to put this water drop on this flower petal, and not squirt it all over the place. Come on, work with me. Talk to the flower. Oh! Mmm mmm. Yep, that looks nice. But, I've just realized something. The other flower petal is probably gonna be in my way. So, I'm gonna suck that water back in... (laughter) All the joys of live broadcasting. And then, scissors, thank you Creative Live, you're always looking out for me, chop these little, ugly flower petals off, goodbye! You have to have a hard hard to do macro photography. Bugs, flowers, lotta damage here. Oh, that's gonna be great, okay, cool. Put my water glycerin drop back. (grunts) Shoot! Suck that sucker back in there. The reason why you're all laughing is because you know you'd be doing the same thing. (laughter) Macro photography takes so much patience. I was just talking with another Creative Live staffer about two hours ago, and he was saying, he was trying to do this macro shot for the Creative Live website, and it took him all day. And at the end of the day, he still didn't have his shot. So... okay. I got my water droplet. Let me just show you what that looks like before we work with our background. K, we'll start with that. Take a picture. And the water droplet, I'm focusing forward and backward. (click) Let's see if we get anything worthwhile. Eh! Background's kind of blurring. And, I boy, I don't know if this is gonna work. You really want that water droplet to like, be on the top of the petal with no other clutter. We'll see if we can pull this off. If not, at least you'll get the idea. You'll get the concept. Oh! Mmmhmm. Looking cool. You're like show us the stinking shot. Hah, okay, not perfect. (giggles) Let's... okay, you can execute this Mike, you can do it. Alright, one more shot here. And if it doesn't work, that's okay. You get the idea. And, try one more, get in real close this time. Ah, tried to ah, see what I was trying to do there was auto focus, which is what I told you not to do. Big mistake, it's just sitting there hunting back and forth and back and forth. So I'm just gonna go minimum focus distance manually, and try to take this shot again. Yeah, and there's too much red in the photo, so it ain't gonna work, but okay. Get half of a World. Okay, there's half of a World. Sorry. I didn't show you the whole World, just half of the World. But you get the idea, right? So, glycerin. That's one of the key tools for macro photographers. Get your bottle of glycerin, one of those spritzer bottles, and a little syringe, the World's your oyster. Or, half the World's your oyster. So, start small and easy. Sorry for the play on words, start small. But you know, start simply. How's that? Start with, maybe extension tubes. Because that's a very inexpensive way to go. You don't have to buy any new lenses, you can use any lens that you currently have, an extension tube will get you into the world of macro photography. After extension tubes, the next thing that I think you should work on, is your lighting. Lighting matters. Making your light look beautiful and being kinda able to define your object, just like you would light a portrait, or just like you would light maybe animal photography, or por, anything that you would light well, macro needs to be lit equally as well for those images to turn out. And then the last bit of encouragement is patience. Patience is a virtue. You have to be very patient. And you know, I'm working as fast as I can today to show you stuff, I'm sweating. This is hard work to be that patient. So, I encourage you don't give up. The great macro photographers out there spend years and years to be truly excellent. Which goes to my quote, you have to shoot every single day. If you want to be good, you have to be always shooting, all the time. So, thank you, thank you very much.
Class Materials
Bonus Materials with Purchase
Bonus Materials with RSVP
Ratings and Reviews
Audrey Reed
This is probably the 30th class I purchased, and the first I watched in full. I like the instructor. He is funny, engaging and obviously knowledgeable. I don't shoot marco and was expecting and introduction, and that is what I got. Lots of good info on gear and techniques. I am excited to try some of his ideas!
Linda
I learned a great deal. Taking photos and attending classes prior to this class. He showed examples of both bugs and flowers. Yes, he did use a Nikon camera but it is unrealistic for him to show all the examples that he did with several different brands of cameras! I have a Canon 5DM4. It doesn't have focus stacking yet. But I did learn that they applied for a patent. So it is coming. If you are doing studio work, the focus stacking is built into the Canon software that comes with the camera. For lighting I have the Canon macro flash that fits around the lens. I have the 100mm and 180mm macro lens. Just received Canon's two extension tubes today. They did work with the autofocus and camera settings. I thought his style was approachable. My macro work is all about flowers. His flower examples were on point. All in all, it was a solid class presented by someone who enjoys his work! PS The iguana's eye photo was stunning!