How and Why to Make a Book in Lightroom
Lesson 3 from: How to Make Photography Books and MagazinesJared Platt
How and Why to Make a Book in Lightroom
Lesson 3 from: How to Make Photography Books and MagazinesJared Platt
Lesson Info
3. How and Why to Make a Book in Lightroom
Lessons
Lesson Info
How and Why to Make a Book in Lightroom
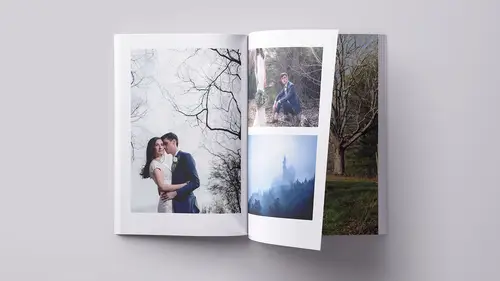
First things first, we need to choose what kind of book or magazine we're gonna make. So in the book settings at the top, we get to choose Blurb Magazine, Blurb photo book, trade book, PDF or we can send them out as JPEGs. So JPEG or PDF would be like, I wanna send out my own book to somewhere that's gonna publish it for me. But most of the time, I'm going to well all the time, I'm gonna stick with the Blurb options because it's so easy to order it. It's not that expensive. It works great for my workflow. So what we're gonna do is we're going to make a trade book. Trade book is the least expensive option with the most options available to me. So I have to change and reformat that. And now I'm gonna choose a size. I can either choose an eight by 10. I can choose a six by nine, or a five by eight. So let's go middle. Let's do a six by nine. So I've got my six by nine. All the everything, the parameters are all set. You can see that I have a front cover and a back cover. And then I have a...
first and last page. And if I just printed it now, with nothing on it, it would cost me $7.99. And I think that the, once you get above 20 pages, it starts counting up. So the price of it starts counting up. And we'll see what it's gonna cost. We will know how much this book will cost before we order it because it'll just keep tabulating, oh you've added 20 more pages. It's gonna cost this much. So, it's pretty easy to see what you're gonna spend. Okay. So now what I'm gonna do is I'm going, I can either do one of two things. I can take an image, and let's take a vertical image. And I can drag that image on to the first page and let go, and it auto fills that into that area. So let me show you what that looks like then. So when I'm clicking on that, there's the page with nothing on it. Here's the first page. I can come down to this page and I can choose from a whole host of different styles of designs. Let's go with things with a, so if I click like that, now it's fitting within an area. So it's got some white space around it. Or I could make it even much smaller and say I want it to fit within something quite small. Or, I could even say I want it to be a photo design that has a photo, photo down here and then an area for text here. That way, I could say well I want to right click this and I wanna zoom to fill and I'm gonna move that up like this. And then I need to find another image to put in there. So I'll just choose another Rome image and I'll zoom to fill that one as well. Okay so now I got the two Rome images. And then I can go in and grab some text. So I'm gonna copy this text. And then I go in here. And just paste that text in. Now, what can we do with all that text. We can come down to the bottom. And inside the bottom, there's all the text options that you find in Photoshop or InDesign or anything like that. It's all right here. So I can choose to look through all of my fonts or if I've already, if I've chosen some fonts and I like a certain look, I can always come up to this text style preset area. And I can create presets by going down to save current settings as a new preset. And then it will show up in this set of options. So I'm gonna choose Georgia 18 Gray Centered. And that centers the text. I don't want it centered so I'm gonna go back down to the centering options here. And I'm gonna choose to left justify it and I, see how I started with Gray, Georgia, Regular, Centered. I've got all of the parameters. Now I can fuss with it and say okay I don't want I want it 12 points. And I also want it to have a little less leading so there. So there, now that is what my page will look like. And that's just a prefabricated page. There's nothing special about this page. It just is what it is. But if for some reason, I decided I wanted to delete this one. So I'm gonna remove this cell. So I'm gonna remove the photo. I wanna actually remove the cell. So remove the selected cell. And then I want to change this so that the text comes all the way across. And it's a little bit more centered down here. And I said, that's a really great page. I wanna keep that page the way it is. Oh I wanna change the size. Watch how as I change the size of the photograph, see how it's staying. It's zooming in to fill that area. And it's not stretching the image. It's just making the image available inside. So I'm getting the full length of the photograph now just by grabbing the edges of it and moving it. So if I like that as my photo page design, if I right click it, I can also save that as a custom page. So now, any time I'm designing a page, so let's go and look back at this grid. See how we have another page right here. If I wanted to design that page, and I clicked on here, I could go to my custom pages, and go and click on that one that I just created. Grab this picture and drag it up into it. And now I've got that one. And I can go in and type whatever I wanted inside of that. And that's so you got two custom page or one page, you made it a custom page and now this one is a custom page based on that one. So you have the ability to create your own pages as well. Now why is that important? If I create a bunch of pages by usually, the way I create a page is simply by going in and grabbing an existing page, and then fussing with that page, and then saving it out as a custom page so that I have various versions based on some other version. That's the fastest way to do it. Once I have that, then I can go into the auto layout area, which is the first thing right below the book settings is the auto layout. So if you invest a little bit of time looking through all of the layouts, making a couple adjustments and making your own custom layouts, then from then on out, every time you design a page, it will be really quick to design because you're just choosing a custom version of a template. And you're throwing it up on the page and you can just drag images into it. Or you can ask Lightroom to auto design the thing for you. So, we're gonna auto design something after we create our auto design rules. So in auto design, there's a preset area and you can see that I've got a whole bunch of presets. If I choose four-up trade eight by 10 like that. That is a four-up proof book on a trade book. So it's gonna design a trade book with four-up just like you saw here. It's gonna design that on a page automatically. So what I'm gonna do is I'm gonna go in and say edit the page layout and this is the rule book. So in the rule book, I get to choose what's gonna be on the left and what's gonna be on the right. So I'm gonna choose a fixed layout or I could choose random layouts based on my favorite image, my favorite pages. So it's gonna look in my favorite section. So if I look at a fix, so there's a favorites area, and these are all the ones that I've added to my favorites. And let me show you how to do that. So if you're here in the page area. And you click on the pages, you can scroll through pages and if you click on that little circle, just like the adding to a quick collection. If you click on the little circle, it adds it to the favorites. So right now, all of those have 'em 'cause their we're looking in the favorites. But if I look at photo and I kinda scanned through it, I could say, oh that's a favorite. I like that one. And it adds it to the favorites. Alright? So your customs, you can come into your customs and say, I'm gonna add that to my favorites. And so then, when you're inside of your auto layout, and you're editing your rules, you can actually go in and say, I want to do a random set of pages from my favorites that have one or two photographs in them. And it will randomly assign pictures to that page based on your favorite two photo page things. Or I can just say only two photos. So the left page always has only two photos. And the right page always has one. Now the way I usually use this is I say this. I'm gonna say the left one is a fixed layout. And it's going to be from my custom pages, and it's gonna be a full text. That's all it's gonna be. And then the right one is gonna be a fixed layout and it's gonna be from my custom, and it's going to be it's gonna be this one, right there. Okay so I now have a full photo on the right and on the left, I have text. So if I design my book that way and I hit save or actually I need to go up and hit preset and then update this, or I can save it as a new preset and say, full right, text left, and hit create. Now I have inside of my auto layout. I can do a full right, text left, and then if I hit auto layout, it's gonna automatically layout a book. You see how it's putting photos on the right and text on the left. Now the text that it's putting on the left is just automatically generated text. So when I click on it, then I could type or I can paste in my text right there. But also notice, that because of my rules in the auto design, it's actually taking the image and it's putting the image name underneath it. Now I can tell it in those rules, instead of adding the text or instead of on that text, adding the file name, I could actually say, well why don't you add the title to the photograph, or the description of the photograph. So that way, if I'm inside of my library, and I click on an image. Let's say I click on this image here. You can see right over here that I've got a title to the photograph, and a caption to the photograph. And I could put a headline. Horse in the Snow. So if that's the headline to the photograph, then, if I go back into the book module and I auto design. So let's clear this book again. And if I go into the text again, and I edit that layout, I can come in here and say change that. And I want it to be chu chu chu chu, hold on. I need to make a new page. So we're gonna make a new page. And what we're gonna do is we're gonna create a page that has a photo that is up here on the top half of the page. And then down below, we're gonna add photo text so all I did is click on that little square that asks me if I wanna add photo text. When I add photo text, what it's doing is it's drawing information from the photo and it's putting it in this little square. So it's automatic text. And I'm going to tell it that that is going to be, so I'm dragging it down. Right like, let's put it right there. So it's kinda centered. And then that text is actually listed right over here. See how it says photo text right here. Instead of file name, I could say headline. So now it's gonna draw the headline from every photograph instead of the file name from every photograph. And then if I right click this, and I say save this as a custom page, then I can go back up to my rules, and I can re-edit this layout and say I wanna fix layout. I want it coming from my favorites, not from my favorites, from custom pages. And I'm gonna look for that one I just made. There it is. And I'm gonna hit save. And I'm gonna call this, full right text, left headline and hit create. And now, if I redesign that. I re-lay that whole thing out, watch what happens. There we go and let's go to our photo of the there it is. So if I have a headline in there. Horse in snow. So that will automatically generate every single time it sees text inside the headline area. If there's no text inside the headline area, it won't do anything. It'll just leave it blank. Which is great because now, you can go through, especially if you put captions and titles and things like that into your photograph, you can go into your photographs and say, okay this has a story behind it. And put the little paragraph story inside of your photos in the captions, or you can put a title to it in the text. And then when you design your book, you don't have to type all of that in. You just simply bring it all in, just automatically. So this has a lot of capabilities in it, but it is very very simple to do. If I wanna edit something, I can go into the grid and I can grab any of these. And grab it and drag it, and move it so that this one is in a different position. I can grab an entire set, so an entire spread and drag the spread around. I can also grab an image, if this image would be best suited over here. I can grab an image and drag it, and when I let go, it swaps the two images. So if for some reason, I right click here and I wanted three photos on this page like that, I could grab this image and drag it over to here and it leaves this one blank 'cause it's not swapping. But then watch what happens if I grab this one and I try and replace this. Oh hold on. Um. Here I'll replace this one. See that, it swapped those two. So its going to do intelligent swapping and say oh he wants me to replace that one. And notice that on this one, because it swapped it, it put Film Store, Vernazza, Italy. Because that was in the in the... The what did I say it was? That's the caption, no not caption. We put it as the title. Right did we do the title? I think we did the title. Anyway, whatever we told it to do. So it's just following our rules. So. So the Blurb book options inside the book module allow you to do quite a bit and it's very simple. So now if I hit save. So if I say, create a saved book. I can name the book. I'm just gonna call it book, and hit save. And I can also, choose to make those as virtual copies. So I wanted to like, if I wanted all the work that I do on this book to save out so that I could re-adjust them all to black and white but I didn't wanna change the originals to black and white, just simply create a saved book and make virtual copies of them, so if I go like that and hit create. Now every image that's in here has been made into a virtual copy, that way, if I go back to that set of images in the develop module, this whole set, they're virtual copies so I can highlight them all and I can turn them all to black and white. Oh I gotta turn my auto sync on. I'm gonna turn them all to black and white. So, huh, I don't know why that turned green but, there. So if I turn them all to black and white, then when I go into the book module again, into that specific book, all of them are black and white. See I can adjust the book at will. I got all of them in black and white but the original photos are still in color. So I created a book layout. I saved it and made sure that all of the images were duplicated as virtual copies. Then I could do whatever I want to all of the images in the book. 'Cause sometimes you'll have a page where there's a two facing images and one's color, one's black and white, and you're like oh it'll look better if they're both in black and white. If you make them as virtual copies, then you could go in and turn this one to black and white so that now both are black and white but the original color is still color, which is very useful when designing a book because when you design a book, the first goal is to design the book, look at the book and then you start adjusting images based on how they look together on the page. Not the other way around. So for instance, when I'm designing, a album, I designed the album for the client, before the images are ever adjusted. So while my crew is adjusting my images, I'm actually designing an album. Then when the images are adjusted, the adjustments come in and overwrite the images that are in the book. But then once I'm looking at the images, I might say oh well, this whole spread needs to be black and white. Or this whole spread needs to be color. So if I make all of them virtual copies, then it's very easy for me to play around with them and do whatever I want to the images because I'm not locked in. I'm not worried about changing the original image. Okay, so it's very important to save those books. Once you've got the design down, save the book. And then now you've got all these books. So you can see like this little art book, if I double click that, that takes me to that art book. And you can see, here's my art book. That's this guy right here. But it's, there it is. It's in digital form. And if I decided that I wanted to start putting actual text here in these books, instead of writing them down as notes. If I wanted to start to add text to it, I could simply right click here, add a description. And, paste some text. And then I could send it back to Blurb and print it all over again. So and that's really helpful with magazines. 'Cause magazines are so inexpensive that it'd be very easy, it'd be very easy to print a magazine, live with it for a while, hand it out to a few people and then realize, ah, you know what? This would be much better if it had text here or if it had different photo there. People would respond to it better. Print them again. You can make a magazine. So just make one of these thin little magazines to hand out to people and then as soon as you've lived with it for a little while, just go in and remake it. Print another five. See how it works. See if people respond differently to it. You don't have to, you can print just one. And then you can print five once the one really worked out, once you've lived with it for a while. So that's the value of this kind of one-off printing that you could do. Okay, so inside of Lightroom, again you have your options for your book setting up here. And by the way, once you get into the books, you can choose hard or soft covers. So you can choose a hard or soft cover for a trade book. It can be soft or hard covered book. So the trade books are super super inexpensive and they really are good quality. So don't be afraid of a trade book. Play with the trade book 'cause they won't cost you very much and you'll love 'em. So we have the auto layout option where you can actually automatically design your proof books or your regular books. Generally speaking, when I do an auto design, I auto design one per page and then I start manipulating the design. So it gets 'em all out there on the page, and then I start puttin' them around. Once in a while, I'll do like random for two images on each page or something like that. And then I'll just gonna go in and fix it, play with it, and change the design a little bit. It's always easier to automatically throw images into a book than it is to start on a blank page and start dragging stuff on. At least, from my mind, it's easier to start with a page that's got something on it. So you can add page numbers. You just simply click on the page number option and then tell it where you want the page number to be. Once you got your pages set, once you've actually got some pages in there, if you come in and click on add a page, or add a blank page, you can just add pages into your book. See how I'm just adding pages. Right now, I'm adding blank pages. If I click add page, it adds whatever this template is. So right now, this template is a full bleed photo. But I can go in and choose and say, custom pages, text. So now that template is loaded up as text. So if I hit add page, it adds a text page, rather than a blank page. So you have two options. Add a blank page or add whatever the last template you used was. Those are your two options. So what I'll do is I'll allow it to auto design something then I'll go through and find places where oh, I need an extra page in the middle here and add a couple blank pages. And then start grabbing images and dragging 'em around and filling up extra pages. By the way, you can also, if I grab say this image here and drag it over here in between these two pages. And then I decide, I want this whole thing to be a full bleed spread so that the photo can go across the two pages. If I click on here, I can say, two page spreads. And now, see how it's all the way across. So now I can drag this image and just say oh I only want to see, you know, that. I just wanna see the palm tree. So you can make a two page spread out of it in existing image as well. So don't just think in terms of one page each. Also you can think in terms of entire spreads and drag stuff across the spreads. Okay now below all of that, these are just guides. What guides do you want to show? Then the cells are basically boxes where photos go. So what we're gonna do is we're gonna add padding. And padding, basically keeps some space on the outside. So if I grab on that padding, and I go like this, do you see how it's creating on the very edge of the photo. Outside the photo, inside where that box was is pad. So now, any photo that gets dragged into that square. Sits with inside that padding that I've created. And that helps to kind of space things out. But also if you click on these little white dots, you can remove the padding so that they're not linked. Now I can change just the padding on the left, or just the padding on the right. Or just the padding on the top. Or just the padding on the bottom. So I have the ability to do any of that. Plus, I have the ability to grab that center yellow box and move the whole thing around. Well actually, let's get rid of the padding. 'Cause the padding was keeping us from going anywhere and I can grab on to this. And I can, so I can grab this and drag this guy anywhere I want him to go, as long as the padding's not restricting me. So if I grab this, I can say I want this to be further down here. I wanna get rid of this one. So it used to be, and I don't know, you know the last time you looked, whoever you know whoever's watching this. If the last time you looked at Lightroom, you were like, there weren't a lot of options on it was all based on templates and I couldn't adjust the templates and whatever. All that has changed, and now you can do anything. You can see that I've completely redesigned this page. I can drag these things anywhere I want them to be. I can resize them to be whatever size I want them to be. I can add text anywhere I want. I can add extra photos anywhere I want so it's very very robust when it comes to designing something. And the beauty of it, and the thing that I like, the absolute most about designing something inside of Lightroom is that it is a 100% raw workflow. So I'm working on images. I put them in a design. And then if I wanna go in and adjust the images, they're still raw. I don't have to reexport something. I don't have to overwrite old images. I don't have to do any of that. It's just there. So the design is made, and then there's a bunch of raw images inside the design. And anything I do to the raw images is done to the design. That's fantastic, because now you can work the proper way. You can lay stuff out. Look at it, decide if it works together and then start adjusting your images accordingly. That's a fantastic way to work. Going into InDesign is my less favorite way to go. Because I have to export the images. Design the book, and then if I don't like something, I have to go back to Lightroom. Work on it. Reexport the images, overwrite the original images, make sure they're the same name so that then can synchronize and change. It still works but its it's one extra step. Okay, you also have the ability to add photo text. We worked on that. You can add page text as well. All of your type options, when you click on your type face here. You have all of everything that you have and all of your Photoshop and Photoshop and InDesgin and Illustrator. All those text options are right here so get used to those. There's centering options. And then the last option that you should know about here is that you can either add a background color, so I can click on this and add black so I can make the page black or any color I want. For instance, I could make the page, let's go to this page and I could make this background color and if I click on it and drag out, I could make it any color in the photo itself. So I just point at say, the blue color here and now I've got a blue background for that page so, you can see that now the background's blue. If you wanted to do that. I highly suggest not. But if you want to, you can do that. Then I can also apply a background image to a page. So let's say that this was a little bit smaller. I can actually take the surf guys and I can drag them on to the square here and it applies a background to the actual page. And notice that the blue is still there as well. So it's overwriting them. So I could click on here and say, well I want this to actually be warm. And then I want the background image I want the background in, oh I didn't do it actually. There we go. Let's warm that up. There. And then I want the background opacity of that image to be like that. So there's a lot of design capability inside of here that you can do pretty much anything you need to do. And again, it's all raw workflow. Super easy to do, and then once you're ready to go, all you have to do is send the trade book to Blurb. It will upload it. As soon as it's done, it'll pop open a website that says, here's your book. Do you wanna buy it? That's it. And let's see how much this, this one's gonna cost. Uh what do we have here? Let's see how many pages we have. So we have, oh this isn't our little one. This is a 434 page book and it's $65. So that's a big book. But if we went to our smaller book, which was how many pages is this? 20, 34 pages, it's $9.67. So little tiny books, little books, little projects and stuff like that. Something akin to this, very inexpensive to produce. Make a bunch of these. Hand them off to people. Show people, if you're trying to sell your business, if you're a wedding photographer, if you're a portrait photographer. If you're a portrait photographer, like especially senior portraits, make these for all your seniors. Don't let a senior get out your door without one of these. 'Cause this is really quite awesome and if they just had a book with all of their images in it, they'd love you. And it costs you 10 bucks. So that's worth it.
Class Materials
Bonus Materials with Purchase
Ratings and Reviews
JennMercille
I thought I had my book printing processes all figured out, but now I'm going to have to rethink the products I offer to clients and the ones I use to market myself. Aside from introducing me to a print company I didn't know about, Jared walked through areas of Lightroom that I've never even ventured into before. It is insane how easy and approachable he made it seem to design and print with Lightroom and InDesign. I definitely recommend this class!