Lessons
Day 1
1Introduction
48:43 2Vincent's 5 top HDDSLR Rigs
1:07:29 3The Importance of Pre-production
1:03:21 4Workflow (iMovie, Final Cut, Premiere)
1:14:59 5End of Day Q&A
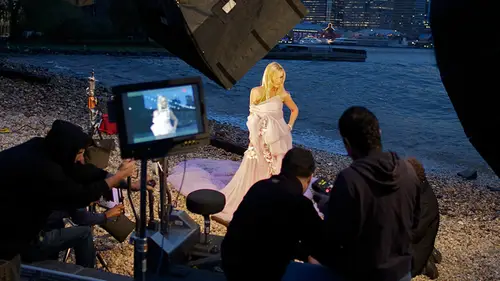
1:35:16Day 2
6Vincent Laforet & Chase Jarvis Chat
22:29Overview & Setup for the Documentary
54:26 8Setup and Shooting the Documentary
1:04:37 9Setting up for the B-roll Shoot
27:16 10Shooting the B-roll
1:11:34 11Discussion: Moving From Still to Video
45:16 12Editing the Documentary with an Editor
47:04 13Completed Documentary Edit
01:42Day 3
14Special Guest: Gale Tattersall
32:23 15Overview of Editing the Final Documentary
13:48 16Working With Actors
35:34 17Pre-Production Recap
44:57 18Hands On: Shooting a Cinematic Script Part 1
59:25 19Hands On: Shooting a Cinematic Script Part 2
1:23:03 20Hands On: Shooting a Cinematic Script Part 3
1:40:55Lesson Info
End of Day Q&A
All right, so we're back uh we're I have just spent an hour if you're joining us part of this and finally cut studio uh we did a quick intro into using bridge um and I love because I don't know how to do it to see you go either doesn't many bridge or something uh yeah not linked up and you hear that let's see right now I didn't even check that we're checking some other things but uh is it it's not just we'll probably quickly start a project from scratch in premier just to kind of get you started from go um and then we're going to send uh a clip or a sequence from premier inn dynamically link it to after effects after effects is one of the single most powerful tools and imaging uh that is used by the mongoose percentage of you know, graphic artists on depositors you name it you know they smoke they have flame they have other stuff but after effects is just a beast um and it's kind of unparalleled and that type of software that's accessible to all of us and we're going to show you they'r...
e really cool road o'toole uh and um it's kind of fun so we'll get to that and then we're going to go from this on we're going to export the xml file and re import our file right into final cut pro and then if we really board will go from follicle prone to premiere to show you can just quickly go back and forth and hopefully finish in time to give you a quick color demo um you pretty much like you know nuts the boats uh start to finish so let's go ahead and we have one hour right let's try and spend half and are doing the intruder premiere and uh the round trip with after effects in the road a rush and that's cool let's go for it so we left off we were talking about the interface and the interface is you know, very similar to uh to final cut which is awesome so that moving between the two platforms is not going to be hard for you so I'm just going to hit a double clicked here on a source file and we see it in the source way do we do it and we forget that we ever set up the presets no no sweetie oh yeah I'm gonna go back one step I apologize for that yet so we've gone ahead and looked a little bit of a media management like that with that but let's talk about um setting up a actually how a sequence get sets up and we could set it up from within here because you could have multiple sequences with actual multiple for men's actually in the same project at the same time which is really really convenient if you're working with you know footage from a seventy that was shot you know you know sixty frames if you were working with footage that was working in a two five d at thirty or twenty four you know you can really start we had an alexis demise of your ex you are quote pretty effectively ok so I'm just gonna go ahead and create a new sequence all right and it's going to give me choices here that are all lined up and these all match two different subsets of video files everything from standard definition all the way through the best up to the camera in tow the red kodak so red one cut back so you can just amazing how many different things you could I worked with once and of course since we're working with de solares here we're going to go to the subset section of digital slr okay and then we've shot everything pretty much in twenty in ten eighty correct that's what we'll be working with so and then ten, eighty eight at ah ah twenty four you go here in the project description and to give you some details about what specifically is involved with this in terms of audio in terms of data rates everything that you need to know just to double check that you want to do that let's not waste any more time to go and create a new sequence and that's a new sequence there sequence to ok I could rename that so we'll just call this uh another test and just to reiterate if your final club pro user you just drive clips and all the sets of for you this is the one step you do need to do that's new and premier yet set your settings before you do anything true. Yeah, well, it gives you the option of that how you want to work and again you could work natively within one project with any given different sequence that you created that and then you know, it's a zoo not quite. You can't necessarily just drag the one thing that I don't like the differences that you can take from your source window over here okay? And drag it over to your, uh, sequence windows you actually have to do drag down to the timeline. You can also drag from this little icon here, okay? And this will drag your video on lee. So if you're laying b roll over, you don't want any audio from the b roll this is going to be, you know, a pretty handy thing to do, so go ahead and open up another clip. That's looks like some fantastic b roll and we want audio only for that so maybe I would just go ahead and drop that over here and if you could just show them just exactly like we did follow cut the in and out points yeah, this is footage that I have seen a number of times actually this is the first video shot and I looked at this and I went, wow there's a dude in a helicopter which was pretty awesome so let me go ahead and focus in here a little bit like here the's a year in and out points carrying you could do your eyes and ends and stuff like that same thing keystroke commands but these air in that point so let's go ahead, grab in point there I'm going to assume that a little bit and we'll just get right there. Awesome this ok? And then I was gonna do the outpoint, ok? And then I'll go ahead and drag them down. Yeah, for exactly the same as final cut exactly the same thing. Okay, I'm gonna clear this clip just so we have a number of clips coming together because you're not a little bit um this is already set up, actually so that you can see your audio way forms, which is fantastic. We had a look. If you look up to the top of the screen where we were looking at where we saw in final cut, we have tools available to us same tools they're available here to call the blade and final cuts called the razor and premier so but I think this is still command command. See? So for quick for a keystroke command stuff like that so that's all available to you much in the same way as you explore this program or you'll be able to get be more familiar stuff. Let's, go and grab that pen tool way could take a look at a slightly different showing. Key frames you back out ok, show opacity handles and then zuman got not working. I want you so there's that should a little mountain thing down here making life will you hear two you could just like if I can do that job, but let's see if we can get it's called the mountain thing. So and then this is slightly different two's you actually have to lake he frames in, and this is something that moving between premier and after effects, uh, that you'll start really working with key frames and the idea of key framing. Okay, and the lake key frames in by actually pressing this button, and then you can adjust key frames either for audio. If you want your audio up, if you want to do, uh, fade in for your audio and it's the same also actually with working with fading and fading out, fearing for your video there you can't just click to make that like in front of you know it's one of the things that's actually unfortunately a little bit from the little differences but the point is, you know, I think when I first saw premier I was like uh and then when it thirty seconds later is like, ok, you know there's there's a median left there's your clip window on the left in the middle and then there's your cameras on the right uh you sequence the right what they called, uh, time to get out of here in like the exit's very similar and in outpoint keys and you know, um export import your navigation tools or the same, you know, if you want to stretch a clip if you want to move a clip and ah little the outpoint and one of adjust that modify that, you know, all the things that you can do within the time line are exactly the same that they are in final cut very easy and very intuitive once you've worked with it for a while. So let's go ahead and bring in a little bit of, uh, of music here uh, what we've got in our music and it will use the same pieces that we had before and I'll just go ahead and just write this into the timeline underlying my uh, my video and you see, we have our way form available to his tune make a little just edit so it starts they're the other thing I can do here is that I could go ahead and unlinked this clip so I can get rid of that audio if I want to go on unlike it highlight that and we're just gonna go ahead and cut that we'll just go ahead so you can see I can cut that so now and if I want to I could just move this right back up here depending on how you want to set up your project and how many how many different stuff you have let's tio before we do the plural eyes sinking uh let's show them how to go from premier to follow cut how easy that is okay right so we would just go ahead and make sure that sequence file yeah and export and we're exporting to final cut pro xml data here and then I'd say that that's brewing okay I'm gonna go ahead and put it in the premier folder for right now so that I know where it is okay just a call that from your test there it's done fingers crossed I was gonna wait try this yet no pre for on this one yeah I've done this in this direction have actually not going in the other direction from final cut two I have two premiere so you have done that so yeah so then import just to new projects. Okay, project the incident on. So when I say that again good premier just appleby notes and it's in your premiere thing o on the desktop way older. Thank you, sir. And three default hoda and yet everything structural police just tells the world clips on yeah, and, you know, we could get all impressed with the realities. Like there are a lot of pieces of software out there in the world. And xml is thie wide interchange format. Um and, uh, go ahead. Yes, and, um, because that close that ugly window booth. Oh, well, no that's, no unhappiness up. I'll tell you what. My guest wass yeah, is that we start monkeying around on linking stuff and whatever, but she's still work you need to know is it took the whole project, and so they're just so my question is because we're those original eighty six, four, five, six more funds side and then final cut can outplay them. Uh eh, so what do you have to wonder it? Well, you said you have a six floor, you can use that media manager, so you'd have to do what you're doing in final cotton and send it back to you, I mean, the reason you'd be doing this right now is, uh several right of reasons one would be to go to color now from from here to be a great way to do it. Uh and if you really wanna work in final covers the number way of doing it a very quick way to do is seize that exact same till I showed you should be file meeting manager instead of copying recon press and you'd select progress and boom is going to create a new sequence in progress of course can't convert it you could work off of it of course you know, so it's not being the world and what's really awesome is that I can now go ahead and test my fate and move this over here and say ok, right back at you and set it back um on the desktop as the final test chicago over by their final and let's go over to premiere oh, and go ahead and create a new, uh project like ok enough yes. And I'm gonna go ahead and import that where's the port xml in final premiere uh I think it was it was just the excitement what we're at that final go and you have just round trip over here another test and there is the clip so you can see how you could just go back and forth now how much time do we have left perfect until today great because what I what I in my mind is just you know you can add fifteen minutes of that took two years earlier so we have on our level we've got to keep that we got forty minutes to end with this after effects that we're going to show you er and give us fifteen minutes to show you a little bit of uh color as well so you've now seen the round tripping and see how easy it is so you can see that you know you don't have to bet the farm on either piece of software if I were you know uh betting on horses right now and deciding what piece of suffered by today um I would wait see if anything it's announce it and maybe next month in the big convention and maybe nothing will get announced uh and then make my decision and if I already had final cut I may want to go and try to see us five or vice versa and know that I can use thes tools and have an incredible powerful sweet mean what you can do today with those two pieces of software because you color the colored rings all try to be a thirty five thousand dollars stand alone the suit where they added to color for free after effects is you know, one of the highest and um you know, compositing pieces alter between these two pizza software you khun do what it is fair to say I've been absolutely possible to do with the most complex computer desktop in the world five years ago with one exception of sg machines but they're sixty thousand dollars yeah she's in you get the idea, you know? And um so there you go. What we're going to do now is we're going to in the next forty minutes in the next ten minutes if you would, uh, show me how to export this just like we did out of father I, uh and then for allies export oh, export out at oh, I see what you're saying so yeah, make sure they know how to deplore allies, right prevention and then also export to all the different types of devices things in america all right, so let's, go ahead and get our footage together for, uh, plural eyes. You see, file open recent project, which was minute. Wait say no on that because I think they brought in all that we bring that david breneman oh, that's right? That's what's making new the new sp project I'm carrie, if you wanna help remembers a big speed bump in from here with the sixty four bit yeah, yeah, significant, yeah, yeah, so if you're not running snow leopard as well, I run my limiting the leopard ex sand uh you're killing yourself and you really you know, this really takes advantage of this next one's leopard only doesn't work with, uh extend version one yeah, so there were two files right there just ran an interview in the interview audio head drag this in there creating new sequence good here that a lot of comments about the mouse I super retro I love this mouse I've been using it for years it's been with me through thick and thin it uh when especially when I don't have to you know, I want to show you as much as it does begin without doing a lot of key stroke command so we can proceed on screen I'm very comfortable with this mouth so you know he's got three way function out when you talked about it these people in the chat room I had a lot to say about the mouse I hope they like it because you start off why didn't you know it was actually it's always been a little bit off color there in that way but now I'm feeling self conscious about my now it's actually cool it is actually it's actually cool way on and then all right so we imported just like we would have and uh you saw him final cut you can actually you drag to the sequence okay, they would reconcile and dragged two sequences and we opened poor allies and it'd all its work and created new secrets for us now here is how it's done in premier you dragging this sequence as well correct? Right? So we had a we had external audio here and then that's the audio there on why I might not see scott dragging that's this is not a pro question to me while we figure out what's bugging out here any questions from my way yes, we're busy compiling questions for the q and a quite a few questions about why you're using both when you do it with either one or the other strengths and we well the strengths weaknesses are that as of right now, it's fair to say that the engines I'd premier is much more up today, you know it's just been rewritten to take advantage of the latest intel processors uh sixty four bit processing so it's good significant faster it's going to will deal with the files in raw mode uh whereas final cut pro currently is on at least a seven year old architecture that's what's going on um and the other advantage is that, um um what was the question? Why premier versus final cut basically what use? Both oh, if you're a pc user which is a lot of people uh finally cut don't work so premier is kind of a great solution um uh there aren't that many great piece of software on the pc uh other than avid and premier you know, people use sony vegas I've never used it uh but you know, premieres pretty much your go to app I would say on the pc barn on unless you want to go have it that's a whole other issue I uh mostly avid people I know are like working on really high end projects and editors who you know are just kind been working out their mid level media composer doesn't really exist anymore the way it once did yeah so you know all these things changed just different market exchange all right, so here. Okay, so for exporting for paralyzed it's slightly different it's there is a version for uh the, uh for premier but it's not like a plug it in the way so you actually have to do an export uh and you have to export actually again xml uh, data to do that and we'll go ahead just premier test um interesting if I could actually use that one, but we'll go ahead and replace this one because actually a different it's a different sequence, so we'll go ahead and do that man hide from your pro hi final cut wait after face we have everything open here all right and so we have teo, open up see if this core allies will link to that actually probably won't so gotta find where the core allies do we know what the plural eyes is a door um apple shit day wraps so do allies is it the software that is self running meaning it'll sink audio all its own without the need for premier or follow cut? So you're using some other stuff where this is that I'm not saying I'm not finding the yeah, unfortunately we don't have to allies and we don't seem to actually have the plural eyes for premier uh huh I'm not saying it and it's my fault I've never done for allies and premiere okay, so I kind of asked so do it and said yeah, but we really check the software yeah, my apologies to you should have double checked that actually earlier, but basically what is you just bring it into plural eyes you import the uh uh, you know, what we can do is tomorrow we're ready when he does the edit tomorrow and we'll show it to you tomorrow tomorrow, okay? They're just going to have installed let's quickly show them thie uh, dynamic linking now, this is what I find kind of add on to your previous question why what does premier do that, uh, chronicle part doesn't s o final cut has you know motion has color has compressor a soundtrack um and other things and c s five has sound booth on has after effects but you know after effects really is the thing so we're going to show you how not only can you round trip which means you leave um an application go another and you're really important export uh, c s five actually allows you dynamically link projects from premier into after effects so when you make a change into after effects you just click on premier it's changed dramatically like that just no important exporting which pretty impressive engineering um so the first thing you're going to do to make it simple it's just make her black and white so uh in after okay, so there's two ways to get the after effects if you want to work on a single clip ok, you just go ahead and right click and then replaced with the after effects composition that's if you want to do because after effects as well as a compositing tool does have some very, very powerful image of judgment tools in it as well a cz well and so if you wanted to do some kind of intense image adjustment that it's not available with you natively within premier, then you go ahead and do it there if you wanted to do a, uh uh eh entire composition go ahead and actually just highlight all the clips as a safety and then you go under file you selected by mistake I'm sure you just told me to dis electable I think about what you're trying to select all right back in just two yeah yeah and then use thie adobe and diamond dynamic link uh and then tio a new after effects composition on we'll keep the settings we've got all the stuff that came in here to, uh nested composition find someone that we're working on usually like preparing not preparing screws you up because you didn't find the stakes in this case preparing is screwing us up because we have all this stuff being clear yeah, we were just close it all it's quit after effects and just watch it you know what I'm gonna do this little get rid of all these files way we construct clear well just a whole new after effects composition on go their way not singing our files awesome we love when that happens uh good work space and go to all right. Well uh let's do it the way we did before, which is uh without the bottle quick, polite natural facts with the bomb clip aladdin after effects just had those two clips over like you the first time okay, so it can't be done when you're an expert at it you know what you're doing so ok so replaced with the after effects company a composition there you see that there it's not right click on that and, uh go there it is there it is that they would send the wrong clip over. Um let's go ahead and see if we can go ahead and get them both into this one uh, because you want to do the right all right away okay, way have to uh so on top of each other. So this is the elinda movie and you won't explain what you wanted wait you want to do he was simply that if you make her black and white in premiere and I'm sure he's set it up right now I'm a little worried uh, you go back into premiere there she is pushing me it's dynamically linked. Ok, so it's like super sweet. So you know, if you're drinking, you know, deadline or interesting complex stuff and you want to add a quick effect that you can't do in premier or final cut because you could go into premiere go and just kind of play with it and it's just like super super sexy um now we're gonna go back and remove the black white um that is the official term uh, black and white and I'm going to show you a tool called the auto uh the road until the new roads holder they have zero mission school because this gives us fifteen minutes to show you this photo tool and color it's going like blazing fast super super rushed um and um this is the tool here I've got to go into this layer over here we're not gonna give you an aftereffects demo I mean this like insane uh what we will show you is just the tool and show you that this is how easy it is to roto somebody and after effects all right it's already drawn a link we're gonna add the hair we're going to take away this part here only option key down I could go ahead and start finessing in here and there was a feathering and all that mess and smoothing uh because we're in a rush I'm not going to uh and then we're going to go ahead and let it do its thing and you could see how it's rodeoing automatically now we could stop right here and say hey actually the other way around let's take that part out and this part to keep going here it's messing up again I mean for those of you that don't not know the single most expensive thing you can do uh in video is rotoscoping because what people have been doing for years is doing this frame by frame with busy a tools and stuff and you're seeing a computer doing it for you on the fly and you're seeing it's you know you kind like an art director I want that back in you know chris can hear over there at this here you know it's it's just like um and there you go let's add this arm over here it's incredibly intelligence software um we can really refine this and change the the definition somebody's done like us arm you dropped the background out basically and say in a second okay, now you're gonna go and be able to obviously rather this more and find a finer detail work with masks export test adobe photo shop and really get fancy work with smoothing feathering it even has a motion blur controls so it will recognize motion blur and take that into account as it oughta rodeos um and at that arm back and now let's for the purpose because I really want to get in the color go ahead and drop out the background on let her live on top of a reverie clip ok, so we've got the reverie clip underneath that and I forget which area that we found that actually to drop it out but we can do a compliment who doesn't right up the road? A russian opposition there curtis okay, so this is ahh really go back to the beginning what we're actually be careful all right and we can go in here and feather a lot smooth it out I hope you understand that you know this is a really rough uh thing that we're doing here but um he spent two hours on look perfect he spent twenty minutes on a permanent if you're if you're careful as opposed to ten hours you know doing it by hand and it's really pretty impressive do quick little little effects like that and then you go right back into premiere with this so that is one of the powers of c s five sweet okay, so I really wish I mean this is annoying me so it's like I want I want to go back here and go clean it up, clean it up and say give me that r and r knit groups on maybe I shouldn't mess with it no it's not mess with it oh let's not mess with so that's kind of just want to show you what the potential is without I have used after effects a total of like three hours of my life oh s so good and I want to get into it more on we got ten minutes so export you've got to give us a two minute export okay export to my iphone the web in a blue ray exact same thing so yeah, we probably what we wanted to urinate programs so file export and so what I'm going to use to get the choice to do media okay and there's another program is like a compressor that's available within your cs adobe cs products on dh that's hopefully what we'll be able to link to once we get this window to open that is blazingly fast relative to final cut because it is uh sixty four bit so that should theoretically and more than directly you know I don't have numbers out state numbers once I have them but it should smoke uh type of performance you would expect from an architectural seven years old uh that's a media manager thing and yeah we're uh launching all about tax or machine a little bit here it's a three year old machine they're not here so you want to bounce a question off meanwhile this machine decides whether it wants to crash waken certainly do that shit see um you know you're lying to me there's no one watching no that's not true I was I was working on preparing a bunch of questions so no go back to where we are right now. Um let's see cannon geek had asked what sequence would you use in premiere for the gopro ht? What sequence sequence setting preset you would use one I believe that girl probably shoots thirty or sixty so if you shot at ten e use ten e it's at thirty frames per second ok they've shot at seven twenty sixty seven twenty sixty thank you josh would asked what frame rate should be used and when? Twenty four p or thirty p um, if you want to look and feel more felt like twenty four is the way to go on thirty or just fine. Um, I think, um, basically has its if you want to look more film, that is twenty four frames per second. Short answer. Okay, we're a little bit locked up for me, her, but I just show you that it's adobe media encoder, okay? And then I can add all sorts of different files. What I would have been doing is moving my project file into media encoder and then making some choices there, but basically, it works a lot. The way that vincent I showed you with, uh, um, using, um, taken just something, uh, hate with computers don't work. I don't, you know, ok didn't give you a lot of the same options that this loads on, um, and you can go through and its after effects still dead. Okay, but I could go ahead for my output file, and I could go ahead and sort of make my choices here based on what I have available. Plus, uh, cancel that presets and different files from its available to me, I think it's very hard to give a demo when things don't work I can tell you that he was your mind is racing trying to go what is going on here? We'll try and talk the audience but the point is um it has every single format that you saw a built in as a built in pre set in final cut again I think we'll just kind of punt this till tomorrow yeah mythology crashing because we're going to be doing well edited premiere but it's really just you know you get the file project you're gonna pick I want an iphone version a youtube version on a blue ray version and go this it will be significantly faster because of sixty four bit architectures all right so take my word for it we'll show it to you live tomorrow with software that is we really are kind of pushing uh this three year old computer to death um and here we go and I'm going to give you the quickest uh final cut over a color demo that anyone's ever seen um let's drag um import import holder desktop every so one of the tricks I used to have before um I knew about all of this stuff is I would uh five minutes uh I put I would crap I would cheat by um instead of converting stuff I would just basically sit in that points in final cut pro uh and seven the color and gray and when you're render and follow cut throat effectively renders progress just kind of another kind of definitely weird way of doing it um let's make sure we don't do what I just did though is we're gonna quickly set in and out points on this clip and window arrange we're going to go let's just say ten minutes over on this one right so they get the benefit of it going to go ahead and come here said it in and outpoint track that in there but this clip and we want to send set in and out point get into well go to that clip and I'm gonna go ahead on uh that's my out over out in here concert on let's look at this clip all that lipstick out um you want to know the origin of the entire everything it was to get this shot of gather glasses and helicopter just reflection that's that's what started the whole everything to be honest and um what I saw was that what you that's around sixteen hundred so wait for a kind of they don't talk about it tomorrow uh it's always good to try to find a turn in here in laws and editing point but I don't think we're gonna have that luxury given how I'm rushing this all right? So we've done a fantastic editing job here created a fantastic sequence youfor blade that uh that all together and we're going to go and simply go file sent to color so color is a piece of software that um does not like to work in a small resolution so you will have a hard time seeing the screen nothing we could do about it it's definitely a piece of software that you want to use on dual monitors um and there's a number of reasons for that this is his big of a of a image that you get to see with a single monitor so it's very tough to grade uh on a laptop but you can use your ipad and share your screen here's a song the software for ipad actually closer to the wheels on your ipad or you can share your screen there's ways around that um but you definitely you know when you're working on a photo or video you want to see what's happening in the images you're pushing it and see the compression coming in jagged edges or what not and when you're working like this it's an issue uh what's cool about color is this is, um what they call a way form and it's showing you what is the equivalent in video of a history ram one hundred is starting is blown out and zero is black all right? And as you play the clip um this machine has enough processing power the bigger ones actually show you the way for move as you go uh now I'm not gonna give me an overview especially what it could do um there's primary in second a primary is a color correction you make on the overall image go ahead in a shadow area making more red making more green or the highlights make those more magenta midtown's or you can reset everything and just go auto balance as well and had a deal like auto exposure all right uh you can say you know what that is not white and I came such a low resolution I can't see anything but is there your shadows and look at the scope on the left you see I'm lifting my shadows and the bottom over here is rising above zero as I do that so no matter how crappy your monitor is always make sure you have a black somewhere what's your statue trying not to do that also always make sure you have a white somewhere make sure that some of those peaks hit the top of that of the way form just be the last stage of this is not the last stages is when you have what you call a lot cut it is the second to last day should be honest last day should be the mixing with audio and you know once you coming out then you track this is that you lock your cut at this point you do not want oh you're wasting a lot of time so once you have locked you're cut you're going to send to the colorist or in this case yourself because you know uh been set up quick little project setting appearances a broadcast safe button up here turn that off and it'll expand the range beyond ok this is good for tv people to make sure you stay within range is so if you said let's make a television and it's beyond broadcast safety rejected you know kind of like the irs just bouncing back uh but if you want to kind of work with the biggest range you're going to do that and simply put uh go ahead and do a simple color correction to it going to the color effects room and we can add a film look to it which is going to make it a little more contrast he's gonna have noise to it as well and go ahead and change the gray intensity and the amount um you go ahead and blurt darkened sharpened there's a believe that leech bypassed look that you have in here that gives you that kind of you know cross process marshall cross process look you do this prick clipper teach her clip or on all of them and the beauty of this is that um such a small screen they go uh here is your first clip and let's do a color correction it's actually halfway decent uh let's go and take some the yellow out there ok and you can go here and just see that in your blues and greens and reds of course overlay or parade the three okay and down here I'm also going to put the three d color space it's kind of very trippy uh you can see that what this basically does is a very triple levitation so that as you hit the middle button you can see how you're expanding the saturation color space is expanding our closing all right um and so simply you know, middle click on saturation and say that's about right for me uh I like this color at any point you can disable the grade by doing control g c where you started and when you stopped you can copy grades you can set multiple greats with a clip so you can show the client that look one look to look through look for not doing anything despite quickies pretty awesome so you can cycle fruit if you work with color wheels um and what's in the coming tension devices makes the wave where you have all these controls the beauty of it is you can actually do this live like this jockey but there's a real advantage that's really fancy but actually it's nice really call it, correct a a clip and see how that is affecting the entirety of equipment supposed to that one frame um and then when you're happy um with this clip you go ahead and um go to the nice clip and start from scratch or just drag the entire thing onto it and have consistency at any point you can save a snapshot of what you have and recall that a month later ten years later it's like a look in uh aperture or what do you call it in light room presets um and it always be there um and you go to the third clip on drag it to all you can also select all uh gonna be out first final cut just stay quiet um go ahead and uh copy this grade different memory banks select all and go ahead and drag this to all on it'll uh it'll crackly all that she had everything so now let's get a little bit fans here and go to the er this area right here and let's go into what they call the geometry room and this is where you can crop and rotate so uh you go ahead and you know pan and tilt within the software some apple plus a little bit directly hunters in color over final cut to do stuff like this no it's just you know the other thing strokes different folks use and after effects wherever you want so I might want to go ahead and uh maybe let's let's work on this clip instead and at a key frame right here go ahead and let's go a little further out another key frame and let's go ahead and zoom in so you couldn't afford a zoom lens I think you talk about tomorrow that you very often uh do this anyways with ten, eighty three foot if you could get away with you know a good thing if you're just you're out put his seven twenty fifth, seven twenty you know can cheat a second camp and she especially going for the web you didn't have a zoom or you're doing time time lapses you know, for four k files or whatever and you'll see that now as you play this back on the left window, you got a crop uh you've got a crop it's going to appear at some point and it's going to hold on, but this is a very not so fantastic computer uh toggle playback to stay in this one you see how it's zooming in and panning and tilting you get the idea. You can also get even fans here and say that at the end of this I want to also rotated it a little bit rotated ten degrees I don't know always because I'm not on the key frame and make sure you're on the key frame on go ahead, rotate so you could go dutch as well during the movement of the idea ok, so that's a cool way of adding motion to your stills and post cropping, etcetera uh you can also go into color effects which we will not go into because it is like staring into someone's brain synapses um but um it's very powerful but I am going to show you this secondaries so the beauty of secondaries is that you can say something very similar enable a secondary uh and say you know what? I always thought that this clip had too many yellows groups actually I'm on the wrong one second um I want to see the elves down a little bit it's quick it's showing up or not really that's not too well expand the range and we're going to be saturated but okay, the point of second areas is it's localized so uh we're gonna reset this one like I did uh I'm going tio select with the, uh hate rushing paintbrush tool his skin and you see it on this window over here the area we're selecting is white exact same principle as uh uh photoshopped black is not being selected white is all right. So that's why it's affecting and you're going to say to the computer I want to de saturate his face justice face and I want to make it less yellow and I'm also going to crease create a little bit getting which is softness in here and also limited to just this area okay? And you'll see now that as you play it's doing it by the math right, it's not an actual selection. It's staying with that kind of color area, go ahead and tweak it and here to expand that or limited you seeing it the effect over there as well. It's like you get different color range um and uh zero minister q and a um, and you scratch a surface on this app um, what you can do to see what they could do is I'll try to this last example that it's also got some very cool motion tracking, um, abilities and let's just say that I knew that at the end of this clip that apparently wants to go on forever I want a dodge your face for whatever reason. Ok, I'm going to go ahead and pick an element right here that I think the computer's gonna be able to follow that go into my geometry room into tracking at a new tractor in here, put it on the area that is like geometrically kind of unique, like a v shape right here and they go ahead and hit process and the computer is going to follow that shape through the motion and create a tracking uh uh, path automatically and extremely powerful tool this is an easy example you khun, do some stuff where it's pretty amazing how well it doesn't tracking on a a pre nineteen eighty five computer this just flies by um but we're going to get their bum bum bum bum bone from bomb. And what you can do basically in color is you can dodge and burn convenient et you can select colors, you can change people's hair color you can make just what you doing photo shop. You connect trees, screen trees go brown you could make blue jeans goto black, I mean its exact same thing. And you can do it either by using the I dropped tool or color range or by actually drawing out a busy outline an animating it. I mean it's incredibly powerful. So when I saw color for the first time, it was like discovering photo shopped for video. It used to be a thirty five thousand dollars in software, and apple just kind of threw it in there for free and that's that's pretty pretty cool. Um, and now if this track ever finishes close it's close. Um we're going to go ahead and attach a little bit of a dodge uh, to her face. Um, it's amazing when you stared stuff, how slow it is it you can watch, but yeah, you know, I think one of the things that you're seeing that colors really, really pioneered is the idea of three way color correcting which has been common with image adjustment tools with in the photographic world and we don't have the bit death color but kept in video that we do in but we're getting the tools are getting closer together so one thing like I like to do what I'm doing color correction is that I'll bring in a camera make some adjustments in my raja adjustments look at the instagram get an idea of how I really want to make this look and I can't perfectly match it but with something like this for the tools and aftereffects of three wake other corrector I can get close to jump enabled secondary creative and yet I'm going to go ahead and make it small right over face I'm going to attach this to that tracker right here and uh I'm going to go ahead and make it softer just the effect of feathering those smaller and go ahead and what we're going to effectively do you can see the area that it's affecting its office right there here's what we're doing we're going to go ahead and because I really have run out of originality d saturate her face uh in that area okay uh I understand that you would obviously be doing something a little more useful with this tool but as you play back you see how it's going to now do that dodge with the motion or burn or color correction rather effortlessly okay and I have a good friend of mine alex pickle graded the last chapter of the project I lasted and um he hey is crazy and that he goes in the geometry into the shapes room and he creates a does busy days and goes crazy give you recommendations for good resource is to learn more about yes so there's ah one that I've used this called ripple training like a water ripple training dot com I mention this last class great way to use color and you can animate the's busy days and add softness I mean this is how they're professional films and commercials have done frame by frame you'll see it's kind of similar concept what aftereffect was doing this is more just in the color grading area and what you would do at the end of all this is you would at all and hit render which on this computer will take an absolute eternity when it's done go ahead file sent to final cut pro and you would have yourself a great project the last step would be to make sound add you know fully and a soundtrack which we're going to kind of do over the next two days so that concludes the educational part of the first day we made it uh and I think we're launching into a let's do you know all right so um way go all right um question from the w t b what do your preferences for cannon picture styles for video on the five day and seventy we come in that last time but very quickly on markets and I make over tomorrow uh you pick a picture style got a neutral it could create a custom one start off a neutral take sharpness all the way down saturation down to in contrast down too and turn off highlight tone priority because it as noise turn off auto lighting optimizer and make sure that you're in the correct live you mode that shows video display and the last thing is the single best thing you can do with canon cameras to get incredibly better quality is to shoot and multiples of one sixty essay once three twenty eight say is cleaner than two hundred say that really it really is true last time you said you weren't sure you know it's absolutely yeah yeah last time I said I was just kind of coming out now it's just not even a question one sixty years say I don't want a five d is so clean that people don't believe its campus eso won sixty three twenty six forty twelve fifty say twenty five sixty never shoot eight hundred aides say never shoot for, say two hundred one hundred so if it's a decision between true a hot areas say or twelve fifty you will get a better looking image in twelve fifty to put other tip of the day? Yeah, all right, cool. Bret douglas had asked, can you take an adjustment layer from photo shop and use it on video in premier pro? Our final cut for absolutely cool? Yeah, um nick mahar had had some color correction questions and I'm not sure if you answer these or not, but yes, when I take my color corrected clips back to final cut pro, the color isn't like it was in color. Why, um it should be, uh, there's, some kind of funky settings and quick time to think what version you have, but I don't want to get into right next I forgot him, but, um it should be exactly the same because what you're rendering and color is a pro s file and you go back in the final cut its the same file should check check here, your resolution here you're viewing resolution in final cut pro you can scale that, um and so it it help performance and so he might have that scaled in a way that's not showing one hundred percent why you'd be color space so when he's bringing back in is it's it's going toe, maybe not look as good as he thought it was gonna look, actually re adjust that check his preferences for resolution and they're doing research time preferences involved in that as well in the older version of quicktime that would kind of crunch the blacks and the whites a little bit and lastly, if he's seeing a big difference in what he saw in color and in fact a cop is definitely setting problem. But if he's seeing a different points he exports that mary compresses it the compression will tend to crush shadow detail and highlights as well ok and that's the that's the second part of his question which is what's the proper way to move back in a phone put pro after you color correct to go you go file question how to go from color correcting to go file how to move back in the final cut pro after you color correct yeah file sent to final cut pro that's it was after you after you render and you'll have a new sequences of secrets from color and the exact same files they're not color corrected understand though that these files are not progress files rendered and there yet a separate file so you don't have your raw file you have your progress filed you decoded and now you have the color grated files your hard drive again just so good media manage that again and I would definitely meaty manage it yeah, thank you uh both er asked, what are your thoughts on magic bullet looks plugging as a color corrector I was going to show that I was going to show the entire calories too sweet uh grinder and everything as you can see we had planning to do but magic bullets is a great way to get into setting looks on your video in after effects it looks after effects it works and photoshopped works and light room it works aperture it works and final cut pro uh and stew mash which is a buddy of mine you shot not turned help develop that and it actually is a fantastic way if you don't understand color correction to get that hollywood look or that dreamy look or that black and white film look uh from um magic bullet software so definitely get into it question from c sequin minor how do you mask to color great only portions of the image like leave the water bridge intact but correct the dress well there's two ways we didn't get against like a full you know, I did do a bit more of this uh in the first demo last year where I kind of got into that did localize corrections and uh there were there's two main ways one is by selecting a range of colors so if her red dress is pretty unique in that scene you could do the math and you can refine the edge or you can also do thie busier tools in geometry where you actually create a shape, uh, that you can add some motion tracking you actually modified that shape frame by frame. That sounds easy. It's uh, it's. Not as hard as you think it is. Uh, definitely like it's, not as powerful as the rodeo brush and after effects begin again. It's a different part of the process. Question from preston cannick is I know their scripts that allow you to go from final cut pro, too, after effects, but other scripts that will allow you to go from after effects to final cut pro. Yeah, we just showed it on and it didn't work, uh, afternoon. Sorry, sorry. And from that aftereffects rocking the final cut. I don't think so on there might be, but the obvious thing to do would be go toe after effects to premiere and export premiere and to follow for xml that would then open final cut for a reason didn't work today, but you know it's, a future in it works when you don't have something wrong on your computer, as far as we know. Well, no, I mean it you know, if you're gonna you're definitely going to be able to go from aftereffects of premier and you're definitely going from premiered after effects now I bet you there's definitely limitations the mental layers and effects we do question was any suggestions for a final formats even code from amy two different form of correct my last question last answer uh you can go from after effects and two premiere and flatten everything and then take that into, um final cut pro but there's no way final cut pro could interpret all the after effects layers and whatnot you could render it you could render this surrender it out but what this person I think is asking it's just kind of be able around trees and wait all these effects and know what you're asking for too much american um question was any suggestions for a final format so you in code from ami two different formats without re compiling sequence that one whoa okay, slow it down. Any suggestions for a final format? So you in code from amy two different with warm and me let's look for I don't know russia does anyone I thought because we all know the dhobi media encoder ok, go ahead ok, I'm gonna guess different formats without re compiling the sequence re compiling the sequence we conforming um we don't get chance unfortunate to show how that works but what you would do just to review is that you would just export to media ok? And then you have the choice of rendering it straight from from here and you'll get all your choices and flavors of how to do that. So if that's what he's calling talking about re compiling you could do it there or you could send a bunch too uh media encoder uh and then make your choices their numbers have them working in the background I'm really shared with final cut pro and you said make all that you know, I think that's what he's asking you to do that yeah it's exactly the same process we for whatever reason the computers crashing when we launched it it wouldn't it wouldn't do it so we're going to get tomorrow uh when we edit the documentary in c s five yeah, that would be the best time looking ok, thanks. We worked that question out of the team a question from eric feel kowski does the increments of the also one sixty rule apply tio all canon cameras other candid camera that I've tried seventy specific ones that I've tried it on is seventy five remark to wendy mark for and absolutely school does it apply to stills as well? No question from reggie from some for someone totally new to video being a mac or a pc user is there one software that will do all the job? Uh, well, if you're a mac user, you have I movie final cut or c s five. If your pc user, uh, I would go to c s five or abbott, is that that I answer the question? Yeah. What was the last one? If you're, uh, avid? Okay, thank you. What a question earlier on from sequin miner who's been pumping a lot of questions, so thank you. Any special tricks for importing time lapse sequences into direct into premiere? What secrets at time lapse time lapse sequences to premiere on me. That was everything I was going to do. Um, and that turned out to be a whole other, like our long process er and he was talking about premier or after effects. Um, you can you can import images into both final cut and premier very easily. Uh, and you can set the duration as a default and boom off you go. The easiest way to really create a quick time lapse all the images of sin quick time seven it's just there's an image sequence function on you could use stacks and uh in bridge and then actually even do within photoshopped right? The professional the way to do it if I were really to invest time would be in after effects because after effects works with raw files and we'll deal better with you know let's say six k files effectively off five d you better have a pretty powerful computer to crunch it um and thank god I didn't get that them all ready for this machines not this one but it can be done ultimately, though most people that I know will downsize their six k files to two k sometimes three k um I think three years a good way to go for case a bit much and that allows you do some image stabilization within after effects or final cut or premier uh motion tracking simpanan scanning um especially no let's give a foreground subject that time lapse is really make sense to move time lapse. You know it works really well when you have that we'll talk about tomorrow but um you can do that in premier or final cut very easily with parents can and fake that's fake the pan or tilt or the move very effectively especially if you had a little bit of a zoom in zoom in there makes it much more nine annual motion blur yeah and uh there's also uh a plug and call g b d flicker in after effects uh that will take away any flicker you have on a time lapse if you're doing it in auto exposure boat pretty cool. Is there any good application for image stabilization after fact, you know which one works the best on emotion does it kind of and aftereffect is pretty powerful there's a plug ins the clock and lock something I think so then one tweet about it something lock which is apparently a superbly powerful plug in use I know and follow saw some footage from china that was used in that yeah going through the who tones of beijing and they should be put before and after it's been a few months and actually I've had a chance to try it their stuff I've seen this coming out soon yeah, well people socks off samar lock and load lock it, lock it lock and load x yes. Lock and load ex is a very powerful stabilization plugging that I know works and finally got out of work since u s five but yeah at the time it was not finally I know it does work folic out it's a very, very powerful ok, next question yes. Ready okay from k aafia does plural eyes have any issues with mixed rate audiophiles, hds hd s l ars generally using forty four point one kegger hurt sound and most external recorders using forty eight gigahertz sound does it work around the drifting issues automatically drifting is a whole other issue yeah that's the interesting thing is that part of the mercury playback engine if we're talking about premier is that you can have multiple uh audio sample rates work and works fine magic so and plural eyes I actually haven't tested with the different audio format for example rates so I don't know but there's a button on the premiere version easy but says try real hard it might be for that okay where it will go back and do it gets hard that's zed try really hard you know to do it again yeah there's a little bit of up sampling that happens but that can create you know, some anomalies and some training some drift issues so experiment I have another question from morris cuss um is there a plug in for premier to correct rulings? Jeter but you know I have not he's premier long enough to know I've tried a few so far results her the results are mixed nothing you want to talk about here you know here's the thing with rolling shutter um you could have like a very limited depth of fields and you might be able to correct for some relation any time you have something and focus that's potentially pretty far away how are you going to figure out the ratio of your rolling shutter those different elements if you look at rolling shutter you know you're foreground stuff is going to be way out your stuff that's pretty far away is gonna be pretty close someone will figure it out but I think it's gonna take some engineering some incredible engineering actually um and I've seen some some uh like engineering like stanford type stuff where they analyze this type of stuff doesn't work on it yeah but it's like super voodoo um all right and chances are that plug ins gonna be pretty processing intensive it's not going to be it's not a quick fix and uh I movie ironically has a relatively good uh shutter uh jello rolling shutter thing you say major built in that thing cool I maybe feature future question from chateau would you suggest using the canada us plug in for final cut two important dslr footage over encoding pro rez outside of final camaro because I have not found the plug in to be stable enough and I think you concur I do I do and and honestly I moved uh uh and started using premiere before the plug in so I've tried it a couple times um the one thing about mp extreme put which I was using for a lot of other things even before this issue came up because he's been around for a while is the batch feature uh and I couldn't get the plug in really to do it as quickly as I could and I think it's designed to do that it's probably better now, you know, try it the reason I don't use the plug and there's a plug in that can makes, uh that works in the log and capture window in final cut and logging capture is like the professional way of doing basically meta data and final cut where you would go clip by clip and enter editor's notes go take that take in out points and do the conversion process um and um, I've gotten burned several times where it does the whole process but doesn't actually render an entire clip or hits a bugs don't want me to and that's you two, right? And how do you know? You said you just noticed that it's way shorter and you really, really you know this is your editor going to notice I can't take that risk, you know that the best clip of the day theater said what you're talking about on their side because what about the time could think is it adds time good that's a nice aspect of it, it adds a a it's good is it came at a time code? Yeah, yeah doesn't impact media's stream clip time good uh not that I don't know actually, I think is there anything you do overall with your footage like denoix zinger sharpening and that usually do like every time the final cut or um if anything I will add noise um to make it look a little film like for certain things dino is no um this is grand mattress plug ins they're really good in color that has some noise algorithms and great bleach bypass effect um and I do use that a little bit but um I don't tend to mess too much with it on that process the only time you ever mess with images in post in the grading or after effects kind of side of things yeah noise reduction tools in video I mean again you're not working it was but with much color data so you can't really you know, really finesse it really fine so they often really, really tricky thing it's like a hammer you can really just blow out your image and make it look, you know, so that's one of the we certainly the weak spots in terms of noise noise is your enemy in any video field and uh you need to make take care of that on set all those things you just don't take care of imposed on, you know, another this is not my saying this is the same erin will tell you, you know don't say we'll take care of it in post take care of it while you're shooting. Uh, because, um, generally speaking is very hard to fix big mistakes and post that being said self was getting better and better, but, um, the cattle are always going on that, I guess is, you know, definitely live by the rule to not fix it in post, but I think you should also become intelligent filmmaker and know what is something. What is what is fixed easily in post that it could be a more efficient filmmakers that makes sense. So, you know, to say no it's gonna be all shot in camera is also bit archaic, you know, our let's been, you know, ten minutes going this light perfectly uh, certain things about letting you cannot correct imposed but certain things you can and that's, why it's good to kind of play all of these tools and know what their limitations are, you know, so blown out highlights could ever be brought back. Shadows can very often be brought out and get something to keep that I mean, camera's really forgiving when you're blown at you could recover stuff video? Not so much. So so we think about when you're kidding, you're white balance and matching, you know, your camera to that, like don't have that leeway of being able to pull out that great information from your blown out whites. They're gone on video, so it's like taking a step backwards. Would you like another question? Sure. Ok. Getting cold? Yeah. I'm question from leslie. Would it be advantageous to have both final cut pro ana mac and adobe premier pro on a pc for a large production? Why not? And hot a clinic system e? I mean, do you need it? I mean, it's like it's, like a it's. Like a trick question. And that, like, why do you need a mac and pc? You know, I don't know, maybe there's, some there's, some there's, something particular about each one that would. You could even run parallels on a really powerful machine if you wanted to see parallels all the mac. I mean, um, the answer is, of course, if you want to do you need to know. Okay? I'm not sure if he's there in vanished, running cs five and final cut on a mac, absolutely have access to color and other tools and tow, have motion and also have after effects and a little tough on, you know, who's going to question him like pro rez since it's, you know, an apple kodak do you usually if you have to work with someone that is working you know, mac or windows how do you usually handle that process and you keep it in pro raised you render it out of something else. You know, one of things we covered in the first syria's again was that whenever you start a project like I mean number one question is what's your deliverable. So where is this going? Was going on tv? They're going on the internet is it going on a fifty foot screen and that will determine everything from what camera use what kodak use, what programs version you use, how you export treated and so you need to know what the end result is and that will determine every decision you make along the process. So you're assuming you we mean really with talking about is going from final cut anything else on a pc because you wouldn't be going the final cut on a piece if you could stay at age two six four stay in h two six four have you ever used I think it's in a form or anything like that? Have you tried that? No, I think those are avid's formats. Yeah, my question kind of back to the twenty four to thirty debate what is like is there twenty four playback used to have to make it plain back at twenty four do our computers playback a twenty four guys that have a debate with the guy I work all the time about why record twenty four after just going playing back in, trying to pull them. Yeah. I mean, I'm so tired of this. Twenty four was just a discussion you had no, no understanding. I want just like, come on, guys, um, frankly, you know, a computer will play back whatever you want, okay? And, uh, there one of the biggest misunderstandings? And initially was that, um, a lot of digital projectors on lea played back twenty four, so you could not play thirty french or second content on film that you shot on a lot of the original digital projectors. Cats shoot twenty four. That was one of the initial problems. Five d so I went over to disney and they couldn't play, uh, my films with sound. They can play it slower, you know, twenty four from thirty. But this was before, you know, twister came out and a lot of other software without using some heavy machinery. You couldn't do it. Now you can. Um, the real issue is when you do twenty four frames a second, it's a certain speed. That is also gently associating with you know, multiple of the french second you double it for the shutter speed of forty eight of a second and a forty eight of a second at twenty four frames per second has a certain motion blur and look to it that feels like film because guess what, that's what film is for the most part um and if you shoot higher shutter speeds film our video looks more staccato. Um and you get mostly undesirable effects sometimes, you know, saving private ryan were shot with mary, you know, narrow uh, sugar angle are really high shutter speed to get that very staccato look, for the most part, if you want that helmet look for things, just move a certain way and aren't jerky. Um twenty four is the way to go. Computers will pay the playback whatever you will, whatever you want so almost tvs you'll see them like when the tv searching for a signal, trying to figure out what frames per second what hurts and all that stuff. And, um, you know, it's it's uh, it's a preference and I should everything in twenty four to keep it simple. And, uh, what about mixing two twenty four, thirty? Well, you'd have to convert it, you know, you can't you can play thirty uh, twenty four times sixty and sixty and depending how way that you handle it, you can tell the computer to do its best, you know, premier will handle it relatively well, or you can slow down twenty thirty to twenty four. You get a little bit of slow motion effects. You know, the issue really comes with all these debates when you try to mix it with sound, I think many if we start trying mix sound, um, things get funky because you're trying to, you know, do pull downs and all that, it just gets funky. I know what you're talking about just really briefly is that, yes, there was a time when you could shoot twenty four twenty four on tape in standard definition, and they had to be something called tell us any process or pull down process. There was a brief time where that was it, but now we were progressive working a flash media we don't, we don't have those issues and he's not wrong to manipulate. Okay, branching off on that whole idea with twenty four. Peters is thirty p m you're saying the twenty four guys that from the look you think we're going at it all wrongs? There's all these like there's always like websites like I'll make your video look like film do you think instead of like now we have this d s lars instead of emulating a film look we should be creating our own luck and stop like stop tryingto like oh well I'm going to try to recreate something twenty years ago instead of like dslr is the new bridge have her own look I have two answers don't reinvent the wheel one view people like the way films look and they're used to it and they want to see things look a film or do something something no one's ever done before and make a name for yourself uh and expect a lot of rejection and there was some incredible adoption who knows? Try it I if anything of all the things I would pick I'm not sure frame rate is what I would like try to make a name on um but um and I have one little caveat all these new tvs have high hertz levels like two hundred forty herds the higher the hurts, the more staccato and jerky or video looks by the way. So on all the modern tvs I turned all that stuff off because my films on blue ray look like video because they're adding frames there uh and it's it's cool for sports, I guess but uh hurts or not good for films to look good this is lauren dutton here set designer tomorrow we wanted to kind of wrap up with him and talk about what tomorrow and sunday are going to look like ok then yeah we're gonna have you guys switch spots thanks very much. Thank you. Awesome to have you dan thank you. Well, I have no you were doing so you tell me I have no idea either except I guess I'm talking about I guess I'm talking about what? Uh we're setting up for tomorrow in the next day? Sure. I mean, do you want to give an intro to you that I could be more fun to watch you suffer but I'll take, you know, a little bit more about it than idea I have one a little slice as I usually do. You have it's fun to just play dumb just in time but I'll love oh, I'll help you out a little bit basically behind the scenes going on for three days prior to start this workshop is we have made sure to uh, you know, working people like them or to help us out and create what is effectively to square rooms into shooting environments. Um the most difficult thing to do when you shoot a documentary for a film is to work in a nondescript you know, rooms actually pretty cool must get a few things going for it but the other room over there is a little more dire um and you know his job and I think we'll talk about it about it is to try and effectively without literally creating a set, which is what he does do for living where he would make this look like the white house if he had the time and budget, he could really turn this into the oval office, um, maximize the budget that no, he was given to accentuate intelligently these spaces so that when we shoot this documentary, the environment looks a little bit more realistic on but we shoot the narrative, uh, it looks a little bit more filmic as opposed to realizing that you are in a room with fluorescent lighting and, you know, brick walls on nothing else. So what we've done, you know, a lot of this will talk about over the next few days is we've had discussions on what prompts we had available our budgets are limitations, um and what we're going to try I was going to try to accomplish in this course, and what he could do is what he has is that a good little intro you started? You know, I mean, for me, it's pretty much a regular job, I mean, uh, maybe a little bit smaller and and the needs are a little bit I mean, I had it took me a while to get my head around how how it about what you're doing exactly because it's like this you know, other layer of very going on that that I didn't quite understand, especially in the narrative one what do you mean it's ok, what he means is, you know, he's designs a set for one film crew he has designed a set for you guys filming and for them filming up. So when I was thinking about the set we were talking about it being very theatrical and stage like and and you know, so I was making a very spare and I didn't realize you were actually filming a film within the film so you did need to do reverses, which you know, so I had to bring extra stuff for that you know, walls and that sort of the flats what we call him and so there was a little bit of that and a door and that sort of thing but basically I just look at a script and I figure out what I need to bring and that's what I do cool on uh, you know, I mean, working with a good set designer or our director uh is like one of the pleasures of working you know, as a director or in filmmaking is that you know, you have people who again I don't know how to build a set I don't think we want to learn either uh I know that I am looking for a certain look for something that I'm going to combine you know, get my my dp or gaffer and set designer and we're all gonna talk and say this is the reality of our space how can we you know, high the ugly parts of it hockley accentuate the pretty parts of it what we need to bring to kind of add layers to it uh and you know what we didn't hit here um which we had a little bit off on the first class was that it all comes down the budget I give budget in time you know there's what's the three this quick quick you can use cheap, quick and cheap and good and good yeah, you don't have to and remember that that is and and that's absolutely true it's one of those truisms that is true and, um I always just like to tell the client you know you could even you could have the a game you can have the bead game I can do it for any budget you have it's just going toe you know, there's tricks and you you make the best of what you have and you you know, so when they asked me what I want to spend on it what I want to spend on it is the budget for a big action movie or something but you know I don't usually get that kind of money, so yeah and I mean no back to the quick, cheap and good you could get two should get quick and cheap you could do a quick and cheap I've done five minutes you look good enough I can make it look good very quickly it's not gonna be cheap because I'm not you know, over pay like up the wazoo to get that piece in here right now where the helicopter dropping it in place you know? And uh if you don't have money though that's when you don't do quick so for most of you uh if you don't have big budgets, you can't get good if you take your time so that's kind of trick where the formula is revert in it, you know, it's pretty rare though in the film business tohave time like that, right? I mean, especially in the commercial world, which is more in my world I mean, I've done features um which is a kind of a whole different approach, but but yeah, I mean, the turnaround even on a feature is so short most of the time that you know, you just get really good at being efficient it's all about being efficient and that's why you know for a lot of people out there who are just starting out aerial wants to be a big time filmmaker and make big films and it's no no problem aspiring to that but don't be so focus of the grass being greener over there realize it you were really ever get the chance to take all the time you want to shoot your own little film ever again as you progress he's very hard to go backwards because you're going to set a certain production standard and look to what you do uh that going back is going to mean that you're content has to go up exponentially yeah, I mean it's going away in a way the more money there is, the more pressure there is, the less time you have to do anything in the less room for mistakes you have I mean it's the big jobs where I'm really expect I just cannot make mistakes and you know, so budget doesn't necessarily mean easier for sure or it's a different kind of heart let's just say that low budget is hard but it could be fun to that could be fun you can have the most amount of money in the world and be absolutely miserable because of explains the reason you know it uh and you have every every toy or disposal but something else is wrong it doesn't solve everything the dps crazy bp is crazy so what do you think of dp going how much time yeah what's your number one pet peeve with dps they think they're that they're supposed to do my job what's your favorite thing if any about dps you know when there's respect that that's all I alive really you know because I don't generally go in and say how the light a seat so you know I mean I respect them and and there's plenty of epi ezekiel along with so I'm not saying they're all terrible but there are a lot of megalomania gps out there so and the challenge and the challenge is to find people that worked together well and a dp has a vision that he or she wants to help how make happen they have an appreciation for geometry and the way they want to see it and then they want to move your setting this way or that way and you may go crazy in the same way that you have to work with them so that you know you adopt certain colors or stay away from certain colors of fabrics that could make their lives difficult as well as building sets they're going to help you know not only tell the story but appreciate motion and stuff like that there's a synergy to so tell us anything when there is that respected you both understand that and we both are seeing what our needs are I mean, the whole color thing in the whole you know, the framing and everything there is a gray area there that's really interesting I think between you know especially dps and art directors and production designers and so that but naturally turned the new a struggle sometimes but you know, you also learn when you're on set a lot just the politics of being on set and how to get along with people and that's a big part of it and you know, just stood not stepping on people still is literally a cz well, I mean there's a lot of action that way ultimately you both make one other look good if it works great so with that point, I think you know, just finding one of the hardest challenges that any film like filmmaker has whether they're experienced or not especially photographers going in filmmaking is this whole concept of collaboration um and one of the things we did last year uh is we would I would have we had twelve students that say you decide amongst yourself director is going to be and I was just like watching you know, uh, a social experiment and survive lord of the flies you know and um because they had never climbing with anyone and they were all photographers and I'm like, well, I may be the director and I'm the director of the dance a slight the beauty of filmmaking is that, um, you're gonna work with the director is going to find a dp who sees differently or the same way that they do augments the way they see things. The dp is going to find a gaffer. Who's, you know, fantastic lighting. Uh, the gaffer's goingto work with, uh, his crew and and the grips, they're going to know stuff about moving, you know, cameras more efficiently, uh, with new original tools and toys and to help save money for the budget and so on and so on. And you're gonna work with set design and art director. The war drove the makeup er and all these different layers and the final saying, I think, is you know what? What determines, uh, or what makes a good film is when all the pieces come together, because I think we can all agree that the whole is always greater than the sum than the individual pieces put together. And that's kind of the idea of filmmaking.
Class Materials
bonus material
Ratings and Reviews
a Creativelive Student
Great Workshop.. Totally worth it, for the sheer amount of Information and seeing everyone work together, seeing the master himself at work and breaking down each and every aspect of film-making while shooting, so people like me can learn the Magic of film-making. Loved every part of all 3 sessions.. Awesome CreativeLive ... Awesome Vincent Laforet.. Awesome stuff, to everyone involved, including the ladies asking "interweb" questions and the creative live camera crew.. Also, when and where can we see the final product shot on Session / Day 3... "Choice"..?? Thank you..
a Creativelive Student
This is, without a question, the best education model I've experienced. The small snippets of details, the interaction, the experience, was indescribable. I don't know how to thank you enough....especially after winning a prize! [Hugs]
a Creativelive Student
Hi guys, great series, nice educational tool, especially when you in remote places. Just wondering where is session 2, since i paid for all, cant find it. anything on that? Cheers bvkfilms@gmail.com