Lessons
Day 1
1Introduction
48:43 2Vincent's 5 top HDDSLR Rigs
1:07:29 3The Importance of Pre-production
1:03:21 4Workflow (iMovie, Final Cut, Premiere)
1:14:59 5End of Day Q&A
1:35:16Day 2
6Vincent Laforet & Chase Jarvis Chat
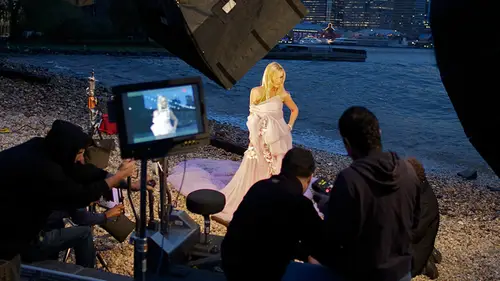
22:29Overview & Setup for the Documentary
54:26 8Setup and Shooting the Documentary
1:04:37 9Setting up for the B-roll Shoot
27:16 10Shooting the B-roll
1:11:34 11Discussion: Moving From Still to Video
45:16 12Editing the Documentary with an Editor
47:04 13Completed Documentary Edit
01:42Day 3
14Special Guest: Gale Tattersall
32:23 15Overview of Editing the Final Documentary
13:48 16Working With Actors
35:34 17Pre-Production Recap
44:57 18Hands On: Shooting a Cinematic Script Part 1
59:25 19Hands On: Shooting a Cinematic Script Part 2
1:23:03 20Hands On: Shooting a Cinematic Script Part 3
1:40:55Lesson Info
Workflow (iMovie, Final Cut, Premiere)
I think we were gonna jump into Q and A for a little bit. We're also gonna welcome Dan Thornton in to help us navigate the other end of the film process video process, which is the finishing process, which, um, is justice critical as preproduction production. Of course, there's posts. Um, and we're going to be doing what I hope satisfies everyone out there in the world. That's never possible, but we are going to be showing our full work flows in final Cut Pro a swell as Adobe CS five Premier premiere. And, um, we're going to touch a few other cool things like color. If we have time, maybe after effects will see how quickly we go. Uh, and we'll talk a little about backups tragedy, etcetera. But we'll line up stuff with time code will use plural eyes. This should be hopefully one of the more, um, comprehensive. You know, start to finish work flows in terms of HD SLR workflow boat with two very powerful tools. We were going to do my movie. I don't know. They don't have time to do that. I'...
ve never used a piece of software either, But Martin Martin, Marcus has been see known Marcus for two, almost two years. I still call them Martin. Anyways, um, and I think we're gonna jump into, uh, the Q and A, um and see if we could get people to have their own Martin's, too. Uh, yeah, All right. First question is from Anna Wu Photo. How does preproduction change for a documentary shoot? How does preproduction change for a documentary shoot? Because you're not planning shots and store boarding in the same way? Yeah, it's It's different, but you'd be surprised if you go into any directors office on the motion picture director's office. It's not uncommon to see boards with entire trip hierarchy, trees of people and actors and how they relate to another and locations and dates and, you know, influences. And when you go into a somebody does works on documentaries, you'll see is being very similar. You know, the people assume that because documentaries maybe a little less predictable, that you I kind of do it a little bit more on the fly and you leave things that more open ended. Not so, I mean, professional documentary editors. Producers are unbelievably organized and they leave nothing to chance. And, you know, obviously it's going depend on whether the documentary is on something that's happened in the past. You don't have to collect any new footage other than perhaps interviews or whether you're working on document that's actually happening live. But working on documentary is an incredible art form. Um, and, uh, you know, it's it's just unbelievable. Impressive to see the amount of work that could be put into, uh, you know, 120 minute piece years. Sometimes people spend their lifetimes on, like one documentary and the amount of media they get access to and rights clearances and interviews, you know, subject people they're interviewing pass away during the interview, and they don't get to them just hopefully not during the actual that could be interesting on. And, um, you know, it's it's pretty amazing, but it's a tremendous amount of work. Tremendous model work, a lot of respect. Those people dressed patients. I think one of the things to keep in mind when you're when you're thinking about documentaries is the writing process is a little bit different, and so it doesn't follow the traditional process that, you know, preproduction production, postproduction, workflow will will do. But, you know, as you create your questions for your interviews as you think about this story, it will be thinking about story ahead of time. As you do your planning, you know you'll shoot, probably asynchronous Lee, as you would a feature, a narrative, something like that. But your writing process will largely happen once you've gotten your interviews, and then you'll take the writing from those interviews from transcripts. Do it's called a paper at it on that may inform your process in many different ways. You might find the 70 my God, we have a completely different movie here or we have a really interesting movie and then you make, you know, make some decisions. And I think that's why they do generally take a long time t sort of jail. Well, I'm not a member Central, that this statement is accurate. I think I would have expected. That's more likely for a narrative film, too. Potentially change during the filmmaking process and a documentary that's especially based on something that happened in the past would not change after LA documentary filmmakers telling me that their process changes tremendously as they make a documentary on and find new things out because, you know, they have that luxury to that. You don't actually have as much of it. Yeah, sometimes, but But sometimes it's It almost becomes a curse because you suddenly see all these different possible stories in mind. Your imagination goes, Oh, my God, why didn't we followed that? And then you think and you got to do a lot of negotiating with yourself a lot of checks And then because ultimately you gotta aim to do something that's finished and you can't start chasing too many things. But a lot of your shooting like like all kinds of motion picture storytelling. Ah, lot of your shooting will tell you a lot about your story. So just trust that trust her shooting Trustor preparation. So kind of, Ah, follow up question to that from Christian Ball was, Do you need? So do you need a script to make a documentary? And just so we're clear. So I'm here on the schedule, you get obsessed. I am worried about 15 minutes of Q and a still from the end. We'll just stay on that because I don't want to kill us on workflow. The last of to do. But do you need a script for doing a documentary? Ultimately, I mean, there's, you know, there's so many different formats for for motion picture storytelling, and I'm not going to say that there's an absolutely right way or wrong way to do it. But the best practices for documentaries? Yes, you will have some sort of shooting scripts and some sort of idea when you go into production where you're gonna be at any given time during the day on that isn't another self a script you will also have When you got your interviews, you'll have a lot of material you have to sift through and move around just as you would with your ideas when you're when you're sitting down with the narrative. So yeah, but you know, if you want to go out there and wing it and you know something, you know, you know, wild and stuff like that and see what you come up with. All experimentation is good. It is, But I don't recommend it. Yeah, okay. Next question is from CNS Uh, what is the best size crew and the most important rules for a small short film production. Well, that's just like asking, what's the best camera lens? You know, um, for example, Uh, when they shot Valkyrie, Um, they had certain sections with Tom Cruise. Uh, Tom Cruise keep coming in. I know. I really don't know. But when they shall Dockery, the director on the camera operator and first A. C and Tom Cruise were the only people in that old German playing with Volker was the German, Whatever. I forget the name of the exact It was a plane going overhead right now. But the point is, for that, they didn't have room for, you know, other people needed to just find when they put the parliament. What's that? He put the bomb in the plane that Noah when he is escaping from the lair. But what's the perfect size crew? Honestly, you wanna have enough people so that you can move quickly. So, you know, I've had producers cut back on the number of rips that I have on a production and guess what? Lights weren't ready in time, and it costs us a lot more money in time loss than it did to have those two people pay for the day and You also want not to have so many people that you are not nimble. And that's where an experienced line producer on A D and director and his team come together know each individual head of each department. You know, I have no idea how many grips I need whatsoever on any given production. I asked my key grip and gaffer. It's That's their department. It's like it's a hierarchical system that bill nature. That's their expertise. I, as a director, will say, I really would like this kind of like the DP, And he will translate that into how he or she wants to light it and communicate that down to, you know, the grips and the electoral department, etcetera, etcetera. And it is kind of how it works. And if you have one weak link, everyone gets killed, you know? So what's he ever done? Etc. Built in Of course, you were always an economy and, um, you know, also wanted for one small anecdote there. Um, when I stepped on a sat back down, I sat back and I was a full ball of water with viannet, and I was like, Cool, you know, And what That reminded me of was to ask one kind of trivia question. I guess they can answer, um, water, and I'll let you answer. Or them whoever pops in first. What are the two attributes that I used to hire anyone on my crew or cast, you know? Or team? Just call the team. Were the 1st things I look at in order 10 of this, huh? Attentiveness, Attentiveness. No. Two. Most important things. People you want to work with. Experience. It's up there. Kind, really. Competence. What's that? Competence. Problem solving. It's all All those are parts of it. No one's headed yet. Punctuality. These are from the Internets. Expected. People who listen, personnel consideration. Who do you guys want to work with? People that you work with, right? Yes. Proactive personality. Thank you. I think. What gets you excited when someone says I want to work with you and you see them and you recognize their work and they are It's talented. Okay, So talent for me is the number one thing. And to is personality. So, uh, you know the attention to detail attitude. So you have to be incredibly talented to get hired again. If you're grumpy, have a poor attitude like unbelievably talented house. Exactly where, As you know, if you are, you know, not the single most talented person but you you are unbelievable problem solver and easy to work with everything. It's just as important. So just don't forget talent is great. But if you're a pain in the butt to work with, I have a hard time. You know, it's almost as important in personality and the little things that you do. Everyone could do the job at a certain point. In this business, it's little things that they do that that make it better. All right, next question. Okay, next question. This was from true in the chat room. This was back when when you were talking about, um, the location, scouts and such. How helpful has it been for you to collaborate with film commissions? And do you do that? Often? I would never do that. So that's what you know my line producer would do. Or the local producer would do our location scout or the, uh, location supervisor. But it's a great resource for anybody, because almost I think every state has a film commission that has contacts of in many cities and cities that you have all the people that you might be looking for. Yeah, Maddie would like to know when capturing large amounts of footage. If you have a really good and easy file naming technique, we'll get to that. OK, coming up. All right. What was the one question I avoided about commercials? Art versus something That commercial was from went. And the question waas, is there a difference between art and commercial and what constitutes the difference? Okay, so it's not commercials are art in commercials, but art versus commerce work. If there is, uh, it's probably not not a great thing. You know, Ultimately, commercials and commercial work have a specific purpose of conveying, uh, an idea selling a product. Um, but the best way gently to do that is with humor, art, Um, visual pizazz. Um, everyone knows they're getting stuff sold to them. Every day they walk for the streets, on billboards or on TV or on, you know, on the internet, if you could do it and make them actually chuckle or see something they've never seen before And forget that their actually being, you know, spoon fed something uh, then it's probably successful commercials, you know, Try to get some sort of emotional impact or do something, you know. Technically, it's it's unbelievable. So, you know, for the Super Bowl, one of the favorite commercials Waas, Lance Accords Commercial. I remember of all mention the brand that had a little Darth Vader kid. I'll remember that. It's clear, you know, it was hilarious. It touched our hearts. Interestingly enough, the brand recognition of that spot was very low. Yeah, Butter remembers a commercial. Matt's There comes the hard part of the road. Or as the chip commercial, you guys will remember the three of them. I know the guy was sucking the guys singer to get, you know, stuff off. Um, you know, I remember that really well. A swell as the dead fish where you Sprinkle in the ships and they came back life along with Grandfather. So that's that's, you know, the rocky, uh, beverage commercial where the Clydesdale and then very unpopular commercials that that that that could have increased brand recognition for that company. Yeah, in a bad way, have been negative way. Won't you mention that particular company, you know? Can I have one little thing course in any healthy film community not unlike in photography, you need like an ecosystem that has a mix of both, so that most of your crew can work all the time and make a living. And that's something to keep to keep in mind. If you want to make feature films, if you want to make, uh, documentaries. If you want to make commercials and stuff like that, all that helps the community in general to keep all the people that you're working with, you know, be able to work to work successfully. And so not every places, New York and other places L. A. So in your various communities and stuff like that, keep your eyes open. Keep you know, keep your ears open and hear what's going on. And you'll be working with people who do this, who go back and forth between these different disciplines all the time. Yeah, I'm Brandon had a follow up question, which is Where is the line between commercial work and non commercial is just specifically making money that the deciding factor, Where is the line in terms of being directors? Where's the line in terms of making money versus art. Sorry. Ask it again. Where is the line between commercial work and non commercial work? Does it have to do specifically with making money? I think that, uh, if it's fine art, it's, you know, it could have a famous Brandon it, but its purpose is not. It's not being commissioned by the brand. It's not necessarily to sell the brand. It could be a commentary on the brand, you know, to be a painting like an Andy Warhol painting of a bottle of water. Um, and just so you know what, we're being all kind of nondescript about brand names that we know. You know, creative lives become no bigger energy, and we and they all have to respect people's rights and brand rights and copyrights. So I can't say, uh, the famous drink, You know that we all know it is just because we haven't cleared it, and it's good to respect all that stuff, you know, and not get anyone in trouble on more important respect. Everyone else's trademarks and all that stuff. But a commercial work is a work that is clearly intended to, uh, help increased brand awareness seller product and is generally commission. It's part of the persuasion industry. Do you want to move on? Or I think we should move on and jump in the workflow. Okay, So, uh, work full of work, Full workflow. It's, uh, actually, um, not that daunting when you learn some of the very basic building blocks of what you need to do. The idea, obviously, is the main challenge of a CSL. Ours specific cannons is they shoot in a format called ABC h 0.264 which is a compressed format. And because it's compressed, it puts a lot of demand on the computer system that you're using to decode it encoded. So open it up to play machine after really kind of use a lot of horsepower on a number of levels. And there's different types of software out there that feel that differently. There's two main piece of software gonna focus on today. The first is final cut studio made by Apple, which is definitely, you know, one of the three big players out there, uh, you know, is basically there's like a pro. There's Abbott, and there's Premier tend to be the keystone editing pieces of software out there and final cut pro is something that I've used for years. I am now definitely experimenting with CS five for a variety of reasons. I'm really interested in after effects, for example, Uh, and also as well get to when we talk about CS five. Um, it handles this thesis. Kodak ABC issues not to natively. Which means you don't have to render anything convert anything, and that could be a pretty big deal, depending on what you're doing. Um, and we're gonna go into that into detail. So let's figure hovering manages Syria. I'm gonna do the first part of this. All right? And, um, talk about one of the question that just came in, which is, um, what do you do when you're handed a card? And here is your CF card that you would stick into your computer, Obviously, how we're all aware of how to do that and you will see that in the directory structure is for can at least a d. C. I. Am and a folder here with a variety of files. Okay, I know that this th em file is actually a metadata file that is associated with it. Um and the workflow going to give you here is for people that are I would say, intermediary, they're people. They're gonna make work flows that are much more bulletproof people. They're going to clone this CF card like, you know, bite by bite and archive that. So everything is conserved the way it was on the drive, and they're gonna back it up immediately to multiple drives. We're just gonna talk about what I would do on a general basis with final cut. All right, so obviously the number one thing to do is as you're shooting and we'll get into this tomorrow and on Sunday, you're gonna be wanting to have someone on set that we call a script supervisor or script e. Uh, and obviously they will be working off of your shot list and storyboards that has for the vaccine numbers. And, you know, they're going to keep track of each take of each camera and they're gonna take notes, and that's incredibly valuable. We'll talk more about tomorrow. But when I hand over to Dan a hard drive with one day's worth of work with 50 video clips, 50 audio clips, he has no frame of reference as to what these file names mean whatsoever. What is M v I 9841? How is he supposed to get started? So as you shoot, you're going to be doing a variety of things, one of them being, you know, having hopefully a shot list so that you can start making all these numbers. If you don't have a shot list for you don't have storyboards. At the very least, take a note and say, You know, on this scene that I'm calling seeing John's bedroom scene because I don't have seen numbers Way shot five takes. The 1st 2 takes were failures. The third take kind of work. The fourth take was not good. The excellent. On the six take, I didn't think work, but had a great little section at the end. And you're gonna hand over those notes over to your editor. And when they get this, these data, they're gonna be able to go off that and save a tremendous amount of time and get an idea so that you can have actually converse intelligently because no one's gonna remember FBI 94 1 It was a great take. Okay, so on the most basic level. We're going to go ahead, and I might have to call Marcus real quick. Here. No, I got it. It's cool. Um, we'll have someone on set a friend of yours with a stable computer, Hopefully a laptop. If it's a desktop or laptop, gonna get fancy, have it operating on a battery operated unit. May PC unit. So if the power goes out, you don't lose anything. We're gonna talk towards the end of this. If we have time on, you know, working off of your internal drive where external drives a quick note. I would always work off of solid state drives. SSD drives because they don't have any moving parts. And I always keep a copy more than one copy of everything. So by the time I leave that set, I'm leaving the hard drive of the day's work. The agency is leaving of the hard drive that day's work, and 1/3 person is leaving with the the day's work going to a secret location during a secret location on different planes in different cars. You know, I literally, you know, fly hard drives on different flights when we fly back from a job just in case. And, um, you go ahead and you stick your disk and and you'll copy it over to either an SSD drive, your internal drive or external raid. I used t check G tec drives, the SST little, many external drives. I also use their there two terabyte kind of g safe they have on the external sorts of redundant. So it's competent to drive in case one fails and you go ahead and you create a simple naming structure. So in this case, it's simply the date. Is there a way to zoom into this eyes? That's, um, uh, Control and then used this girl that he holds a very go. So the date of the year, month date underscore and the title of project. And then, if you're force enough to have more than one camera, gonna break it down into a camp and then be cam. So you know, obviously you know, you know, find. All I know is a tight shot for shot on Camera B, and then a 0102 is the equivalent of a film role. So we don't shoot film anymore, but it's a disk so it's not a bad idea also to actually mark your CF cards, you know, with actual numbers eso that if your hard drive fails, if you have the luxury of not having to re use those CF cards for the day at the end of that you realize you have corrupt file or missing file. You can still go back, though cf cards and inside there you're going to go ahead and put all of your movie files. All right, so it's a very simple Oh simple, ah kind of starting off point. There are many different ways of doing this. This shows you a basic kind of structure so that a year from now you can come back and you'll have every single date. They were shot every single camera and a for to roll number. You can make a more complex or for seen numbers. I mean, go is complicated as you want. The next step is going to be with the final cut pro workflow to go ahead and convert the stuff. So as I mentioned the A B C H architects for the native product that the cans recorded will not play back smoothly, on the most powerful Mac pro Tower with much ram, etcetera or, you know, laptop, Um, in final cut pro because it doesn't support natively. It's gonna jump and skip frames. So what we do is we'll go ahead and we'll use a variety of things you can you can use. If you have final cut studio, you can use compressor. Um, and even if you do, I still use Ampex ringlets for a variety of reasons, I find to be very stable. So here we are, down here. Piece of software called EMP Extreme clip that we showed last year. The beauty of this piece of software is that it's absolutely free. You can get here at squared five dot com, and it works on both PC and Mac and all that. This does does a lot. All that we're gonna use it to do is to convert our files to a batch list. You hear that? Then we're gonna go ahead and make sure that they were all cleared. Go ahead and drag our files into here, and, um, go ahead and set a destination. In this case, we're gonna convert to pro rez. Um, gonna go ahead and great a new folder. You can call it programs. You can go converted footage, Whatever you feel like doing it, You can also ideally duplicate the full A structure that you're copping out of. Okay, which is what you should definitely do. We're not gonna do it this time because we're kind of trying to rush. But you don't lose that whole naming structure right now. You'd like to try and keep that so that when you drag that folder in the final cut, you have the whole same kind of structure for your editor. Follow to select, and you're going to go up here and pick between, uh, these are what I recommend for final cut pro. They're all Perez for two to lt proxy for two to H Q and four for four. We went over this in detail on the first lesson. For most people, 42 is more than sufficient. It wants slightly higher quality. You could go to the H Q 444 you would Onley ever use if you're going like two motion picture or going to a lot of special effects? Because the reality is that the original file themselves containing enough information to justify it and proxy in Lt Airways to have more compressed stuff. They're smaller files or faster to read if you're on deadline. Daniel, I really don't see you. That why you would need to You for two. To four at newspaper? Yeah, Yeah. Use lt. You're wasting your time creating bigger files. Uh, it's all about speed, right? And no one ever see the difference on their IPhone or their laptop. You barely tell it. You're making much most for our reason to do pros for two to we're not going to go into any of this stuff down here. My understanding is this has absolutely no effect on it. That's what I was told. OK, so I'm going to stick with that. If anyone on the Web wants to contradict me and correct me, I'm happy to hear. But don't worry about this. It's actually it's a locked down standard. And make sure you dislike that and go ahead and add to batch and you'll see the two clips are waiting and you click. Go. What I love about this is how many times do you start this new laptop? You're on a plane or you gotta get on the plane. You gotta stop. You could pause this at any time. Um, once this clip is done and have the other clips cute. Whereas you do have a compressor sometimes really software. It's like that fund. I don't recommend that things will kind of get jumbled. And it process that one clips and awaits when you're 70 other clips for when you're ready to go with your laptop, go and that's it. So that's like Step one. It's super basic. The beauty of it is when you drag a next clip into here, you could just say use previous folder and settings, okay? And I'll send it right to the same folder, the same settings. Boom, boom, boom. You can see how fast this is, and that whole process is simply about converting stuff from the native to a Kodak. That final cut pro was like built toe work it. All right, so here ago, we're gonna go ahead and quit. We will then launch a final cut pro. And our purpose today is not to teach you final cut pro. There are a superb number of fantastic instructors who have done this already on creative life physically for HD SLR as well as, you know, advanced courses. Um, and I'm going to go ahead now. There's a variety of ways of importing these files. Go file import import. It's got doing set up a new project remembering in new Ben. Ben will call this reverie Day one. You can see that we kind of skipped that step of creating camera A and the sequences. It'd be nice to have it now because it would auto fill it for us. Um, and I can cheat and do that and just say, I'm gonna import a folder on the desktop. Apple de brings you to the desktop casino Apple. A apple shift day brings you applications to quickly Wilkie's, um and we're going to go ahead and find reverie. So this is unconverted footage, right? And what you can see is you have the advantage of having all your clips organized here, which is a much better way for the editor work off of. We cheated. So we're going to go ahead and just import the progress files. Couple D again. Perez did. I clicked the wrong button just doing you Ben Perez reverie Day one going on, and I'll just show You don't have to go to import. You can simply drag the Progress folder doesn't have all my little quickies I like to use expose and all that you guys don't have that islands here progresses right side. There it is. You just drag and drop it in. Okay? And there are your clips. Okay, Go back to arrange standard. And here your clips. Uh, this is what they call the browser on the left, where you have you organized your entire structure. This is your viewer over here. So when you double click on a clip, you can view it right here, hit, play, and see the makings of a bad clone commercial. Um and, um there it is playing, you'll see on the top left. Here is the total clip duration. And on the right, here is where you are in terms of the time code quote unquote. Uh, at any point, you can hit em to set a marker like a reminder on a piece of music or on a video clip. Do a number of them. In our case, we're simply going to say OK, I want to start right here with an in point. I'm gonna hit the I ki How do you even do it? Like the keyboard way? There's buttons down here to hear Yeah, uh, that one. Okay, cool. So you can go ahead and you you can click this button or you can hit. I just I've done it for ever. Don't even know what buttons are. And then you go to the end of the sequence where they kiss and that's your outpoint. So click this button here, the out point. And basically, when you play this, it's gonna clip if you click the button to the left of the play button is gonna keep playing just that selection. We've just done that. Basically a basic in outpoint the beauty of final cut, pro or avid or premier is it's nondestructive editing. You're not cutting pieces of film. You can always change this later. You know, either in here or on the timeline, then you can go ahead and drag us to the right window and watch where you're play head is in this case, the start of our little short insert going to ask you this question Basically, in final cut, you don't have to set up your resolution. Your frames per second. You can have this clip determined everything for you. So in this case, you're which is a nice features. You say yes, you know, I know. I shot. This is p a 10. 80. Make it so. And there it is. And you're done. Obviously, if you're gonna grab another clip now, that's a different type of frame rate and everything you definitely want to know, but it won't come up. And so here you have this clip. We're gonna go ahead and go to this file over here and here they are in point outpoint again. I could go ahead and insert right there. Clip, third clip. This is called scrubbing. I'm gonna find she was very cold that day. There you go. Click in out. You don't have to, Clark dragon. Here. You could drag it over over right to the right. You could drag it on top. And, uh, there's a number of ways of doing this. So some editors like to cut and just see how it is. People like to stack clips on, and that's pretty much as far as I really want. to get into the basics of it because we don't want to give you a whole tutorial. This is more about the workflow from start to finish. Um, the one thing I will show you is also how toe drag in audio. Gonna go into file import files. Where did you put it? Music. There you go on. Let's, uh yeah, that'll work that work. And there is your audio clip right here. You would simply drag it down here, go ahead and use these little guys to see the entire thing. And there you now have, um, a another commercial, Another bad calling commercial. Hit the home button. Always go to the left, and you have a bad movie with some music. Now you'll notice that I'm fighting the keys, You little bit. That's because snapping is on turn snapping off. And I could cut that right there. Note that ages until it went and used a very helpful tool. And you'll be able to explore all these tools. But you have a little too toolbar right here on the right, if you want. Yes. That'll be for Blade. Yeah, so I mean, you know, a lot of these will be familiar from working with all sorts of the, you know, everything from, you know, I can't say names about that. But all sorts of programs use very similar things like that, and some of them won't be familiar right away. But feel free to explore. The great thing about this has been said is this is nondestructive. That's right. You make a mistake, you can change your mind. So if I realized you know what, That in point that I had there. I want to change. You can change it up here by double clicking the frame. Or you can change. Use it with these different tools that ripple to look center. And we're not getting a defendant editorial. Just want to keep it basic. The last thing I want to show because some people really are not going to get beyond this is the idea that, um there is a very simple, uh, busy a tool that allows you to fade clips and out very easily like that. You'll see as you go. That's how you could do a quick fade and have this one fade in the same time so effectively a cross fade, you can also use a tool that's called a cross fade that's built in what I really want to show you this for was for audio. So when you reach the end of your piece, you're going to gradually one thing that they wanted to show you, that you could go into sequence and show audio away form. Yeah, I love that. And that way you can just visually kind of eyeball things where that issue shift command W Let's do it over here for people. Where is it? In here? Six settings, settings, timeline options. Show me what you wait for it and they also helpful, uh, the ability of show frames here, which is remember, that is, uh, to show the actually so frames when you zoom in. Whatever. You know, I don't, actually, but you can see the way form down here. If you know anything about audio, you learn to see when there is audio when it's blown out and when there is none. And, uh, at the end of this, you would go ahead and click. Oh, for outpoint. That's the end of your movie. All right. Uh, and, um, at the simplest level, I would go to file export as a quick time movie, save it to my desktop and just going to save whatever for Kodak were in with the audio track at a very high quality. Setting your desktop as a quick time movie. Now that's super basic. All right, that's super super basic, but that's just so you don't get too confused. The real way to do this is to actually, in my opinion, go to file export sent to file sent to compressor. I'm gonna show you what I think is a very confusing implementation headed the share it's meant to simplify stuff which does share will probably Window. That is just kind of meant to remove that step of going into compressor does the exact same thing, but just kind of stays here. And you can tell it I wanted to go into my documents or into my movies. You can give it a name over here, uh, reverie, and I want to make this for my Apple TV. My blue ray A DVD an IPad IPhone for IPhone IPod mobile, me YouTube press for two extra. You can see they've done all the work for you, all right, and the beauty of this is you can click plus, and you can say I want a version for my Apple TV. I want a version for my IPad to show my friends. I also want a version for my IPod, and I want a version for Blue Ray and I want a version for mobile meat and hit export, and it's gonna do all that for your walk away. That's called a render queue. It's gonna queue it and do one after the other in order. And there's nothing more painful than waiting for the stuff to get done, and it will send it to this destination right up here. And, um, you know, once it's done, you're done. Yes, I've noticed things. If you're using a lot of plug ins and takes longer, if you go this route versus just exporting its progress 42 then dragging into compressor, you're using Final Cut the senator compressor. It takes significantly longer. Yep. So sometimes if you do a lot of stuff on your sequence, I just go export Quick time and I direct quick time on a compressor because I find that you know it just like you said it will take longer doing it this way. It's just kind of the way it's implemented. Yeah, I mean, it's a comfort level. True, But I mean, I think you talked about this before. Time is your most important budgets. Make sure that you, you know, whether you're editing or whether you're handing this off to post production, that you're giving your editors your crew enough time to get this done. And also to change your mind if you come up with something or, you know, find something that wrong and things will go potentially wrong at various points. So, um, what the more complex than you can do is also say, sent to compressor, which launches another piece of software that comes in the final cut suite, which has exactly, ah what we just did. Awesome. Um, and you would go ahead. I didn't like that. Did it? Pile sent to good pressure. My compressor. Not working, It might be. Where is it? Pressers would be not working. Figure out what's going on. Why the share windows Cool. That's the same thing. There's also you condone. It's just a dozen like the resolution, but continue well, the wonders of yes maybe more from Marcus. Immature, just relative to like, eight bit files, 16 bit float and stuff like that. How does this fit in? You know, as you import it. Are there any issues? Like if you're gonna go to color correction or something later and you don't want the banding and your color correction and so forth as you convert an import, is there any issue need to be aware of Here, it's You can't scale, color, bit, depth and video like the way that you can with, like, a camera raw file or something like that. You can't scale some of the artifacts and stuff, feel it, Just just, you know, honestly, I mean, H 264 is a compression decompression format. There is compression in that. So, you know, some that will happen just on set when you got artifacts blocking, banding and stuff like that, you know, And that's just part of the reality. There are ways t help that to cure that. But you're locked in in a way with video in some, in some ways, that you wouldn't be. You don't have the the options that you would maybe moving from a camera workflow to like Down J Player. So it's kind of a moot point, really. You just what you need to understand is that you can't what different types of programs you're gonna select. Press four for four. It's going with the least compressed and biggest file size shreds 42 issues to be more compressed, use more and more and more as you go down. Um, but if you go to 4 to 2 for the majority people out in the world and for the two h two, that's more than good enough on Lee. If you're working for a major studio, would you go to for for for working for a newsroom lt and proxies more than good enough. But there is no way right the color space and all the information is there. Okay, so let's go ahead. For some reason, compression is not working. What I was going to show you compressor simply was that has a lot more advanced tools. Let me see if I can get export to you're in it, but you're not getting the, uh, it's weird. I've never seen happen before. We'll move on. The only thing I would have shown you is that in compressor you can do, You can crop the image. You can resize it. You can control the compression much more carefully. You can add a watermark. It's a pretty powerful export tool with a tremendous amount of advanced settings in it. So I really need to show. So, um, we have now shown you that, um, we haven't actually rendered anything. Uh, I think you could go along with me and believe me. Then once you're done all these files of living on your desktop and named appropriately based on what your name and go ahead and drop them into ITunes. Sink your phone or IPad uploaded mobile, me burning blue ray, etcetera, etcetera. OK, so that that's the in and out workflow on a simple, simple level, we're gonna do two more things that, uh, are relevant to what we're doing with next few days. Uh, Day one, we're going to go ahead and open a project, uh, called timecode example, and we're going to discuss how you would line up a dual system job. Other words. You have an audio reporter whether it's resume age for end or sound devices or whatever, it ISS and you have your camera, and you now need to sink the audio for most professional cameras. They do it, you know, right on the same file. If it's camcorder, you have to worry about that. But for any film, camera or high end camera is quite common to have to do that. So you go ahead and find your clip right here. Um, and you would also find your audio and three key is how do we line them up? Well, here is the, uh not so good way of doing it. You go ahead and drag one onto the under your video timeline, and the other is the audio, and you start moving them around, uh, and try to line up lips. Okay, so on the base, the reason we have stick on that sticks slates is so that you can visually see the slate closing, and you can see the spike on that wave form of when it does that. All right, So what you would do is you would find the frame here, and you hit the right arrow on your keyboard from Teoh right there. These? Yeah, it's kind of Where is it's between there somewhere. okay. Most slates do not have time. Code is what you're seeing here. Okay? It's a fancy thing, but all that matters as long as you have literally your hands when you're on set so you can see the camera camera, a camera, B, cameras, C. You know, uh, that's good enough because you'll be out of line that line it up. Okay? Use your IPhone or IPad to pull ups. But here, what we're going to do is, um we're going to do this with plural eyes, which is what you do if you don't have any time code, which is 99% of you, right? Um and we're gonna go ahead and call this sequence plural eyes, and we're going to go ahead and launch a software called Plural Eyes by Singler Software, and you'll see that this software is basically a, uh it has a 30 day or 15 day trial. It's free for you guys. Try out from singular software dot com, and, uh, it does some voodoo, and it's really not voodoo. It's actually analyzing the wave form from the camera, which is kind of like hissed a gram from the camera audio, the camera audio the built in audio and is looking at the same way form from your other device were lying. Camera audio was so bad on the systems and it's actually turns out it's super. It's more than good enough and it's gonna line up those little peaks and what we're gonna do is gonna select the project, which is right here. Time code example. Select the sequence just right here. Plural eyes, and we're gonna hit sink way. Didn't do that, Mrs. Step gonna drag both of these into the timeline. Now we're gonna go to fertilize, and we're gonna hit, refresh, good and sink. It's gonna analyze it. And did it. Uh, will it work? Uh, it's magical. Lined up for you. So what's that? And here it is. Now you can get out of your allies and you have the original instinct and a sink. And now, um, you should be able to see if we go and go to it was again modify second settings. Uh, timeline, timeline, options, wave forms. Do you see the spike right there? There's the spike on the audio clip of the slate. Let's go right to it. It's like, wow, and. And guess what? It also matches with the slate being closed. Okay, that's it. The beauty of this is you can froze at it. Uh, I don't If you could do more than one audio source, I'm sure you can. Yeah, I meant Yeah, definitely one of your sources. You know how it works, The more you add. I've never tried that. It's free. Done to at most. But I definitely added a crap load of clips of different formats. Different. Yeah. And she's like to boot, you know, and it's close to perfect. I won't say it's perfect. I mean, it mess up because, you know, Hey, you might have a bird chirping in the one of your microphones that is going to completely tricked. But there you just save yourself a incredible amount of money in terms of buying a a audio device that has time code, a camera that may have general on time code and a slate, etcetera. I had a lot of situations with camera is peaking whole time. Yeah, no problem. Pretty credible software. Yeah, I did have one where the battery ran out on the shotgun mic on the camera with me nothing. Yeah. Then I ran and do some trouble just lining things up. Just a Calgary somebody out there. Nothing's perfect. If you want to do it, the professional away. The perfect way to show how to do that with all the fancy toys. Yeah, but you are just basically using the on camera on on the can and stuff like that's good enough. It's your records. Best the rights track, right? That's what I mean. So that's why it's the person way over there. 600. That's where this doesn't work, right? You know, or you have a really obnoxiously loud, you know, some operator is chewing gum right into the microphone or Giro's on your camera, something like that. So it's not foolproof, but for what it cost to stuff the way to go, I'm gonna try. And just fast, for if you're questions like we have so much to cover, I'm gonna had close this. You can also run a sound out of like H for. You can run sound into the camera so you shot your booms a long ways away, getting that sound on the H four and then you capture. You're also getting the sound in the camera, and then later on, it can sink that to the sound that was captured on the same signal. That is one work together, many different workers that you could do here. The main thing is, is that, you know, clean audios awesome, redundant, clean off audio is awesome. Awesome. And so, you know, again, part of your pre production processes to make sure that you have batteries in your shotguns. You know, your cables, air working tester cables, make sure that all works and then have some backups. Yeah, so that you don't run into that situation and then be willing to be flexible. Maybe, you know, in terms of your locations. But then location scouting is important about that. To Justin. Want to be in a loud, loud environment, You know, you're one quick second just could make it. Yeah, you know, already. Can you find me the original interview camera file without the time code? Already in it. What? I find that Yeah. I just don't wanna sit here. Yeah, you just did it. Okay. Oh, it's because we did earlier. Where did earlier? It's just Yeah, time code. Its first. So what? We're doing something knows we're actually sort of. We've got two different conventions that are living together now in the worlds of like, motion picture Story doesn when working with the sl ours. We're working with this whole idea of what's called simply time code, which is what? Which is basically what the American standard of television is based on terms of frames in terms of you know, how you count those frames and stuff like that. And then now we have this camera that doesn't shoot timecode. So but where Still a lot of people are still talking to each other and need to talk to each other in these different ways. You still have to set broadcast clocks to time cook. So that's why so you'll be in a situation. If you're cutting a commercial, you're gonna have to have leased the master in time code and you're driving yourself clips in time. Okay, so let's say you're not gonna use plural eyes and you want to do this using a digital timecode slate. Um, and you have all the fancy toys. Um, here you go. You're gonna find the clip. It's good for screen. You're gonna find this point right there. Um, where? Boy? Right there. What's going on? Any time you find a you tube area. Yeah, right. So there it is. You compress m for Mark. Remember again to remember where that is. Uh, here is where you would have the spike. It's giving you a clear timecode. Go over here onto the clip, Modify time code current, and you're gonna enter that number 17. 13 separated by colon because sex separate by Coghlan's. Okay. And now you're going to see that that media start was originally 000 Go ahead. Do undo. You see, that's what you're normally clip comes in as with no time code. But you went ahead and you manually type that in. All right, so now you go ahead and, uh, go to sequence, start, modify, merge, merge clips. There you go. And using timecode and those clips under married together. So it does the same thing that EMP extreme clip did, but it doesn't professionally. Okay, so now when you, uh, yes, uh, paralyzed. And the sequence. You're gonna go ahead and drag this into your sequence and you will see that they are going to be lined up perfectly. You see how that's the professional doing it? You can do that with multiple cameras. Obviously, it's the professional doing it. So there's no excuse. And that's that's basically the two ways of aligning your time code, which are the biggest issue of these cameras. If we have time, we're gonna come back to final Cut a little bit later on, go into color to show you a bit of a grating example. Uh, Justin, I forget anything from this part so far? I don't think so. What? Mars eclipse. We got it. You just did it. And, um, we got 20 minutes to go, which is pretty good, cause you get exactly good and, um, that's it. Let's go. That's final cut for you in terms of the whole workflow. Um, we've shown you how to export it. I will show you one thing that a lot of people don't know that I may not get to do later. What happens if at the end of your 16,000 edits your 32 versions of your different cuts? Um, you want to travel with your you want to back up just what's in that project In other words, you shot 200 gigs of data or two terabytes over a month, and you've made a 10 minute movie and your files are all over your hard drives because you have a horrible meeting management system, and some of it is progress from color. And something is over here is that was over there, and you just want to make sure that you could just take that and either transported to someone else's computer or just kind of archive it. There's this wonderful tool that I kid you, not I have yet to meet a professional editor I've worked with that knows exists. And it's called, um, file media manager. And what it does is it shows you this is the original amount of media that you have actually make this. This is not a good example. Uh, Day one, here we go. Go ahead and cut that there, too, Also a very simple trick. Whenever there's a gap between clips, hit the delete key on it. It's a whole other issue here, but it actually closes the gaffer, and you see also how I'm like overriding their turn snapping on, and I just do but Normally, if there's a gap between clips, click on that gap, delete and it goes. We got other issues going on here. Uh, so, file media manager, I was gonna say I want a copy or move or recon press. Don't move. Always copy all my data, and I don't want to include other clips. I wanted to leave stuff I didn't use. I want to use handles, so I want to add two seconds in front of a re audio clip two seconds after. So if I ever change my mind, want to make a small change? I had that liberty saying with video clips. I do not want to rename stuff. Okay? And you're gonna duplicate that information. Um, and you're going to select where you are normally, this will fluctuate with very civil project, but the point I will show you starting off with 400 gigs of data. But your actual sequence for selecting right here is to gigs. And depending on how you change your handles or not and all these checked boxes that you included, you can control how much you're copping over. The beauty of it is you hit browse. You're going to say I'm a good of my external gonna call up, Call it reverie back up, and I'm going to choose that his destination. I'm gonna go ahead and give this my reverie back up, archive whatever naming structure you have, I mind a little more complex. It's safe, and it's what it's gonna doing right now is just taking every single clip that's in that project. Every single audiophile, every single sound effect. It's compiling them. It's adding those handles or coming them right there over the external hard drive. Your server, whatever it is. And you will be able to open that up 10 years 10 years from now. But you'll be able to open up on any computer without having to search for anything and having to bring your whole former gigs. Yeah, it's a fantastic tool. All right, that's it for Final Cut. For now, I'm gonna go hand over the reins to Mr Thornton and, uh, quick follow Kyle's. Leave it open. That hair was worth right there. Sure, it's. No editor knows about this. They all these people were doing for 25 years ago this meeting manage this just me manager for me. What You mean like cool? You know? So, yeah, it's great. It's It's It's like safe. You know, we all have that that impulse like Oh my God, you know, how do I get this over? And how do you archive just your gold finished product? Because if you weren't paying attention, all the settings with final cutting, all the caches, who knows what stuff is exactly? What was that part of Final Cutter? Was that an external? No. It's called for its immediate manager. It's built in a file media manager. It's really not how we doing time. You're perfect. You got 15 minutes to kind of start during the intro. And then after that, I believe we have another hour, Okay? To do all the fancy, your stuff and more. Premier, I was going to be a little bit of bridge and an intro to Premier. We're gonna do a little bit of Adobe Bridge, which, when you get year, uh, your CS five premiere Pro Bridge comes with them. There's all the different flavors of of the creative suite that you can possibly get that you can attach to premiere and stuff like that. The reason why premiers important to me is that, like Vince, I'm a big believer in a media management, and I'm also a big believer in metadata. Okay, so there was some test shots of to show Jello effect. I guess we had here. Yeah, that's that we had. We went ahead and we grabbed from Theo the card here, so I opened up bridge. If you're not familiar with it, it is a media management system that actually works with every adobe creative suite prod application. Okay, It's a very, very important piece of software. Fortunate a lot of people don't use it to its maximum degree on some people don't understand it. It's for photographers, for videographers, it's becoming more and more important, you know, with the amount, just the sheer amount of data that we have to deal with bridges in a really, really great ally for you in terms of archiving your stuff and stuff like that. So what I would do coming in working with Vince's, I'd say we would have our CF card with our material in it, and I would go ahead and automatically, then imported through here, okay? Rather than just dragging and dropping okay, because It gives me the opportunity to create folders to create new folders, and I'll go ahead. And I believe we did. We have premier premiere folder. We created one already. So and then I would choose that. Alright. And then we'll just go ahead and, uh, for now, without going through the naming convention, stuff like that, we save a little time. We'll just do this shot date. Not the day that it said it shot date because that's gonna actually quite nicely match up to the naming convention that was already done. Okay. And then really importantly, is that I have the option of saving up a backup right away on an external drive. Okay, so I want to do this twice. I want to move stuff around twice. And this will meet your digital assistant, your editor, if their onset, if they're doing both jobs, makes their lives easier so that they can start, you know, sort of pay attention to getting their projects it up. So we're going ahead. We're saving two copies onto two separate drives. That's correct. Okay. And we've done that. So let me just up back. I think what we did is we did yet slot for there we go and then shoes, and then I would get photos, OK? And I think we've already done that. So it's moving stuff over there. Great thing is, too, is that I can have this running in the background because it's running at bridge. It's not running in Premier. I'll go ahead, stop it just so we don't have any resource hogs going on in our computer. And don't don't stop just yet. Don't worry about that. Clear that away. What's what's important here to understand is it's just two different approaches. One was me working off desktop, creating my own folder structure manually. You may like that better. I think it's a little messier personally is more prone to mistakes when you're rushed, whereas this is doing it from ingest and going to force you to create those data folders. And when Dan's going to show you on the right as well is as you do this, you can actually apply metadata to your files. And I love final cut pro. But the number one thing that I dislike about contro and apples workflow in general is media management. There really is not. There's no browser to find your video files. What I do is I have a server and I have projects where I have the final cut Pro Project in there. I have my video, my audio files, my music, any other resource is and then my phonic, Oprah projects that's all lived in one and thank God for the BT Manager Tool. Uh, I'm able to also do that as an extra step of a backup, but there's no way that, you know, to see, like the way the dancing, all of your assets and making sure they all in one place. So this this forces you to do that and associates meta data to it. She can keyword a tag it the same way your use doing photography, and that's pretty powerful. Decide. Close. Uh, what does it do in Premiere? It's the same. You mean for videophiles? Yeah, it's the same conventions that you'll find with ex MP meta data. Okay, but its uses those thn files, so it's in the same way mth Yeah, you know, that sort of sidecar files stuff like that. There are also various meta data that you can embed right in the file itself so And it's an incredibly powerful because it's searchable once you have these things. And if you've done photography and then a little bit of metadata a lot of these things, they're gonna be familiar, Teoh. And we don't have all the information that we would over the camera raw file, potentially one of things you might want to do on Set. It's just snap off three raw files that you'll bring in with this stuff like that, and then you you know a great way to remember what lens you're doing. Something like that is all should be written down, but it's a fail safe. It's something that I do I like to do because I can see the reiterate. What he's saying is, you know, if you're on Saturday, go ahead and fire still frame before issue video, because that will create a D and another tng some care as well. But a Sierra to any F and that has all that information that the movie file doesn't. And if you're using bridge, guess what, you can correlate them. Actually, I'm sure there's a way to copy it over. Uh oh, it just it's all right there exactly. And, um, the other thing that I really want to make sure you mentioned, um, I forgot to keep going on. Okay, so and then, you know, and depending on the project and stuff you can enter in keywords. Let me show you right there. You know, they have this sort of the stock ones that are available to you. Okay. But you can, you know, you know, you can create your own, you know, and attach it to that. Create sections and stuff like that. Click it all off white, all of them. And you're good to go. You can rank your stuff because after a year and we're special, especially more than one camera will have a lot of envy. Envy I 98 for one daughter movies, all of your hard drive. Just a photography. Trying to get where you're exactly right, Right? Right, right, right. Right. So we actually wanted it. Way have this open. Let me go ahead. Just clean up. We did our pre pro. We've tested that this would hopefully work out before doing it. Live. Right. One thing that you'll probably notice about Adobe premiere is that it looks sort of like Final Cut. And the thing is the most fun. Most non earlier editors now, in terms of their interface very similar. If you're familiar with Adobe Products, you'll also see some very familiar aspects to how this interface is set up with tab windows and things like that. Okay, but exactly what Vince sodas in final cut is that we have a project area, okay? And even says here, project if you could see that. Okay, we have our source clips. We have nothing in here right now on. And then we have our project clip of our project window over here, which corresponds directly to our sequence down here. Okay. Sane, you know, set up same workflow, more or less, you know, So you'll be comfortable going back and forth between both of these things on if you're editing for you know, if you start moving into editing as part of your work flow as well for other people, you'll be comfortable working in both environments. Okay, Uh, one thing I like about Premier. Well, there's a few things I like about Premier. I like final cut, and I like premier, but that premieres media area here is that you can directly link this to your files that in here that are on your hard drive so you don't have to actually import anything. Necessarily. Okay, so we have actually you mentioned two quick things. Like, if I may. Yeah. First of all, you can go from premier to final. Cut them back with two clicks to see, you know. So for all the final cut, pro users were tuning out. Say, I don't use Premiere. Keep watching for all the premier users who tuned up before I go by the things you should watch your back later tonight. The point is through XML, which we will show you after the break back and fourth round trip between these APS like that share. It's fantastic that you're not locked into anyone. He stuffed all your final cut pro projects that you've been working on for years. One click of a button you can get him to quick about getting into premiere and vice versa. We'll show you that and to the single biggest difference that we haven't really kind of want, want make clear with premier, is that it natively supports the cannon format. So what? That means is that entire conversion process we were talking about? EMP. Extreme clip is gone. You can actually edit off for someone like you. Daniel was on deadline off of your disk. I never recommend anyone ever do that, but you can edit an entire sequence off of your CF card without ever copying it over in premier without having to render anything live and export. And that's there's something to be said about that. Why is premier so cool? Because it was just released. They completely rewrote their system. They're open rumors on the Internet that maybe Apple may be announcing something or not. They have had a bunch of industry leading people get together. Apple two weeks ago to see the noticed the next generation of perhaps final cut pro. And the words that came out were astounding. Might be 64 bit noses. There may be announcement, and maybe they may not, but obviously, you know, final cut pros. Internal organs are at least seven years old, and eso were premieres and CS five until I went 64 bit. They kind of beat Apple to the punch in there early on, but I'm sure that Apple will catch up and I would not be surprised on. I have absolutely no idea. Honestly, I wouldn't be surprised if if they do release the next version that Apple's final cut pro will do the exact same thing. But as of today, this app really makes a heck of a lot of sense for a CIA. Slower users for this purpose alone is that you take that conversion process out of it. Uh, that's a pretty big deal for anyone. I don't care who you are. That conversion process slows you down. You know how the raw version, which is nice, that like a nice lady rah version. But now you have a second version that drives getting smaller because you keep any more data, you have more fouls to keep track of on. The last thing I wanted to mention to make sure you run fruit before we kind of cut out is I like you to show them how to use the mini bridge or the bridge to get from there to this. And then also, I guess we'll come back. We'll show you how to do it straight from the disk or whatever, and mentioned the main difference for me between hit my mike again between premier and final cut is that final cut. When you drag clipping onto sequence, it can copy that clips information with Premier will ask you to set all that beforehand. The only one. That's what you were talking about. That was such a nice future. That's why he was like, Oh, that's really nice future, like, you know? Yeah. Where was this when I first saw it gets five like you got enter. You tell it what you want to be, can't tell itself, you know, different ways of doing the same thing. So I'll get back to you. Um, so, uh, just Teoh to go back to where I left off before we started talking about some of the features which we'll talk a little bit more about here, too, though, is that the one thing I you know, one of the things I appreciate about what they've done in the changes here is that they built like they built browsing through your file structure right in here. So if I want to, um, just go ahead and go through the files that I have available for me, I could go ahead and I can just click through the browser and then just ragged in there with the file structure that we've created. Okay, So remember we went through this naming convention where we had a B Cameron stuff like that. Well, now, I could just bring that in and the editors just right on right on page with the with the rest of the crew as you're moving into probe into post production, which is which, you know, which is a real time saver. And I think that's one of the things that that adobes trying to do with CS five Teoh. And while he fixes that one quick little thing, there's this they call it in port. If you work off of the desk and you import, um, your Raul can file, it's still living on disk this, you know, it's not copying anything. Samos follow cut kind of a little thing going, but you take that card out or the hard right out still lives there. So I don't like the word important. Yeah, yeah, And that whole paradigms changing because we're working non destructively and natively with all this stuff. So, uh, the, uh, all the actual musical music files were actually just brought in here. Okay? There was some sound booth files and some garage files in there that they were not brought in so that, you know, now I don't even think about those, which is good on, uh, you know, you can get to work just in the way that, uh, we saw working. The workflow was going in in final coddle. Just go ahead and drag a clip down to the timeline here. Okay? Now what Vince was talking about before in terms of working natively within premiere, what premier is done is they've built an actual virtual rending rendering a machine in the background called the mercury playback engine. Okay, so what it does is it translates all these different flavors and Codex files, OK, And in the background, it converts them. The one thing that will help you, though, if you have a machine that is not particularly fast, is if you set the playback resolution for the file and you'll see, actually, I actually have started it. Set it up already, and it's not hard work. There were No, it's going playback resolution. And so what? I want to do is not have full playback. This allows me to play the native H 264 in real time from the timeline without doing that, if I go ahead and set this to quarter resolution, okay, but my pause resolution will keep its full so that when I do match frame editing and stuff, it'll work. And so I'm hitting the there we go hit the play button and there it is. Okay, playing in real time, that's H 264 playing directly from the desk from the desktop, that perfect. And if you could think about time saving, that's what I would do personally is I would do the finish. This very simple. And let's stop. Well, stop now and we'll kind of take over. We're gonna take a 15 minute break. We're going to show you how I will use the word. Ridiculously similar premier is to find a cup pro I for in point over outpoint. When you double click, click a clip, it shows off that screen as well. On the right screen is the equivalent of your canvas and finally cut
Class Materials
bonus material
Ratings and Reviews
a Creativelive Student
Great Workshop.. Totally worth it, for the sheer amount of Information and seeing everyone work together, seeing the master himself at work and breaking down each and every aspect of film-making while shooting, so people like me can learn the Magic of film-making. Loved every part of all 3 sessions.. Awesome CreativeLive ... Awesome Vincent Laforet.. Awesome stuff, to everyone involved, including the ladies asking "interweb" questions and the creative live camera crew.. Also, when and where can we see the final product shot on Session / Day 3... "Choice"..?? Thank you..
a Creativelive Student
This is, without a question, the best education model I've experienced. The small snippets of details, the interaction, the experience, was indescribable. I don't know how to thank you enough....especially after winning a prize! [Hugs]
a Creativelive Student
Hi guys, great series, nice educational tool, especially when you in remote places. Just wondering where is session 2, since i paid for all, cant find it. anything on that? Cheers bvkfilms@gmail.com