Lessons
Lesson Info
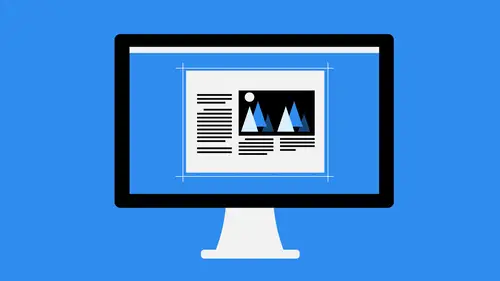
Demo: Balancing Design
all right, let's talk about one of the principles of design, the actual principles. We just talked about the thematic approach and something that I try to bring to all of my layouts and designs. Now let's talk about balance. Balance is a huge deal. When you're talking about the principles of layout and composition, balance refers to how a piece is laid out and how you can create a very either even look on both sides, or at least sort of create the illusion of evenness on both sides. Let me show you exactly what I mean by that. So here we have an example of something called symmetrical balance. So that means on either side of the piece left right top bottom, you have the exact same type of content. So here in this example, we've got a bar on each side of the ball, out to the side of each one of the bars, and you see they're mirror images of one another. The same would hold true if you're laying out a book, for instance, and you had a block of text and then a block of text in an image on...
the other side. You could have an image, a block of text and then a big block of text. To give you a more practical example, Let me show you inside of Illustrator when I mean we'll get back to these principles in just a second. So I'll go over to illustrator very quickly. And let's just create a print document here, a letter based document and I'll grab text tool and we'll just draw at a column of text. Like this illustrator automatically fills any new text box with placeholder text, which is very good for this example, and then we'll duplicate this over to the sign. And so this is a good example of symmetrical balance. So both sides are equal and they contain the same amount of information. Now we can create balance in multiple ways. So Friends is, Let's say we have this open section right here. This is not balanced, right? It's very heavy towards the left. So what do we need to have over here? What we need to have some sort of element, whether it be text or images that help us offset this. So, for instance, if I were to go to the file menu and choose place and go out. And I'll just grab kind of a random image here, such as crab and maybe something like this will hit place. And then we'll move this in, assume that a little bit, shrink it up. There we go. So this obviously doesn't balance it out completely, but it does a pretty good job of helping it out. And then let's do one more. Here we describe this street scene, we don't know what this is all about, but just an example tryingto actually create a piece here, and I'll just drink this down, continue to shrink every girl moved into place. Notice how I use the smart guides to make sure everything is evenly spread out here. And then there we go. And so now this is a good example of symmetrical balance or formal balance. And so our skin informal balance. So we've got the long block of text over here. We have a short block over here, which made it a little bit heavy on the left to begin with. And now we've added these two graphical elements on the right. That helps balance it out. And this is what I'm talking about you want to make sure that visually, the weight is the same on either side, no matter what type of content you have. So you have to balance the the items where they would be texting images all together like this. All right, let's jump back into keynote here and let's talk about asymmetrical balance or informal balance, which kind of what we just did there. But in essence, we want to replace an entire side, this time with something else. So we've got over on the right hand side here. We've got the bar in the ball and then over on the left. We've got just this gigantic bowl, the idea here being that you want to make sure that you fill whatever that second side is. Top bottom left right? Doesn't matter. You want to fill that void with something that is the same size or relatively the same size as the previous section that you've worked on. So an example of this might be inside of illustrator. Let's go back here and let's do maybe a new art board and with the art board, Tool selected will just click new to add a new art board and I'll move this over and then I'm gonna change the orientation of this. Something kind of like that. And then I'm going to grab the text. Move that over. Duplicate. Let's say we've got this text here now, If I wanted to create a sense of balance in this, I would have to fill this section up over here. And so if I go back to the place, I have a photo inside of here that should work. Really actively. Nicely hoops. Let's, uh it's gonna file place. Let's try that one more time, Portrait, Riggio. And now just come right here and place that like that. So there we go. Now we've got asymmetrical balance, right? Because we've got this big image over here on the right and this block of text over here on the left. The composition altogether is completely balanced because it fills up the allotted space. There's no gigantic gaps in here that make it look uneven. But we've maintained the same type of text from the previous section and then filled in this content over here with one big image. So visually the weight is the same. So you can see here. This is the composition that was created so far, everything looks relatively balanced throughout the entire thing. So that's formal balance, informal balance, symmetrical or asymmetrical. However, you want to phrase that finally we have radio balance. Radio balance refers to the fact that something is symmetrical all the way out based on a center point of information. So a practical example of this might be inside of illustrator if we have, and I'll create a new document here so you can see this. So if we have something in the center of our illustrated document, let's put this right in center like this and fill that in there. We can now, by itself, this object is just floating out in the middle of nowhere. There is no balance to this because it's just one single thing. But if I want to fill this in with content, I can do so by radiating the content out from it. I got this idea from a concert poster that I saw not too long ago. They had the band logo in the middle and then coming out from it in rings of text, were all of the dates and venues that the band was going to play. So basically, what they did is they took this. They created another shape, just like so, and I'll fill that like that. And so basically, they were able to create balance by radiating outward like that. And then they took text and filled around the outside of it. I'm not gonna type a whole bunch of dates and venues, but you can kind of tell here what's going on or fill each one of these in with placeholder text. And so this is basically what they had and start off with larger text or smaller text there. Excuse me and then grab character increased at a little bit. And then as they went out, they increase the size of the text. I thought that was kind of interesting how they did that, and it created a sense of balance, even though there was a lot of difference between the different elements. So that's basically what it is. And you can see here that it does look balance all the way across the composition, and that's because everything is even on all of the axis that go around the outside of this. So there we go. So we've got our balance in terms of asymmetrical and symmetrical. We've got our balance in terms of radio. All of those are the basic principles of balance in your composition. So when you're creating your documents and laying out your pages, think about these different principles and how you can apply them so that your design looks evenly weighted all throughout. And you don't distract your reader by having too much information on one side or the other. Now let's talk about the idea of rhythm and repetition. Okay, so what I'm going to do here is create a brand new document. I'll just close these up. I don't need these anymore and I'll go back over here, delete that and we're going to stay with this document here. So we're going to continue this and then what I'm going to do is just replicate these here by duplicating them over. So hold on the option key all key on the PC, never Gil and then do the same thing here. And so these are basically facing pages, right? The exact same thing as what's on the other side, minus a little bit of the spacing there again. And so what this does is it creates repetition across the board here. So this is very easy to read from left to right, and we've got all these different elements lined up with one another. It's easily translated, and we can see the direction we need to go all the way across. Now, something else that a lot of people do is they integrate shapes or, um, patterns into their design so that it makes it even mawr obvious as to the direction that you might want to go. And so for this one, what I'll do is I'll just kind of shrink up the text a little bit here, and we'll shrink up to text a little bit. Here, make those even. That's the other thing we want to make sure everything's even on both sides. So I'll go in here and I'm gonna find the pencil tool. The pencil tool, traditionally an illustrator, has been sort of a pain to use because of the fact that it creates very jagged lines, especially when you're drawing with a mouse. But you're gonna get to see me fix that issue without having too much trouble. So my drawing tablet, obviously not working right now. But if I needed to get this done in a pinch, I could make illustrated do exactly what I want simply by double clicking on the pencil tool. When I double clicking on the pencil tool, it brings up these pencil tool options. And at the top there's something called the Fidelity slider, the fidelity slider. Traditionally, an illustrator didn't work all that well. You'd move it to the left, moving to the right, and you really couldn't tell anything when it when the results were in. Now an illustrated, though they've reconfigured the algorithm so that when you do push it over to the smooth side, it actually Smoothes out the path, meaning that it's very forgiving when you make a sort of jagged motion with your mouse. And so what I'm gonna do is leave that over there on smooth and I'll leave all the rest of it the same hit. OK, and now what I'm going to do is I'm just going to draw a shape and to draw the shape very easily. Just come out here and draw something kind of like this and will continue over into the next one and then I'll just complete the shape by coming back around like that and you can see there. It kind of smoothed out. I had some corner point looking things down there, but it smoothed it out completely, and I'll take this and move it up a little bit. So we have some. And so there I filled in the empty spaces that also helps with balance. And now I have a rhythmic flow to my composition here, which is helping you guide your eyes through it. And then let's go ahead and fill this in with a color. Bring up my swatches panel here and fill this with a blue, making it a little easier to see and then to trim this up so you can see what it looks like in the final version. What I'll do is grab the rectangle tool and I'll just create a rectangle. Let's go to the top here that fits that. Duplicate that over like that, and then I can use this shape builder tool to trim these down. So shift in the letter M on your keyboard, it's gonna give you that. And then just holding the option key on the Mac. Old key on PC and you can remove that, like so same thing there and then thes let's go and combine these in the one shape. There we go and then we'll just move these down with the align panel. It's a line those to the art board and there we go, closing up and there you have it. So now you can see we have this continual flow almost like water. So maybe this is a brochure for ocean conservation or something like that. And so now we have this rhythmic flow all the way through the bottom helps us go across the page. And any time I create a new page, so I'll just shift Oh, create a new page, something like that. What I would do here is I would just take this and I would duplicate it over as well, something kind of like that. In that way, each and every time I have this pattern that goes across, we saw an example of this. If you were watching my color section of the graphic design fundamentals, you probably saw this here. Let's go back, see if I can find that again. There it is the rhythm brochure you probably saw this where we have all these shapes that create almost like this tunnel that goes through now. They have different shapes in each one, so the 1st 1 is sort of a swoop, like I just created in the other one. It goes right into this kind of straight, geometric like figure, which then goes over here into this jagged thing that then transitions back into a swoop. So basically they've got a big thing. It's continuity. Basically, you've got the swoops on either ends in the middle of it. You see, it's all cohesive, and that all lends itself to your eye, going up and down and left to right exactly like they want you to. So when you're talking about rhythm in a design, it's basically just making sure that the eye goes up and down and left to right exactly how you want it to go. You don't have to use something as obvious as you know a swish around the bottom. You can use shapes. You can use different layout options for how you do that. You can use images, icons, anything you want to point people in the right direction, and then repeat it throughout. The key is consistency. You want to be as consistent as possible across all of the different facets of your design. That's not to say that this only applies to multi page designs either. You could do the same thing with business cards. So, for instance, let's say that we had changes two inches and let's say we had 3.5 by two inch business card, something like this. And on the business card, maybe we have Let's grab the pen tool here and we have something along the edge that goes like this. And I was like that there, and I'm just making up shapes as I go. But you'll get the idea. So something that looks kind of like that, right? So let's say that's the front of the business card. And then if we have the back of the business card, which is, somebody would just flip it over. It's not multi page, but it's the same basic principle. So we create a new one, and then here we take this guy, move it over, and then we would reflect it. So transform reflect just like so. And so now when they flip it over. It's almost like a continuation of the original card, the front. So that's something else to think about, creating continuity between different sides between different pages between different elements. All of that helps to create one for he's package that's easily read and easily guided through.
Ratings and Reviews
Student Work
Related Classes
Design Projects