Lesson Info
6. Exposure Test Comparison
Lessons
Class Introduction
01:29 2Outline
03:36 3Creative Cloud Overview
07:07 4The Camera
16:38 5Perfect Exposure
27:39 6Exposure Test Comparison
15:31 7Lightroom Overview
16:49 8Importing Images
18:01Image Review, Organization, and Selection
11:52 10Image Editing and Enhancement
54:16 11Profiles and Presets
22:16 12Local Adjustments
30:50 13Black and White
09:24 14Retouching
22:48 15Synchronization
10:40 16HDR (High Dynamic Range)
28:14 17Panoramas
13:27 18Photoshop
19:10 19Sharing
37:24 20Sharing Via Connections
05:49 21Adobe Portfolio
43:14 22Printing
10:38 23Lightroom Mobile Overview
37:32 24Lightroom Mobile Camera
06:12 25Tips and Tricks
37:44 26Archiving
15:51 27The End
09:10Lesson Info
Exposure Test Comparison
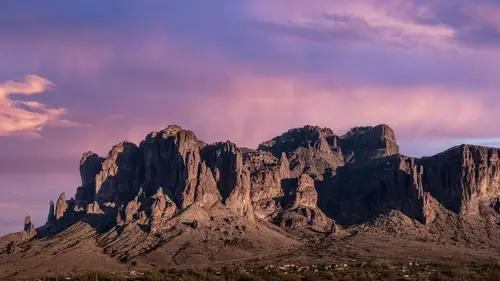
Okay, I am looking at my images on my camera, and I'm looking at the informational page that shows me the image as well as the hissed a gram, um, of the image itself. So I'm interested in that page because I've got my images up here, uh, on in light room and I'm clicking on the same image. So I'm this the image on my cameras number 8994 And so I'm scrolling down until I find number 899 four, which I can see right over here in the info area On the right hand side 8994 dot c r. Three. So I know I'm looking at the same image, so I'm just going to double click that. So I see it in the full view, and I'm going to go into the editing window. And so now I get to see what the hissed a gram looks like here inside of my computer. And I also get to see what the history Graham looks like here on my camera. And when I look at the history Graham on the camera versus the hissed, a gram on the computer, I see some interesting differences. The first differences that especially if I look here at the jus...
t the white, black or the tonal, hissed a gram. You'll see that I've got plenty of information at the in the darks, so the there's no clipping in the black, Um, but I also see that it on Lee goes, not even halfway up, the hissed a gram and over on the right hand side. Sorry. Over here in the computer, I see the hissed a gram, but I see that not only do we have the information that's showing on the computer are on the camera, but I also see that there's a little bit more information that's spreading off to the right. Now that doesn't show a huge difference between the two. Hissed a grams, but let's go instead to the opposite side of the spectrum. So I'm going to click on this way overexposed version and on the over exposed version. Um, now I'm gonna look at the history Graham. I'm going to see it all piled up on the right hand side, and if I go on my camera to the over exposed version, you can see that it's all piled on the right hand side. You'll notice in the over exposed version that you're getting a huge blinking light on the sky and actually a bunch of blinking highlight warnings on the mountain itself as well. On DSO, the question then becomes, How much can we actually recover from that sky? So I'm going to go into my exposure settings and just grab the exposure on the computer and drag it down and see what happens. Okay, so that looks really dingy and ugly. So what I'm learning is when the camera blinks at me with this incredible warning, that means don't rely on that being a good exposure. So it's It's being very accurate that there's you can see that the sky is just kind of a muddy grossness, and you can see that the the area that's blinking on the mountain inside of the inside of the camera is also really bad. So as I do that you can see this is not good. This is not a good exposure, but let's go down and try something a little bit more. So we're gonna go on the camera down until we find something that's a little bit mawr palatable so I'm just gonna look for an image that out there we go. Okay, So number 9005 has a good chunk of warning happening. So I'm gonna go to 9005 So let's find image 9005 which is this one. And let's let's see if we can recover that because right now what we're seeing is a really bright white sky with a little hint of blue in it. But the mountain is overexposed and our cameras saying this entire left hand part portion of the sky is overexposed and blown out. So we're gonna go into the edit area and we're gonna grab the exposure and bring it down. And what do we see happening? We see that the the actual mountain looks fine. There's actually blue in the sky and over on the left hand side, where our camera was saying that's blown out, We actually find that there's plenty of information. If you look at the history Graham, we've brought all the piles that the camera is reporting over on the right hand side are clip, but we got them back and the reason for this is very simple. The reason is that your camera is showing you the hissed, a gram based on and the exposure warnings based on it. Reading a J peg and A J peg is a compressed image that has very little latitude and very little color depth in it, whereas the raw image, which is the underlying image that the camera can the camera actually captured. And it is what we're looking at in the computer. The raw image has, uh, exponentially more information in it. It has a lot more latitude, and it has a lot more color depth in it, which means that the computer can recover what the camera thinks is lost and you're not actually recovering At this moment, all you're doing is taking information that's already there, and you're pushing it around your manipulating it, because the information is there the cameras just warning you early because it's looking at a JPEG. But what you have to figure out now and we're gonna go to the next stage of our discussion with our camera. We're comparing. So now instead of 9005 and we go to 9006 and you can see 9006 has a ton of over exposure warnings. So it's blinking almost the entire sky. So now let's go over to number 006 here, and let's take the exposure down and see. Oh, look, we were able to get all of that information back. Now you're gonna ask me, Is that that mountain gonna look that ugly And no, the answer is not. We would just have to go into the color and actually play around with the correct color on the mountain in order to get the right color balance on it. Right now, we're just kind of looking at it as as as it was shot. We've got blue in the sky. We've got, uh, information in the actual, uh, mountain. And we've got information over here on the right hand side. So we know now that when our camera does this, it's still okay, so let's go to the next one. So now we're going to 07 and it's almost the whole sky is blown, so we're gonna go to number 007 and we're gonna do the same thing. We're gonna go up into the light area and bring the exposure down and lo and behold, we can still recover it. Now, at this point, we're going to start to see things mushing up because it's not. It's not great to try and recover. You'd rather get the right exposure from the beginning. But what we're doing is we're learning what we can get away with, and so I could take the highlights down and see if that helps us a little bit. So take the highlights down first. That does help us a little bit, because now the tones in the sky are still captured and we still have the tones in the mountain itself. I'm again gonna have to go into the color, and I'm gonna have to do a little auto exposure or something to play around with it and get it back to what it should be, which is kind of more on this lines. Um, and of course, we would then work on it. But again, we're not trying to make this look beautiful. What we're trying to do is find out. How does our camera speak to us? And clearly we're still getting information where the camera things were getting no information. So now let's go up one mawr and see what happens when we get to number eight. So we're gonna I'm going to take number eight and I'm just gonna pull this down, okay? Now we're starting to see that that mountain is really turning ugly and were stopped. We're not getting as much information over in the left hand side, but we still are able to capture that sky decently. Well, so let's go to the last one, which is gonna be probably number nine. And now we're really, really pushing it. And I'm going to go up here and I'm gonna capture, And now you can see that the sky itself is just turning gray. So now we're just getting gray in the sky, which means that it's just making it up. So the light room is going to still try and darkened down the sky because you're asking it to, but it just has to make up numbers because the numbers don't exist. But what does that tell us about the file that we're seeing here? That tells us and I just went up a third to stop on each of them. So I was going up one third to stop on all of these shots. So what it tells me is that when I get to the point that my camera starts starts telling me there's a problem. So in number four, there's no problem. Number five, there's a pretty big problem. At least it reports about a 3rd. 1/4 of the sky is a problem. The next one, almost the whole sky, is the problem. And so what I'm learning from my camera is that when it reports that there's a little bit of a problem, there's not. I can get away with recovering that little bit of a problem. And I'm also finding that if I go from the moment it reports, I can go up an entire full stop from that and I can still recover something. Aiken still deal with it. I don't want to. Obviously, I want to get a better exposure than that. But what I'm learning is that this camera reports a stop and a third before it's actually gone before I'm actually losing everything or before I'm starting to get, like, really ugly colors in there. Um, I'm I've got about a stop. Maybe a stop in the third and the way I can tell that or when I'm out in the field. If I see a problem occurring and I want to see well, can I really recover this? What I want to do is I want to see how long does it take for me to go from sizable problem to no problem at all? And if that is like we see here in number five, it's a decently sized chunk that's blowing out, but then one third stop down. It's fine now. I've just learned that my camera over exaggerates that first blown out area, and if I can see that that blown out areas just one third to stop and it's fine, then I know that Aiken without any question. If I see a sky blinking and then a third stop down, it's no longer blinking. I'm fine. There is no reason to worry. Go ahead and let that sky blink on that one third stop over exposure and then when I get into light room, I'll be able to recover it without any problems whatsoever. That's what I've learned about this camera now because of that, So I know that that I have that latitude And I also know that in a pinch I could go a full stop. I can let it go one. So if it if it blows out at a third stop over a certain exposure. So here's my normal exposure and are my brightest exposure without blowing out. And then I could go. 123 stops are three klicks above that one full stop above that, and I'm still going to be able to recover that information. So that's what I'm learning about the camera. And I'm gonna do this several times. Any time. I'm in a situation where there's a lot of contrast and I have some time, I'm gonna run through this test and I'm gonna try it again. And after a few of these And remember, I've only had this camera for about a month and a half. And so, uh, the more I do this with this camera, the more I will become comfortable with exactly what it's saying when it's blinking at me and exactly what it's saying when the hissed a gram is showing me things because I'll look at the instagram here and then I'll look at the history Graham, over here So as you are getting to know your camera, just take a lot of photos and just do one third step increments from really too dark to really too bright and then look at them on your camera. See what your cameras telling you about the file and then look at him on your computer and see what light room tells you about the file. And at some point, you're going to get to so comfortable with the camera that you'll know when the camera blinks at you and tells you that something is overexposed, you'll know exactly how far you can push beyond that. If you're in a pension, you need thio now. Hopefully, your images that are in front of your camera are perfectly within the realm of your cameras capability. And that's what we hope all the time is that our exposures air perfect as they are. But in order to make sure that we're ready for difficult circumstances, we have to take time to get to know what our cameras saying so that we can make a perfect exposure in a challenging situation.
Class Materials
1. Lightroom Presets and Profiles
2. RAW Images To Follow Along With
3. Lightroom Creative Cloud Schematic
Ratings and Reviews
Teresa Piccioni
Great great great class: Jarett explains the Lightroom workflow clearly and thoroughly. I am not a native English person and my English is quite poor but Jarett explains in a very simply and clearly way everything and I understand all chapters perfectly. Thanks guys, great job. I highly recommend this lesson to everybody,
Roger
I have watched each and everyone of Jared's classes on Creative Live and they are first class. I've waited a long time for a new one and now we have it and it's another gem. This is a wonderful overview of Lightroom and will repay watching sections (or all of it) several times to absorb the wealth of information presented. For anyone new to Lightroom, this is just what the doctor ordered.
Bess Palmer
Great class. So informative with just the right amount of practical examples combined with clear theory. He speaks clearly, confidentially and calmly so it was easy to follow him. I watched the whole 8 hours straight through