Lessons
Lesson Info
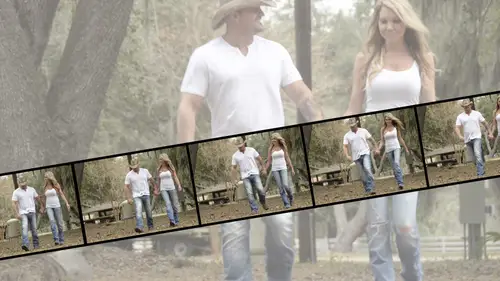
Making a Slide Show
Because this class is called editing or creating an editing video also won't talk about how could we just create a video? So one of things we could do in photo shop and kind of a neat way is a slide show, but a slice of this more interesting than just a photo appears then the next photo appears the next photo appears, but to do it in a way that's a little more interesting than that, so I'm going to make a new document the size of my document I'm using twelve eighty by seven twenty because that's a standard video format is that size I could also open a video clip, but now it was the right size but there are also by the way presets and here for film and video, so if you couldn't remember twelve eighty by seven twenty, you could pick one that has that for you and this panel called timeline if it if you don't see it, you would go to the window menu and then you will see there's a timeline I have mind set up like this at the bottom just because it needs with so wouldn't make a lot of sense ...
but anywhere else because you need to have that with us the timeline goes along need to see what's happening there because this at first I just said file new at this point is just a standard still image document until I tell it well I want this to be a video so by clicking on that button now all a sudden I see a timeline and my layer over here is also the first thing you see on this timeline is layer zero so you see there's a very close relationship between what you see in the layers panel and what's in the timeline and that becomes important as we start putting things together so I'm going to just this is just because I have a blank document is just a very small little white area that's going to be the start of my video but I what I want to do is add a series of still images and a few of the things that are the adobe is done here I think are really interesting is there's been assumptions made that are really good assumptions anyone who knows me knows that I'm not afraid to kind of poke fun at some of the decisions that don't be make sometimes on some of their settings of things like that but this one actually is really good it assumes if I click this little button down here that allows me to add media if I add a whole bunch of files it assumes you want thumb in a row one two three four five which is a good assumption is ruing this light show you want them end to end on the timelines when you hit play it'll switch from one image of the other so way go and find these images now the on ly thing that I did here was I just make sure I picked a bunch of images that we're all in landscape orientation because I just wanted that if you didn't, you have a mixture and you might have to play with that, but that's really the only thing that I've done besides picking whatever that is five or so out of a much bigger collection, these air, all j peg files, so when I hit open, they all come and you can see their layers on the side. But if we look at the timeline down here, these are the same things. So right now you can tell it's perfect already I don't do anything because I'm seeing beautiful close ups of her chin that's awesome, but that's ok? Because I deliberately new and planned on these files being bigger than my canvas, shall we call it? Because I wanted the ability to zoom in and zoom out if they're all exactly twelve eighty by seven twenty, I wouldn't have options like panning or zooming, which is a big part of video, so I deliberately made sure they came in that size you will make your life so much easier in the world of video if you instantly turn every layer into a smart object in other parts of photo shop, smart objects are quite important in video there, very important because for things like transforming overtime and moving over time it's so much easier if they are smart objects. If you're not that familiar with the concept of smart object it's like we're putting this layer into a protective container, which allows me to scale it down and back up again without losing any quality without a smart object, if I just hit free, transform and scaled it down, that would be its new size, and then if I decide to scale it back up later, I'd lose quality besides the fact, when it's a smart object, it also lets me you smart filters, which means filters like an edit and in the world of video filters that can have an effect over time, everything we're doing here to try and give us the option of saying on the timeline as the video progresses have something changed whatever that something might be paying, so I'm just going to go through each one of these and convert to smart object. In a earlier class, I talked about how to make your life easier by doing carting, creating custom keyboard shortcuts, and I very cleverly removed the one shortcut that I had for convert to smart object, so I had to do that manually but it's not a big deal now aiken select all of these layers and hit free transform if you're not familiar with this happens all the time photo shop where you had commander control t for free transformer because the image is so big you can't see the handles so if you press commanded control zero its scales down your views you can see the handles and oppress option or halt and the shift key so I can scale toward the center and size them as close as possible. So now I have images that if I zipped through my slideshow you can see it's basically just switching between those images so if nothing else just there I now have a very basic slideshow that just does this which you could do frankly and, you know, like rumor bridge or something else where this gets more interesting is when you want oh very the time you want things to move things of that nature. So one of the tricks here and I very rarely complain about the size of my monitor except when working with video because I like the timeline to be much bigger but in this monitor than my video give becomes this big so that just is sort of a challenge but we'll live with it as best as we can here because a lot of times where you need to, you see where it says video group one that's all of these clips that are now end to end but very often we need to sort of twirl that down to see other settings and before you know what the video timeline window wants to be really, really big so we'll work around that as best we can so as an example here's this very first clip that's this one you can see down the bottom so that the order in the layer bottom up our is equivalent left to right in our timeline. So if you decided you wanted the order to be different to say well I really like this one first you just drag left to right and then that changes the order in the layers panelas well or vice versa he could also change it over there but let's say this one right here I want to have something happen so it's not just static some of things that are built in is you can just say I would just like it to zoom and you say it zoom from where the center zoom in and that's it you once you've done that lips right now as we go through it you can see without me doing anything it's that a very slight little zoom in because of the length of that clip was this long it zoomed in that much if I made the clip longer would have more time to zoom in that wasn't me doing anything other than picking from a menu of preexisting choices, so my plan here is to start with the simple stuff where you could just click on existing elements and then build from there and get a little more complicated if we want to. Any time we're doing just a slideshow of images like this, having just a jump cut that goes from one to the other isn't as interesting as something that mixes somehow so once again there are lots of nice built in choices where you can say I would like to have a cross fade and you just drag it right between the two clips and now you can see just by doing that upped up, this little cross fade happened so instead of just going stop, start it's a nice little fade in between so all of these things are just built in changing the length of it just by dragging, and you could see when you do that it pops up a little box that tells you in seconds how long it is. So if you're trying to deliberately have one short the other and that's, I think kind of important to note because even at a basic level, most slideshow software that you have it says how many what's the duration personal id unless you go in and record something custom is always the same amount per slide well, there may be a case where some images you want on their longer because there's two people who want people have more time to look at it. So this way you can adjust each individual image yourself to say this one should be a little longer this one should be whole shorter so on if you want to do anything a little fancier like a more unusual kind of ah transition because this one it's just cross fading by itself this what we're looking at here is these five layers inside a video group and any time I add another clip or image is going to assume I wanted inside this group but if I take, for example this last one and drag it outside the group that's also saying put another track in the timeline so sort of all being in the same one now you can see this is the one I just moved is right up here on its own track so now I could deliberately overlapped um and then do even bigger fade in or something of that nature so often we just put a whole bunch of clips right along one time line or one track, but other times it makes better sense tow have them on different tracks so we can do different things with them down here at the bottom there is an option to add audio because if you've ever watched a slide show without music you want to kill yourself in about fourteen seconds like you watched, bogart said here's the slide show of my portfolio and after that could be the most amazing images of after like ten seconds your lego taking so long so find audio somewhere I have found this wonderful sorting there's lots of options out there like triple scoop and things like this where you could have memberships but there's also a really interesting website called free music after checking double I think it's free music archive dot or ge and it's free music that you just have to give it tells you what the usage rights are mostly it's attribution so at the end you put credits to say music from this artist and things of that nature so I found some and you can search by genre and everything else and there's almost anything to possibly imagine including scratchy old record music that someone put into digital along time ago may weigh so whatever your music sources I have a couple here that I'm going to look, I think it's uh here so just to prove the fact that you can actually play audio and video in photoshopped this is what it looks like so far no, I haven't done a lot of other transition you see already it looks better because there's music because you're like music um I will say though pick a song you like because the video editing you go over the same territory many, many times after a while, you're like, I hate this song. Now, as you see it in the song that I, the video that I end up using, I was by the end, I was like singing along with it, because I knew all the words having that has so many times, which is no one want to hear that because my other three guys, I sing in a barbershop quartet. So my three other guys with me that's a lot different, but solo, not so much. So this is the kind of basic idea, and we're going to build on this, doing some other things as well, but you see, even that was pretty simple. I just said ad media, and it came along.
Class Materials
bonus material with purchase
Ratings and Reviews
Dennis Hartman
For years I have observe that video thing at the bottom of my CS6 program. What would you do with it. Nor could I do anything with it. I saw this course offered at Create-live. WOW, what a wonderful course. It sure helped me with the basic uses of this part of adobe photo CS6. Thanks