Lessons
Day 1
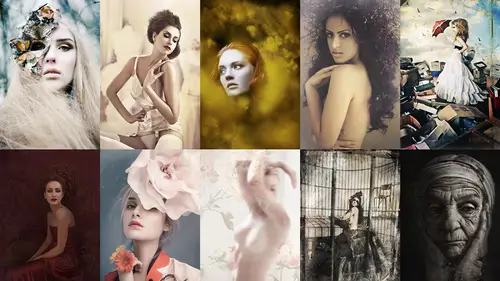
1Early careers
37:20 2Building Online Presence
40:09 3What You Are Going To Learn
10:30 4Shoot: Ballerina Look
43:58 5Shoot: Ballerina Look Part 2
19:54 6Shoot: Floral Look
14:15 7Shoot: Gatsby Look Part 1
20:23Shoot: Gatsby Look Part 2
24:24 9Shoot: Creating Textures From Everyday Items
16:28 10Making Your Texture Library: Lara
20:08 11Making Your Texture Library: Sue
40:26 12Sue's Alien Skin How To
19:36Day 2
13Vizualize What You Dream of Being
37:13 14Bring Your Ideas to Life
43:58 15Shoot: Ivy Wall Portrait
38:12 16Shoot: Ivy Wall Continued
27:21 17Shoot: Aerial Woman
32:37 18Shoot: Trapped Male
12:03 19Video of Eva's World
50:23 20Deconstructing Lara's Post Process Part 1
31:29 21Deconstructing Post Process Part 2
23:26 22Lara's Post Process Step by Step
20:23Day 3
23Sue Bryce Photoshops Man in Tree
48:11 24Sue Bryce Photoshops Man in Tree Continued
30:29 25Sue Photoshops Woman In Ivy Wall
41:56 26Sue Photoshops Woman In Ivy Wall Continued
18:47 27Sue Photoshops Eva
18:52 28Lara's Photographs of Sue Bryce
29:15 29Q and A About Lara's Photos of Sue
30:16 30Lara's 22 Steps to Live Your Dream
40:08Lesson Info
Deconstructing Post Process Part 2
So this was one of the blue textures that I had in my collection as well, so I put that over the top and if you see on full capacity it looked like this because it was too much we don't want too much with things I'm going to place it down again that was on overlay and the reason was because if the contracts I wanted a little bit of contrast in the blue if we place that into screen or lighten you would say obviously it's too much he's heir to light whereas an overlay in a stuff light I would add that contrast ok alright, I'm just gonna pull that down just a little bit more then I went in and decided that it was too saturated when I think of this kind of shoot it's a little daca skin turns of a loping wrote more unrealistic and she's quite pale anyway, so I went in and just added a hue saturation layer, which can be found on adjustments and he saturation and I went on to that and you can see the difference already on that I then went into curves and I'm just gonna pull up curve fair sorr...
y everything's all over the place, okay and you can see the curve down the bottom here, so in rgb we've got second we've got a little bit up on the green hair and we've got a little bit up in the blue, so I'm playing around with those two cold turns, the green in the blue and just taking up from the neutrals to the highlights and that adds nor that that adds this kind of effect, so it takes away a little bit of that blue. I then went into the radiant map and remember, at this point, I'm showing you my experimentation, I'm not showing you exactly, okay, I decided on this and this listen, this is the final you can see how I'm going all blue works let's take blew away a little bit. Oh, this works and I wanted to really show you that because that's, how I work every image. And then I went into the radiant map and I added a really interesting tone and you could just go through and what's great about this. As I said yesterday, when you add it to textures going in and going on to those clicking any one of those and then adding it on screen and I have it just a low ten percent. So if I added that all the way up to one hundred percent, you can see what the grady and that would look like when I first added it, and I use this technique for every one of my my image is everyone because it's such a quick and easy way as well as alien skin is such a easy way to kind of tweak edit tones and just to give you an instant example of what you can be doing with color so I placed the on screen and the reason because of that is because I wanted to add it to the light of parts of the image okay, I wanted to make skin tone slightly colder I wanted to add it over the blue and you can see how it added almost like a neutral kind of to the image it took away some of the shadows too, so then I went in and added a dodging bun, so dodging burn I put on one lay just to give you a quick example of that, so when I'm doing dodging burn, I said I followed the light just slightly I usually also use dodging burn for the eyes to enhance makeup I use it to add highlights to the hats to the skin so this you know, this image isn't to shop, but I don't mind that because it's scott's being it's you know soft so I went in and did that I'd have some dodging bone you can see a little bit of highlight in the hair and that's kind of what you get from pain too like teo get that painted feel it's so easy I'm just going to see him in and out and show you what it looks like that said the dodging burn you can see where I've added it to the skin and I'm just following the way of the light I'm not adding it here I'm not hiding it here because there's not that shadow we don't want to get rid of that we want the death and then I went in let me just uh I should see men for this to show you clearly all right? So when I add thiss and again to remember our transparency paper we had the image we have the grey layer because we're not destruct in the image underneath the want ad the gray and we went out the light and dark on top of that so all I've done here is putting gray layer and I went in and painted in the colors like the hats, the lips so it's just such a simple way of doing it but I went in and simply use my paintbrush picked up a color I'll show you how to do it so I went in with my paintbrush I picked by pressing wrote on my keyboard picking from there with my color picker he said the color wheel that pops up and I always go just slightly brighter than what I see in the image so if I'm here I usually go to about here or here and then I went in and I simply went onto the mode at the top and you could do this in normal on the lower pastie but what I find again is we just want to add a hint so I went onto the soft light and then I went in and just simply painted on the hat there and just playing around with my capacity so this is every time I never have a definite set of where I start you can usually paint on quite messily and you'll see the before and after of that okay and it just starts to add that highlight and bring that color back you could have the golds in the neck with shea how'd I do that so I went and I'm just trying to find a nice gold going in picking a brighter color and don't be afraid that it looks messy straightaway because again we used in layers just take your past city down go in and to see no add to this I shouldn't be looking at that while I'm this is easier to do this my way okay and you just see how much of a difference that makes already with just that okay any questions on that one before going to the last it's one I was just wondering about more about that gray layer yes a see through layer or yes it's a c free later yeah so it's kind of like a transparency paper okay, so you put it on but it's protected by the transparency just wondering why it wasn't looking great thank you. I got a question from samara when editing a whole set like a story of color images how do you make sure that they all have the same tone? Do you create a template which then applied all other images or all I do is simply just dragged my layers over to a new one so I always save us psd is which I get angry at myself and not saving as a pierced e ages ago because it was so much easier to kind of come back to me but I always make sure I save this is appear steve so I can come back tio and then if I decide to edit another image and next day I can kind of just go along drag these over to another image if I have a a mask that's unique to the image, get rid of the mask and add a new master your new image so you just simply dragging them across you would have to add the texture again and mass that out but it's so soon paul and again when you want to add textures to more than one image, you want to make it unique for each image anyway so rotating the text you zoom in in a little bit so you don't see the same detail on each image all right, I'll go into the last image and then we'll show I'll show you how to edit from start to finish hey, this was the guts be one again because I couldn't help myself no way always just that when it seems in lara, while you're opening this up, I also want to remind everybody online because he showed us a number of the images from yesterday that felix has created lighting guides that will be going along with this workshop. So when you purchase the course that all of the lighting setups for all these chutes that you did yesterday will be included yeah, then as well as his q and a for assisting an assistant and errands or the styling of fish, so three different pds, so thank you. All right, so I want to go in again removing those layers I've organized these few try and be as organized as possible. First here I did some skin and hair techniques, so this is a little bit more complicated because I love this image, so I really spent a lot of time on it. So the first thing I did was just kind of messing around with that backdrop because you see there it's going to get rid of those, okay, so I just filled in that backdrop to start, which was just simply going in in a clone use in um, just the clone tool and taken away, but I don't want it to look too obvious, so I just took a bit of time to make that, um, happened there, then I went in and just light in the skin just slightly, and her makeup was perfect, her skin was great and that was really useful to me because I didn't have to go in and do too much. Then I went in and just light in the skin just slightly on. I'm going to show you soon how to do that just to kind of you an idea, it's just simply a clone with the lighting on the mod, but I'm going to show you soon exactly how to do that. Then I went in and simply just painted onto the lips just to kind of clean those up just slightly, and you'll notice I'm not getting rid of too much of the shine there. I'm just hiding up the edges because even though makeup artists a great sometimes they miss just slightly or the models on set for a long time and you don't have time to keep changing it's important to understand these techniques that you can quickly change after then I did a quick dodging burn, which was simply my grey layer again. And then going into the dodge tour here I'm just going to quickly show you and then I'm going to go further into detail on that so you'll see if I zoom in too to her a little bit more clicking on my dodge tool and on the grey lady is my safe layer what I tend to do is go down teo about there and I usually used for this particular image I usually use mid times so you follow the areas of the skin so the mid tones the shadows, the highlights so that's how you would follow what you don't want to do is start using highlights here because I'll show you what it does if you do that it starts to look unrealistic so what you want to do is try and just use highlights on areas that follow the life so I'm just going in and I'm like, okay, I can see light here just gonna move me image I can see light for slightly on a chin here, here, here, here and then I'll go into my mid tones make that a little bit larger because again we want it to be quite seamless to my exposure at the top here isn't on a lot we don't want to affect the image too much we just want a hint of this and then I've gotta protect homes against we have our safe layer we're protecting those tones here and we've got the exposure low and again I'm quite safe we're doing the dodging burn but what you could do is put that up on the exposure, not protect your tones and then do it roughly and then just take the a pastie down but I trust my technique to know that that's what works for me and I take that back down protect homes for the mid tones I would go in about here on the face here and then if I wanted to do the burn it's simply the same way so we go into the burn tool, I would go to the top and I just want to affect the mid times and this is just to simply add depth and highlight to photo see you've got your light and we can't get this technique within camera this is something we have to do to make our photos that more unrealistic toe add that kind painted feel so I'm going to go up to my brush around this biggs remember we want it's seamless we don't want a little brush that's like this because then it starts to kind of be a line we wanted thiss when it got hit go in and just delicately, you know, kind of around the face where the light falls you couldn't do this to make up, you know just here and I also do this around the eyes so you can see here how I've gone around the eyes and make up and just added the highlights to the top of the eye. So this is what a lot of beauty and fashion photographers do as well as, well, a skin retouching they go in and do that, and I am just going to quickly go over that light and technique here, I'm gonna go back down to this layer, I'm going to go on a clones don't tour here and then down, and then I'm gonna put my mode until lytton remember we haven't used and I should mention that we haven't used to grey layer, all we've done is going layer new, so there's nothing in between now we're just working on the image and at the top you can see I've got a way, there's, you can do all layers or current and below so that's affecting every layer below that, okay? So there's, nothing there to protect it and that's because we're working from the skin, so we want a sample from the skin. We don't want a sample from a grey layer and paint on with some plane from underneath and that's, what clone is all about, so then we go in, the press wrote with sample a piece of skin. And then we paint above and that was quite heavy because I've got it on a hundred percent so what you want to do is go down on your past city down on your flow do that again so oat click sample a piece of skin and just go over and this is perfect for just kind of highlighting under eye bags or like, you know, wrinkles but remember it's important to not get rid of sorry it's gone back to dodging burn there that some important to not get rid of people's wrinkles too much? We just want to kind of take them away just slightly because they're part of someone's character and if you get rid of them too much, they start to look too fake so you see how I've just at the light and lay there and I'm just going to take the past he down again and you can do this here is well, you can do on areas like this where there's a dock in kind of area and you can see the lips and then all of this has gone a little messed up on my thing because it because yeah, sorry ignore the skin clean because that was simply me cloning okay, so that's all of the techniques I've got for that area and the beauty of that is what I wanted to show you here is that this is how you paint an image it's just simply dodging burn and knowing where to fill the light, knowing where to fill in the makeup lightning areas and just simply cleaning up the skin as well. Now, if you wanted to clean up the skin on this, an easy ways of doing it is just to make a quick layer knew leia, we don't want to add a grey layer we want to pick up from the sample below that's we've got nothing underneath and we just simply go in and I like to use the spot he'll brush for anything like this and just all you do is you go over that over it, you don't even have to click out or anything, you just follow the line and this is also great for getting rid of lines. It's great for getting rid of hair that's kind of crossing the face and you notice how I've just got a ll this in skin and hair so it's easy for me to kind of go back to you after this line here and it's just perfect just to kind of get rid of those lines so the combination of dodge burn using this tool using the clone tour, using the clone to enlighten their or steps to create this kind of painted skin in the clean skin look okay all right, so now we've got a skin we've got our hair now I want to show you how I reached the color, so I'm going to open that for you guys and you take that off so the first thing I did is I went in on a curve on I'm just going to show you that so what I wanted is cold skin I don't want it to look too warm as I said earlier, something about it to rose me more to that kind of cold or kind of guts be look so in the curves player the first thing I've got, I'm just going to show you on the separate channels I've got flu and the blue is affected if you pull it up that way, that means it's affecting the highlights so it's adding blue to the skin, I then got the green and I've just kind of experimented with the curves here you see that just kind of tweak and it just slightly and then I've gone in and left the red I think I've just pulled it down just slightly because we don't want to affect the warm tones too much here now I'm going to use the selective color and all I did hear in the selective color is I just went into the blacks and just move those points just a little bit on the magenta is on the yellow and that it's a very like small kind of adjustment but again I just want to show you my experimentation on my journey to kind of get to this image I'm now going to go into the texture and this has a lot of texture already like the other shot everything is shot in camera I don't want to do too much with this I just want to add a hint of that a lot of my textures and like suze have got a lot of texture in them already so I when I was experimenting this I found that some of them didn't work so very few of them worked for this kind of concept so going in I used one of my orange layers here from my text your library and I simply went in added that and you can see how it just adds a slight bit of warmth and again you'll see how I'm going I want to go cold oh but no I want to kind of add some warmth and some milky time back and you'll see the way that I kind of tweak and this is what I do want every image and at the top I've gone in on soft light and I've just gone down to one a pass ity of twelve and you'll see that's what the text you're spoken for rapacity I'm going down to twelve since it's just a small effect here and if I wanted to hear I could just add a mask going on my paintbrush always say I'm mask here is white I'm just going to go into black witches are opposite going onto that, just putting that back to a normal mode I'm just going to raise that from this skin because what we don't want is any of that to affect the skin as well and you can see I've done that on that top one here, so if I remove this texture, this is from my texture library as well. If I put that up, you'll see the effect of the texture sorry did that thing again, where did you see that one? Added a hint of orange this one is for my textual irene at the detail I don't want to overkill it in photo shop I want to take away some of that texture I want to take away so it's just a hint said that was put on the mode of overlay I then went ahead and thought, okay, so I originally wanted cold I then went backto warm what would it look like if I completely change the background? So sometimes I shoot him like I had this idea and I'm like, okay, I really want this background and then I come into photo shop and I see like the floor image of the blue background that doesn't why or maybe I want another option and I do this on my very first image when I added fashion story or a finite image and I always give myself another option and I just basically place it on top and just go okay which one do I like better than why and I leave it like that because if I edit mohr I'll start to see on the other images what works best for the set as well so all I've done on option two I'm going to show you that is just quickly used hugh saturation and I've gone in on the hugh here and I've just taken it right to the blues and I've taken down the saturation of it so the effect of that it's simply that and that obviously would affected the whole image but I've added a mask their filled it with black which means it's just overall the image and then I've uses my used my paint which means I've just added in the background so that the girl is left the original tone but that starts to look a little fake so we then have to blend the fact that there's a cold background with her so then I've gone in too selective color which is one of my favorites like that and I've gone in and it just adjusted some of these settings in here you think I did it on the science or the blues as well no, I just basically did this one on the blacks. The neutrals? Yep. So the neutrals in the blacks have just got in and started to move it so it's a little cooler. And then I added a curve on what the curve dead is. It just took it back. So it's slightly warmer but it's still cold so the girl now blends in with the background as well. So then to finish the image entirely and I'm just going to pull that up completely. See khun see it to finish the image entirely. I just added a basic tone and that was just basically a curve layer which pulled up the highlights pulled slightly the neutrals but it's still dark in the dark so I was happy with the way that the darks were but there was something about it that needed a bit of contrast so that's just a simple on I always finish my image usually start with a curve and exposure and I finished with the curve a swell because I then nowhere I'm out with it. All right, that's, all of my ps thi's kind of deconstructed is there any questions before I goingto editing my image? Absolutely. If I could get my lip on, I forget to do way have some in the studio audience witnessed how often do you decide to go into alien skin rather than go through all of your stuff in a shot? Even if I use alien skin? I used that as a basis to work from and then I start editing on top of that as well or alien skin is just a way of me to see quickly what holmes work for the image and a preview so I either go both ways sometimes I don't use alien skin all sometimes I use it and I'm like great, but what you don't want to do when you use the program like alien skin is to just go okay, that felt is great today on and then leave it because there's so many people that have the program so many people use those filters that people will start to have the same tones and you want to develop your own style. You want to develop your own tones for your own image and remember every shoot is different colder, warmer, different themes gatsby seats, colder, the floral that black and white. So you want to develop your own star with that. But even though it's a great program it's just worth trying to get to know these things because if a client requests from you we want this certain time and alien skin doesn't give you that, you've got to know how to do it this way okay. And also, alien skin only edits the flattened image, too. So I usually, if I'm working with alien skin, I use it on my background layer. And that I work with my layers above that.
Class Materials
bonus material with purchase
Ratings and Reviews
photogirl
This was my first Creative Live course and I thoroughly LOVED it! While contemplating purchasing the course, I was a bit weary because some of the reviewers commented on how they wished they could have seen Sue Bryce give more in depth information about one of her projects, but there is SO MUCH information that is packed into this class. I LOVE Lara Jade and her work is amazing. The enthusiasm that both instructors bring to the class, their eagerness to share their workflow and wonderful retouching methods are worth every penny and then some. Going into the class, I already was familiar with Lara's beautiful fashion photography and really wanted to know her trade secrets so for me this was everything I needed. For me, the bonus feature was getting an insight into Sue's wonderful mind and how she conceptualizes, photographs and retouches her amazing portraits! Wow, I learned so much and I HIGHLY recommend these ladies and this course. Creative Live just one more thing... please, more LARA JADE courses!!
Susie
fantastic to see Lara in this; she's so natural and inspirational, and so generous with her resources. I would love to see her do another course, maybe with Felix too as I love his lighting and creativity. More, please!
Kristen Clapham Photography
SO glad I bought this one...!!! Check out Day 2 - "the gospel according to Sue Bryce" - it's absolutely awesome - if you feel like you've been in a creative rut then you've gotta own this and watch it repeatedly!!! Thanks Sue, thanks Lara, thanks Creative Live team... another GREAT workshop!!
Student Work
Related Classes
Glamour & Beauty