Lesson Info
3. Complex Selections: Using Color Range
Lessons
Lesson Info
Complex Selections: Using Color Range
well, let's remove the background and other stuff that's supposed to be hard. What about smoke? You could try to use the background eraser on smoke, especially when what's surrounding it. Contrast eso We could try that, but I will just want to make sure you know of other options. So let's do, ah, background Racer and just see what happens. Alright. Ah, it's hard to tell without putting a new background in there. So let's put in a solid color behind this. Let's just act like we're putting a blue sky in, and I'll just throw that behind. Not bad, right? Um, I still have some stuff to delete down here cause I can see hints of the old background there. So I just grabbed my background eraser and I just hit in there. But now it's the leading too much. So I choose on do and I what lower the tolerance tolerance means is bleeding too wide of a range. Maybe bring tolerance down to 20. Try it again. Again. I can't sell what is dirty screen right now and what is actual image because my screens quit...
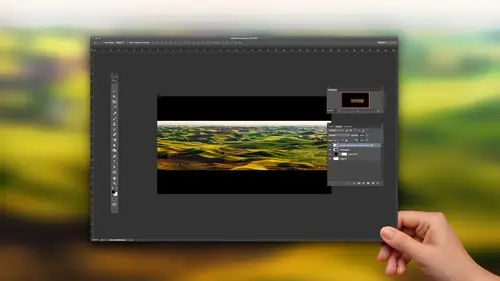
e dirty. But you could try that alternative to that is when the thing you're trying to to get is one color. And this is true with, in this case, the smoke, but would also be true for things like fire, like one or two colors that are not found elsewhere. You can also go up to the select menu, and there's a choice called color Range. Before we actually get into color range, though, I'm going to select the skydivers. Um, watch this lasso tool and most people think the magic wand. It should be called the tragic Juan. That's what just cause it sounds fun, but Magic Wand tool and I put it right here in an area that's already selected. But I hold down option. That's all time Windows, and that means take away from So it's gonna take away from the selection. I already have. Do that again down here. In case you're not familiar with it, you hold down shift to add to a selection. So I was a select. This is Well, if I didn't have shift held down, it would have replaced the selection that was already there. Then I grabbed the magic wand, and if you hold on option, it means take away from what I already have selected. So I just put it right inside the selection where there's blue sky that I wanted to get rid of, and it just kind of shrinks the last, so down to what's there now we would like to get the smoke, so I'm gonna go to the select menu. There's a choice called the Color Range, which will select a range of colors. The problem is, it would usually replace the selection I have were only work on the area selected unless I hold shift right now, when I choose it, As long as I have shift held down at the moment and choose color range, it knows now it should be adding to the selection already have. So I'm holding shift right now, which is color range. So in color range. What we have here is I move my mouse on top of the image and I click on the most colorful area, the smoke, and then I can hold down either the shift key or there's this little I drop it with a plus sign, and that means let me work on Mawr of things that are different colors. And so I'm just gonna come out here and click on various parts of the smoke to get it to have an idea for how various in color, I'll click four or five times. And here we have this preview. If you look, the areas that are white are areas that we be considered selected, and this is a miniature version of our picture. If I bring up this slaughter called fuzziness, that's my favorite technical term. And Photoshopped fuzziness is if I bring it down all the way, it means only select the exact colors I clicked on as they bring fuzziness higher. It means very from that, you know, go a little brighter and darker, and I'll bring that up until the background start showing up and then back off until no background showing up somewhere out there. Click. OK, now we have both our skydivers and we have this smoke selected. We could come over here in at a layer mask, then to say OK, then just show that we could then dragged this over to our other file. But we have trees and now let's see the word Navy seal. I know if you can see it, it's his Navy seal on that. It's upside down. Rotate this thing. So let's go over here and rotate 180 degrees. Maybe, yeah, they're not worried that Navy seal and let's see, Put that so he's going out. I wanted to look like they're coming in above the trees, like up by the sky coming in there. And then when they loop around here, they get below the trees down by where we are, and then he almost exits the frame that way. Well, I already have a layer mask attached to this layer, and I don't want a paint on that layer mask to further hide this because I want to do it in a way that you can easily undo and change later. If I paint right on that mask, it's more or less permanent, so have to mass on one layer. I'm gonna take that layer and put it into a folder, at least what I call a folder. It looks like a folder icon. It's actually known as a group, but you click there and that creates an empty group. I'm gonna just drag my layer into the group like this. You can tell it's inside because it's indented. So it's kind of lines up with the edge of the folder and I click on that group, and now I can add a layer mask to it, and now effectively have two masks on one layer. Then I could grab my paintbrush tool, and I can come in here in paint with black black hides things. And what I'm gonna do is hide this wherever I want it to look like. It's above the trees. Now, if I just paint like this, though, remember what I said when you use funny settings, What do I do when I'm done? Put him back to normal. Otherwise, no mess you up. Get back to painting normal. If I just do it, we're gonna hide all of the smoke, and that's not what I want. I only want to hide the smoke where the tree branches are so that it looks a ziff. The smoke is above those tree branches, and then we're looking through the tree branches towards it. So in order to do that, we'll get even fans here. Remember this Advanced tips and tricks. I'm gonna hold down the command key control on windows and click on the mask that is limiting where the tree is showing up. That'll give me a selection in the shape of the tree. I'll type command H to hide the edges the very first time you type that it asked, because the Macintosh operating system thinks that command age should hide the program you're in in front of shop thinks it should hide your selection and things I choose hide extras. It'll only ask you that once. Okay, now what I paint since I have a selection active, that is the shape of the tree branches. When I paint, I can hide it on Lee where the branches are. So then I could make it look as if above the branches until it gets to about there. I don't know that this is the best rendering of this, but it should look now like the skydivers air coming in above the trees here cause the tree branches look to obscure the Your view of the smoke comes around here and then suddenly right about there, it starts crossing over, and now it's in front of the tree comes over here, and now it's in front of the tree over there now kind of Cygnus. See, we're getting more weirdness in here. Not the most beautiful image, though, so we might want to double click on the bottom layer. And why not give it a blue sky? What I would usually do is go grab a new picture of of sky and put it in there. So that's kind of a mess of a picture, but you'll hopefully learned a bunch of little tips related to it. Um, fire is similar to the smoke you might need to do. To pass is do one pass for yellow, one pass for orange so that you do, ah, color range. You click on the yellow, you mess with fuzziness. You click OK when you go back to use color range of second time, hold the shift key down to say, Add to that yellow that I just selected in this time. Go for orange and you can remove the background on on fire. If you want to move, remove the background on glass. Go for the highlights in the shadows in it. That's what defines glass. If you go for highlight and shadow, you can get the shape of a piece of glass as long as what's behind. It doesn't contain really bright and really dark things. If I want to remove the background on the glass of water, I'll slide a piece of blue or red or yellow or anything that's not a shade of gray behind it, something that's not overly detailed in. So just find a sheet of paper that blew or some color. Put the glass of water in front of it. You do two passes with color range one clicking on the brightest. Highlight one clicking on the darkest shadow and you will get a glass of water just sitting there on the layer. You have to the simple background, though.
Ratings and Reviews
Frank Lombard
Ben, THANKS, you always make your classes a pleasure and informative opportunity, Keep them coming !!!
user-1c9a21
Ben is fantastic as always. Has a way of getting directly to the point and packs a lot of information in each of his classes. He's my favorite instructor.
Terri
Watched this cass live during Photoshop week. I think I'm going to have to buy it. Amazing stuff here.