Lessons
Lesson Info
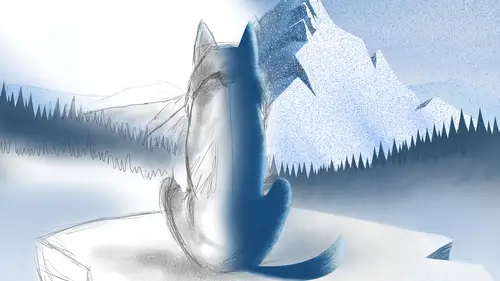
Starting a Drawing with Sketch
So lets go and use Tofu brush just here on this one, I think the tofu brush, this is amazing. I'm gonna add a new layer here, go for my sketch layer, like so. Something you can add, you can turn layers off by double tapping them, a few others things besides. And I'm just gonna make some marks up here, that's way too dark because I'm working with black. So I'm just going to go to my themes here, these are pre-built themes and underneath that I've got things from the community and things I've made myself. I'm gonna go with the dark gray, always better to go with dark gray, I always work at less than but when I'm doing something serious, I always work at something less than 100% opacity. So, I'm just gonna undo that stroke a couple of times there, and start to work over the top of that. So, normally I find the lines I want before I start inking up, so I maybe move around like this, how's this looking Jim? Looking sharp Tony. Cool. So, can you see that? And if you look at it already, ...
this is the texture I was actually after. This is something that actually looks like it's been done on paper and it's been smudged a little bit by the action of the hand moving across it or other things moving across it. Okay, so I'm just gonna come in there, find those lines and let's come up to here and we'll do a bit more there, like so. So I'm just gonna try and get around that a bit quicker, let me zoom out here. Now, I'm just gonna make ... not gonna make so much of a big deal of doing it, like I said, not trying to produce a piece of finished work today in the time allowed that's just too short. So, let me just get in, and I'm gonna just do the paw things there, go round that front, just put those claw shapes in, now the tail, don't usually see the tail on my quirky cats but because this one's actually jumping, kinda needs it. And ah ... this is how Bilbo jumps at stuff, he jumps like a kitten, when he jumps. He jumps with his sorta paws folded, he's really funny. I mean he's very good at what he does, it's the apex of his particular chain I guess, but, he's just too cute, he doesn't really get it, he doesn't get that he's like that. He's nice, he's a bit of a pacifist cat really, and that's why I love him so much. He's so good. So there you go, you can see I can make those lines around there. Ah, just indicate this up here, I started to draw that ear the wrong way around on the other side. But let's do that. I'm gonna add, I'm gonna tap on the layer beneath, the pencil layer. In fact I can double tap that to turn that off. I'm gonna add another new layer here, okay. Another sketch layer, like so. And I'm gonna change brushes. I'm actually gonna use one of the default brushes here, this marker brush. I am whacking this up to 100%. And I'm gonna choose one of my own colors here. And I'm gonna try and work quickly over this. I sometimes actually come out to Illustrator Draw, to do this part, but I want it at 100% because what I actually want, is a really good, solid fill. I'm gonna go over the whole thing, because you can't mask in this application, okay, as such, yeah. There's no selection mechanism like you've got in Photoshop, it's part of the Photoshop family, but it's not a replacement for Photoshop, it's meant to be a way for you to be able to express your ideas and then get them in to the kind of mechanism the same way I use it, get them into the design mechanism, as quickly as possible. So, I'm just gonna try and get around those edges there, as quick as I can, just doing that like so. If there's any questions or anything Jim, anybody comes up with them, just fire them away, otherwise I'll just keep on drawing. Sounds good Tony, just confirming you're still in Sketch, correct is it? I'm in Photoshop Sketch now. Photoshop Sketch, perfect. Yup, I am indeed. So I'm just gonna come out here and just add on the tail there, just get around that real quick. And I'm sorry I'm not doing you something ... .. whoops, just gonna undo there. Here's a great thing about this as well right, you could never do this in a sketch book. If I tap that undo just there, you can see it undoes that. If I long-press on it, I can redo it. If I plant down three fingers, watch this ba-ba-ba-ba-ba-ba-ba-ba-ba-ba-ba-ba-back through the hiiiiiis-trrrrrry. And then, all back that little way. So, (humming a tune) okay, there you go, right to the mistake I made just there. (laughing) I'm just gonna up the size of the brush, okay, like so. I'll be jumping out to do some inking in Illustrator Draw in just a minute, Jim, if that's okay with you? Perfect, sounds great Tony. Yeah, so I'll be doing that. Ahh, just there. If you do have questions by the way, it's cool to ask, I can draw and answer questions at the same time if you have any, so that's good. Now I've got that layer there, I'm gonna tap on it and get some options. And the option I'm after is this one down at the bottom, painting side. I'm gonna tap that, and that locks the transparency, even if the pixels are semi-opaque, that's why I move this to 100% opacity, then you'll get a semi-opaque result if you paint over it. Now I'm gonna swap out to one of my other brushes, I'm gonna use Teri Hatcher, and this is, without a word of a lie, the day I made the Teri Hatcher brush, was a day that I was actually talking to Adobe Community Professionals about mobile drawing. I was doing a demo for Adobe Community Professionals, dropping this down to about 30% opacity here by the way, and once I'd finished doing that, and using the Teri Hatcher brush I went home from the studio, which is just like across the corridor, really (laughs) and you'll never guess who was on TV. Guess who was on TV, Jim? Ah, that'd have to be Teri Hatcher. It was Teri Hatcher! And she was on a program called "The Great British Bake Off" which is, a program where basically you make cake, you make loads of cake and distribute it, so there you go. And you can see there I'm using that, I'm not being desperately careful here, I'm just adding in some texture, I like the randomization of the thing. You see now it's starting to take on this sort of hessian-like appearance. Now if I over-do it, it's gonna start to fill in too much under there, but I am actually making some ... I'm gonna bring the brush size down and actually I'm gonna go to ... I could go to a dark gray and switch the blend mode to multiply, under there. Because what I want to do, is just move across here, can you see that, how I can muddle some color under there, like so, just to give that a bit of depth and also the idea of my quirky cats is their eyes are bulging outwards all the time. They're perfectly alright, there's nothing wrong with them, that's just the way quirky cats are, man. They're just like that. So, I can go under there, that tail, come along, do that, get all those nice bits in. It's got a nice .. I think that's a nice texture, it's kinda groovy. It would have taken me ages to do that. (laughs) In fact when I was doing these, back when they were actually a series, they did take me forever (laughs) to do that because I was doing all of that hatching by hand, yeah, so, barmy. I've got another blend mode here called Blend, which is an interesting mode. You might see some of that in a minute. This color's not quite right, so I'm gonna muddle that a bit more towards yellow, just there. I want to get that a tiny shade lighter. There are other ways you can muddle color yeah, but I'm just gonna paint in there now, just to kinda lighten that off, a little bit. Of course it will get darker as it went inside the ear, but this is not a real cat. (laughs) So, we don't have to get hung up on the actual, physical properties of it. Loosely, yes, right, but not too much. It needs to resemble a cat in some way but it doesn't actually need to physically be like a cat. So I'm just gonna come on and draw this, for a minute. I'm just gonna keep on doing coloring, which is what my kids thought I did for a living for years, they're so nice (laughs). Thought my job was actually coloring in because that's all they ever saw if they came in was me adding color, they're not allowed in while I'm actually ideating or drafting 'cause to be honest, when I'm actually working on my own, that's a slightly longer process, I take a bit of time over doing that and nobody's ... I don't like interruptions as some of the people in this room know because they tried to contact me while I'm busy drawing (laughs) I don't talk to anybody, I'll have none of that stuff. Let's have another brush out on here, let's have Point Break, which is a flaky brush and that's going to make some flaky stuff. All of these brushes by the way are ones that I've made. I'm gonna go towards red, which means if I now bring down the brightness, I'm gonna get something towards brown, I actually want a darker brown, and I need to push that more towards orange, red is too dark. There, and go back a bit further, let's put some Point Break brush in there, so can you see that? I can bring in those things. That's not dark enough, I'm gonna undo. Let's go back, we might actually need to go round the other way. I think really for harmony with this ... There's a good way I can tell, I'm gonna long press on here, on the color swatch and then move out like so, and you can see, look at the top ring, it's exactly like the color picker ring in Photoshop, it's showing me the color I've got already loaded and then the color of the group of pixels, just like a small group, I think it's three by three or five by five, underneath, something like that, not entirely certain of that so don't take that as being the absolute truth, but it's around about that. So once I've got that, I'm gonna release just there, it's given me that color, so I can carry on painting with that color. If I tap, to get back to the color dialogue here, up on the top right hand side of this window, ignore the libraries I've got there, but if I tap just there, I can choose color harmonies, so analogous generally tends to be between five and fifteen degrees either side of the color on the color wheel. So you imagine a point on the color wheel, let's say red, which is typically at zero degrees then, the analogous colors on there would be towards orange, about 15 degrees out, orange is actually 30 degrees out from there, but it'd be that sort of range towards orange, so red-orange, and on the other way it'll be sorta red-magenta out from there. This is slightly different, it's green and it's a dark green so the brightness component is slightly separate, but if I tap analogous, you can see it creates me colors that are separated out that way and you can hopefully see that with the dots that it's created underneath. I'm gonna tap there again, monochromatic will give me different variations of brightness and saturation just there, and I've got a few other color harmonies that I can choose from there. So all tried and tested ways of pulling color together. Now I could use one of those colors straight away in isolation, but what I want to do is tap the plus at the top and that will add that to my currently selected library, which is at the top here. I'm gonna chose that one there like so, and now I can go about ... I need a slightly bigger brush for this, okay, let's make some Bilbo-like markings. So Bilbo's got ... do you know I really do love that cat so much, I don't think ... do you know anybody else that draws their cat as much as I do? Not so much Tony. (laughs) Is it healthy? So, not exactly ... in reality I'd really tune this, but look at how ... so I'm gonna draw the tail now. You should be able to see this okay on the ... I'm just gonna bring this in, so you should be able to see this just fine on the overhead view. So, I'm gonna step to the side so you've got the clearest view possible. Because this is only painting inside, if I wanna make ring markings on the tail I can just color across like that, look, see. ♪ Boom, boom, boom, baah. ♪ Ha ha ha. Don't have to be particularity careful about how I'm doing that. Even if you're not doing this commercially, even if you're doing this as a therapeutic retreat from the world, which is as good a reason as any to explore it, I'm talking to the wrong camera just there, I was walking to the overhead camera and the overhead camera doesn't care unless I stick my face on the iPad, but even if you were doing this, I will talk directly at you for a minute, but even if you're doing this as a therapeutic retreat, get you away from the world, sit around, just get the basics of using this together so you know how to do things like this, and then just do stuff, just color stuff in. If you wanna bring in something, if you think "I can't draw," (whispering) you can. But if you think, I can't draw, tap, bring in an image layer, change the opacity of the layer by tapping on the layer and trace it and then color it in. Commercially, it's perfectly valid way of working, I mean back in the day, before digital, we used to have a thing called a Camera Grant Enlarger in which you put something in to the camera, and then you use these handles to wind up the lens, and then you'd make tracing and things off of the top of there as well. So, let me just come in there and make some other marks, just in here, just generally. What, has become pouncing Bilbo now, is missing is a few different little things here. Let me swap out to the nose here, let's fix that. So let's add a bit of pink on the nose, just there, and lets get a slightly darker color ... Oh, do you know, I want to use some of that in there too, I wanna use a bit of that, just there, just to get a bit of edge, and I'll use a bit in the eyes, then I'm gonna get a dark color again, I'm gonna go for a dark brown just there and let's do the, do a gritty shape there and there, like so. And now I think I'm gonna hand that over to Illustrator Draw for inking.
Ratings and Reviews
Student Work
Related Classes
Design Projects