Lesson Info
16. Recording and Editing Bass Guitar
Lessons
Day 1
1Class Introduction
11:38 2Do You Hear What I Hear?
13:26 3What Really Matters
13:19 4Pre-Production and Arrangement
07:03 5Pre-Production - BPM
17:22 6Pre-production - Boring Sections
15:45 7Pre-Pro- Bad Transitions & Tying it All Together
14:51Two Methods of Drum Production
09:48 9Cut and Slip Drum Editing in Cubase
29:38 10Drum Sample Replacement with Drumagog
26:55 11Prepping the Guitar for Recording
30:52 12Cut and Slip Guitar Editing Techniques
19:01 13Riff Building
21:47 14The Mutt Lang Method
15:09 15Toneforge - Menace Demo and Questions
34:45 16Recording and Editing Bass Guitar
21:00 17Reinforcing Bass Guitar with Sub Destroyer
18:33 18Cinematic Sounds and Tricks - Explosions
08:09 19Cinematic Sounds & Tricks - Reverse Sound & Risers
24:36 20Cinematic Sounds & Tricks - Bass Drops & Glitches
26:51 21Vocal Recording Prep
19:06 22Vocal Recording Workflow
21:13 23Vocal Editing
35:02 24Mixing - Master Bus
12:21 25Mixing Drums
20:29 26Mix Bus Processing on Drums
17:51 27Mixing Guitars
17:25 28Mixing Vocals
19:15 29Joey's Advanced Production Workflow
32:54Day 2
Lesson Info
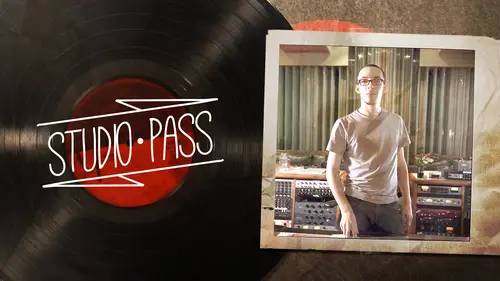
Recording and Editing Bass Guitar
And let's introduce our position our bass player yeah, this is john where can we find your stuff? John I play in a pop rock band called the home team we're on facebook bandcamp amazon, spotify I'd you know you name it we'll be there so awesome. Thanks for being here course cool. Yeah, so today we're talking about well, we're going to first start off by talking about base then we're going to go into some postproduction stuff now I know there was some people asking about the d I signal chain yesterday for guitar and honestly it's the same thing for guitar as it is for base so I'm just going to spend a little bit talking about that so basically when you're working in the box with like am simulators you're going to start with your base of course or your guitar and then you go out of that into a d I box and this is the d hi box that I used the countryman and then this is an active d I box so it actually needs power. Um the cool thing about that boxes you can power it with phantom power um s...
o it goes out of the d I box and then into the interface now this interface has it's a built in pre amp, so we're using the pre empt that's built into the interface which it has phantom powers as well so the fan and power powers the d ay box because it's active and then we just adjust the preempt gain here and then it goes into the computer so very simple work are very simple gear set up signal chain whatever works for bass and guitar that's pretty much how we do do it every time, not fear recording like an acoustic guitar you probably would want to mike it, but for an electric instrument you're going to want the d a box okay, so one of the challenging things about recording heavier music is especially with base is the tuning because it's just so low it's hard to get the notes to be in tune so I'm to show you a couple techniques on how to do that, how to tune it properly so first you need at least some kind of tooner plug in or you can use like hardware tuner I like to use the tuner in the computer just because it's more convenient it's easier to get to um do we have a signal going through? Okay, cold so yeah, if you know the typical way to tune a basis, just play the string and and turn the knob right but if you notice the tuner is actually struggling to pick up the note that he's playing it's just so low that it's just not working very well. So if you actually play a harmonica on the twelfth, fret now you can see how the tuna is picking up the note a lot easier. Um, the reason why is just it's an octave higher? It could be the fact that this tuner is is built for guitars, and so it doesn't really look for those low notes, but when you play that that harmonic on the twelfth, fred, it puts it into the higher octave and allows the tuner to pick up the no easier. So you just go through in tune and does a lot better job picking it up on the next stream it's usually that low string that you have to mess with, I wouldn't recommend tuning it to the threat, but the harmonic is fine because when you do the harmonic, its still the string being open and resonating, but when you push the string down onto a fret, then you're tuning it to the intonation, which could be off so I don't recommend doing that cool. Is the top stream still into sweet? So one thing you should understand when you're tuning any kind of instrument base especially, is that when you, when you tighten these strings, it actually pulls the entire neck a little bit so it can make this string go flat. So you tune this string, then you go to these next three strength in you too and all those up and then by the time you got you go back down to the lowest note it's gonna be flat because it's pulled the the neck a little bit, it just depends on the guitar though some some types of wood don't you know, it doesn't flex as much, okay, then the next thing we're going to talk about is pick vs finger base. Now this is really specific with the type of music you're playing with, like the metal on the metal core in the heavier music it's pretty much all based on playing bass with a pick. Now there are occasionally some bands out there that play with fingers, but I think it's harder to get that stuff to sound um more articulate it's kind of there's also slap bass too, and actually in some productions, I do like to do a little bit of slap bass just cause it sounds mean, you know, um, I I prefer pick based on because when you're talking about editing and you're talking about building a perfect riff it's a lot easier to do when you're picking the strings than it is when you're using your fingers um so it's actually it's actually record apart so we can shows and stuff on screen now, I used the same work flow with base as I do with guitar, so I have one track where I'm just going to record an edit, almond based parts, and then as I finished them, I'm going to drop them down into the track that has the actual tone. Um, before we record part, let's, talk a little bit about based on, um, what I like to do is based home is split into two channels, you've got a low channel and you've got a great channel, and I think that's really cool about that, is you, khun, you can make the great channel really, really distorted and do lots of crazy tone shaping on that, and then with the low channel, you can keep it very clear and have your low and be really smooth, so, um, one way you can do it is let's record one part real quick, and then I'll, uh also how do this will start the first? Ah, so I record the part in in the top track, and then I can, uh, I'm just going to grab a random section just like and show you this. If you take that track that you recorded, once you've got it all edited and finished, and you, you like it, then you just drag it down to this track here which is the low one and then you copy it and you paste it into the next track and that's the grit so then with great track you can you know, put distortion and do whatever you want sands and something like that sounds like this so this is just the, uh the great track right now if we look at our low track we just have basically the sound of the d I a we haven't done anything to it but what you can do is you put like a low pass filter on it and this is just uh what we're trying to do is um we want to isolate the low frequency so we'll put a low pass on there and depends on tuning how much you want to keep I like to just listen to it and pick what frequency I think works the best weii just want low frequencies that's what we want and then after that you can either use like a compressor or a limiter to bring the all the notes to be more equal in volume okay then we just go back to the great track and we're gonna remove low end from this with a high pass filter you can kind of get away with making that really dirty and then when you mix it with the smooth, clear low and you're going to get nice, nice clean based and then what we're gonna do is I'm going to show you compare that to just having it with with one track the way we recorded it, we just had it in one track and then the other way this gives you ah you basically get to failures, they can kind of control your track a little bit more to control how much low and you have versus how much great you have to and then if we go compared to the other one way pretty much the same thing, especially with this tone in particular but by having it split into two signals it just gives you a lot more control. What you can do is like on heavier parts when you don't want the base to just be overloading song you can actually automate your bass track down a little bit but keep your grit where it is so the base is still audible on dh still defined within the song and within the knicks, but you you know, you just have more control over it that's all it really is about, um, so let's talk about we're going, we're going to come back to base tone and second, but let's talk about editing first, how do you get a perfect base tracks? Well, it's kind of similar to what we were doing with the guitar um you've basically just record the person playing the rift the best of their ability and then you find parts that could be better and you punch them in and we're going to use to cut slip technique for taking those parts and getting them to fit with each other so let's really let's record that one more time and then let's uh let's see what happens cool okay, so just like we did yesterday we just go through and we listen to the take and we see what we like and what we don't like okay, so right off the bat this first part to me feels a little bit oftime was gonna delete that and then the next part so that time that sounded more on time it's the same part from before but he played it more on time this the second time so I'm gonna cut that out and copy and paste it here? Okay, that transition to that note right there I don't like it someone to delete that and then just have you play that part let's try that again too. Okay, that part's a little messed up so that's the part that goes, uh starts on the lower note and he goes, yeah yeah so it's punched that and this time try punching in like where it actually happens so you're going to hear the bass playing back and then when it gets there it's just start playing that part there you go all that time I just punched it in place just so take a you know want let one last step of moving into place so it sounds a little rushed I'm going to actually slip it to the right a little bit that sounds better that cool so much sounds on time ah that's a little late so as you go through the track you're basically just making little edit points you know, putting little cuts where you want to start doing a slip and then you can slip things within that sounds better I'd like to leave little uh like the muting sounds too like there's a little slap at the end of this base part right here well I like to leave those in sounds cool, sweet and then just like we did on the guitar you would select all of your edits or all of your little parts and then do a trim left which gives you a little bit more pick attack and then you do across there you have to be careful if you have ah if you have a piece of audio that's really close to another sometimes the thing will automatically cross fade them together when you don't want that to happen you have to be careful make sure that you're at its our space properly like this these air too close so they would end up getting cross faded and I don't want them to sew sometimes you have to go through and do some sections by themselves, you can't just sometimes it, like a few have a bunch of edits, especially on a breakdown, let me show you, so if you had, like, a bunch of little notes like this, and then some editing between, you wouldn't want to select all of them and hit cross fade because it could potentially take thes these two sections and put them together when you actually meant for them to have mutes. Um all right, so let's see what we got here? Sweet. So I'm happy with that. I'm just gonna bounce it. I don't have my key commands. There we go. I know what you would do is you just drag that down and then copy and paste it to the other track, and then you have the two tracks and make up your based on. So this is one way that you can do it. Um, I like to do this for bands who have easier to ning's toe work with if you're working with a really, really low tuning, it can be frustrating to do this because it's hard to get the low pitch to be perfect.
Class Materials
bonus material with enrollment
Ratings and Reviews
Tim
I have been following Joey's work since the early Prada days... This is one of the best discussions any producer has ever contributed to digital audio. I love the amount of transparency. He simply reveals everything and guides you on a very wise path on how to become a in-the-box producer like him! Turns out, the answer is -- a ton of hard work! Plus, this has to be the best use-case on his own awesome and super-affordable plugins. I have watched almost every popular producer/engineer workshops and have also sat-in on Eddie Kramer, Alan Parsons and Quincy Jones producer workshops and believe it or not... This is the best one yet.
Adam Train
I'll be honest, I'm not a fan of the bands Joey records. The only reason I bought this class was because I enjoyed the Periphery one so much. Joey takes modern production techniques to the absolutely extreme. He takes punch-ins and editing to a level where it's not even funny any more. If you're looking for tips on recording and mixing in general, this class is not for you. If you're looking for editing tips to see how far you can possibly push the strive for perfection, this is pretty spot on. If you're a beginner, don't take this class to heart - Joey's workflow is borderline psychopathic - go and get the Periphery session instead. If you've been recording for a while and you're looking to see how far editing can take you, it's worth a look.
a Creativelive Student
Easily one of the best investments I've made. There is so much information here that you'll have to watch it multiple times to really catch everything. Looked up to Joey Sturgis for a long time and this is literally a dream come true to get a behind the scenes look into his talent. He delivered the material in a very understandable fashion and was extremely clear with all his examples. I love creative live =)
Student Work
Related Classes
Recording Drums