Lessons
Lesson Info
Deep Dive on DAWS
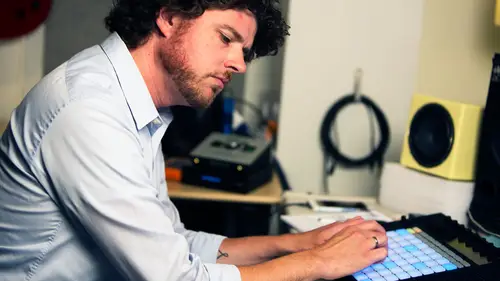
This lesson is a deep dive on digital audio workstations. We'll talk a little bit about, you know, what the different ones offer, and give you kind of a, a quick look at those. And within that, I just wanna give you a quick look at signal flow. So this is a little bit 101 stuff for anybody who's in, into audio. How many people, just show of hands in the room, like have some experience with, with audio? Okay, okay. It's about half the room, okay, this is good. So this is an, this is an, it will be fresh to some people, which is good. So we're gonna do, do a quick look, and just kind of talk about the, the different elements that we have. Tracks are just kind of the, if you think about where that derives from, a piece of tape, you know, if you, if you had a cassette tape, it had two tracks on one side, two on the other, right, a left and a right. That's kind of the, the most basic and reduced way that we look at it. But we are working in the multi-track environment, which allows us to st...
ack these different tracks alongside one another. The tracks are not analogous to the inputs and outputs, like how you, what you get into your session and where it's going. You know, most likely where it's going is, you know, to your headphones. But it's going to some output that's delivering it to your headphones. We'll look at some different track controls, like what's within the track. And it's really, I try to, to think of it as like plumbing, you know. There is a flow to things, there's an order to them. And we're taking these many streams into, into one. And I kinda try to reduce the amount of work that's happening at this very end stage so we don't get bottlenecks, right. So we kinda put things in different silos. So we have, also have to, a chance to take a tap off of everyone of these signal paths, send them somewhere, do something with them. So within Pro Tools, which we're gonna go to right now on my screen, you'll, you'll see that stuff happening, okay. So let's just kinda do the, the very basic stuff. I've got a track here. This is from my host, Al Letson. Every case is different and complicated. But this nation's economy was built largely on black-- Okay, so this is one track, and this is one audio file or, you know, if it's, if it's cut from a number of, of other ones, it'd be a clip derived from one audio file. We're in the nondestructive environment. Remember, we can do, we can repeat this as many times as we want. We're never damaging the tape. I can have 50 different sessions looking at the same tape. But it's, it's all deriving from that same source. And then, within that, we have just a few of the real basic controls that we need to, to kind of isolate things and to pay attention to the things that are important to us at any given moment. So, if you look, take a look at a track here, you'll see, you know, a record button. I'm gonna just go ahead and assign this input so we can see that showing up. So, you know, we arm the track to be able to record. It's in kind of like a record-ready state now. You know, you're probably not gonna be recording into your DAW unless it's, it's for the studio side of things. Don't really need to, to worry about the, this next button, but the solo button, in the context of, let's say, we bring some music underneath this. Every case is different. You're not hearing it right now 'cause the top track is soloed. We're just listening to that one. So if I... Just do this. Now it's unsoloed. Every case is different and complicated. But this nation's economy was built largely on black. Okay, and I can solo the music. on black farm labor. For hundreds of years. Or I could mute it, okay. So these are just, just the stock controls you're gonna find in any workstation related to the, to the tracks in your control of them. You can have a lot of, you know, kind of dummy tracks or, like, you know, the raw audio track that you're not really using for the most part or listening off of, but that you could pull stuff from at a, at a moment's notice. Some people like to work that way, other people just like to pull their material from the clips bin that you import your audio into. And then, within that you've got the input and output. You can also see that was, you know, how I get into, you know, this physical hardware input and this output, which is feeding both my, you know, in, at, back home, it's feeding my speakers and my headphones, but it's, you know, wherever, wherever the signal is going. And you expect that at some level to, you know, always result in going to some kind of main output, otherwise you're not gonna hear it. All right. Some other really just kinda primary controls that you have, you have the control of level for every, every single track. That can be a static set thing as it is right now, or we can have kind of more dynamic control over that. You also have pan control, so This nation's economy. If this where, if we're on stereo monitors here, you'd be hearing that come from the left at that point, as opposed to the right. So pan, thinking to panorama, the scene of, of what's in front of you. And, and, you know, that's one thing that people don't play with a lot. I think there are really good reasons for that. A lot of people are listening on laptop speakers or in the car where it's really weird to have somebody's voice just come from the left side. So, that's, that's kind of a decision that you make intentionally, but, you know, for music or for ambient space, we really like those things to unfold in stereo and kind of give a full picture. And it also means that they're not competing so much with the music too, or with the voice, rather. Okay. All right. Talk a little bit about seeing what you hear, okay. In this world, we're working with visual representation of our work, right. And that can play tricks on us sometimes. It can make us fall into certain habits. It can maybe take our focus away from really listening, 'cause it's like, oh yeah, I know that when I see this, it means x, right. But it's really good to kind of just always think about just, your, your ears are in partnership with the eye in really trying to make sense of it, kind of, with, with both senses. So, if you're seeing what you hear, you're kind of seeing and hearing a lifespan of a sound. Just gonna pull something off right here. (whispers) Here we go. All right. Come back a little more to some of the track functions. (clanging) Okay. Sound with a very short lifespan. That lifespan, we think of in four categories. It's attack, decay, sustain, and release, okay. So the, these, these four... And they're gonna be different for every kind of instrument, for every kind of voice. But every sound has, has this shape, you know. And, if we wanna go back to Pro Tools, I can kinda show you a distinction between, you know, a couple of different ones. So what we think of, when we, when we hear this, a drums, or kinda anything really percussive like that, we're thinking of something that has a really fast attack, you know, a really percussive, you know, quick quality, you know. Also consonants, things like that, kinda have that same shape and character. You usually see a big spike at the beginning of the wave form or, you know, a quick rise up to kind of a, to, its max level, if you will. So you've got the attack, you've got the sustain, how long it stays at that level, and then the release of when it's, you know, going to, what we call, the zero point and you don't, you don't see this waveform information now. We can zoom this in on a very crazy level. And kinda get playback. In bondage for hundreds of years. Now that doesn't sound like anything, you know, where, even though it looks quite healthy and level to us. I've just, kind of, done, like, a little bit of zooming in on the waveform shape. So, case and point here, we talked about signal to noise at the very beginning. You know, that's whatever, you know, level of noise is in, is in Al's studio track. It's, I hope it's not very much because, you know, I'm in control of that situation, I designed the whole damn studio. I should hope that I've set things up in such a way that, that, that that's not a problem for us. But, you know, the more, the more you have to turn someone up, if they're kind of, you know, really reserved in their, in their delivery or they're really quiet, the more you, you're also boosting noise in that scenario. Let's look at another lifespan of a sound here. This one, we've kinda, it's from a sound design, so, and using orchestral instruments, so it's kind of got what we think of as like an infinite sustain, so we don't see the release so much here, but. (flute music) You know, that attack, you know, no matter how much you zoom on, in on it, does not have that really, you know, sharp transient quality. It's, it's a slow attack that, you know, that, and that's one of those things that really defines that instrument as a flute, whereas, you know, a flute might share a lot of the same qualities as another instrument, but, but I know it as flute because I can tell from the attack that it has, you know, from what happens when somebody's lips are resting on a mouthpiece and blowing and forcing air into that. It's so different from, you know, someone exciting a string with a bow or, you know, or with their fingers. So just looking at the qualities that you can see in the sound, transients, you've got this, kind of, fast attack stuff, you've got your, your frequency character, so you'll, you'll see that in another environment that I'm gonna look at in a, in a moment here. Broadband noise, that's the stuff like we're hearing, you know, very quietly in this, in this nice room. But, you know, air handling, that kinda stuff does, does become part of the process. This is something you can identify, you know, to, to varying degrees when you're looking at it in the environment, hiss, self noise of any equipment that you've got going on. And then you can also see the dynamic range of your audio relative to other tracks. So, you know, this one here doesn't have, it has a pretty narrow range of, you know, what's the loudest, what's the softest it gets, right. So any, and if I want more out of it, I have to kind of bring that out, and to kind of supply it with more, what we call, gain, you know, boosting the level, making it a healthier signal. This one with Al is really looking like, you know, a pretty healthy, healthily-recorded piece of audio with, you know, an occasional excursion where it got a little loud, but not too loud for my system. In digital, it, there, there's kind of a thou shall not pass point with digital audio. And if you've ever heard digital audio distortion, you kinda know what it's, it just sounds nasty. It's because you're taking this nice, you know, shapely wave form, and you're literally cutting it off. You're turning it into, sort of, a square wave, so it's, it, you know, it, you wanna make sure that that is not happening at any stage in your process but particularly when you, when you're out recording. Okay, let's move to couple other quick looks. Before we get to, to plugins, what I wanna do is, kind of, work through another third-party piece of software which works as a plugin. Plugin just means that any workstation can use that tool, so they're kinda compliant with a bunch of different software platforms. So, you know, it's really nice that somebody who uses Pro Tools like me can have access to the same kinds of effects tools as somebody who's using Logic, or somebody who's using Ableton Live, or Garageband, you know, so on and so forth. So plugins are something that you'll find are consistent, but it also, if you're getting into that world, you wanna make sure that the collaborators that you're working with either are using those or have a way to access your work without them. Pro Tools has kinda started to, to make things pretty nice with the ability to freeze tracks, and kind of bake in those choices that you make, and to then, you know, later on, to be able to release from them. So that can be a nice route to go to. But whatever the case, you know, if you're working with some really, kind of, boutique-y studio types, they might have their, their tools that they really love, and you're, you're working with those tools or you're, you're locked into, to working with those tools as a result. So the one that I have, and this is, this is one that I just think is so essential, is called iZotope RX. Pull up a piece of audio here. This is just kind of more about the practice of, you know, looking at your audio and, and being able to identify certain things. This one is cut from, as you can see, a lot of different times within a particular recording. But I can send this whole package over to iZotope RX. What I love about this software is, you know, it just gives you so many things that you can, can do to correct. It gives you a lot of, kind of, under the hood exporting tools, loudness, and, kind of, diagnostics. So this audio that you're going to hear, I'm just gonna make sure that my playback is coming out of here, is a little bit noisy. How does that sit with you now? It-- Okay. You all hear a pretty healthy degree of noise. That's all this in the background, is broadband noise. It's just a part of that space, you know, and presumably, you know, out on the street, you know, maybe near some, you know, pretty heavy machinery or, or air conditioning vents. And, you know, that's baked into it. I tend to, with most of the time, seeing this kinda stuff, it's like, okay, this is, this is the place where we are, this is where we got this person. We may, you know, if it gets much worse than this, we may need to, like, with some narration, say, I talked to so-and-so outside this place, you know, and kind of prepare the listener, prime them for the fact that they might hear some audio that is a little difficult to hear. We can also identify a couple of other things. I mean, even though this is noisy, you see that the audio is really across the whole frequency spectrum. So if you, you know, from your high school physics, maybe you know that we can hear from about 20 Hertz, below here up to 20,000 Hertz. Maybe those of us who are, the age of most of us in the room are a little more down here (chuckles) after prolonged exposure to headphones and other things that damage our ears over time. But you do see that, that the mic has captured this signal pretty well, or, you know, whatever the recording medium we're using, is really preserving this info quality, it just happens to be in a, in a noisy place. And then, we can also identify a couple of other interesting things here. On in his job and continue on his life like nothing-- Okay. So if you were listening and watching at the same time, this is the car horn at these multiple different frequency. So frequency, time, so you're hearing the frequency that that horn is at, and then, you know, it's kind of like a multiple note sound, so we kind of hear some intense concentrations at those notes. And then we hear harmonics. Every, kinda, every sound in a, in a space has some kind of harmonics, unless, if you just see one of these lines like this, what you're probably hearing is like a, you know, a specific hum or tone at one note. This is, this is many. This would be something that it would be pretty damn hard for me to take out of the mix, you know. And if, if he said something important there, I want him to get that again. Okay. And then, here's another piece of audio, same session, same story. A lotta people don't believe these stories are true. But, but they are. And it's crazy 'cause we're talking about cops. Let's see if I can get that a little bit louder for ya. A lotta-- So what I'm gonna do is just boost this going into iZotope and set it again. A lotta people don't believe these stories are true. But, but they are. And it's crazy 'cause we're talking about cops. Now, on headphones, so, so if you're, if you're listening in the audience at home, you're probably hearing like a kinda little, like, warbly high frequency stuff going on or it sounds like a little, little bit reduced. And you're actually seeing that in the audio here, you're not seeing it kind of in full spectrum. It's also probably something to do with his closeness to the mic, versus, you know, what the other person, where the other person was positioned. Still some broadband noise, but kind of tailing off in the higher frequencies. And this kind of like, you know, Swiss cheese that's happening up here is almost certainly the result of some MP3 compression where, in trying to reduce the amount of data that this thing takes up, it's cheating on those frequencies. So, iZotope RX is a, kinda functions as a plugin. I'm gonna look at the world of plugins, and kinda some of the tools that you'll have available to you while you're doing this. Amazing and costly, you know, engineers and people in my business have, like, any number of money pits that they can get involved. And plugins can definitely be one of them. So the, one of the cool things is that most programs like Pro Tools will offer a lot of stock options that are great. I'm gonna show you some things from my template later on, but I've also created a template that is, you know, using almost exclusively stock plugins, and then, then iZotope stuff is in there as well. iZotope is a manufacturer, but iZotope RX is the plugin that I'm using for a lot of noise reduction, for a lot of things like controlling mouth stickiness, which, you know, it's a pretty unnatural thing to have somebody speaking right into a microphone and then to be pretending that you're that same distance from them and hearing everything that they had for breakfast. Also, if you're in that situation too, have them eat some apples or drink some apple juice. It can kinda help reduce some of that stuff. But, kinda, we've all got it, and the drier you get, the worse it gets. The more that stuff kinda really, really speaks out. And there are shows that I love, where, when I get 'em on headphones, I can't take it. It's like reverse ASMR, is that the term? Like, I (shudders). (Jim laughs) So, you know, iZotope RX has some mouth declick tool, it's awesome that I, you'll see it on my template on almost every track. And it just helps me sleep a little better at night. (Jim laughs) But, so, you'll see some stock plugins. But what the, what the plugins are really gonna give you, they're gonna fall into, mostly into these categories. Nicely, Pro Tools breaks them up into those categories for you. You're gonna see hundreds of plugins when I, when I pull mine up, but I'll kinda clue you into the ones that come with the program or why I use what I use. Dynamics, we'll get into the real science of that in the next class in the sound design and mixing class. But, we're talking about regulation of levels, right. Compression is a way to automatically do that or kinda set some parameters so that you keep your audio so that someone isn't needing to turn it up and down all the time. EQ, you're managing frequencies, or we talked about timbre, it's tone control. If you've ever adjusted the base or the treble on your stereo, you've done some EQ. You know, really light EQ, but that's what it is, boosting or cutting certain ranges to suit. Reverb and then convolution is a tool we'll get into later on, but, you know, kinda everybody knows that, what reverb is, it's happening, again, in this room. It's just my voice bouncing off of the walls in here and giving us some pretty good cues as to how big this space is, what material construction it has, and we're able to simulate those things with a reverb plugin. Delay, delay, delay, that's what that is. Stereo field, again, talking about how wide an image is. There are tools that can kind of create that for the listener out of mono sources through some kind of creative spreading of the frequency content over left and right. I use that sometimes. It's a nice little trick when somebody didn't go get a stereo recording, you know. Chances are they haven't with the tools that we're giving them. But most kind of handy recorders, you know, our reporters go out with Zoom H6s. And those do have a stereo microphone attachment that, you know, it's a great way to get some ambience and avoid having to do that stuff in post. Pitch shifting, I don't have to do a whole lot of that unless it's to protect a source. Sometimes I have to do that. But these days, we, I do much more than that. I really kinda get it and damage it. I do some pitch shifting but, if it's somebody where their life is on the line for having spoken to us, you know, I need to do some things that are, perhaps, changes that you can't dial back quickly, you know, just by taking it into this environment. And then evaluation and metering, I should almost start with that as the very first one 'cause my meters are always on. I'm looking at them from the get-go. I'm sizing up my audio and looking at how it performs, because I have a deliverable at the end of the day that needs to be at a certain level, and that needs to be, you know, I need to kinda keep things within a certain range. So I'm using all of these tools to arrive at this finished product that really, you know, sits alongside my own work, sits alongside other work on public radio. I don't wanna hear from the stations about how it sounds later on. I want them to be trusting that I'm giving them something good from the get-go. Okay, so, let's take just a little demo look at the plugin environment, and kinda play around little bit here. So, I've got Al Letson's voice here. Every case is different. Okay. So I'm gonna kinda get back into signal flow a little bit. I talked about, kind of, every track going in a lane down to this finished, you know, main mix. In my world, I'm really looking at that stuff all the time. And I have this always-on element in my template called a master fader. That is overseeing the whole operation. Everything that's playing back in my session is going through that. So, if you don't have that, you don't really know what the cumulative impact of your addition of all these signals. Your voice signal might be, you know, perfectly healthy, like looking good. You add music to it and you've overflowed. So, that's, that's something that you kinda wanna always, you know, from the get-go, I work with a template, so in that template there is always a master fader. We've got... Then, within that, so that's the mix, right, that's the final mix, the mix that's going through that master fader where it says mixst, you know, stereo mix. Within that, I've got sub mixes. And this kinda takes, basically breaks up the work. I've got some mixes of my music and sound effects. I don't lean too much on sound effects in my show because we're doing journalism. So when I do, I certainly love to sink my teeth into those opportunities, you know, when it's like, okay, let's recreate this thing for somebody, or, you know, this is a storytelling or, or a simulation, or imagine what it's going to be like if this hurricane hits here, right. So, music and sound effects, I kind of think of them as, as working in that same realm. They're gonna be very spacious, they're gonna be, you know, supporting the primary stuff which is the talk here. So, I've got actualities, the, you know, clips of my tape from the field. I've got ambience living in that same space. And then I've got voice over, narration coming both from my host and then from different reporters that we have, you know, in the chair in the studio. So, if I do that, I open up some doors for myself later on. By having these sub mixes, I can listen to what it sounds like just with the voiceover, or, you know, just the talk stuff and cut out the music. I can export elements from my session. I've got a member's station that wants to do an adaptation of this piece, or they partnered with us on the piece. I can give them split elements, you know, because I have these different sub mixes working. I can export, you know, what we call stems, kind of breakdowns of, here's the voiceover, here's the actualities and ambience, here's the music, and, you know, if you need to make internal cuts to that, you have a little more flexibility to do so. But it's all as I mixed it and they're not damaging the choices that I made by getting, you know, too far into the edit. So it's a way for me to, kind of, afford people some options, but also have a little more control over the process. So we have those buses. And then we have, just in the, kind of, template world, we have this, you know, very, kind of, repeatable, you know, every, every track kind of has some expectations it'll have. So, with a track, I've got, you know, where, where it come, what comes into it, what goes out of it. I've also got what could, how could I affect it, you know, in line, what kinds of effects can I insert into this before it goes out. I've also got what kinds of effects can I send it to that goes somewhere else, right. And that's what I usually do for something like reverb, one reason for that. A very practical one is, you know, sometimes we make cuts that are very hard on the end of a statement. Like, that's what I think, but I, I really have this other thing to say. You know, if I need to end it at, that's what I think, there's a very good chance I'm going to cut that off before the, kind of, natural ambience of the room trails off, so I need to make some choices about, you know, how do I, kind of, disguise that edit and make it feel like they naturally ended the sentence there. One of the things that I can do is send it to some reverb, you know, that kind of mimics whatever space that they're in. So, you know, I have presets, living room preset, and, it just, you know, for that moment, at the very end of the, of the edit, I've got that option. And, you know, that's the kind of thing where I probably have that same process for, you know, four different voices in the piece. So the idea of having one, or, you know, one (chuckles), the idea of having one reverb plugin that is handling all of those instead of inserting one on each of these. It has, you know, for one, we kind of keep things in the same space, two, we really cut down on the number of resources that are being used in the program. You know, any effect that you're using takes some processing power. They've gotten smarter about, kind of, dynamically allocating things to when they're in use and not, and when they're not, but reverb is just kind of one of those really processing-intensive tools that we have so, you know, I don't wanna be stacking nine of those upper, I'm gonna get, you know, CPU errors up the wazoo. So, let's look at inserts and sends. So an insert... And I had a... If I had a whiteboard, I would, I would just draw this up for you, but. An insert is, you know, going to be literally inserted in the chain, right in the middle of it. So, I've got a bank of what are called five inserts. Signal flow matters, order matters. So whatever effect I put here is gonna feed into this one, into this one, into this. So this is a open, empty bank. You see some ones that are, you know, derived from my template, that already have some inserts set up. But let's just do something kinda crazy with Al's voice here, and. Every case. Okay, so I'm gonna insert a reverb plugin. Every case is different and complicated. But this nation's economy is built largely on black farm labor, in bond. Okay, so we've put him in a mysterious cave. Not a lot of practical value to this, but you, you can see that, that this sound is going fully through that effect, all right. And really the only bounce that I have or choice that I have of taking this actual sound and getting the original of it is in the effect itself. It's got what's called a wet-dry balance. Every case is different and complicated. Dry. But this nation's economy 0% percent of the effect. Is built largely on black farm labor, in bondage for hundreds of years. After the civil war, free. So you're hearing it, you know, really going fully through that effect and, and I'm limited in what I can do with it. I cannot send something else to that same reverb. I'd have to instantiate another one of them, right. So that's, that's what an insert is. If I, you know, do another one, you know, perhaps bring an EQ, this is, and we'll talk more about EQ in the next class, but this one is going to, you know, adjust the frequencies or adjust the timbre of, of what's coming through that reverb plugin already. Every case. (muffled speaking) So you still hear, kind of, trail out in space but very muffled 'cause we're taking out the high frequencies, the stuff that makes intelligible speech. It sounds more like he's in the next room or something like that. If I switch the order of these. (muffled speaking) The real difference here is with the reverb first, I am cutting out the high frequencies of the reverb. With the reverb second, I am cutting what's being fed into it, if that makes sense. So it's, you know, maybe here in these speakers, that effect isn't quite as pronounced as it will be for, for headphone listeners at home. But it, the primary point here is that the order does matter and can figure in heavily. All right. So then, let's look, instead, at a send. So, sends are like a tap off of that path, okay. So it doesn't disturb the original signal. I'm just gonna set one up. We do this through, what's called, buses. I seem to have deleted my buses. So I'm gonna, I'm gonna quickly bring that up just to, to give us some, kind of, real, basic paths to send on here. Just gonna make, what's called, a stereo bus. A bus is just an internal place to route something to and to take it from. So what happens is you are sending it somewhere, and you need something else to, kind of, match up with it to, to take that signal or to receive it. So I've just created this path called bus one and two. You'll see it show up here now. And I'm gonna make, what's called, an aux input. This is, instead of having audio on a track, this is just a path within Pro Tools that's going to be able to receive that input and send it to somewhere, okay. So, if we're looking at this bus, it's sending to bus one and two. This is a fader that's going to control how much of it's gonna be sent there. Right now, it's not going anywhere, I can. Every case is different and complicated. But this nation's economy I can bring it up and down, and it doesn't do a damn thing. Was built largely. Now, if I take this aux input and make what's going into that match, it's going on bus one and two, it's a little hard to see on this screen, but you will see. I'm gonna have to solo this too to hear it at the same time. Every case is different and complicated. But this nation's economy was built largely on black farm. So what it's doing right now, because there's no effect on this, is it's just increasing the level. So it's kinda duplicating it to some extent based on how much I'm sending over there. But if I do something like put a reverb plugin here. Every case is different and complicated. But this nation's economy was built largely on black farm labor, in bondage for hundreds of years. After the civil. So you can hear that I have separate control of those two things. Now, if I bring, say I have the reverb up, the way that this is set up right now. Every case. If I bring that down, the reverb disappears too, right. Those are, those are tied together. Everything is sourcing from this track. Kind of understanding the signal flow is just so important in being able to, kind of, unlock your potential in this realm. So, kinda the, the real thing to do is just explore it, you know, understand that, if you're sending signal somewhere, it needs to be received somewhere else. And then that you have the flexibility to, you know, route it to another place. So, say I want this to go to my music and sound effects bus. After the civil war, freed slaves were promised 40 acres and a mule so they could be self-sufficient as farmers, but that promise was broken. And what followed was a century of share-cropping and-- So just doing a little muting there and, and you're, you're seeing these two things go. So this effect, the reverb. Is different and complicated. But this nation's economy was built largely on black farm labor. And mute that music bus. So that is going there because I have music and sound effects bus as where that's being delivered, okay. So, again, these, kind of, sub mixes, subcategories that we're working with, okay. All right, so, this is kind of the last chain of thought on, on the kinds of problems that we have. But if your audio is not very good coming in, it's, what we're, what we're stuck with is a rescue job. If it's of good quality, we're going to, you know, really be able do the most with it, you know. So, again, every step of the chain matters. Garbage in, garbage out. You wanna avoid that. What we do want you to think about is just, you know, we have a few elements that are really important to us as engineers. I mean, I don't know who here is interested in, kind of, pursuing being a full-time engineer. But if you're a producer, you really wanna be conversant in the language that your engineer is speaking, and to give them things that aren't gonna leave them with a ton of questions, right. Maybe you're developing a workflow together that is, like, okay, you're gonna expect this kind of track every time, let's build that into a template. You're gonna expect that we're gonna be using music in this way. Let's have a few different music tracks so we can overlap them, or, you know, build in certain ways. So a clearly-organized edit session is really important. I shouldn't have to be looking all over the place for stuff. The rookie folks, that's the, that's the number one thing that I'm having some trouble with is like, how do I get them to make sure to deliver it so that it's not like this, which is just absolutely meaningless to me. I must have 50 billion files called Audio 01 in my lifetime. I don't know that it's yours. So, you know, we developed a system at Reveal that's probably overly-complicated, but we have a lot of assets coming in from a lotta different places. So we give everything a project code, we have the person that's being interviewed. They might be being interviewed twice. They might be interviewed on another date. We have that information. We sometimes put, you know, who's engineered it so we can go back to them. We really want, you know, clearly-labeled tape. In Pro Tools, it's pretty easy to just double-click on a clip and rename it if it came in as audio one. You know, give it something more specific. If you're cutting things down, a lot of, a lotta producers will leave, kind of, little notes, you know, as, like, the title of a clip, you know, riverboat exchange or something like that. I don't wanna be in the process too much if the script is not locked. There are times where, you know, okay, we're trying things, we're gonna see how this sounds, and we know that we're gonna have to rerecord some of it. But if, you know, if the editors are using my time as kind of playground time too much, then, again, it just puts a real crunch on the end of the process. Time code, excerpts, or time codes of tape excerpts are a real plus. There are services like Trint out there that, you know, it's a transcription service that you upload your audio to. And you can pull clips from it, and when you pull that, it's got metadata that tells you the time code. So, you know, if something happens and things get lost in the shuffle, the engineer knows where to get, you know, where in the tape to get what you're talking about. If that stuff is not specific, or if it's wrong, you know, you send the person down rabbit holes that, you know, again, it's, that's work that you hope, like, a good production assistant can do for you, you know, if you need them as opposed to putting the onus on the engineer. Then you really wanna have a hierarchy of people who need to hear, and evaluate, and approve changes to the mix. If you're a one-person show, like, that's obviously you, right. But if, you know, if you have an editor, you want them to be able to weigh in with enough time to make changes and approve them. So just evaluating the different workstations that are out there, and we'll move kinda quickly through this stuff, we've already talked a lot about it. We're in the non-linear environment. I can duplicate Al's voice over and over again. Non-destructive, we can make endless numbers of sessions and versions. And I really do a lot of version saving, you know, version one, version two, version, 'cause I can always trace back my steps. If I made a choice that we didn't like, I can go back and I know, you know, based on date searching what I'm working with, or, you know, I liked it better that way. The different workstations that you'll find, I use Pro Tools, I grew up using it. You know, you do accumulate knowledge and kind of a habit of mind with the kinda tool that you're working with. You can make great radio, great podcasts with any one of these pieces of software. I think if you're, if you're looking for something that does what Pro Tools does, and is a little more on the affordable side, and you're really the kinda person who likes to tweak things and make them, you know, kind of fit you like a glove, REAPER is really good for that, and also really caters more to the PC side than Pro Tools does. But, you know, with that program, you can, you could basically copy every shortcut out of Pro Tools and build it into, into REAPER, if you're that kind of person. I'm not, I like to just come and have it be working, and working the way that I'm accustomed to. Ableton Live is so cool for a lot of the, kind of, malleability of music that we're working with, and sound design, like really just pulling things apart in different ways and in a much more musical way. I like to work in that place separately for my sound design and composition. I just find, one, it's really good for me to separate my, kind of, editing, mixing brain from that part of my brain. I also, just try it. It's got really advanced, kind of, time-stretching, warping capabilities and the use of, you know, software instruments and synths is really built into that platform. You could probably make a good podcast on Garageband if you're starting out and you're just strapped, and it's where you need to start. I would say, you know, think, think longterm about moving on from that, but you could really do some great work. And Hindenburg is one where a lot of these processes that I've talked about here are kind of simplified and built in. They've got, you know, EQ or, like, something that treats your voice the same way every time that you record it in, like a profile assigned to your voice. So it's limited but also very powerful. Limited in the, kind of, usability, but powerful in what it can do. You really want a program that enforces good organizational practices. I love the way that Pro Tools allows me to leave markers and notes to myself to, kind of, customize the look of it, that I can get deep into the editing down to, like, the sample level. Sample, we're talking about 44.1 kiloHertz, you're talking about 44,100 samples per second. So you know, if you wanna really kind of get in and be really granular about it, you know, Pro Tools has that in spades. You want a high degree of control in the program via shortcuts to be able to do all the things that are repeat tasks really quickly. Pro Tools does that awesomely. And you want some compatibility with others. So ask yourself, what are those repeat tasks, probably a lot of this stuff, right. Zooming in and out, like I'm doing that about, you know, 90 times a minute. You know, selection, the selection of different tools that you're going to use in the program. Copy and pasting, nudging, this is like one of my favorite things. I spend a lot of time nudging the audio by very small increments just to get it to land in just the right place. And then Pro Tools has this mode called keyboard focus mode that's really cool. I can show you. We're gonna go to Pro Tools really quickly. But, you know, this, with this keyboard focus mode, it's engaged over here. That unlocks a lotta single stroke shortcuts, like I just hit R, and I zoom out. I hit T, and I zoom in. And I just got, kinda got my fingers parked on those all the time. There's B to make a little razor blade edit right here. So it's stuff like that that's just super helpful. And then nudging with the plus and minus keys to delay entry of a different piece of audio. And you can set those values too in Pro Tools, so we wanna kinda go more coarse, we can do that. One of the things that I really try to enforce is that we build repeatability with templates. It's, you know, if, if there are things that I know can be handled the same way every time, then I really just speed up the work because I know, I'm gonna, I'm gonna get this at a certain ballpark, and then I'm gonna let the template handle a lot of, of what's going on. So I like to step back from these options a little bit. I kind of get option anxiety, we all do in this realm. There are so many ways to do every one of these things. There are probably three shortcuts for a number of them, like, you know, zooming in, zooming out. I just use the one that works really well for me with the way I wanna, you know, my bodily comportment and the things that I, you know, I wanna do. I don't wanna be like this. I don't wanna be, you know, having to, to hit three keys at a time. So, you know, this, kind of, single keystroke method is great. You really wanna be, kind of, focused on what you're making and not getting lost in the weeds on plugins. I just, you know, I would look at this and say, okay, what are my top 10 things that I need to remember just to start? Like, I'm gonna just focus on, okay, I got the zooming in, I've got the tool selection, you know, the function keys that come with this keyboard are great for that to be able to kind of cycle through different tools and their purposes. You know, and while you're not on a project, you can kinda go in and unpack it and look at shortcuts periodically.