Lessons
Class Introduction
01:39 2Location Scouting
02:59 3What is Macro Photography
02:09 4What Makes a Good Macro Photo
03:44 5Gear
11:20 6Preparing for Outdoor Macro
02:00 7Camera Settings
06:48 8How to Get Started With Macro
11:59Lesson Info
How to Get the Shot
So, now I'm going to shoot some water droplets. It just rained here, lot of water on this plant, all sorts of different types of droplets. We have some water collected on the top of leaves, some that's dripping off of leaves. And the easiest way to shoot water droplets is just to use the natural light. You get light shining through the droplet, reflecting off the droplet. And now you can use your Live View. I turn Live View Boost off, so I get an actual indication of my exposure on the LCD or in my electronic viewfinder. And basically, whatever I see in the viewfinder is what I'm going to capture. So it's much simpler. It's just a matter of framing the shot with a composition that you like and clicking the shutter button when your subject's in focus the way you like it. This is the kind of opportunity where we wanna play with our depth of field a little bit. So, currently, I'm set up at 125th of a second. My ISO is at 400, and F/3.5, I might go down to 2.8. I really only want the edge ...
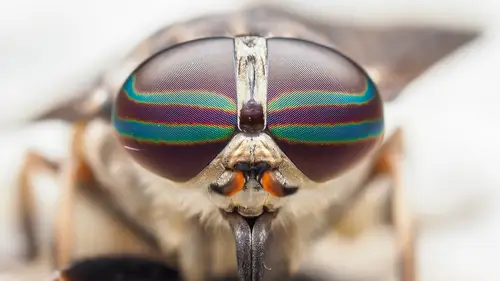
of my water droplet in focus and everything else to be nice and soft. As I approach the water droplet, unlike an insect, this water droplet's not gonna go anywhere, so I really have the luxury of framing the shot how I want, getting it just right, and as I do that, there's a small droplet right at the end of the leaf with a larger droplet behind it, and I kind of like how you see that larger droplet out of focus. So I am going to use Focus Assist to magnify that smaller droplet up to 5x. That way, I can see right when it's in focus, and I can take my shot just of that tiny, tiny little droplet. (camera shutter clicking) Don't be afraid to take several shots. It's nothing other than space on your memory card. These shots are free. If you think you've gotten focus, take another one. I can also switch over to low-speed bursts, like I did with insects, take a few shots, or we could set up either on a tripod, or if we had a way to brace ourself up against something, and I could shoot a stack to get everything soft, but get the entire bubble or water droplet in focus. (camera shutter clicking) When you're shooting water droplets, remember to play with your aperture. So, just like with any other type of photography, the wider the aperture, the less the depth of field. This lens, a 60-millimeter macro, has a widest aperture of F/2.8, that's going to have the shallowest depth of field, and my background and foreground will be soft. But try open, or, uh, closing the aperture down a little bit, opening it up a little bit. I just shot some at F/2.8 and I shot some at F/8, and you'll see that it gives a very different feel, where, at F/8, the entire droplet and some of the background are in focus. You see some different type of bokeh in the background. At F/2.8, just the edge of a droplet are completely in focus. We just spotted a frog right at the water's edge here in the river, and because frogs tend to be pretty skittish, and they're probably going to leave as soon as I get close, I switched over to the 40-150 Pro again. This is going to let me get close to my subject, but not right on top of it. I can be four or five feet away, zoom all the way in, and hopefully get a shot that more or less fills the frame. As I approach, being very slow and very cautious, when you're approaching and photographing a subject that you think may flee as you're photographing it, my recommendation is to get a shot before you get the shot. Don't go in thinking, "Oh, I wanna get this close-up shot "that fills the frame, of this portrait of a frog." Just get a shot, take a step closer, take another shot, and hopefully, you build enough trust in that transition where your subject stays put. If not, if it leaves, maybe you still got a shot that you're happy with that's a little bit further away than you originally planned. So I'm able to get shots here. They're not quite what I want, but like I said, I'm gonna slowly work closer, work toward a better angle, get myself in a better position, and hopefully this frog trusts me along the way. Since I'm getting closer and closer, I'm gonna close my aperture down just a little bit so the entire frog's face is in focus. So I'm gonna slow my shutter speed a bit, I'm at a 500th of a second now, and I'm at F/6.3. There's not much background to speak of, so I don't have to worry about that. (camera shutter clicking) So now we're gonna get even closer. Now approaching the minimum working distance of the lens, this is about as close as I'll be able to get. (camera shutter clicking) I'm gonna try to get a couple that are just a little bit lower angle, and to do that, I'll use my vari-angle LCD. Come around to the side. (rock grinding) Now that the frog is in profile a little bit more than straight on, I don't have to worry about my depth of field being as deep, because I'm really only focusing on one eye. From the front angle, you have the frog's nose all the way to the back of the eyes that you wanna account for. Here, as long as the eye that's near me is in focus, we should end up with a pretty nice shot. (camera shutter clicks) We found this tiny, tiny little orb weaver spider up in its web in between these trees. As you can see here next to my finger, how small it is. This is pretty much at the extent of my reach, but I have a pair of extension tubes on my 60 macro, they're giving me extra magnification. I'm able to reach the camera overhead and hold it as steady as possible while watching for focus in my LCD. Also, because I'm not sure how close I'm going to be able to get to the spider, because it is outside my reach, I'm using autofocus. I'm tapping, I'm setting my autofocus point to the center of my frame. I'm tapping autofocus, and when I see that spider in focus, I am clicking the shutter to take the shot. What's really neat about this scenario, because there's absolutely nothing behind the spider, it's just up into the sky, the flash will only illuminate the spider, which means everything else is going to look black. So this is going to look like a tiny spider, or, depending on how close we can get, maybe a large spider, suspended in a black frame. So, let's try to take a few shots and see how we do. I'm still trying to focus on the spider's face. Luckily, it is pointed downward and looking at me. (camera shutter clicks) So it's just isolated on black. 'Kay, we'll take a few more shots, see if I can get a little bit closer. It's a little difficult when the LCD's so far away from my eyes, I'm trusting that when it seems in autofocus, it is in auto, or it is focused. So we'll try that once again, and we'll see. (camera shutter clicking) So, what we were able to do is, by shooting up, and using the flash, we've completely isolated the spider on the black background. But, if I zoom all the way in, you'll actually see a tiny bit of the web, and you'll see some of the light from the sky leaking through in the corner to give some context. So, I'm really happy with this composition, and we'll see what it comes out with after I process it. Walking through the rocks here, we've just come across a crane fly that's resting between some rocks. It's a large fly, really cool-looking, prehistoric-looking insect that, hopefully, it's sitting still at the moment, I can sneak in here. I'm going to try and reposition. It's looking up the rock right now, so I'm gonna try and come down slowly, approach from above, straight on, I'll have my camera aligned, in focus, as soon as I see those eyes, I pull the trigger. I'm slowly working towards my other arm, which is bracing me. Hopefully I can get my wrist to come in contact with the back of my hand, to support my camera. There it is. I just need to come down a little bit more. (camera shutter clicking) I've got the shot. Try and get a little bit closer. I was at about a 1:2 magnification there, I'm gonna go to 1:1. (camera shutter clicking) Because this insect is cooperating, and I'm supported, I'm gonna hit my focus bracketing button, which is set to stack in-camera, and I'm gonna try and take a series of four images right as it moves. Let's see if stops so we can get another opportunity. So I'm just gonna let it do its thing right now, it's walking here along the rock. Looks like it's rested again. And I'm gonna focus on the closest point. (camera clicking) I'm gonna do the same thing, and gonna reduce my flash power a little bit, because with in-camera focus stacking, the shutter speed automatically defaults to a 50th of a second, so it's a little bit slower, longer shutter speed than I was shooting on the previous shots. (camera clicking) And I'm using my arm and this big rock to hold in position. I'm gonna adjust a little bit. I think he might stay. I'm just peeking under my camera. There it is. (camera clicking) On one of those series, I got a focus stacking error. And that will happen when you're moving too much. So, focus stacking in-camera is intended to be a completely stable camera. So, I was shaking a little bit, so I got an error. The good news is, all of the shots in the series are still saved to my memory card, so I didn't lose all of the shots, I only lose the opportunity to stack in-camera. So, I shot again, made sure I was braced a little bit better, and I was able to successfully stack in-camera and have a really cool result. Because I'm using a flash, it is difficult to handhold a stack. If we were in bright sunlight and had an opportunity to shoot with no flash, we can complete that series a little faster, and it makes it a little bit easier. With a flash, you do have to wait for the flash recycle time, and it takes a little bit longer. So, that was probably about a two-second series, and to stay steady for two seconds, as you probably know, is fairly difficult. When approaching live subjects in the wild, there's a few things that you can do to set yourself up for success. You want to make sure you approach slowly, you want to make sure that your camera is ready to go, and you want to make sure that you get shots before you worry about getting the perfect shot. So, start a little further back, test shot off to the side, pay attention to your lighting, and take a few shots that are maybe a little further back at less of a magnification before you get in super close. As you work your way closer to the subject, you'll get a little bit more comfortable with what you're doing, a little bit more confident with your composition, and your subject will become used to you, allowing you to get even closer. After you get at least one shot that you're happy with and is in focus the way that you wanted it to be, start working the angle, start working with the subject, rework your composition. Get in closer, move to different sides, adjust your focus points, maybe try some focus stacking. That's your opportunity to improve on what you've already gotten. It's important to not get discouraged. If you're working with a subject and it isn't ready to cooperate or isn't willing to cooperate, move along. Wait, sit down, let it get used to you, let it get comfortable, or find another subject. That's the beauty of being outdoors. We can move from one place to another, we can move from one plant to another, we can look for other subjects, and, sooner or later, you'll always find something that's willing to work with you. Traditionally, when working with insects, you wanna focus on the compound eye. Specifically, the front of the compound eye. When you get that in focus, that's what people are going to look at, and that's what's gonna make your shot even more exciting. After you get a shot with an in-focus front of the compound eye, adjust. Move to the side, maybe get a profile shot, or maybe even focus stack for greater depth of field.
Class Materials
Bonus Materials with Purchase
Free Bonus Materials
Ratings and Reviews
Andrew Lamberson
I found the class both very informative and very motivational to get started in Macro photography. It is an entry-level class but it explains what you really need to know to be successful. I especially found the information on the value of using flash and how to modify your flash for it to be more effective especially helpful. I am an experienced wildlife photographer and have done some "Macro" with my telephoto lens, but this class motivated me to purchase a dedicated lens. I am really looking forward to spring and finding some good bugs!
Gary Hook
Chris does a commendable job of explaining his techniques, reasons and potential pitfalls to avoid. Very thorough and much more enthusiastic about little bugs than I will ever be :-) but at the end one has a good concept on how to approach the task at hand. Nice closing with his practical examples of 'post' shoot production. One suggestion for inclusion would be some operating tips/techniques with a tripod/macro rail slider. His Olympus is way smaller/lighter than my Canon 5D so my hand holding will be at a minimum. Well done. Thank you
Chris Baudec
Great presentation and great motivation in the post processing. I do wish that the would have been made available. After all, this is a Olympus sponsored event, and Oly settings are always welcomed.... and a tad difficult on the learning curve.