Lessons
Lesson Info
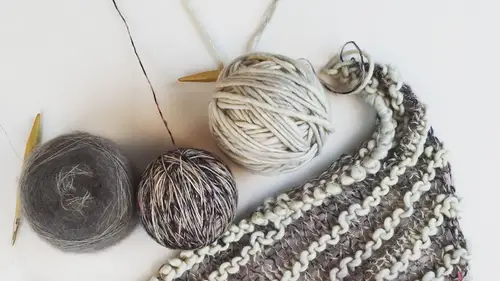
Kitchener Stitch
Alright, so my in-studio audience, I need you to get set up with two pieces, maybe two swatches. Do you have swatches that are already cast on on needles? I can't remember what I asked you for. We have both. Okay, so if you've got two, we're gonna be working on Kitchener stitch so you need an even amount of stitches on two separate needles. Of any form. So, that can be, let's just go ahead and say you can have, two, four, six, eight stitches on each and work a few rows if you don't have it already. If you have swatches that are already on your waste yarn, if you've got two equal sized swatches, then put those, place those on needles. I'm trying to remember what I had you do. On the double point needles? No, don't worry about that. Just on two parallel needles. We did some little ones. Are those for an I-cord? One is. But the two little ones that are the same size? I don't know, I think those are for the Kitchener. Yeah. Cool. Go ahead and put those on needles. You want ...
them on though, so pretend like these aren't double pointed needles. You want them so that one is right side and one is wrong side. So that will mean that one will have one more row worked than the other, you know what I'm saying? Because you're gonna have at both ends, you're gonna have a wrong side piece and a right side piece. And you're gonna have them with wrong sides facing, if that makes sense. So we're gonna do the little ones? Yeah, yeah. So go ahead and take a second to get set up for that. So we're gonna be working on Kitchener stitch next. This is a method of grafting two pieces together, so this would be a method that you could use if you had used the provisional cast on that we learned at the beginning of this course, depending on what stitch pattern that you are using. But this is a way of seaming together live stitches to live stitches. Why would you choose this rather than seaming? It's just cleaner looking. It creates a really nice, it looks like you've knitted the two seams together versus sewing them, so there just won't be that same seam at all. When is this called for? Socks, almost always at the toe. Sometimes they'll be a shoulder join if the designer doesn't want there to be any seam involved. Often if you are working with shawls, where you're knitting two separate pieces, you'll graft it together. You may not graft it together in this method of Kitchener stitch. You may graft it together in a lace version, but in general that way. In my book, we garter stitch, I have you doing garter stitch Kitchener, which is actually super fun and a little bit easier than what we're doing today, but I did that so that two pieces of a blanket would mirror each other. So there's a lot of different uses for it. So what you need to do is you need to make sure that you have a swatch of some form. You need to have one piece on the front, one piece on the back, wrong sides facing. So you just need to make sure that your needles, I have double pointed needles because this is a wee sock I was making, but it doesn't matter what kind of needles that you have at this point. You need your yarn or your tapestry needle, and you need a long tail, either that's already attached to your project like mine or you can join one, either way. If you're joining, you'll have to come through, kind of like we just did for the mattress stitch, come through like in the back and kind of do a little either weave in and then come out or do a little knot and then come out. Probably weave in, but it's up to you. Okay, and also I wanted to make sure that you know at home that in the bonus materials, I've created the instructions for this stitch and also there's a photo tutorial leftover from my book, Step It Up Knits, too that's there as an additional guide for you. You of course have this video, which will probably be more useful, but just as a little backup for you. Kitchener stitch is one of those things that you're gonna need forever, but it's really easy to forget how to do it, so I like to always keep a cheat sheet around still, this many years into it I still keep this cheat sheet. It's not hard to memorize, but there's only so many things that can go on in a head at one time. So don't worry if you're not getting it right away, it's totally normal and just remember you can refer back to this course at any point in time. Yes, Linda? Did you put one of these ends in the needle or are you using a separate piece? I used an end. I used an end. That's ideal, but because you're working with swatches, I wasn't sure what you had leftover. I thought that I had asked you to keep a long tail, but just either way you can make it work. Okay, I'm gonna give you 10, 15 more seconds to get set up here or at home. If you're at home, you could just use a couple of already made swatches, just unravel the last end, your bound off edge, place them on needles. It doesn't really matter right now what you're connecting to each other, just as long as you have an even amount of stitches on your front needle and your back needles. Are there any questions about anything so far from home? Melissa? No questions, but a lot of people responded to your ask on where people are from, if you want to hear. Oh, I would love to, yes, talk to me! I'm listening and looking at the same time, so... Okay, so we have an individual from Houston, Texas. Yay, I'm from Texas, so hello. Macedonia, Ohio. Awesome. Lincolnshire, England. And London, UK. That's awesome, yeah! This is why I love online education. I love... I'm gonna sidebar a little bit. I was having a conversation with a professional teacher in the knitting world the other day and we were talking about the benefits of online education versus the sort of guilt of taking away any business from local stores that also bring students in. And I fully believe that having a platform like this is the perfect way to open up people to going to their local stores as well. I would love if you would go to your local stores after and practice the things that we've learned here and give them business. But I would never be able to reach people at local stores that are in, you know, the UK. So there really is a place for all of us in this community and I love, I love that I can be standing here in Seattle and be talking to people over the pond, it's wonderful. Okay, so we've got our pieces. How are we doing? Are we set up here, ladies? Ish, sort of? Okay, so the first two steps that we're gonna do are just for anchoring our yarn so that you don't have a gaping hole at the corner of your work. For me, I'm working on a sock, so that means the corner of the sock. So what I want to do is I want to come up the back needle, through the stitch on the back needle knitwise. I'm gonna pull my thread or my yarn through, but I'm leaving that stitch on the needle. I'm just bringing it through. Then I want to do the exact same thing for the front needle, coming up through the stitch knitwise but leaving it on. That was just to set you up. We won't be doing that again for the rest of our Kitchener life of this particular swatch. Alright, so from now on, we're gonna start what our repeat is and it's a four step repeat. So the first thing that we're gonna do is we are going to come up through the front stitch again, the one that we just did. We're gonna come up through the front stitch of the front needle, knitwise, and we are going to let that stitch fall off. Then we're gonna go into the next stitch on the front needle purlwise. So what that means is we're taking our needle and we're coming in as if we were gonna purl the stitch, so we come in from this angle, but we do not let it drop off. We keep that on. Now we're gonna move to the stitches in the back. I caught one of my loops, so I want to make sure that I've pulled it. Okay, now we're going to purl, or enter the stitch purlwise, through the first stitch of the back needle. And we're letting it drop off. Then we want to come up through the next stitch on the back needle knitwise but not letting it drop off. Knitwise. Knitwise. And those are the four steps that you're gonna keep repeating. So I'm gonna do it for you a few times because it's one of those things that it's just gonna have to click with practice, okay? So what did we just do? We just came up knitwise. Okay, so I'm on my step one. Come up through the first stitch on the front needle knitwise, letting that stitch drop off the needle, pulling our yarn. Step two. Go through the next stitch on the front needle purlwise, keeping it on the needle. Step three. Go through the first stitch on the back needle purlwise, letting it drop off the needle. Step four. Come up through the next stitch on the back needle knitwise, keeping it on the needle. I'm gonna pause here just to show you a couple of things that might help you get in the rhythm. You're never gonna let two stitches in a row drop off. Okay, so you'll remember that. The overall rhythm is knit, purl, purl, knit. You're not knitting or purling but you know what I'm saying. Like end with knitwise. So KPPK. If you can just chant that, KPPK, you'll do better on keeping track of it. Not that you weren't doing awesome already. When I say you, I mean me. Alright, so I'm coming in through... I'm starting over again, so I'm gonna come up through that first stitch, let it drop off. Knitting or purling? The knit one, yes. Then I'm gonna go through the next stitch on that front needle purlwise, not letting it drop off. Going to the back needle, entering the first stitch purlwise. Letting it drop off. Going through the next stitch on the back needle knitwise, not letting it drop off. Is anybody's mind blown? Is everybody getting this? (audience laughs) I hear the nervous laughs and I know something... This is one of those things that you're gonna have to go home and rewatch this video, you know, a few times and just get your brain into that cycle. And you're gonna just have to do it and do it and then you're gonna have an aha moment where it's gonna click. And then you'll later have to refer to it when you've forgotten. But you'll at least, it'll be like riding a bike. You'll say "Oh, right, right." But once you get into the method of knowing that you're never gonna drop two stitches one after the other, like you're always working one without dropping it in between, that'll start to click. If you always remember it's KPPK, or knit, purl, purl, knit, that's another sort of reminder that you can give to yourself. So just give that to you and practice. And don't get on yourself if you're not getting it right away. This is an intermediate skill. But it's worth it. It's a good skill to have, so just keep on working. So I want to spend a little more time on this before I move on, even though we have a ton to cover. I just want to really make sure that you have this skill. So let's go ahead and work a few more stitches. And at home, if you have any questions, I'm happy to answer them. Otherwise, please just continue working with us. Okay, so I'm coming up in the first stitch, letting it drop off, and that was knitwise. Through the first stitch on the front needle now purlwise. Not letting it drop off. Backstitch, coming through purlwise, letting it drop off. Next stitch on the back needle knitwise. Not letting it drop off. Front needle, first stitch knitwise, letting it drop off. Next stitch on the front needle, not letting it drop off. First stitch on the back needle, letting it drop off. Purlwise. Next stitch on the back needle. I just took my needle off. Knitwise, not letting it drop off. I might as well finish my last stitches so you can see what it looks like when it's done, since I only have three more to do, but you guys just keep on keeping on. Can't do this when watching TV. (laughs) You know what, no. I mean, no. At least nothing that has a really solid plot line probably. Our in-studio, one of our in-studio students said that you can't do this while watching TV. I wouldn't recommend it at first, at least. You might work up to that or you know. Just don't watch anything that's plot driven. Oops, let that drop off. Although I do love a good binge watching while knitting, not gonna kid you. Alright, we're getting close, we're getting close. You know, Vicky, you would be good as the star of a mystery series based around knitting. There's been books written like that. Mystery. I thought you said misery. I was like "What do you mean? "What do you mean?" Whoops, I accidentally-- Question that came through that I thought was interesting. Yeah. Do you have tips on how to avoid the little ears that sometimes end up on the edges? Yes. Well, I mean... It's not a huge tip, but I'll show you. I'll show you what I got. Well, let's see, that was knit, so that one... I'll show you and you'll see that I'll have a little ear first here. So I'm on my last two stitches and I'm also, this is... Purling to keep that stitch on. Then I purl the back one, I'm gonna let that last, whoa! That last stitch slide off and then I'm gonna come up through that last stitch knitwise and I'm done. This is that little ear I believe that they're dealing with. The only thing that you can really do is take your tail and feed it through. That didn't go well. Okay, and feed it through. And as you pull on it, it pretty much goes away. I mean, it's almost all the way gone away, I split my strand so it shows a little but. If it was really bothering you, you could also come up and embroider a duplicate stitch over it. A duplicate stitch. On the fly bonus skill. A duplicate stitch is when you come up. Trying to find where the actual ear would be. Let's say it's right here. This may not go well, so send me good thoughts. (laughs) Alright, so you're gonna come up at the base of the stitch and you're gonna duplicate or replicate the stitch. So you'd go around the two loops and then come back down in the tip of the stitch. And all that would do, and I feel like this is not the best thing, that you're not gonna be able to really see. What I'm doing is I'm creating another stitch on top of the stitch so that it hides some of what might be considered an ear. Play with it. I wouldn't do it if I was using really thick yarn because then you're gonna randomly have this thicker spot. But this is this great sock weight yarn. I think this is Heritage 150 is the name of the yarn. So it's no big deal here. And it wouldn't be with a lace weight. But play with it, experiment. If you have any tips to answer that question, please post them, that I'm not thinking of. We always love to hear from the community. Alright, go ahead and wrap that up and we are gonna move on to our next skill.
Class Materials
Bonus Materials with Purchase
Ratings and Reviews
Toni Imwold
Thanks Vicki for teaching a great class. I consider myself to be an advanced knitter but I still learned some great tips and ideas from you. The cowl patterns look great and I plan to knit one soon.
Chris Lopez
This was an amazing class. I've been a knitter for 40+ years but still picked up some new skills and refined some existing ones. Vickie is a wonderful teacher and her enthusiasm for her craft shines through in all she does. Please keep adding more classes with her.
Student Work
Related Classes
Knitting