Lessons
Class Introduction
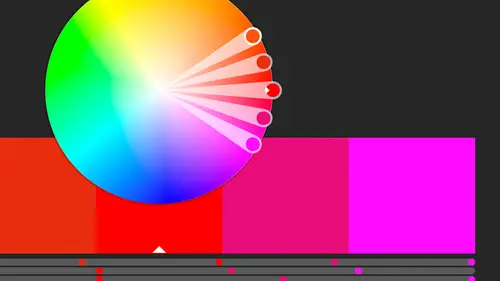
02:37 2Color Overview
11:38 3Color Panel
13:51 4Swatches Panel
12:22 5Creating a Tint
09:47 6Creating a Gradient
04:13 7Creating A Color Group
05:55 8Applying Swatches
17:15Lesson Info
Creating a Gradient
Creating a gradient, I can actually get some interesting looks, like for instance, I've got just this black and white one. Let's change this to a radial. I'm gonna also remove the stroke here. If I do that and then choose with the gradient slider, if I actually work from here outwards, I actually can get things like sort of a three dimensional look to it. Kinda changes where the lights hit. It's not actual 3D space, but it's just a neat way to kind of give you that sort of look with the gradient that's there. Gradients are a great way to add some shading, things like that. We're not gonna talk about that a lot, but I just wanna show you that they also live in the swatches panel, and how we can create and change each one individually once we've applied it to a specific object. Let's go into this guy over here. Let's look at the swatches that are here. I have a lot of swatches. Some of them are global swatches that I've created later on. We come in here, we've got berries and strawberrie...
s, and cherries, and mangoes, and then we've got several of these unnamed colors. We've got some patterns and we've got some woo, some gradients with some funky names. We've got some font issues going on there, that's for sure. Let's undo that. I realize I've got all these fonts that are-- I'm sorry, all these colors that are here, but maybe I haven't used all of them, and I wanna get rid of them, the ones that I'm not using. I'm gonna go up to the panel menu and choose Select All Unused. This is a great way to get rid of things that are not being used in your document. In this case, the colors might actually be there and be used, but because they weren't named and they weren't added to items specifically from the swatches, it might see them as unused. I'm gonna delete that, and the only, oops-- Sorry, I'm gonna hit the trash can. It's gonna say, "Do you wanna delete all those?" Yes I do. Nothing went away, it's just that those colors weren't named or anything. These are just mixes that have been created but not necessarily saved to the swatches panel. While this color obviously exists and isn't one of the named swatches, it just means that it was mixed with the color, so with the color panel here, and created whether in CMYK or RGB. It was created and it was never saved to the swatches. It doesn't actually have a swatch, a named swatch attached to it. Just some of them do. Some of the ones that I created here, actually have swatches assigned to it. If it's a color that you actually have assigned, like for instance let's grab these these red, the red fruits here, and I assigned this berry color to it, now of course when I select that item you can hopefully see, it's kinda hard so see on this screen, that that's outlined, and that means that that's the selected color. It is actually using a named swatch from there. Otherwise it was just created in the color mixer and never saved as a specific color, which is fine if you don't need to duplicate it and use it anywhere else in your document. If you know you are gonna use that again, like maybe you really like this orange color color and you wanna use that somewhere else, if it's not a named color, then you can't apply it easily to anything else unless you use the eyedropper tool, but that means you have to pick it up and place all the places you want it. Then, when you decide the orange needs to get slightly darker, you're gonna have to do all of that again. If I take this item and I go into the color panel and then I go ahead and-- Let's actually look at the RGB sliders for that. I can go ahead and create a new swatch from that. Looks good, it's global. We might give it a name if we want, but whatever reason, we now have that color sitting in our swatches panel. I can use that elsewhere, instead of having to actually pick up the color from there, which is great, especially when you're looking at all these reds and you think, "I like that red. "Was it this red or was it this red? "I can't really tell which one it is." By putting it into the swatches panel and saving it, not only do you get to make it global, which is nice, but also it's there when you want to reuse it for something else.
Class Materials
Bonus Materials with Purchase
Ratings and Reviews
Anka
A lot of useful information about work with colors. Solid colors, Gradients, Global Swatches, Color Groups, Object Mosaic for grabbing colors from images, Color Books, Libraries...and so much more! This is a class for those who want to know everything about color management and use of colors in Adobe Illustrator (some information is helpful even for Photoshop and InDesign users). Erica is a great teacher! She has a good articulation. It's important for those like me whose native language is not english. She speaks evenly (neither slowly nor quickly) and to the point. I definitely recommend this class!
Gemma Kelly
Erica is a really clear instructor. I found the class really useful and the pace was great. This will make my workflow much quicker and I cannot wait to put what I have learnt into practice.