Color Adaptation, Content Aware and Median Blur
Lesson 9 from: From Shoot Through Photo Editing: Wedding Portrait Retouch in Lightroom and PhotoshopPye Jirsa
Color Adaptation, Content Aware and Median Blur
Lesson 9 from: From Shoot Through Photo Editing: Wedding Portrait Retouch in Lightroom and PhotoshopPye Jirsa
Lesson Info
9. Color Adaptation, Content Aware and Median Blur
Lessons
Class Introduction
02:07 210 Tips and Techniques for Shooting Wedding Portraits
22:14 3Shoot: Groom Portraits
21:28 4Shoot: Bride Portraits
25:07 5Shoot: Wedding Couple
10:58 6Post Processing Workflow Tips
11:51 7General LR Base Tone Recipes and Batch Processing
27:42 8Cloning and Simple Compositing in Photoshop
13:17Lesson Info
Color Adaptation, Content Aware and Median Blur
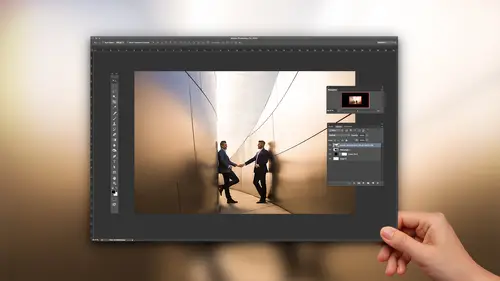
Color adaptation and content aware. This is gonna be fun. So, let me show you all somethin'. This is a, it's a beautiful feature built in recently into Photoshop that not a lot of us know about and use, and it's very, very powerful. So, I'm gonna open up this image, and what I'll do is I'll go ahead and select a new layer. And, see these, like these things, I wanna do certain things with this image. I wanna remove like the fingerprints on the walls, and obviously, I don't have a towel with me, I can't go and like wipe down the Disney Concert Hall when I'm shooting. Right? So, I shoot the image, and we'll just have to fix it in post, but there are quick ways of doing this. Now, this guy, look, if you'll notice on this side, I actually blocked him out. You see it? So, I used his body to block out the other one, so I'm tryin' to save myself work in Photoshop by doing a little bit of posing in, and composing in camera to reduce that. But, this guy, there's nothin' I can do about him. Now, ...
you might think, "Okay, well I can go, and I can clone this out," right? So, let me select my clone brush by pressing J, and I'm gonna go and just like try and knock this out like this. And it does an okay job, it's not terrible. We have to kinda smooth that over, fix it. Maybe you wanna do like a patch tool. So, the patch tool's really cool too, because we can use, the patch tool's another healing tool, so if you use the patch tool, you can select this area, and then, we need to be on a, sorry, we need to be on an actual layer that has information. You can't be on a blank layer when you use the patch tool, but you can drag this and try and get it to flip right, and that's not bad either, but we still have edges, right? So, watch this. If I just select my selection tool, I'm just gonna do this. I'm gonna merge, let's just delete this, and let's just jump this to a new layer by pressing Control + J, or Command + J. That just jumps your background, whatever layer you're on, it'll jump it to a new layer, so we get a copy. In case anything goes wrong, we have our copy, right? I'm just gonna press the, we're gonna just use a lasso tool real quick, and we're just gonna select this out. Oops. Let me press Control + D, or Command + D, to deselect that, select it again. Doesn't have to be super precise. Go up to the edit menu. Go to fill, and then, check this out, we're gonna do content aware, but there's a little trick here. If you press content aware just like this, it does kinda the same thing that the cloning thing did, doesn't quite get it right, right? So, press Shift + F5 to get there again. See this little button? Turn that guy on. Color adaptation tells Lightroom, "I want you to," or, sorry, tells Photoshop, "I want you to match the color tonality in this area, "in addition to doing texture, and everything else." When you turn that on, is that not beautiful? Like it does a almost flawless job of fixing it, and now it's so much easier, so when you see, when you see an area like this, that has a color that's graduating, and you wanna remove something from that area, that color adaptation fill on your content aware is gonna really-- So, for skies, for anything like that, where you have that graduating tone, it's gonna be fantastic. And, if you wanna do any other fix to it, you can. What, often times, works well is doing that, and then you can simply use your spot healing. If you see anything in that area, just kind of run over it a couple times, and it'll kinda blend those areas together a little bit. Cool? K, so we knocked that guy out. Now, look at this guy over here. So, we could sit here. Actually, I wanna show you a different way of doing this. So, we have junk over here on the right side. Let's see what we have next, first, on the slides. We got that guy. Let's go next. Op, (laughing) I'm so slow. Okay. So, color adaptation content aware. This is simple, Lightroom to Photoshop, remember Control + E to get there. Jump your background layer, make your selection. Edit, fill, Shift + 5, content aware, turn on color adaptation. Now, the median blur clean up, this is the next piece. So, I wanna actually fix the background. Let's go back to Photoshop. You'll notice that in this image, we have like this hand print and stuff, and I could create a new layer, so I can go like this, and let's go add a new layer. I can sit here and I can do this all day, right? But, that's gonna take a lot of time to do that, so what I would recommend, maybe do that for a couple of these large pieces, okay? If there's a couple large pieces, knock those out real quick. But, I'm gonna show you guys this really cool trick. You guys might've seen this before. These techniques are nothing new. I just wanna show you how we incorporate them into our workflow as a wedding photographer, because we have to be very selective with what we do to make sure everything is time sensitive, right? So, what are we gonna do? Well, let's actually bring up our tips so you guys can follow along with this. Oh, actually, you know what? Let's go to the slides real quick, and so here is the slide for this. So, yeah, let's just, we'll actually show them over this guy. So, what we're gonna do is this. Let's go back to Photoshop real quick. Press Alt + Control + Shift + E, or Option + Command + Shift + E, once you did that big retouch, so we removed that little guy on that side. We removed the light. We did those kinda things. Now, what we're gonna do is go to the filter menu now. We're gonna go down to noise, and you're gonna go to median. What this is gonna do is blur the entire image, and what we wanna do is set this to a pixel radius where we knock out the detail, okay? So, let's go up to like 50. We knock out all the detail. 50 is a good number. 30 to 50 is a pretty decent number in this area. Hit okay. So, what happened is we just kind of killed all the texture to those areas while retaining the color, right? So, once that's done, press Option, and the click again on your mask. Now, use a soft brush, k? Reduce the flow. This is where your tablet is really gonna be handy, okay? I'm gonna go down to like maybe five percent flow, so it's a little bit quick. Usually we work between one and five percent. You wanna get, you wanna do something, and prep it for enlargement, go down to one percent, and then zoom in, make sure it's refined. If you wanna just get something done quick, five percent's a good number, k? So, we're gonna go five percent. All we're gonna do is if you look at the brush settings, it's just a standard brush zero hardness, k? And then, watch everything just disappear. I'm just pressing bracket to kind of shrink it down as we go. K, I'm gonna increase the flow just to get a little bit more speed out of this. K, we'll go to this side. Gonna do it a little bit over this area right there where he was standing. Do it over here. Smooth this piece out. So, now look at the before and after. So, this works fantastic if you're shooting a studio, your backdrop gets dirty. If you're shooting like against a graduated area like this, you have fingerprints and dirt on the wall, anything that you wanna knock out real quick while retaining detail, a median noise layer, just knock it out. Cool? Steve's like, "Boom." I know you're a landscape guy, brother. That was for you. This is all for you, baby. (laughing)
Class Materials
Bonus Materials with Purchase
Ratings and Reviews
Pamela Richardson
I would absolutely recommend this class. I watched this class by chance on the rebroadcast, since I am not a wedding photographer. However, I learned so much that I was amazed. I do take many many photographs of friends, family, and at events, although my professional speciality is landscape. I will be able to improve my photographs of people substantially thanks to Pye's course, because I learned so much about how to pose subjects, how to work with a variety of backgrounds, lighting, and then the photo editing. I can apply the photo editing to all of my photographs, not just portraits. I really liked Pye's comprehensive explanations of each step that he was demonstrating, for both the portrait session and the photo editing. I really appreciated Pye's clear demonstrations of how images of people can be improved, and am eager to apply his examples to my own work. I appreciated Pye's absolutely outstanding presentation skills, as he had slide show already prepared, with the list of tips and associated mini tips for every step of the process. I learned so much about equipment (such as lighting and flashes), additional software, printing and publishing services, and more. Pye's presentation pace allowed me to make notes and absorb what he was saying. My friends and family will also appreciate my increased skills at retouching photos of them!!!
user-a2f1eb
loved this class! lots of good info and it was great to see a small version of his normal shooting process. He presents it in a very fun and entertaining way making it not just educational but also enjoyable to watch!
Sean
A+ Fantastic course. Quick work flow is a real weakness of mine. Pye did a terrific job. I must admit, sometimes I fail to appreciate the top caliber of talent CreativeLive gets. There are a log of great Instagram photographers that don't make money. CreativeLive gets top tiered working photographers, which is key. I know I'll need to re-watch so I can implement what Pye taught.