Photographing the Child in Segments
Lesson 9 from: Using Composite Photography to Create a Fantasy WorldKaren Alsop
Photographing the Child in Segments
Lesson 9 from: Using Composite Photography to Create a Fantasy WorldKaren Alsop
Lessons
Class Introduction
03:01 2Adding Fine Art Compositing to Your Business
24:28 3Background Plate Workflow
22:54 4Setting Up Studio for Shoot
09:04 5Photograph the Rabbit
05:09 6Mock Up of Rabbit in Photoshop™
08:56 7Photograph The Rabbit Costume
34:34 8Setting up the Studio to Shoot with a Green Screen
03:41Photographing the Child in Segments
27:22 10Photographing Hair in Motion
29:46 11Getting a Great Costume Shot
11:21 12Use Lightroom to Choose the Best Images
13:07 13Make Selections in Photoshop™
15:08 14How to Use Photoshop™ Brushes to Mask Out Images
22:36 15Crop Out & Add Costume to Rabbit
27:41 16Warp Techniques to Fit Costume to Rabbit
20:31 17Shading & Shadows on & Under Rabbit
31:50 18Change color of Rabbit Costume
12:00 19Remove Green Screen from Child Image
08:22 20Background Plate Workflow
21:40 21How to Create a Brush
11:25 22Add Layers to Create Full Looking Hair
27:49 23Add Shadows to Image
05:57 24Workflow: Group Rabbit & Child Images
10:47 25Match the Scene with Color
05:31 26Spill Light: Painting with Light to Blend
09:46 27Levels Adjustment Layers: Shading & Rim Lighting
04:59 28Finalize Image Workflow in Lightroom™
08:36 29Export Image in Different Formats
15:44 30Marketing Composite Photography to Clients
17:13 31Presenting Image to Client
23:06Lesson Info
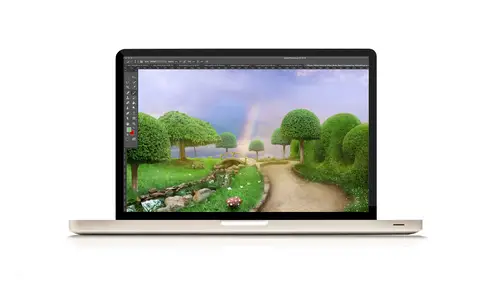
Photographing the Child in Segments
I think we'll introduce our model up here. She's so cute. (laughs) So, our model's name is Evie isn't it? And Evie is the most beautiful Alice you have ever seen. Come on up Evie. Look at this beautiful long hair and she's got the beautiful Alice dress on. So Evie, I need your help. I need your help so I think you've been in lots of photos before so you'll know how to pose for me. I want you to stand on this black square here. That's the way and I need to take some photos and just check that my lighting is correct. So you can stand there, you can relax. You don't have to do anything yet. You can just smile beautifully for me. So I'll turn on Lightroom. Ready and for this I will talk more about perspective in a second but I am getting down on her level and I'll take a shot. Okay, so my settings are at what they were on before and if we look up on the screen here it's too bright. Now one reason for this is because we were shooting on black before. We're now shooting with white and green.
The white is throwing some light up. It's reflecting light up. Our subject is wearing white as well. So there's all this light being reflected that wasn't there before. So I can change my aperture so that my whole, the exposure is darker for the whole scene. So at the moment I'm on 1/25 of a second and I'm on 8.0 which is what I was on before for the rabbit and my ISO's 160. I can change the aperture to be narrower. I'll turn it up to f/10. Take another shot. I'll explain the shutter speed in a moment too. Okay so the next shot's getting a bit closer to what I want. Looking at Alice, she's relatively well exposed. The green behind is bright enough that I can extract it out. It may even be a bit too bright. It's, we still need to see the green tone in it to be able to extract it out. So we probably need to make some adjustments on our lights but you're cool standing there for a bit. Yeah? Alright, so these lights that are pointing at the green screen we will turn down one stop. So I'll just get Danielle to do that. I'm not going to talk about specific settings because I think everyone has different strobes. I don't have these ones back in my studio but I'll talk in general terms. Turning down the strobes means obviously it's not gonna be as bright. The other thing that you need to consider is when you're shooting outside and you have a shutter speed and you wanna capture motion, you obviously need to shoot on a shutter speed that's fast enough to capture that motion and when Alice is, we're getting the fan coming through her hair and it's blowing. 1/25 of a second generally wouldn't be quite fast enough for what we're after but this is, the strobes are actually freezing the motion. I wanna take a photo without the strobe on. So I'm gonna turn it off. I'll take one photo in exactly the same place with the same settings. Can you see that photo? It's black. Okay, so with the strobes off it's black. The strobes are what's lighting our scene and the lower the strobes are, the faster it's capturing motion. It's like you don't worry about the shutter speed. The shutter speed actually doesn't come into it with freezing the motion. The strobes, how fast they come on and off that is what's freezing it. So when you turn them down, they're faster and when you turn them up to full power they're slower so if you use your, if you're finding that the strobes aren't freezing the motion what you need to do is turn them down. You need to adjust your camera to suit. So you might need to make your aperture wider to let more light in. But you turn the strobes down and you get a faster shutter speed as such. It's not really. So when we're photographing our Alice. When we're photographing Evie, we need to make sure that those strobes are freezing the motion. I won't really know that until we're actually in the middle of doing it. So I'll turn that strobe back on. Do another test shot. Okay, that's looking much better. It's loading up. So that green is now sort of a light to mid-tone green which will be easy to remove. We're on white underneath. Now another reason that I use white on the ground. I actually had them change it 'cause we've got green underneath and what happens is if the green is too close to your subject it bounces back. So that green light bounces back, it makes it really hard to get rid of the green. If the green is far enough away and it's lit and your subject is lit then it's much easier to take that green away. But if you have green running right underneath the subject, that's when the problems arise. So if you're using green, remember if you put a neutral color underneath you're much better off. Often you might wanna use a tone or a color that is close to your background plate. In this scene the ground that I'm putting Evie on is sort of a light tan. So the white will work, it's neutral and it's also easy to cut around her feet because she's wearing black shoes. If I was using black down there it's much harder to cut the feet out. So that's why we're going with white. I could use a gray as well. If there was a gray that would work just the same. So I do manually cutting out around the edge and the green, we extract with the green screen setup that I'll show you later. The other thing I need to adjust is the strip lights here. We need to bring them up a bit. They're too low at the moment. We want them sort of pointing down at our Alice. So I would say about a foot up. Yeah, something like that. And, we'll do another test shot after this and see whether that's lighting her well. See she's got really soft rim light around her hair. It's highlighting the hair, it's beautiful and soft. Okay, so I'll do another test shot. (camera clicks) Okay, all looking quite good. I know that around the edge of the dress here, on the bottom, that's going to need some manual cutting out work because that white is sort of blending into the white on the floor. But it's a small amount of work compared to if you had to cut everything out manually. So I don't worry about little things like that. The lighting on her hair is good. The lighting on her feet. The lighting on her legs. So, overall I'm pretty happy now with how it's exposed and how it's looking but I wanna check it in the scene as well. So before we go to the extent of getting Alice into character and getting her to pretend to run, I'll take one more shot to make sure that my perspective is right. I wanna go back to Photoshop. Having a look at this scene and what I'm going to do here is just hide the white rabbit I will group all of those test shots together by hitting shift and clicking on the group symbol down below so that I can turn that off. And then I can bring Alice in. So I'm wanting to place her, now you're gonna see how bad my drawing is. I'm wanting to place her up here. There's this nice stick figure for you. So her head, Alice's head will be where the horizon is across here. So when I'm photographing her, I get down on her level and my camera is pointing at her head. Evie's feet will be, I'd be looking down at her feet. So the angle should be correct. So looking at where your horizon is, then you match that up with your character. So I'm gonna take that shot again and you'll just stand there for this one. With your feet, that's good how you've got them slightly apart so we can check that they sit nicely on the ground. One other thing is how wide the shot is. So at the moment I'm sorta zooming in. I feel like if I take it around here and that it should work. But we'll test it and we'll look at the feet and we'll look at how the feet actually sit on the ground. Okay. So, you just put your arms out beside you. That's the way. Beautiful. Alright, so now this shot here. You're gonna be put into Wonderland. This is the first time you're visiting Wonderland isn't it Evie? Is this exciting? So I'll crop down like this. I'm not going to do any changes to my file at the moment. This is just to test. Edit in, again open a smart object. Exactly like what we've been doing before. And the first thing I can do is get rid of the green. I'll do this quickly right now but I will go through this in depth when we do the editing. So if you don't pick up on it right now don't worry I'm going over this. So, select, color range. I'm choosing the green. I'm using the eyedropper tool to make sure all of the green is chosen. My fuzziness, I generally have it around but I'll go over the settings of this in the editing segment. Okay, I can check how it looks with different selection previews. So that's how it looks with a black matte which means there's still some green around the edge of the hair. There are a few steps to this whole green screen thing and I'll be going through that but ideally what we're wanting to achieve here is as little green as possible so I'll pull up the fuzziness without losing any of our character. 'Cause if I pull that fuzziness up too far then we lose parts of her there. So we need to bring it down, make sure that that, this area is solid white. But this is in sort of a nice soft, very subtle green. And we can get rid of that very quickly. Okay, that gives us a selection. I can very quickly add to that selection now. With this tool. Can see you get quick selection tool or magic wand tool, I'm using the quick selection tool and I use that quite a lot to do quick cut outs. It can give you a rough edge which is why I don't do it up here. You'll find that the edge on her around this area is much, there's some roughness to it that needs fixing. Whereas the area that I cutout with the green screen is much smoother, cleaner. Okay so, I'll just select all that out. Whoops, okay. So there's some areas that miss 'cause the white against white but that's okay. For now I'm not going to refine the edge but when we do it properly we're going to refine edge and go through a few more steps. So I'll just make a mask. And drop her into the scene. Sizing is sort of a guesstimate in this scene because it's a make believe scene and it's a fantasy, it's a fairytale. So we can really decide how big our Alice is and in fact in the story she grows and shrinks anyway. So that side of things is really up to you as the artist. Sometimes you need to be more specific with your sizing and make sure it's accurate and other times you have a bit of leeway. So I'd like to make her around this sort of size here. Now I've, now brought her head up above the horizon line. Higher than when I was actually drawing it. I had that head down lower. I think if I turn that on. I made her smaller but now looking at her in the scene I actually don't want her that small. I want her slightly bigger. So looking at this. I could get down lower. Okay, so putting Alice around here. She's going to be running and chasing the rabbit but putting around here means that I need to have that camera in line with Alice's stomach like that. Instead of head so I can get down lower and shoot from this angle. So looking at where I'm placing her in the scene that helps me to work out where I'm going to shoot her from with the camera. So we're nearly there, we're nearly ready to do it for real. You can pretend to run in this one. We can do a practice run and we'll check that our angles and everything are right. So the other thing I wanna do with the angle of this is have Alice running slightly sideways. So this direction, like she's coming around the path. So yeah, that's perfect. Excellent work. Alright, so I'll bring back Lightroom. Are you ready? You can run on the spot if you want. So I'm coming down lower. And I don't want you looking at me. You're looking at the white rabbit and in fact it's probably good to have someone in the position of where the rabbit would be. So Danielle, if you don't mind. The rabbit, so we've got a point. The rabbit, I'm actually gonna put here. So although Alice is running this direction I'm thinking the rabbit's kind of over to the side so you'd be looking over this way. So if you wanna just bob down there. That's it. Okay, excellent. That's good Evie. So, on the count of three I want you to run on the spot and look down here at the white rabbit. Are you ready? One, two, three. (footsteps pattering) (laughs) Now the other thing I wanna check is if that is freezing the motion. So that's the other thing we can check now with these shots. Well done. Bring those shots up. So I don't think I got down low enough because I was distracted with the running. So I'm gonna get down even lower. Sometimes you get so into your photography you forget a particular point. So it's important to go back. So I'm going to bob down even further. I think if I sit. You're right there, I can sit down here and take another shot. Ready, one, two, three. (footsteps pattering) And doing it, look running this direction but looking around this rabbit. So running this way. Running towards the fan. So you're pointing your body that way. That's the way and then looking that way. (camera clicks) Okay, we'll see how that looks. That's a good practice run. Alright, so I'll shrink this down again. Crop in nice and close just means there's a lot less to cut out rather than bringing in the whole scene. And get it in. Open as smart object. Now I'll close down some of these other images. Okay, so again if I go in now to select color range straight away it bangs out that green because it's remembered the settings from last time. So that's the benefit of doing a shoot like this and having it set up and if you have a studio set up where it's always the same you've got all your settings done and you can actually save it as an action if that's the case. So already it's chosen out most of the green. There's just a little bit up there that I can add to. I press okay. And I'll select the white area around here. Now the reason I don't use select color for the white area is that, there's whites in skin. There's whites in the clothes. There's whites in there, that it would take away all of the white in it. Whereas green is a completely different color. The reason we use green is because it's totally opposite to skin color. If you used red or pink or anything like that you'd be taking away skin color. So that's why we're using the green 'cause it's very easy to extract it out. But using this smart selection tool here. I won't bother about the other areas in between the feet for now 'cause we're just doing a test run. Hit the mask tool. Bringing it across. Over here. Press shift, shrink it down. Okay, we're getting there. One thing that you'll notice is that if I turn on the rabbit. Whoops, and I need to work out where she's going to be in regards to the rabbit as well as where the rabbit's going to be and I can move this around. Just deselect that. I can move it around. And change things but one thing that I'm seeing is that Evie's eyes are not on the rabbit. They're up higher. So we actually need to maybe find a spot down here and perhaps if we get an object that we can put on the ground then we can better get eye contact. Getting eye contact in your composites is really important because without that it sort of feels disjointed. So I'm very conscious of eye contact and sometimes it doesn't, you don't get it quite right in camera, you can move the head a touch. I've moved eyeballs sometimes in my shots just to make that eye contact happen because then it feels like it was all shot together. So this eye contact part's important. So where Evie's looking is important so that she's actually following the white rabbit. So I don't want the white rabbit in front of her or covering up too much of her legs but I do want it coming towards the camera still on the pathway. I also need to work out, do I want the white rabbit here? And do I want Evie over here? So it's a matter of, it's a matter of just moving things around and seeing where they fit best. I feel like that would be a strange way for her to run if she's on this side of the path so I do prefer Alice being over here. And the rabbit being sort of here. Off to the side. And Evie looking down at the white rabbit here. The rabbit may be smaller. And that's going to work too. So she does need to look down quite a bit to get that eye contact. So we'll see if that works. I even think here may be better. Okay, so we'll go back to Lightroom. And I get down here. Alright, so running on the spot and looking at the white rabbit. Ready, one, two, three. Bit of a smile on your face. Okay, awesome work. Awesome work. Now let's have a look at these and we'll zoom in at Evie's feet as well and make sure that they're frozen. So when I'm taking a lot of shots and I will take a lot of shots in a row for this because there's all these subtle movements of hands and feet and wanting to make sure that we can see all the different body parts. You don't want arms hidden behind bodies and you want to get the best of your subject. This is one shot that you're finishing with out of however many you take. So you're wanting the best. So sometimes I join shots together if I've got the upper half is better in one photo and the lower half is better in another photo. That's possible too. Ideally though you want to try and get all in one 'cause it's less work. So we've got a shot here where Evie's running really fast and you can see everything is frozen. So even though she was moving and I'm on 1/25 of a second that doesn't come into play because the strobes are actually freezing that motion. If something was moving really, really fast like water being thrown up you might need to turn the strobes down and give them less power so that they freeze that, in a you know freeze it more. So when I'm photographing water and dirt and things being thrown. Tend to turn the strobes down so that there's less power and they're actually firing off faster but for Evie's running it works quite well. Doing very well. So let's check the eye contact now. I won't extract for this one. I'll just drop it into the scene. Edit in, open as smart object in Photoshop. Drop that into the scene over here. Shrink you down. So already I can see that eye contact of looking at the rabbit is much better. She's directing her gaze onto the white rabbit. So that's what we're after. Chasing a white rabbit. So I'm happy with that. I'm happy with the angle. I'm shooting to the waist so that's where the horizon is. Again, so that's all good. Now kinda need to do the real thing. So we want some motion. We want some hair flowing in the wind and there's a few ways that we can do this. So we will try a few different ways and I'll show you. Were there any questions before I move on to that? I think just to reiterate again. We actually haven't done a lot of using greenscreens here in a lot of our classes on CreativeLive. So it's really cool to see you do that. Can you tell us again why you weren't using green the whole way through? Absolutely, so had we used all the way underneath then that light, that green would bounce back. In fact if we move Evie back against the green. Don't know if you can see that you would see more reflection on her clothing and particularly when the lights lighted up. If I take a shot like that I can probably show you. So the closer you are to the green. The more light spill you'll get. So you really want distance between your subject and the green. We'll have a look at that on here. I'll zoom up. Still not too bad. We've lit it pretty well. So it's hard to tell but if she was standing on that green definitely there would be green on the white stockings and yeah, makes it a whole lot harder. So that is why we run a neutral color underneath.
Class Materials
Bonus Materials
Bonus Materials with Purchase
Ratings and Reviews
Judy Mitschelen
I've found many great instructors at CreativeLive and Karen ranks right up there at the top! With her relaxed, thoughtful manner of presenting, I was immediately hooked. Her organization, clear explanations and demonstration, and on target response to questions are superb. This course covers an amazing range of skills and tricks of the trade. Whether you're interested in getting better shots to work with, better workflow at the computer, or better output at the end, Karen covers it all.
Kim
Karen is very talented and a great teacher and I enjoyed every minute of the course. But what I found to be the best part was seeing what an amazing person she is. The video of compositing the disabled children to make their dreams come true had me in tears. It has inspired me to use my talents to help others and not learn photo manipulation for self enjoyment. God bless you Karen.
Endigo Rae
This was such an amazing class! Karen is so talented, inspiring, and such an amazing teacher. Very forthcoming and open about all of her techniques. I'm so looking forward to jumping into compositing, I feel like this is definitely something my soul desires to explore and Karen has made it so easy and accesible through her beautiful course! Thanks so much Karen and CreativeLive!
Student Work
Related Classes
Portrait Photography