Lesson Info
12. Lightroom Classic: Sharing Images
Lessons
Introduction
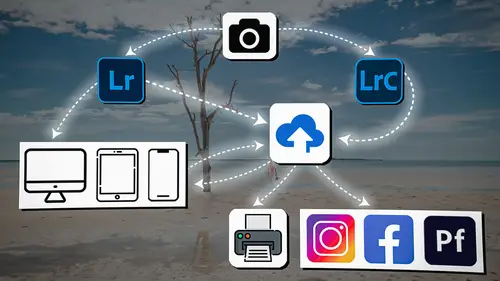
04:12 2Lightroom Ecosystem Overview
07:30 3Lightroom Ecosystem Image Delivery Details
09:21 4Lightroom Introductions
04:03 5Lightroom Application Names
02:33 6Lightroom Classic Getting Started
09:11 7Lightroom Classic: Importing
19:42 8Lightroom Classic: Selecting
09:28Lightroom Classic: Organizing Images
14:05 10Lightroom Classic: Adjusting Images
09:19 11Lightroom Classic: Cleaning Up
04:34 12Lightroom Classic: Sharing Images
22:08 13Lightroom Classic: Archiving Images
17:21 14Lightroom Classic: Workflow Review
06:34 15Lightroom Classic: Bonus - Cloud Files Location
11:16 16Lightroom Classic: Bonus - Fixing Synchronization Errors
06:24 17Lightroom Classic: Cleaning Up the Cloud
14:18 18Lightroom: Introduction
07:20 19Lightroom: Importing Images
03:38 20Lightroom: Browsing Images in Local Storage
11:53 21Lightroom: Organizing Images
06:20 22Lightroom: Copying Images to the Cloud
22:45 23Lightroom: Adjusting Images
07:12 24Lightroom: Masking
03:17 25Lightroom: Making an AI Preset
02:40 26Lightroom: Synchronizing Adjustments and Masks
07:07 27Lightroom: Sorting and Finding Images
14:13 28Lightroom: Sharing Images
14:26 29Lightroom: Archiving Images
11:31 30Lightroom: Workflow Review
05:57 31Lightroom: Importing Presets and Profiles
04:12 32Lightroom Mobile: Workflow Introduction
10:22 33Lightroom Mobile: Settings
08:56 34Lightroom Mobile: Overview
01:50 35Lightroom Mobile: Albums, Collections, and the Cloud
05:07 36Lightroom Mobile: Importing Local Images
05:39 37Lightroom Mobile: Importing Images
11:59 38Lightroom Mobile: Albums and Searching
04:34 39Lightroom Mobile: Selecting Images
06:12 40Lightroom Mobile: Organizing Images
05:34 41Lightroom Mobile: Archiving
11:06 42Lightroom Mobile: Editing Images
11:36 43Lightroom Mobile: Editing Across the Cloud
09:19 44Lightroom Mobile: Sharing Images
14:46 45Lightroom Mobile: Finding the Best Photos Feature
04:41 46Lightroom Mobile: Presets and Profiles
12:44 47Lightroom Mobile: Workflow Review
02:42 48Putting it All Together
10:25Lesson Info
Lightroom Classic: Sharing Images
1 Remember it's already tied to the cloud. 2 We just looked at it on the iPad. 3 And if I go to the iPad now, instead of 33 images, 4 you can see that I only have four images in there. 5 So all of this stuff is happening in real time. 6 As I put them up on the cloud, 7 they are just always being moved around, 8 adjusted, flagged, starred. 9 If I delete stuff from the collection, 10 it deletes it from the album up in the cloud. 11 It's doing it all at the same time, which is awesome 12 because the second I've done here, I can share it out 13 because I already have a webpage built. 14 So I'm gonna right click this collection from here. 15 And I have a dropdown menu that allows me to go 16 to the Lightroom links area. 17 It's already synced with Lightroom, Lightroom links. 18 I'm gonna make this collection public. 19 Once I've made that public, it tells me it's done it. 20 Now I'm gonna right click it again, 21 go to the Lightroom links 22 and I'm gonna view this on the web. 23 So when ...
I view this on the web, it's gonna open it up inside 24 of whatever my default browser is. 25 So now that I'm on the website, you can see 26 that I've got the collection here. 27 So this is the collection that we're sharing. 28 And I'm going to go down to the bottom left hand side 29 of this grid area in order to choose all of my options. 30 And the first option is just how I want to view 'em. 31 So do I want 'em view 'em very close together and bigger? 32 Or do I want to view 'em as a grid? 33 That's kind of unimportant 34 because that's not what the client sees. 35 That's not what people outside of your purview see. 36 This little artist palette is what people outside see this. 37 So I'm gonna click on that 38 and that determines what the outside world is going to see. 39 So I can change the theme. 40 So I can either do kind of a masonry style, 41 I can do a bigger style like this where they're much bigger 42 or I can do one at a time. 43 So this is kind of what we'd call a blog style 44 where it's just one picture after another one. 45 I prefer this second one mostly 46 because it gives me much bigger images. 47 And then I can choose either a dark theme or a light theme. 48 I like the light theme 49 'cause my website is similar to this. 50 And then there's a little up button. 51 If I click that up button, I can change the title 52 to this collection. 53 And I can say Self Portraits 54 by Jared Platt. 55 The author is Jared Platt. 56 I don't need to show that because that's in the title. 57 Actually, let's do that. 58 Let's just say Self Portrait there, Jared Platt. 59 And then I can use a cover image 60 as either a background, which is kind of dumb, 61 or I can use it as a hero image. 62 And I kinda like the hero image. See that? 63 That's kind of cool. It starts the page. 64 So then if I want to change that hero image, I go up 65 to the right hand side and click on this little icon. 66 And then it allows me to drag this up and down. 67 I'm gonna go like that and apply. 68 So that's a good hero image. 69 If I want to change the hero image, I can go to any 70 of these images, whichever one I like the most. 71 Let's do this one instead. 72 So if I click on that top right hand check box, 73 then it gives me options. 74 I'm gonna set this is the cover image. 75 So now if I go to the top, that's the cover image, 76 I need to renegotiate the crop and apply. 77 Good, that's a great hero image. 78 And then you've got the title, 79 and then you've got two images, two more images. 80 And the great thing is that I can actually go in right 81 between images and I can click on this little plus button. 82 And now I have something that I can write there. 83 So I'm just gonna write anything. 84 So self portrait 85 test are 86 a fun tool for testing. 87 Okay. And then I hit done. 88 Now see how there's like a little comment as we go. 89 So you can literally write a blog here for people to read 90 as they're looking at images. 91 Or you could just kind of separate groups of images. 92 So you could say, these are my favorite images 93 and these are less favorite. 94 Or you could say, this is Rome and this is Venice 95 and this is Cinque Terre, et cetera. 96 Okay, so that's all you have to do. 97 But we've literally created a website in no time at all. 98 And so now it's just a question of how do I share it? 99 So I'm gonna go over to the right hand side, 100 right at the top right hand corner, 101 there's a little silhouette with a plus. 102 If I click on that, that is the share. 103 I can copy the link. I can say anybody can access this 104 or it can be by invite only. 105 And if it's by invite only, 106 then I've gotta put in an email here and invite them. 107 And each email I put in 108 can have a different amount of permissions. 109 They can either view it only, they can contribute, 110 they can add photos to it, or they can even edit the images. 111 So if you give them permission, 112 then they get the raw editor available. 113 When they click on the image, 114 they can adjust it if they want, which is kind of cool. 115 So I can invite people here. 116 The display options are the display options 117 that I just fixed down at the bottom of the website. 118 So that's where those are. Then the settings. 119 Do I want people to be able to download these JPEGs? 120 So if you want people to find... 121 Like say you're sending these to your mom 122 and you want her to be able to download 'em 123 and put 'em on her computer or whatever, just flip this on 124 and now she has access to download any 125 of the images she likes. 126 If you don't want them to download 'em, turn it off. 127 You can also show the metadata, show the location, 128 and you can also allow people to comment 129 and like the images. 130 And this is where it gets really cool. 131 But if you're gonna do this, they have to log in 132 and they can log in with Facebook, with Apple ID 133 with a Adobe ID, which they can get for free, 134 or even with their Gmail address. 135 So they can log in with anything. 136 And it's not like they have to give all of the information 137 to Adobe, they just basically click on 138 which one they wanna log in with 139 and it takes them to their account on Facebook. 140 And that kind of proves who they are. 141 So it's a great way for them to log in 142 and be able to make comments. 143 So once you do that, copy the link. 144 There's also an embed option that you can copy 145 and then put it into a website if you'd like. 146 But I'm gonna copy the link to the site and hit done. 147 Now what I'm gonna do is I'm gonna go to the site 148 as a visitor 149 and you can see here's what the visitor's gonna see. 150 They look in here and if they click on an image, 151 and let's say this one, 'cause I like this one the best. 152 So they click on this image, they can come over 153 to the comments area, which is right over here on the right. 154 They can click on that little comment icon 155 and they can type in something. 156 So they can say, 157 "Great image, print it". 158 And they can post it. 159 And they can also add a heart to this image. 160 So now it's been liked by me and I've been commenting on it. 161 So now when I go back to Lightroom Classic, 162 these images look, it just appeared 163 so cool, so cool. 164 So see that little yellow tag, 165 that tag tells me it has comments. 166 If I click on that tag, it takes me to the comments area. 167 And voila, Jared Platt liked this photo 168 and he put a comment on it that says, 169 "Great image, print it". 170 So I don't even have to leave Lightroom Classic 171 to see people's feedback on my images. 172 Super cool, so now that I've gotten feedback from my client 173 on this particular image, and we've proven, 174 because I sent it to my client 175 and they said that was the best image, 176 and I thought it was the best image. 177 So clearly that's the best image. 178 So now what I'm gonna do is I'm gonna give that a four star, 179 and I'm gonna color it green. 180 And I usually color things green 181 when it's a go from my client. 182 So the client has said, "Go ahead and print that photo." 183 So now I want to work on this photo specifically. 184 So I'm gonna go into the develop module 185 again with this photo. 186 And now that I have a green light from my client, 187 I'm actually gonna zoom in 188 and I'm going to move around this photo 189 and make sure that I get rid of any blemishes 190 or any things that need to be getting rid of. 191 So now I'm going to share this image out. 192 And the way I'm gonna do that is simply export it 193 with the export button down here, 194 right next to the import button, click on the export button. 195 And you'll notice that I've got a bunch of presets here. 196 So these presets are things that I have created. 197 So what you need to do is choose all 198 of your options over here, 199 and when you've chosen the options the way you want 'em, 200 then you come to the left hand side and add your preset. 201 So I'm gonna start up here 202 and I'm gonna decide where I want to put it. 203 I want to put this folder out on the desktop 204 in a sub folder called print. 205 Then I'm going to, I don't need to name it, 206 so I'm just gonna leave the name the same. 207 No videos are going out. 208 Image format is going to be a jpeg 209 and it's going to be a hundred percent quality. 210 And it's going to be an SRGB 211 because that's the way we print things in the United States. 212 And I'm not gonna do HDR output 213 because that's not where we're going. 214 I'm not going to change the size 215 because when I send my files, I send the full file 216 to the printer at White House Custom Color, 217 and then they do whatever they need to do with it. 218 But if I was sending out a whole bunch of proofs, 219 like say 500 proofs for a wedding or something, 220 then I would size them down to four by six 221 'cause that's the size they're gonna be, 222 or five by seven so that I'm not sending huge files over. 223 So I don't need to resize it, I don't need to sharpen it. 224 They'll do the sharpening if needed. 225 Metadata, if you're sending this out for like web, 226 if you're gonna put it on Instagram 227 or something like that, you need to think through what kind 228 of metadata you want in there. 229 All metadata is probably not the way to go 230 if you're sharing it on the web. 231 Instead, maybe copyright only is the best 232 because then it removes any person information 233 and it also removes location information. 234 So I always export with location information removed 235 because if I have GPS location on a client's house 236 or on a location where I don't want people to know about it 237 because it's a place that I have found, 238 I remove that information. 239 That way it's not publicly available on the web. 240 I'm not gonna watermark my images. 241 And then afterwards, what do I want to do? 242 Post-processing actions are really awesome, 243 and I talk a little bit about them in my other workshop, 244 but when you finish a job, what is it going to do 245 with that job? 246 I want it to show it in the finder. 247 So it's just gonna pop up that folder in the finder 248 so that I can then do something with it. 249 Okay, I've made my settings, now I just need 250 to add the preset. 251 So I'm gonna go over here and click on add. 252 And by the way, if I'm putting something on the web, 253 I will actually add JPEGmini to it. 254 So JPEGmini is a great way to take a file size 255 that's a little bit bigger and kind of crunch it, 256 but it crunches it 257 and it doesn't allow any visual change to happen. 258 So it kind of like sizes down, then it inspects it, 259 then it sizes it down, then it inspects it, 260 and it sizes down until it first sees 261 some kind of a visual difference. 262 And then it backs off of that. 263 So it gives you the smallest file you can 264 without seeing any visual artifacting 265 from the process of crunching it down. 266 It's a great program. 267 So you just simply click on JPEGmini and then insert it, 268 and then JPEGmini shows up here, right there. 269 So see, and the last time I sent something out, 270 the reduction ratio was 73%. 271 So I saved like 42 gigabytes worth of savings 272 in my export. 273 So it's really, really good. 274 Okay, so I'll leave it in there 275 so you can see how good it is. 276 So I'm saying show on the finder, 277 and then I'm gonna add this as a preset, 278 and I'm gonna call this 279 basic print with JPEGmini. 280 Okay. And then I put that in user presets and hit create. 281 That way I can always use this again, I can just go down 282 to the bottom to the user presets area, click on 283 basic print with JPEGmini and hit export. 284 It is now exporting that JPEG. 285 There it goes. 286 It opened it up for us. 287 I'm gonna just preview that. 288 You can see how beautiful that file is. 289 And that was crunched down with JPEGmini. 290 So let's take a look at the file size on it. 291 It's only seven megabytes. 292 If I were to export that file without JPEGmini, 293 let's find out what that would be. 294 So I'm gonna go in here and I'm gonna remove JPEGmini, 295 and I'm going to export this thing again. 296 And right below the actual where I'm gonna export, 297 it says, "What if it's an existing file, choose a new name 298 for the exported file." 299 So that's gonna export a new file name. 300 Okay, so now we have two of them. 301 And if you look at this one, this is the JPEGmini one. 302 It's only seven megabytes. 303 If you look at the non JPEGmini one, it's 11 megabytes. 304 So almost cut it in half. 305 And so let's look at the two of them. 306 This is the non JPEGmini. This is the JPEGmini. 307 There's no visual difference between the two of 'em, 308 and I promise you, even if you zoom in on them, 309 you don't see a difference. 310 They are really great. 311 So JPEGmini is a very, very good plugin. 312 So then once I have these files as JPEGs, 313 I can email 'em to someone, I can post them, 314 I can ship them off to a print house. 315 I can put them on a disc, whatever you want. 316 But that's how we're delivering a JPEG file out, 317 is just by the basic export. 318 Now, once I have delivered the file 319 to my client via a disc 320 or to my printer via a webpage or a disc 321 or something like that, there's one other way 322 that I deliver files to my clients. 323 And that's through SmugMug. 324 SmugMug is in a publish service, 325 and there's a lot of publish services out there. 326 So you might use ShootProof, 327 you might use, there's all sorts of, in fact, 328 there's Flicker has a plugin, 329 SmugMug is a great plugin. 330 ShootProof has a plugin, like everybody has a plugin. 331 And so if you're with a web page maker 332 of some sort or a printer 333 or anything like that that doesn't have a plugin, 334 they're probably not the right people. 335 They're not as professional as you'd like them to be. 336 And so SmugMug's awesome 337 because I can come into my client section here 338 and I can just right click here and create a gallery. 339 And then that gallery can be 340 Jared's Self Portraits. 341 So I'm creating an entire gallery of self portraits. 342 It's in my client section. 343 I'm gonna include the selected photo. 344 So there's only gonna be one selected photo 345 in there right now. 346 I could put a custom URL, 347 I could put a description in there, keywords in there. 348 And all of that's important if you want SEO. 349 This, I don't care about SEO on, 350 because I'm probably gonna delete it shortly 351 after this workshop. 352 Maybe, I don't know, maybe I'll start putting 353 self portraits in there. 354 That might be an interesting... 355 That is an interesting idea, maybe I'll keep it. 356 So I'm going to put the self portraits in there. 357 Maybe later I'll come back and fill in these keywords. 358 And then I can use quick settings. 359 So the quick settings allow you to change all 360 of these settings down here very quickly. 361 So I'm just gonna click on my quick settings 362 and go to protected images view only. 363 So now, if you go to photo protection, it only allows you 364 to see a 4K version. 365 It watermarks them, the downloads are off so 366 that you can't download 'em. 367 Social is off, shopping is off, 368 the appearance is normal, security is on. 369 So all of this stuff helps me to protect those images. 370 I'm gonna hit Create, when I do that, 371 it creates a page on SmugMug. 372 So SmugMug is the website. 373 It creates a page called Jared's Self Portraits. 374 And it is ready to receive these. 375 It's not gonna receive them yet 376 because I actually have to right click it 377 and say, publish now. 378 Now that I've published 379 and it's wants me to update my software, I'm gonna say, 380 remind me later. 381 So now it is publishing this image to that webpage. 382 Now, the beauty of SmugMug, 383 and the reason I use SmugMug is 384 'cause I have a website, jaredplatt.com 385 is actually built on a WordPress format, 386 but I use SmugMug to sell my images to my clients. 387 And so I post a gallery, I send it to 'em, 388 they can buy prints from that gallery 389 so they can just click on an image and order print. 390 So very, very easy way to send my images to a client. 391 But when I publish them, 392 now I've got these images published on the SmugMug website. 393 If I right click that collection, 394 they're called publish services. 395 So I'm in the publish service section here. 396 So it's called a publish service, 397 but it really is just a collection. 398 And so if I right click 399 this publish service or collection, 400 I can say show on SmugMug. 401 It opens up the page on SmugMug. 402 So there's only one image on here, 403 and if I click on it, see how it says proof. 404 So this protects all the images. 405 If I wanted this to be a gallery 406 where you could order prints, 407 all I'd have to do is right click this gallery again, 408 go into edit gallery. 409 And when it gives me the edit options, 410 I could go up to the quick settings 411 and I could say, 412 2023 sell and download and hit edit. 413 That just edited the gallery settings. 414 So now if I go back to the website 415 and I refresh the website, 416 and if I click on it, now I can buy this photo. 417 So all of the buying options are here, 418 all the paper prints are here, standard sizes, other. 419 So all of my shopping cart is here. 420 You can order this print to your heart's content 421 and you can even comment on it, all that kind of stuff. 422 So this is a really great way to sell to clients. 423 And it doesn't take me outside of Lightroom Classic. 424 I'm in Lightroom Classic. 425 I make a collection inside of the publish service area, 426 which is basically an album online 427 for selling to my clients. 428 And I hit publish, and then I can copy that address 429 and send it to my clients. 430 So the address itself is right at the top of the grid. 431 You can see it's 432 jarredplatt.biz/clients/jaredplattselfportraits, 433 and then like a little short code. 434 And that is the address to get to that particular page. 435 Okay, I wanna get back to this image 436 inside of the folder area. 437 And rather than scroll around trying to find it, 438 just right click it and say, 439 show it to me in the folder in the library. 440 And that takes me back to the original portrait folder 441 inside of Lightroom Classic.
Class Materials
Bonus Materials
Ratings and Reviews
Milena Marguenski
After giving up on Adobe long time ago (for apparent reasons). I decided to go back with my recent coming back to photography. I’ve been a heavy Photoshop user but never Lightroom’s. Since I signed up I was straggling to decide between the “new” Lightroom and Lightroom Classic. It was obvious LRC is more versatile but I loved the modern, cleaner look of the Lr. At the end I am a visual person :). Jared’s workshop made my decision easier and cleared up the question I asked Google repeatedly about managing Adobe cloud storage. A very comprehensive, easy to understand and fun course. Can’t wait to rearrange my 20+ years photo library. Thank you, Jared!
Maarten Barckhof
JP knows a lot and can explain very well! I took another course, called Editing and Organizing your Photography in Lightroom Classic. That was very nice. But now, maybe he filmed all courses one after another, but he is less sharp, with so many repetitions... the idea of these online courses is, that you can look back whatever and whenever you want. But having to listen to all repetitions for me it was quite exhausting, sorry about that!
La
Jared Platt is the best educator when it comes to explaining how and when to use each program in the Lightroom ecosystem. He knows and explains extremely well the pros, cons, and tricks of using LrC, Lr, & LrMobile together. Most people teach each independently. Jared teaches in depth knowledge of how they interact --amazing!