Two-Light High Key Headshot with Male Model
Lesson 15 from: The Business of Professional HeadshotsGary Hughes
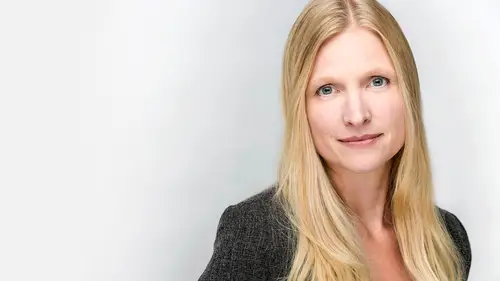
Two-Light High Key Headshot with Male Model
Lesson 15 from: The Business of Professional HeadshotsGary Hughes
Lesson Info
15. Two-Light High Key Headshot with Male Model
Lessons
Class Overview
13:07 2Getting Headshot Clients
27:23 3Headshot Pricing Models for Individuals
24:47 4Headshot Pricing Models for Groups and Companies
13:05 5Payment and Delivery for Groups
20:49 6Six Styles of Business Headshots
38:31 7Headshot Lighting Gear
11:31 8Posing Basics for Headshots
08:03Basic Standing Pose for Headshots
05:10 10Basic Seated Pose for Headshots
03:22 11Head Position for Headshots
04:25 12Expression Sells the Image
06:45 13One-Light High Key Headshot with Male Model
35:42 14One-Light High Key Headshot with Female Model
09:01 15Two-Light High Key Headshot with Male Model
10:08 16Two-Light High Key Headshot with Female Model
04:58 17Two-Light Standing Pose Headshot with Male Model
19:17 18Two-Light Standing Pose Headshot with Female Model
13:47 19One Light Low Key Headshot with Male Model
16:18 20Two Light Low Key Headshot with Female Model
14:55 21General Q&A
11:03 22Constant Light: Low Key Classic Headshot with Male Model
31:47 23Constant Light: Low Key Classic Headshot with Female Model
21:56 24Constant Light: Standing Pose Headshot with Male Model
17:22 25Constant Light: Standing Pose Headshot with Female Model
10:45 26Setting up the Background for Extraction Shoot
10:49 27Shooting for Extraction Headshot with Male Model
12:06 28Shooting for Extraction Headshot with Female Model
13:53 29Shooting Low Key Modern Headshots for Extraction
12:28 30Basic Headshot Facial Retouching Techniques
23:48 31Basic Headshot Eye Retouching Techniques
12:14 32Basic Headshot Retouching Techniques: Dodge and Burn
07:40 33Basic Headshot Retouching Q&A
11:18 34Extracting a Single Subject
20:01 35Creating a Headshot Composite
15:07 36F-Type Headshot Lighting: Equipment and Principle
10:36 37F-Type Headshot Lighting: Execution
21:29 38Shooting Headshots in Volume
18:49Lesson Info
Two-Light High Key Headshot with Male Model
So the next thing I want to do, is to do some high key stuff slash white background. And this is really cool. It's black on one side white on the other. I use this all the time. So, I'm gonna show you how to light the background with just one light. Good. Good. Cool. This thing is a little old and beat up but we're going to use it anyway. Okay, magic, perfect, okay. Now that is awfully wrinkled and terrible I know but it's not going to matter because we're going to pull away from it on the background. I got my background light over here. Another one of these beautiful little speed lights with the footies on it. And I've got this other, tons of these, this is the flash bender by Rogue, I think, and I'm just going to stick this on the floor. Make sure that's zoomed in, so about 50 millimeters and I'm going to control all the power and everything from the unit. I'm going to do a couple of test shots here. Good, and we're going to do some standing. Cool. We might need to get like, a little...
light stand for that here shortly, but we're good. Alright. Let's bring that boom over, do we have room for that? Can we do that? Cool. Thank you. So I'm going to take this guy and we're going to do, like, the high key modern which is really cool. With one, with two lights, trade ya. Cool. Man there's a lot of stuff up here. Alright. So, I'm using this boom as my light stand because I'm going to shoot with this light straight on in a sort of a beauty kind of configuration. Alrighty. And once we do this we should be pretty good. Now when you're making a beauty light configuration, or it's called clamshell lighting, butterfly lighting, tons of different things to call it. Oh, there we go, move to the other side. You are basically, literally creating, sort of, a clamshell shape with the light and a reflector underneath, or sometimes I've seen it done with a light and another light underneath which I will show you tomorrow. There we go, there we are. And perfect. Okay, and lower, Oscar are you ready. Sure. Let's do it. The reason you need a boom stand to do this sort of effectively, you don't absolutely need one, but it's cause I'm going to be shooting directly under this light, there we go, and I don't need a light stand in the way of that. And this is the world's heaviest boom stand. There we go, there. Okay, come right on up to that reflector for me, Oscar. See if I got one of these wrinkly back grounds, this is like 100 years old, so that's why it's, and I keep it, like, in a closet. We're gonna create a clamshell shape, for Oscar, this light coming down, and I'm not pointing it necessarily directly at him, again it's feathered and a lot of this light, I want to be bouncing so it's going to be kind of indirect. With me, alright. And then we've got that light in the background, so at this point with this, what's cool about this controller is I can split the ratio and the flashes can be on two different power settings. So I'm gonna bring this too, because I want to really blow out that background, I'm gonna have that back light a lot more powered up, will that stay there? Cheap light stand everybody, there we go. Boom. Now remember, I'm only trying to evenly light the portion that sort of directly behind his head. And we're going to do a high key classic so I'm going to change my aperture value. I'm going to shoot this at F4 and with a 7200, the distance I typically shoot, I find at F4 is a really great depth of field to light the mask of the face while still letting the background fall off really nicely. Okay, so you get soft ears, but that mask of the face will be sharp, you with me, everybody cool. I'm going to go a little tall, you're taller than I expected. There we go. Cool, that way. So if I was using a non-boom stand for something like this, you would see that I would be shooting into a light stand right now, okay. So let's see what we got, focus, this just a quick test, okay. Wohoo that's nuclear. Cause I opened up my aperture and I forgot to reduce my ISL. Alright, cool, hey look at that. And boom, okay. That' pretty close. Little less and I think that we'll be pretty good. Okay, look at that goodness. How about that, that looks pretty good, right. And a little more of this into your life here. You see that I'm not necessarily, this isn't pointed right at his head. Again just like we made the alley between the light and the reflector, flipped this way, we're doing it the other way, because most of this light is going to be soft and flat, and I want this reflector to be getting a lot of this to bounce it back up into him. So this is a two speed light high key, good, okay. Relax the arms, good, and I want you turn 45 degrees from me like so, point that right foot right at me, boom. And then just hook your thumbs into your pants pockets, it's cool, see you got, now he's got something to do with his hands, tilt your head a little bit that way, a little less, right there. At the waist I want you to kind of, by pushing your butt back towards the wall, I want you to lean towards me a little bit, right there. You see bringing that face the closest thing, check me out. Okay, so nice and relaxed the first one, then we're going to warm up as we go. Now, alright, killer. Yeah, that's looking pretty good. Alright, let's do two or three more in a row and as we're doing that I want you to sort of, warm up the expression a little bit. Let's say that no smile is zero and that a big smile is like six and I want you to work your way through it. A lot of times, working with a client, is just getting them used to being expressive in front of the camera. A lot of times if I'm shooting a whole first set up, I'm not, I know that I'm not even going to use it, a lot of the times, if that makes any sense. It's going to end up on the digital cutting room floor. I'm just trying to warm them up a little bit and we're talking and we're shooting, they're getting used to being directed by me and by the end of a session they're going to be a lot more comfortable. Alright, you ready, Oscar, you're looking great man. So let's do five in a row and we're going to go up through the range of emotions. Ready, here we go, one, good, bring the chin down a little bit, yeah, two, good, three. Oops, see how we need that recycle time. Four, okay back to relaxed, yeah, good, I want you to open, relax your jaw and let a little bit of air between your lips, just a little bit right there. Take a deep breath (breathing) yeah right there. Perfect, yeah. So we're getting a totally different look than we were before and all we did was add one speed light for the background. I don't know, does that look pretty cool, let me check my histogram. It's probably a little on the hot side, go down one more, good. And now I'm getting a little bit of fall off of the side, which means that my light isn't centered. But I kind of dig it. I'm gonna bring it just little more to the center, like so. And we're there, little bit, there. It's a small light source like I said it's, you gotta be kind of be precise with it. But again if you could use an umbrella for this, that would be cool and it might be alright. That it's a little bigger and a little softer. Alright, yeah there we go, cool. That's where we're at, dig it. Okay, a little more underneath, a little closer, I want a light up under that chin just a little bit. Alright, bend in towards me a little bit, yeah, yeah, yeah, yeah. Oh I like that small smile, kind of intense, bedroom eyes Oscar, bedroom eyes. There you go, (growling) Alright there, that's good stuff. Alright I dig that, you see, even when he smiles with all that up light that his eyes are still kicking, alright. And we could go a couple vertical without moving anything, change the whole feel. Zooming in, alright, take a nice deep breath (breathing) lean into me a little bit, alright bring that chin down a touch, good and relax that jaw, let those lips part just a little bit, there you go, alright. Nice intensity, that's good, and two more. Ready, nice little squint going on there and one more okay, cool. Yeah, I'm pretty stoked with that actually, I think that looks pretty great. So this is gonna be something that's really cool, it's not a traditional lighting that you would use on men, again this is a very similar to what you would get at, like, a Glamour Shots or an Olen Mills from back in the day. But at the same time it's kind of become a cool, like, new way to do lighting and it's flat and it's easy and we got two lights.
Class Materials
Bonus Materials with Purchase
Ratings and Reviews
Melville McLean
Gary Hughes is possibly the best teacher I have seen here and that is a very high compliment. His business analysis is simple and to the point. His set ups and techniques are simple and straight forward, no easy task in itself. His interactions with his models/clients are finely developed and reduced into the fewest but most important key exchanges. He teaches by example how to interact and direct. If you are a high volume photography with brief time per sitter, you might especially appreciate his tips. It is extraordinarily difficult to keep a tight, well structured class going live for so long at a time. His intelligence, wit and personality are all in his favor but it is the content itself that is most impressive. I am not a portrait photographer but I have 30 years of commercial studio experience. He knows what is most important, leaves out the rest and has organized the material in anticipation of most difficulties that arise so that it rests in a seamless, smooth, coherent learning experience. All of his practical advice is excellent. Just understand that his work is about doing a relatively large number of shots in the most efficient way rather than a lot of time spent on a few clients for a completely different format [presentation like very large prints. In fact he is especially pragmatic. He emphasizes that you do not have to own the most expensive equipment but you absolutely do have to know how to use the equipment that you already have. And I am telling you this as someone he makes fun of in his course with fancy cameras and Profoto lighting gear. He is an advocate of all thought out approaches as well as relying on skills and knowledge. You will understand how and why to make all of his key, conventional light and posing set ups. He makes everything sound simple and doable -- and with his help -- it is. What you have to appreciate is that it is up to each individual to acquire the specialized skills to make our work compelling enough to be competitive. The unspoken truth that we all face is that talent plays a key role as well and that it takes time to become every accomplished. But I have also seen concentration, commitment and hard work result in developing innate talents that blossom in very successful careers. Mr Hughes reduces every step into the clearest, most essential components. He is self effacing both as a photographer and post process retoucher but he is very good indeed and does not waste time overdoing images that cannot benefit from a larger format presentation. Everything is appropriate and practical. He has already removed everything that does not matter for his purposes for us that would only interfere with the concise, clarity of his presentation.
Roan
I am so glad that I had the opportunity to watch this course. It has not only provided valuable lighting set-ups, but also great basics for posing.!. The Photoshop extraction technique Gary demonstrated was icing on the cake. Gary did a great job teaching and I greatly admired the technique in which he taught. Thanks for a great class!
aodeal
This was an excellent class! The class covered so much information and great tips and ideas. Gary is funny and has an easy going approach, which makes the class that much more enjoyable. As a struggling pet photographer, I have been trying to find something to supplement my business with that does not involve children/babies, or shooting weddings again and headshots seemed to be a great option. After watching this class, I feel confident building up a headshot component to my business. Definitely recommend this class!
Student Work
Related Classes
Portrait Photography