Basic Headshot Facial Retouching Techniques
Lesson 30 from: The Business of Professional HeadshotsGary Hughes
Basic Headshot Facial Retouching Techniques
Lesson 30 from: The Business of Professional HeadshotsGary Hughes
Lesson Info
30. Basic Headshot Facial Retouching Techniques
Lessons
Class Overview
13:07 2Getting Headshot Clients
27:23 3Headshot Pricing Models for Individuals
24:47 4Headshot Pricing Models for Groups and Companies
13:05 5Payment and Delivery for Groups
20:49 6Six Styles of Business Headshots
38:31 7Headshot Lighting Gear
11:31 8Posing Basics for Headshots
08:03Basic Standing Pose for Headshots
05:10 10Basic Seated Pose for Headshots
03:22 11Head Position for Headshots
04:25 12Expression Sells the Image
06:45 13One-Light High Key Headshot with Male Model
35:42 14One-Light High Key Headshot with Female Model
09:01 15Two-Light High Key Headshot with Male Model
10:08 16Two-Light High Key Headshot with Female Model
04:58 17Two-Light Standing Pose Headshot with Male Model
19:17 18Two-Light Standing Pose Headshot with Female Model
13:47 19One Light Low Key Headshot with Male Model
16:18 20Two Light Low Key Headshot with Female Model
14:55 21General Q&A
11:03 22Constant Light: Low Key Classic Headshot with Male Model
31:47 23Constant Light: Low Key Classic Headshot with Female Model
21:56 24Constant Light: Standing Pose Headshot with Male Model
17:22 25Constant Light: Standing Pose Headshot with Female Model
10:45 26Setting up the Background for Extraction Shoot
10:49 27Shooting for Extraction Headshot with Male Model
12:06 28Shooting for Extraction Headshot with Female Model
13:53 29Shooting Low Key Modern Headshots for Extraction
12:28 30Basic Headshot Facial Retouching Techniques
23:48 31Basic Headshot Eye Retouching Techniques
12:14 32Basic Headshot Retouching Techniques: Dodge and Burn
07:40 33Basic Headshot Retouching Q&A
11:18 34Extracting a Single Subject
20:01 35Creating a Headshot Composite
15:07 36F-Type Headshot Lighting: Equipment and Principle
10:36 37F-Type Headshot Lighting: Execution
21:29 38Shooting Headshots in Volume
18:49Lesson Info
Basic Headshot Facial Retouching Techniques
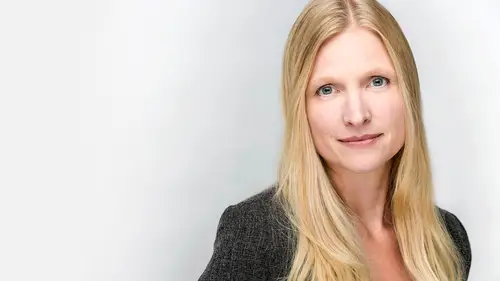
So, what we just did in the last segment was learn how to shoot for extraction and now all that crap that I was talking last I have to actually prove that it works by showing you what the images that we just shot, how to do that. In addition, I'm actually gonna show you some of my basic retouching techniques that I use to make images, the phrase that I like to use is beautiful but believable, I stole that from a friend of mine, so I didn't make that up, but you want it to look good, like somebody on their best day, got a great night's sleep, clear skin, but you don't want it to look fake. I think one of the biggest mistakes I see photographers especially in headshots make is very heavy-handed retouching and you want it to look like you didn't do anything, that's the point. One of the things about your clients nowadays is that everybody knows about Photoshop and everybody expects you to do Photoshop. And so, people's expectations for Photoshop are somewhat unrealistic. I actually had a ...
bride one time who had her hair very elaborately curled for her wedding, and so when she saw the photo, she realized she didn't like how her hair was styled and she asked if we could straighten her hair in Photoshop in every photo. And so, it just goes to show you that people's expectations are insane sometimes when it comes to stuff, so the best thing that you can do to help yourself is to get the photo in camera as close to you want it as possible. Now, that being said, there are going to be things that you just can't control, things that you're gonna wanna fix and make your clients look their best. I will preface all this by saying that I am a absolute hack, okay? All this stuff is, like, the worst possible way to do it, if you talk to somebody who's a real Photoshop expert, they would say don't do it the way that he does it. But the way I do it is speed, economy, and to save hard drive space 'cause I don't save everything in layers, I mean, because it only takes me about five minutes to retouch a headshot the way that I do it, I'm not really worried about it if I mess up and have to start over, which I don't usually have to do very often. It's five minutes, you know, whereas if you're going through layer, and layer, and layer, and going through every pixel and you're taking two hours to retouch headshots, you get to a level of retouching for the commercial market, it's gonna be on the cover for a national magazine or something, the retouching that they do is so finally detailed that they do take two, three, four, hours just to retouch one photo. But for what I'm doing, again, you gotta remember that the intended use of most of what I do is to be 400 pixels on somebody's website or somewhere abouts, usually not much bigger than that. So, in that case, there's no sense in retouching that way down to every pixel in the iris of someone's eyeball because nobody's ever gonna notice the difference. Have you ever filled an order for a client and you retouch for an image that's gonna be a five by seven? I would retouch a five by seven very differently than I would a 20 by 30, because a 20 by 30, you're gonna see a lot more detail. If it's a five by seven, it's, I mean, there's no way you're gonna be able to see the things that you're gonna be able to see if it's much larger, so, consider the formats. So, take it with a grain of salt as everything else I teach, it is the way that I do it, and if you think I'm an idiot or I'm crazy, that's okay, you wouldn't be the only one, you'd probably be in pretty good company. But I'm all about getting it done quickly and doing it well, I want the final product to look great, but I don't want to spend two hours retouching my headshot. Especially depending on your business model. If you're the type of person that you're getting three, four, $500, a medium amount of money, not a ton of money for a session, the more you spend retouching, time you spend retouching, the less profit you're making on that session. So, I would also encourage you, if retouching is not your thing, then either have somebody who edits for you or outsource it to a company that does it, there's a lot of 'em out there that are really good. I also wanna address that I will be working with Bridge, Adobe Bridge, and Adobe Camera Raw, all of the stuff you see me do in the Raw editing is totally doable, it has every equivalent in Lightroom if you're a Lightroom person, okay? So, don't get hung up on the fact that I'm using Bridge and you use Lightroom, you don't have to switch to use Bridge to do what I'm gonna do. For the extraction part, I will be going into Photoshop. This is the Photoshop Creative Cloud, the most recent version, but everything that I'm gonna do you can pretty much do as far back as CS and most of the retouching you could do in, like, Photoshop Creative Suite, the original version of it. The extraction uses primarily a tool called the quick selection tool which didn't come around until I think CS4 or CS5, so that is the one thing that you will need to have updated in order to do that. Other than that, I'm not using any special actions or plugins, it's all just straight up stuff that you can use, alright? Everybody ready? Strap yourselves in, try to stay awake, it's gonna be weird. Okay, let me sit down. It's about to get weird! Okay. I know I don't wanna be that guy that says, oh, well, this isn't the stuff I normally use, so, blah, blah, blah. It's just not the stuff I normally use, okay so, I do edit with a mouse, that's a question people ask a lot, not a tablet or a pen and all that stuff. I think those people are great and I'm sure they're right when they say that it's better I know they do. But if you do something a certain way for so long, you just, and it works, and it's efficient, if it was holding up my ability to produce or make money or something, I would learn the way that would save me money and time, but the way that I do things, it wouldn't save me any time, it would cost me a couple weeks of my life learning how to use one of those things. So, if you use it, this is all, you can use that just fine. If you use a mouse, come join me with the other Morlocks and mouse users, we're over here. Alright, ready, let's take a look at what we got. I'm pulling up Adobe Bridge Creative Cloud and what I've done is what you can do in Lightroom, is I've gone through all of the images and I've selected a few different ones that would be good for us to work on from the different types of lighting and also the ones that we're gonna extract. And so, I've labeled those green. If you are a PC user, that's control, eight. An Apple user, that is command, eight. So, if I say command or control for a copy or paste or anything like that, you know that they're the same thing. So, from now on, I'll just say command/control and that means command or control. Got it? Alright. So, let's start with a basic retouch on Oscar, there we go. Okay, so this is our classic muslin and, again, please do account for the fact that what I'm looking at, what they're looking at, what you're looking at, everything's gonna be different depending on the monitor you're viewing on. So, take into account the technique and some of the things that we're gonna do are fairly minute and depending on the resolution of how you're viewing this, you may not necessarily be able to see the exact result perfectly. But if you take the technique into account and add it to your own personal practice and editing, you will be able to see it on your own computer at a full resolution. So, that's where we get in a little tricky in the editing stuff, but we're gonna go ahead and give it a whirl. So, the first thing I'm gonna do, this is Adobe Bridge, this is my baby, if they ever discontinue Bridge, I'm probably gonna quit photography or just quit Photoshop, or quit editing and just hire somebody else to do it, 'cause I absolutely love this program, it's very powerful, it does a lot of things, Lightroom has a whole list of things that it does that Bridge doesn't, I understand that, I just don't need any of 'em. And the main difference, for me, between Bridge and Lightroom is that Lightroom uses a cataloging feature, which means you have to import things into Lightroom and to use them inside of Lightroom, they have to be part of that Lightroom catalog. And so, Bridge is more of a viewer where you can navigate to a specific folder that's already on your computer, you can organize your images in your own way. However, with the cataloging feature, if every time you upload a image, you can import it with tags that say, you know, corporate headshots. And so, if a client asks you for samples of corporate headshots, you type in corporate headshots in the Lightroom and it'll pull up every corporate headshot that you've ever put into Lightroom regardless of where it is on your computer. So, it has some advantages, it has some disadvantages. I find it to be a little slower for me and I kinda like organizing 'em myself, but that's totally up to you to decide, I have no animosity either way, I'm not going to get into an argument about which is better, this is what I use, use what you like, and I'm not gonna try and get you to change your mind. So, what I'm gonna do first is just open this first image in Camera Raw and this is gonna be familiar to a lot of you and for those of you that are Lightroom users, you have literally every single control that I'm about to use, it's gonna be in a slightly different place, but it's all there, okay? So, there's nothing I'm gonna do here that you cannot do in Lightroom. So, let's take a look, first, at our histogram, which is this little beauty up here in the top right of the image. Your histogram is basically, if you're not familiar with using them, this is gonna tell you the tones in your image. It can either just do light and dark or it can do red, blue, green, et cetera, which you see here. Now, what's really cool about histogram, and I think somebody pointed this out to me years ago and it kind of blew my mind, is that you can actually teach the histogram to show you when you have clipping and when you have blocking. So, blocking up would be when your dark tones start to mash together, and then you lose detail in the shadows. Clipping would be when you have highlights that are out of control. And so, these little triangles right up here, if you turn these on, they show you where there is clipping and where there is, and in this image, there's no clipping, but I'll just put some in there just so you can see. And so, to adjust my exposure, all of these controls, exposure, contrast, highlights, shadows, whites, blacks, all these things right here, you can control these individually, these are all separate functions of controlling the curves, let me show you what I mean by that. So, here's your curve right here, okay? And this is a histogram behind it and your curve that comes across it like this, you can go in here and bring up the shadows if you want to or you can bring down the whites if you want to, whatever you wanna do in this image, but all of these are just separately laid out functions of using curves. And so, whatever you're most comfortable with is fine, I use a little bit of both. So, if you put it on, instead of parametric, you select your curves and put it on point, and you could control the curves and your histogram by just moving the line around. And as you see, if I bring that right side in which is my highlights, whatever turns red, that's where I start to lose, that's called clipping, that's the highlights losing detail. So, that's with this little triangle on, you'll see that. So, you could turn it on and that way you know that you have all the range of tones in your image without actually losing anything. So, in order to get the right amount of contrast, I like to bring the edge in until I just start to see tiny, little specks of red, like, bam, that's the edge, that means I have brightest tone possible, what we're going for is maximum density which means that you have true black and true white somewhere in the image and just this is a way to make sure. So, now you're gonna see when I start to bring this over, you see the blue blocking up? That means those are my shadows losing detail the more I bring those darks in there. So, those are pretty close to the edge, I'll probably bring it just a little bit until I see a little hint of that blue right down there in the bottom right. And there you go and I'm pretty happy with that. And then if you want to bring your mid tones out for a little more detail, just drag this sucker out here. And so, what I've done, when you bring the two ends of the curve in like this or when you're looking at it, like this, you're adding contrast to the image, that is the very same thing as taking the contrast slider and moving it to the right, your right. Okay. Alright. And so, I'm looking at, at least to me, it looks a little warm, and so I'm going to adjust it, I'm just eyeballing it, I shot on flash white balance and I always find that with my camera, that when you shoot on flash, it's close but it's a little on the warm side. So, I'm gonna bring that down a little bit to probably, and you also find, what's really cool is when you make an image a little cooler, that oftentimes it'll get rid of some of the little red speckling of clipping, so you can actually get some of the highlights back just by changing the white balance sometimes which is pretty cool. And I'm just gonna make sure that we're not overly red here. And I think that that white balance looks pretty darn good to me. Now, this is what I would do, I would edit one image in the sequence, and then I would select every other image I took from that same session and then I would apply that same edit to all of the images from that same sequence, and now I have done the raw edit on every image in one shot, so I only have to do it once. That's why, even if you're shooting at the wrong white balance, shoot every image in that same sequence at the same wrong white balance, so you only have to correct it once. If you're changing back and forth or using auto, you're gonna have 12 images with 12 different white balances on them and you're gonna spend a lot of time fixing white balance, which is, you know, not awesome. So, it looks like my histogram is solid, everything's looking pretty good, I don't really have any issues there, I have sort of a natural vignette, because remember when we were using a really small light for this, we're using that 20 by 20 soft box on a speed light, this is our one speed light studio. And so, you can see that there is a natural fall-off of the light as you go down into the suit and as long as the details are there, I'm actually, I really like that because I want the face to clearly be the brightest thing in the image, okay? So, I'm gonna zoom in here and just make sure it's nice and sharp. Here, we've got some of those specular highlights we talked about, remember this is actually the reflection of the light itself in the oil on the surface of the skin, so we're gonna deal with that once we open that up in Photoshop. Now, I will say this, some of you might ask this question, how much retouching do I do to images before I show them to the client? I do the raw processing only and then I show the raw processed images to the client and they only get finished retouching when they actually order the image and I found that my sales, when I'm talking about professional headshots, my sales haven't been affected by that in the least. The only thing that's been affected is I have a whole lot more time than I used to going in and retouching 25 pictures. Instead, I don't retouch any of them, I just do the raw correction and it hasn't affected my sales at all. If you're doing the best you can to get the lighting and everything right and the camera, with some exception, you know, if the client has a really bad, obvious zit or something, I'll probably just go in there and grab those out real quick, you know, just make that your judgment call, but I don't spend a ton of time, I try to get it right in the camera as much as I possibly can. Alright. And so, we're gonna see if Photoshop, just gonna open photos here, opening it straight into Photoshop, bam, there we go. How 'bout that. And then I will zoom in and now I begin to work. Now, because I don't work in a ton of layers, I use a tool that's very often not paid attention to called the history brush. The history brush is one of my favorite things and I'll show you how to use that. So, the first thing I'll typically do is I got good light in the eyes, is I'll attack these specular highlights. So, there are a couple ways to do this. These are gonna be, and this is gonna take a lot longer for me to explain it than to actually just do it, but I wanna make sure that everybody understands what I'm doing, okay, 'cause it's really easy for me to breeze through this. It's like if somebody were to ask you to explain how to ride a bike, you have a hard time doing it but you could sure show 'em how to ride a bike. So, the first thing I do, I have a couple techniques to get really specular highlights, I'll show you the first one. I grab the clone stamp tool right here which you can also press the S key on your keyboard. I mean, a word about keyboard shortcuts, if you save half of a second 100 times a day by using a keyboard shortcut, how much more efficient are you working? Take the time and learn your keyboard shortcuts in Photoshop, even just to select your tools. You wanna select the pointer tool? V. Now I select my pointer tool instead of dragging my mouse all the way across and clicking on that. I want the marquee tool, hit M, really not that difficult. You want the brush tool, you hit B, and it saves you half of a second 100 times a day, which, over the course of a week, gets you, like, about, you know, two good happy hours in there, where you could be drinking margaritas and hanging out. If you drink margaritas, I'm more of a beer guy myself. Alright so, I'm gonna grab that clone stamp tool or hit S. Now, some of these tools, almost every tool in Photoshop in the toolbar has multiple tools associated with that letter, it will select whatever tool was last selected in that branch. So, for example, if I come up here and I go to the lasso tool, there are three different versions of the lasso tool, if you last used the polygonal lasso tool and I'm on another tool, I go back to select it, what's the key for that? L, obviously, for lasso. And I hit L, it's gonna select the polygonal lasso tool, which may not be the one that I want, so make sure that you've actually got the one that you want. You can also set up hot strokes and all kinds of stuff just to make it so that, you know, I have friends that have certain programs where they get this one little one-handed keyboard and it does all their actions and everything just like that. I don't really need all that but it's possible. Anything to make it more efficient. So, back to the clone stamp tool. Now, what you wanna do is, you can, every tool pretty much that has a brush, like this round thing here, has a blend mode, right? By selecting from up here, I use the darken blend mode and what the difference is, if you use a clone stamp tool normally, you're gonna grab a piece of his face or, like, an eyeball, and then you're gonna bring that eyeball and you're gonna put it over here. So, basically, it literally just grabs what you just selected and then you can put it somewhere else. Now, if you grab with the darken tool, it's going to only grab, it's gonna grab this area, and then it's only going to affect the areas that are brighter than the area I just selected. So, it's gonna be totally different, so let me show you what I mean. I'm on darken, my opacity of the brush is always pretty much gonna be around 30% for this maneuver, and make sure you select a nice, soft brush. So, you want those edges to be soft. I use the edges of the brush rather than the center of the brush because everything I do is gonna be a little minute maneuver, so watch this. So, if I've got these specular highlights on darken, I select an area that is darker than the area I'm trying to darken, I grab it, and then I'm gonna go ahead and just do a little brushing. See what I mean? And away go those specular highlights. Now, do be careful because it will grab other things and if you're not paying attention, you can end up with an eyeball or a hairline somewhere that you didn't actually want one. Alright, which is, you know, not great. Okay. So, let's take a look at what we just did. Okay. Pretty simple stuff. Everybody cool with that? Alright. And then I'll go down here onto the eye, you will find that when you're use directional lighting, in almost every situation, your specular highlights will be on the same side as your main light. Here's the other thing, we don't want to remove specular highlights. This is the thing, the mistake that so many photographers make when they're retouching headshots or portraits in general: they take away the specular highlights completely. But what do specular highlights actually do? They give shape to objects, they show roundness, they show depth. Photography is a two dimensional medium that we are trying to make appear three dimensional and how can you make it appear three dimensional if you remove all of the highlights that give definition and shape to something? It's one of the main reasons why, you ever seen anybody, they, like, just soften it and blank it out to the point where it's just mad, it looks like a Barbie doll? That's what we don't want. I like pores, I like definition in the face, and I want those specular highlights but I want them to be managed, I don't want someone to look sweaty but I want their face to look like it has shape. Cool? So, let's do this down here under the eye, let's move a little faster now and just do the same kind of thing, just grab those similar areas and here's the big one, the bridge of the nose. This one's hard to do because if you remove this completely, the nose ends up looking really, really weird. See how I accidentally got nostril in there? Too much nostril. So, I would recommend being really, really careful when trying to remove the specular highlights from the nose. I'll just do a little bit just so that doesn't look super hot, and then I'll leave it in there 'cause that's what's giving the nose that definition. So, let's take a look at what we did so far. Zooming in, boop, boop, boop. Let's look. We'll go back to the beginning using the history. Okay, so now I've got a face that is quite a bit less shiny. Everybody cool with that? The next big hurdle you're gonna run into is going to be bags under the eyes. This isn't gonna be a big indicator, I've been using a lot of uplighting and reflectors underneath just to circumvent this, but I'll show you exactly how I do it. A big mistake people make when they do this is they remove the darkness under the eyes but they also remove the roundness. Anybody got any idea what shape your eyeball is? Just call it out. Spherical! That's good. And so, it's round, right? So, if we completely flatten underneath the eye, it's gonna look ridiculous, so what we need to do is find a way to remove the wrinkles and the darkness without removing the roundness under the eye. So, let me show you how I do that. Alright so, I'm gonna grab over here the patch tool. You can select it with the J key, but typically by default, Photoshop will have that selected for the spot healing brush, so you wanna make sure that you select that patch tool, mine's pretty much always on the patch tool. So, it's right over here, that's what it looks like, you can select it with the J key. And I think this is pretty much an out of the box standard setup for Photoshop. I haven't moved anything around or done anything to it, I think this is pretty much as you open it for the first time, this is what it's gonna look like. So, what you do with the patch tool is it's actually a really cool tool for a lot of things. The patch tool transfers texture, okay, so if I were to take something like this spot on his forehead and I were to move it over to a similar area, it's gonna take the texture from this area and replace that other area with it. So, it's really cool for removing blemishes as long as you transfer those blemishes to areas of similar texture and in focus. If I were to grab a spot right here and I were to bring it over to this, that would end up looking weird, you see? It transferred the texture but not the color, so it only, it will really transfer the texture and tone. So, this is a super way, and there are a lot of different ways to do kind of retouching. I know frequency separation is a really big thing right now. If you want, you can Google that. I don't really quite even understand it. I have an action that does it, but I don't know what it does. But it basically, frequency separation takes the highlights and shadows and the texture and puts them on two different layers, and then you go in there and retouch individually. It's a really great way to do some really great retouching if you want it to take, like, a million years. So, just, this is the way I do it. Alright. I actually, if you Google frequency separation, there are plenty of great videos and I've seen some people that are really handy at it, but I don't do that, so let's just pretend I didn't mention it. Alright. So, this is what the patch tool does, it's gonna transfer that, it's really good for quick removing little blemishes as long as you transfer to an area of similar texture, but you do wanna be careful because if you do it the wrong way, you can end up looking sorta, if you do it too close, you can get this sort of clone tracking kind of bad marks on it where it's just gonna be the same texture all the way down.
Class Materials
Bonus Materials with Purchase
Ratings and Reviews
Melville McLean
Gary Hughes is possibly the best teacher I have seen here and that is a very high compliment. His business analysis is simple and to the point. His set ups and techniques are simple and straight forward, no easy task in itself. His interactions with his models/clients are finely developed and reduced into the fewest but most important key exchanges. He teaches by example how to interact and direct. If you are a high volume photography with brief time per sitter, you might especially appreciate his tips. It is extraordinarily difficult to keep a tight, well structured class going live for so long at a time. His intelligence, wit and personality are all in his favor but it is the content itself that is most impressive. I am not a portrait photographer but I have 30 years of commercial studio experience. He knows what is most important, leaves out the rest and has organized the material in anticipation of most difficulties that arise so that it rests in a seamless, smooth, coherent learning experience. All of his practical advice is excellent. Just understand that his work is about doing a relatively large number of shots in the most efficient way rather than a lot of time spent on a few clients for a completely different format [presentation like very large prints. In fact he is especially pragmatic. He emphasizes that you do not have to own the most expensive equipment but you absolutely do have to know how to use the equipment that you already have. And I am telling you this as someone he makes fun of in his course with fancy cameras and Profoto lighting gear. He is an advocate of all thought out approaches as well as relying on skills and knowledge. You will understand how and why to make all of his key, conventional light and posing set ups. He makes everything sound simple and doable -- and with his help -- it is. What you have to appreciate is that it is up to each individual to acquire the specialized skills to make our work compelling enough to be competitive. The unspoken truth that we all face is that talent plays a key role as well and that it takes time to become every accomplished. But I have also seen concentration, commitment and hard work result in developing innate talents that blossom in very successful careers. Mr Hughes reduces every step into the clearest, most essential components. He is self effacing both as a photographer and post process retoucher but he is very good indeed and does not waste time overdoing images that cannot benefit from a larger format presentation. Everything is appropriate and practical. He has already removed everything that does not matter for his purposes for us that would only interfere with the concise, clarity of his presentation.
Roan
I am so glad that I had the opportunity to watch this course. It has not only provided valuable lighting set-ups, but also great basics for posing.!. The Photoshop extraction technique Gary demonstrated was icing on the cake. Gary did a great job teaching and I greatly admired the technique in which he taught. Thanks for a great class!
aodeal
This was an excellent class! The class covered so much information and great tips and ideas. Gary is funny and has an easy going approach, which makes the class that much more enjoyable. As a struggling pet photographer, I have been trying to find something to supplement my business with that does not involve children/babies, or shooting weddings again and headshots seemed to be a great option. After watching this class, I feel confident building up a headshot component to my business. Definitely recommend this class!
Student Work
Related Classes
Portrait Photography