Lessons
Lesson Info
Blend If and Textures
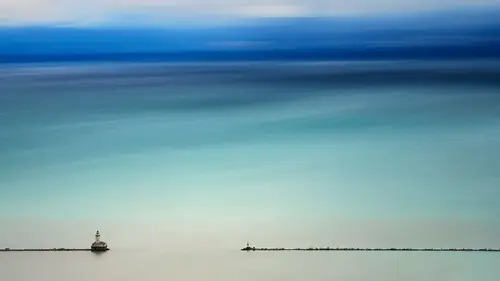
The next thing I'm gonna use on this is a texture. So I like this image, I've got it to a point where I think I could probably either be done or step on the teetering edge of making it a little bit more artistic. I could make this a really happy looking image based on the texture I put on it, or I could make it a really grungy looking image. So I'm gonna use a texture. Now, let's just talk about textures for a little bit. A texture is just something in nature that looks tactile that you take a picture of. That's essentially what a texture is, right? When we feel something. Textures, you can find them anywhere. You can find them everywhere. This floor that we're working on here has a good wood grain texture, that if you were to take a picture of this you could use it in your images. So I take texture images all over the place, and sometimes it drives my wife nuts. And this is from our old toaster oven, when we would toast our biscuits on our little tray. And this is all like the buttery...
goodness that would just kind of go, where the biscuits used to be, you know? But look at that texture. It's beautiful. I don't dumpster dive, but if I'm in the city you'll find me at a dumpster. The most beautiful textures that you're gonna find for making grungy looking work are gonna be on dumpsters, okay? And it's on the parts where like the arms go in, like to pick it up and dump it. Right there, all the paint gets scratched away. That's gold, okay? That's gold. And there are photographers that make a lot of money just off of photographing those textures. So, just some things to think about. A lot of times I shoot these textures just to give you a little bit of advice on shooting textures. I actually use my cell phone, shoot my cell phone with the flash on. Like, as close as I can get, so I'm like taking a mugshot essentially of the texture. Because we don't want a whole lot of highlight in there, we don't want a whole lot of shadow in there. We want a washed out texture. Because if we had highlights and shadows and we put that onto our image, those highlights and the shadows from the textures are getting put onto our photograph, and it just doesn't look good, okay? So like when I'm doing workshops and stuff and I'm walking around while the other people are taking pictures and stuff, they'll see me taking pictures with my phone and they're like, what are you doing? Like, I paid you to take pictures with your phone? What they don't know is I'm putting those onto a little drive for them so they can have all those textures. That's pretty cool. So, little thing for you guys to think about when you're shooting anywhere. Any environment you go to, I'll oftentimes take my cell phone, take about 50 texture shots. Now I've got over, at least 10,000 textures in my portfolio to work with. So you're like, how am I gonna use this Blend If? You went on a really big long aside there, Blake. Thank you, I know, I always do that. So we're just gonna press V for the move tool. We're gonna click and move this over the top, and this is just like we're working with cloud replacements or sky replacements, right? But now we're doing it with textures. So traditionally, you might have seen people use textures with blend modes. A good blend mode to use, one of my favorite go to blend modes when I'm doing texture work is Soft Light, and why? Because Soft Light makes darker things darker without making them pure black. Lighter things lighter without making them pure white, and anything that's middle gray or close to middle gray will receive little to no effect at all. If it's middle gray, no effect happens at all. So if you look at this texture, if we change this back to Normal, you can see that there is quite a bit of middle gray in here. That's why this makes a great texture. I know what you're gonna do when you go home. You're gonna go to your toaster over, you're gonna be like, what does mine look like? What does mine look like? I know it, I know it, and I love it. Melted butter, like butter melting in a pan, that makes a great texture. It's beautiful stuff. So I'll change this to Soft Light because that's typically where I'll start. But then, when you're looking at this and you're like, well I wish that that texture wouldn't be running across X, Y, or Z. Then you go and say, well let me just drop the opacity a little bit. Well that's just dropping the opacity and the effect or the flavor essentially of that texture. The flavor on that texture is definitely butter, so we'll double-click on this layer. And now we have Blend If. So this might be something, if you've ever seen someone use textures before, they might not have gone into this territory. Again, why? Because it's that untapped resource. It's hidden within that layer that you're not gonna find it unless you know to look for that. So what we're gonna do is we're gonna turn that color overlay on. I always suggest getting into that habit, especially with that magenta. Click on your Blending Options, and now what can we do? Well we can say, well anything that's in that underlying layer, protect that from this texture, period. So if we move this over, you're gonna start to see our little crocodile coming back, and he's like, roar, I'm gonna get you now. I see you, right through that magenta. So if we press Alt or Option, split and feather that over, bring it into our highlights a little bit more. And now, if we turn that color overlay off, that texture is not finding itself anywhere in this image in a dark area. It won't rest in any dark areas on the crocodile, it won't rest in any dark areas that are happening over here. The cool part about this, let's go ahead and double-click this, let's bring it back down, is maybe we want to look at it from our highlight perspective. Bring this over. Alt or Option. We don't have this in our highlights now. It's only affecting those shadowy areas, which creates a pretty cool looking effect in those shadow areas, right? But watch this. Wait, there's more. If I click this color overlay layer on, I'm doing this specifically because I want you to see what's gonna happen when I do this, because this is the absolute power of Blend If. We're getting into the title, okay? So if I click on this background layer and I press a Curves Adjustment layer, watch this. I'm just waiting for dramatic effect here. (audience laughing) Nothing happened. If I bring this down, look what happens. Things are getting darker, right? And that magenta is changing. If I bring it up, things are getting brighter, and that magenta is changing. Why, why is that happening? Because we have this set, we have this Blend If set that anything that is a highlight, you're not going to affect. And that's because this layer is on top, but when we put that curve underneath as things get lighter or darker, this is automatically gonna know, okay well you said Blake, in this Blend If, you told me, do not affect anything that is 255 down to about, I don't know that's probably 235. So, anything that's between here, 65, and 235, right around here, you don't want me to affect. So anything that changes underneath that Blend If, if that value starts to change in that image underneath, it will not affect those areas. So as it gets brighter with that curve that's underneath there, we're seeing that that effect, the texture essentially is not gonna be on there. We turn that color overlay off, watch how this changes. Boom, look at that. Isn't that wild? Man, so cool. Could just stare at it and play with it all day, so cool. Turn that color overlay on and you see the difference there. Now, you still have all those other things available to you, so I don't want you to think, well okay I used my blend mode of Soft Light, I used my Blend If, well that's about all I can do. No, you still have your opacity that you can drop here, and you still have the capability of putting on a mask on that layer, and physically, manually brushing things out. Let's say like I don't want this to affect that guy at all. Let's just do that. With black, not with white. Thank you for correcting me. Change to my black brush, do not affect this guy at all. And then turn that color overlay on, and as we paint on here, just to show you, that mask is showing me what, that magenta I should say, is showing me the mask, it's showing me the Blend If, it's showing me the opacity. That's cool, that's real cool. Name a program that can do that, I'm just saying.
Ratings and Reviews
Teresa Trimm
Wow! Great course!! Lots of good information about using Blend if. Blake has a great sense of humor and he makes the course fun and interesting while making sure that you learn something that you can use. The course was created in 2018. In 2021, this information is still very valid and helpful and I definitely recommend it.
Robert Staser
Super helpful! Another powerful technique made easy. Blake is super laid back and throws wonderful bits of comedy in with the class!
David Rachlin
Photoshop has so many features, it's hard to wrap your head around it. But Blake Rudis explains things so well, and with such a delightful sense of humor, one cannot help but learn something terrific. The "Blend If" function is powerful and useful for so many photographs. I will most likely watch the lessons over and over again as I experiment with my own work.