Solving 12 Common Problems of Studio Lighting: 10 to 12
Lesson 34 from: Studio Lighting 101Lindsay Adler
Solving 12 Common Problems of Studio Lighting: 10 to 12
Lesson 34 from: Studio Lighting 101Lindsay Adler
Lesson Info
34. Solving 12 Common Problems of Studio Lighting: 10 to 12
Lessons
Day 1
1Studio Essentials: Shutter Speed
15:50 2Studio Essentials: Flash Exposure
22:26 3Studio Essentials: White Balance
21:15 4Light Principles: Inverse Square Law
26:46 5Lighting Patterns
15:29 6Shoot: Demo Lighting Patterns
28:06 7Quality of Light and Modifiers
09:59Shoot: Choosing a Modifier - Diffusion and Grid
13:40 9Shoot: Choosing a Modifier - Umbrellas
31:01 10Shoot: Choosing a Modifier - Softboxes
21:08 11Shoot: Choosing a Modifier - Extra Stuff
28:10 1210 One Light Set-ups: 1 and 2
17:07 1310 One Light Set-ups: 3 to 5
18:16 1410 One Light Set-ups: 6 to 10
15:57 15One Light Set-ups: Pop Quiz
21:21Day 2
16FAQ for Purchasing Studio Light Part 1
31:00 17FAQ for Purchasing Studio Light Part 2
25:36 18FAQ for Purchasing Studio Light Part 3
43:53 1910 Two Light Set-Ups: 1 and 2
24:29 2010 Two Light Set-Ups: 3 to 6
25:24 2110 Two Light Set-Ups: 7 to 10
22:30 225 Two Light Set-Ups: 1 & 2
13:27 235 Two Light Set-Ups: 3 to 5
33:37 245 Basic Three Light Set-Ups: 1 & 2
21:05 255 Basic Three Light Set-Ups: 3 to 5
25:52 265 Intermediate Three Light Set-Ups: 1 to 3
17:14 275 Intermediate Three Light Set-Ups: 4 & 5
12:58 2810 Common Lighting Mistakes
16:46Day 3
29Solving 12 Common Problems of Studio Lighting: 1
39:29 30Solving 12 Common Problems of Studio Lighting: 2 to 6
37:25 31Solving 12 Common Problems of Studio Lighting: 7
15:50 32Solving 12 Common Problems of Studio Lighting: 8
25:51 33Solving 12 Common Problems of Studio Lighting: 9
16:19 34Solving 12 Common Problems of Studio Lighting: 10 to 12
26:11 35Portrait Lighting: 1, 2, and 3 Lights
14:51 36Beauty Lighting: 1, 2, and 3 Lights
18:06 37Lighting Groups: 1, 2, and 3 Lights
15:53 38Lighting for Drama: 1, 2, and 3 Lights
24:19 39Your First Studio Lighting
38:46Lesson Info
Solving 12 Common Problems of Studio Lighting: 10 to 12
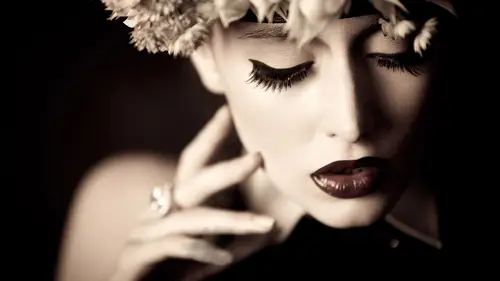
This one we've demonstrated yesterday, so I don't want I won't definitely here, but you, you guys will know the concept. How do I separate a dark subject from a background? And I really struggled with this for a couple reasons I perhaps would have a black background with dark black hair, and that subject just blends right in this is something this is one of the reasons why you would want to lights over one light, because even if you take a reflector opposite this light, when it's a black background and try to catch some of that light to separate the hair it's too dark, it doesn't catch enough sheen, you really need another light that example either a strip bank, but strip box or barn doors or something of that sort, and the other reason that I had trouble with this is because of ratios I had learned about lighting ratios, which would be how strong is the back light compared to the front lines would have a barn door that I was trying to get the ratios, but it doesn't take into considera...
tion what its landing on the fact that it is hitting matt dark black hair, which just absorbs all the light. So perhaps if you're used to, you know that you usually have your back light said it a certain strength you might have to double it or I'm ok I'd probably say go up a stop or two for someone with darker hair whereas with someone with completely bleached blond hair and I have to go way down because it will go over exposed so that's, why there's somewhat of the dangers of just saying ok, the ratio of this that this is because whatever subject is on will actually make a difference so in other words, pure lightning black subject on a black clothing on a black background you probably need another like and strip box or barn doors would be the way to go. One other thing you could do is you can like the background on that something else that we covered yesterday if you still want that low key feel if you still want that dark and moody field, you would take a grid and just put a highlight behind the shadow side of the subject's face exactly so this water refer back to yesterday yet perfect thank you that's a checkerboard letting highlight shadow highlight shadow all right, next one how do I like groups evenly? There are a couple things to keep in mind and I'm going to recruit my audience so just you go if you guys need to get prepared with that, I'll read the notes and then you can conjugate out here are how do I like groups evenly all right, one of the things that you have to keep in mind is if the light is relatively closer to one person in the group that person is going to be brighter so you've got to do whatever you can to try to get the light more equal distant from everybody if you have the light and look at our lovely audience placed over here for this whole group, you're going to be significantly brighter than person far away in fact probably two and a half times brighter so what you want to dio is either try to bring that light out more to the front so now the distance between you two yeah you're still a little closer but not that much closer you're not going to be that much darker there's one thing you can do or if for some reason this's right in your shot and you can't shoot this way if you have the light off to the side what would help is if you feather because now the center of the light is kind of pointed in the middle you're getting the edge to the center's still a little bit further away from you and it's a little bit closer the person on the end so feathering the light is one thing moving it more central would be another the other thing that makes a big difference is small light sources you don't want to use a smaller light source because that whole effect becomes much, much more dressed, like a small light source in this instance would be much fall faster fall off you would be much darker if I use a small light source they use a big light source ok, still, not even, but it would be a lot more subtle of the fall off for transition. So four groups, I'm going to recommend things like three by four foot soft boxes or if you're on location that's not super convenient, I would probably use the big pop up umbrellas, the silver reflection with the diffusion in the front on any of those something else that you could there just kind of that's to summarize it. If the light is close for or if the latest close and really far off to the side, somebody is going to be getting a lot more lights and someone else you got to kind of counteract that large groups, I'm talking like thirty people you can't really light the group of thirty people with one like there's what you'd have to do to get that roughly even is back that light so so far up that it's going to be small compared to everybody, and now you have what looks like flash on camera almost that just happens to light everybody because it becomes a small contrast the light source from really far away so austin with large groups you would try to get his big of modifiers is possibly with a seventy two inch reflectors umbrellas with the diffusion and get a couple of them it tends to be with big group shots you don't have very fancy lighting it's flatter lit just so that everybody is nicely illuminated you're not really going to see huge group shots that have rembrandt light it just doesn't work like that with the direction of the light because as they move away it's it becomes split light as they get closer becomes loop the distances will make a so you may need multiple light sources or with a medium sized group one light source with just like a little bit of phil so we are going I'm going to recruit whoever's willing let's get this going I use the umbrella sure I like that one that's cool all right so um I do this and you know where you're standing I don't figure there ok perfect squish squish squish thank you audience and they were actually I feel like you are already sat roughly where you should be for a group shot because I feel like they sat you based on these things okay so taller gentleman in the back yes please another thing that this would be opposing thing I'm not going to go so fancy with posing but making them all fit on a nine foot seamless I would maybe stack them more. Can I have the two of you grab a chair? Ok, ok, well, you know, what this is going to do is this is going to give me another problem that I have to show you howto all solve is the people on the front are closer to me and closer to the light and the people in the back. So that's yet another dimension of this whole thing. All right, perfect. All right, so reasons I'm gonna have you right up against that share. Perfect. Yet good. Everybody squish even more. Ok, that should be good. All right, so I'm just going to shoot this as a less than perfect composition. Will you turn your body towards towards her and put your hand on the back of the chair? Your left your right hand on the back of a chair. Yeah, just like that. Perfect. You just you're just just just not tall and team. We've been just a little bit right now. I'm happy. I'm you know, I can't help it. Okay. All right. So here, the problems that I have to think through in my mind's eye. If I'm in a small space ace and I have the light, maybe right behind me. Problem is, if I have a lot of depth to this group like there's three or four or five layers the people in the front like these twice as close as the people in the back to that light source and so what that means that they would be significantly darker so what I did instead is the kind of found ways to kind of switch everybody in and then I'm going to back my light source further away because if I bring it close now that relative distance is more dramatic what's going to happen is the person in the front seems a lot closer light and a lot closer to the light in the person that back when I back it up basically or the same distance it's really not going to be huge difference so that's one element of it next I pick a big light source a very very large light source and so with this large light source it's going to evenly illuminate them and I'm not going to have it too far off to the side because what'll happen is if I have it here you are twice as close as you are the subject in the foreground is going to be a lot closer so basically a little bit more to the front further back and trying to get rid of a little bit of depth in my group so I can do this okay with one light and I do have some glasses that will give me my challenges I'll take a look at how this work remember what I said is that you don't want tio protest it thank you yes and so what he and what he just said is he did a test for me and it said that we would be shooting in an ac richer of four point size that is not good with a group with death because what will happen is the person in the foreground might be in focused person the background won't be at nine so f eight or f nine is going to be much safer for a group so let me let me talk through what I would do let's just start with it behind me and show you what doesn't work idea ok it's going to be off the background should move them over ruled this will just make it work here testing light okay so you will see so what I'm going to see okay, so what I have in this instance is let's take a look at the illumination the people on the far left are similarly illuminated to the subjects on the far right because I put the light in the center and I use this large light source if I use a small light source it wouldn't be a soft however I am going to switch you I want to switch your chairs okay, here's, what I'm going to do is I'm going to move the light off to the side a little bit, and I'm going to broad like her. So you were going to exactly what you're gonna look a chin a little bit that way we'll move the light off to the side, great. And then just right there, perfect. So basically now what I'm seeing is significantly less reflection, and this will pop up by switching her and changing the angle of where her eyes are now. There's no reflection on her glasses anymore and you have a little bit of reflection, but it doesn't really bother me. You could could flip up the glasses a tiny bit if I wanted but it's the same thing if his glasses were bothering me switch can I switch the two of you? And now it's the same thing he's facing slightly away so that reflection will hit the glasses and kick off not towards the camera like it is here. So perfect. All right, good, great. Ok, so everybody is nice and evenly illuminated and there's a tiny bit of love, affection, but it's really minimal again, I could kick down a little bit what I'm also doing is we're shooting on a white background here because they're close to the background. And this light sources faraway e mean, if I did this in a way that was where they actually put on the background and didn't randomly pose them further to the right, it would be pretty much a white background behind them, so you could have a boy background without lighting it. If you were shooting them on a dark background, you've got to find some way to separate them from the background that might be let's say this. We're a great background. I might just stick a light behind one of your guys, his legs, and pointed up at the background to give me a little bit of separation. If you wanted to get fancy, you could put lights from either side to give them a little bit of hair light. You could take a strip light from far behind and really high up to give a hair light over the top. It depends on how complicated you want to go. Thank you, my lovely subjects so let's see if you guys have any questions that makes us okay, and we did that with just one light again, I didn't even need additional if you want more shape to the face, I could have pulled the light off farther to the side just you don't want to go too far. And tell us again, lindsay, what size this umbrella was that we're using for this? This was a seventy two inch silver umbrella with a diffusion panel on it yes outside and its vote takes are not I don't I don't know if you would ever shoot something that's simple like for your business but how could you make that? Would you front light it with any other lights? If you had all the lights in the world and all the modifiers and world would you make that like kickers or what I would d'oh to make it a little bit more interesting is that would bring the light a little bit off to the side so I give myself a little bit more shadow I would raise it up higher if I have the height to give a little bit more shape to the face but if the people sitting needed a little bit more phil light then I could add another modifier what they do in like the vogue group shot those are all composited together everybody's let individually and then put together it most of the time some of them like some of maybe there's a specific like game of thrones shot that was a cover of vanity fair the any lead woods did she used that's silver umbrella with the diffusion of high and they just had imposed in dramatic ways that made more interesting compositions versus a white background just a couple of suggestions, because a lot of people do say two people or four people, what size would you umbrella would you go for for that? Have either a two or four? It kind of depends basically what I would consider it if you're photographing two or four people you just don't want to use, say, a beauty dish, because it won't even they like them and you don't want to probably a three foot doctor box you could get away with, too, but maybe not for people, unless you had them stacked closely together, so it might be not as large as that might be like a forty inch umbrella instead of a seventy two inch umbrella. But if you want really super soft light than you could use that as well, which is why I end up collecting all this gear. Give him this would work for this even though I could have used this one over here for a small group of three by four foot soft box would be totally fine pretty before foot would be a great solution. Perfect. So the last one how do I achieve wide akra cher's when using strokes? I quickly did this sunday one, but this is the like let's walk through it, step by step and I will need the ladder. What I was going to do is to show you how I happened to do that shot that was the lead image forth the workshop so this is the step by step of the things that you have to ask yourself when you're trying to shoot a wide aperture first of all you if you were trying to shoot wide open the lens I'm going to switch to is two point eight but this could be if you're shooting at one point for whatever it is you ideally need to shoot with a strobe with lower watts lower wants seconds you it's going to be basically impossible for you to shoot at two point eight in a small space if you have a thousand watt second head you can't turn it down far enough so you would ideally five hundred would be the highest and what helps me out with this particular five hundred watt second stroke is that it's a good strobe that has high variability so I can turn it down really low other strobes or other power packs you could basically just do like half in quarter power which wouldn't be enough to decrease the power whereas other ones have nine stop variability which is what ahead like this has so the more variability the further you can turn it down the better so let me go through the steps of what you'd be considering all right first of all what I'm going to be doing in this instance is I'm going to be opening up my aperture really wide and normally would I dio is a shoot at you know usually I know that I don't have to worry too much about shutter speed as long as it's faster I don't worry about the ambient light in this case you need to shoot the fastest shutter speed possible without going over your sink speed because since you're opening your aperture wide up it is going to bring in whatever light is there so fast shutter speed fast is your sinks for you can go turn down your ambient light whatever you've got put curtains over the windows turn off the lights eliminate all ambient light it will affect your exposure the next thing is take the power of the light turn it all the way down it's better it's easier for me just to start at the very bottom and then if I needed to turn off the power great the next thing that we run of that we would run into is if I use that head bear bowl that my subject I won't be able to get the power down because it's so direct so ideally you'll be using a lot of fire that cuts down on a little bit of light it diffuses it which what we have here is an octo box and the octo boxes spreads the light out a little bit that diffusion in the front whites if you've gone through all of that so the next step that you could possibly try if you give it a try and it's still too bright and you want to shoot at one point four to point and that light is still too bright you can back the light up a little bit at that point you're forced to use distance in the inverse square law to start decreasing the power of the light okay but when you back the light up it changes the quality of life you just have to be aware of that and in the last thing that you might want to check is your modeling like some strobes when you fired the strolled the modeling light turns off briefly other ones are continuous at all times this one's continuous so what happens is I'm shooting at two point eight and this modeling light if it's at full power it's going to show up so you have returned the modeling off or all the way down and that's what I did and that image that was the lead for the class I still had it on so I could see the patterns of light but I turned it way way down so I am going to bring my lovely female model up here and show you the one change and can I have my o ut heaven thank you what a switch lenses because the it's twenty four to one o five that I have is a four point owens and this seventy two two hundred is a two point eight land so I can shoot wide open the reason I have a ladder you do not need a ladder to do this shot, but the problem is is if I'm shooting her against the white background like I am here or a seamless background, I should it two point eight there's nothing out of focus really? I mean maybe a little bit less focus but basically it's a solid background, you don't see any difference, so part of how you would see a difference is by getting at a higher angle perhaps so I could have her eyes and focus and then have the focus fall off should be great for a boudoir shot where she reclined and I shoot down her body so there's some depth of field being shown if I'm just shooting her straight background there's turned up the field and the reason that john put up this flat and something you might consider is if there is an idiot like you just cannot get rid off. If you put up a black v flat and try to block it off your subject, it will help and in this case it's the overhead lights illuminating me that I can't turn off because then you can't see what's going on so we have that to help us out just a little bit. And so what I start off doing before I take any pictures is they set my camera at the settings that I would like to be shooting at two point eight when you're under those second ice. So two hundred also shoot at your lowest viacell throughout that one. All right, so give us a test and I ideally see nothing. This is no stroll. Okay, I took the trigger off. I should see nothing because if I see her full face, that means that the ambient light and the modeling like are affecting my subject. You see a little tiny bit of late there from the modeling like it'll be overpowered by the strobe. So it's ok, because we turned the modeling light down so far. All right, so let's, take a look at what reading are we getting currently? All rights were getting three point two kind back it up a little bit great. Tried again. Okay, so I have to point eight there also I know I liked over exposed skin a little bit. So even if it's a little brighter than two point eight the numbers a little higher it's okay, I like to open up a bit, so I'm shooting it two point eight let me give this a quick test here all right, so notice in this shot you can't really tell what's out of focus like the hair is a little bit out of focus but why bother shooting it too pointy and risking getting the eyes out of focus if there's nothing being gained from it so I'm gonna pop up on this letter thank you, john and I can I'm going to put your hands soft your neck I'm giving myself something so I can see and put your hand a little bit lower right there great and turn your chin to decide I can't remember exactly what I don't look, I think was lou plight good and look your eyes just kind of neutral down great so I'm going to zoom in, shoot it to pointing a little bit back up a little thanks john here you go. Okay, perfect. That is good enough to give it the demonstration. So now compared to the last photo, I couldn't actually see any narrow down the field. Now at two point eight her eyes and focus here and in the light falls off and I think in my shot I had the light off a little bit further to the left. It was a little bit more looper rembrandt lighting and I had a little bit higher ladder and the only reason that matters is I need to be a certain distance away to focus so that would be my slight change but I think it looks pretty and maybe it had hand here when there's a time you could do with it so that is shooting with a wide aperture using studio strokes thank you down for backing me up there just a quick question if you didn't mention it what about about ten people have asked what about using neutral density filters on the lens great to get that wide aperture great question okay, so what nato density soldiers are is they are neutral filters there basically a gray filter that you can put on the front of your lens and it cuts out like and so it makes it so that less light is getting into your lens which means you have to open up wider which allows you to shoot at wider apertures you would have to use something like that if you on ly bought a thousand watt second stroke that's all you have and you want to be a wish you wide open the downside of this is something else you have to buy and we're trying to keep this you know one on one and try to keep it less expensive also there's different ones you can cut out one stop or two stops of light or three stops of light and so that might be something you'd have to test out in your studio space you get it down turned out as lois posse how much light do I really need to cut out? They have variable neutral density which is what I own it has nine the one I have is a helio pan I believe it's not it's six or nine stops variable neutral density but it was four hundred fifty dollars so you could probably get a strober too for that? Yes you're not mentioning neutral density gels at all so you know that's a great point so there's gels that you can stick in front of you there's a couple things actually there's gels that you can stick in front of your strobe that they just look like kind of clear gray ish that cut down on light you can do that you could actually put it inside your soft box and they sell it looks it looks like the elements diffusion paper that you could put inside of your soft box and actually adm or diffusion and each one that it comes in different cuts of light so I could cut out a quarter stop or a full stop. You could do that using the diffusion obviously diffuses your light more if you weren't intending to do that but you could definitely check and see how much light it cuts out and you could use one of those and they have those at theater supplies shops and they also have them you know, adirama things like that that was an awesome question question about that music. It just changes the quality. It also, sometimes I think it like, depending what you get, it might warm up the picture a little bit, because it's it's not it's, supposed to be totally neutral, but sometimes it looks a little bit warmer, but it should be fine, especially just the neutral gray like that's. What it's made for eighties just neutral cuts out a little bit of like, I'm not working, so we could repeat with question what the question was does adding his villamor, adding, and they'll change the quality of life or decreasing, and it might defuse the light more if it's the diffusion material.
Class Materials
bonus material with purchase
Ratings and Reviews
BolesMA
If you're on the fence about this class I can easily answer your concerns. BUY IT. Lindsay provides top notch professional education while keeping things interesting. Her words are precise and direct. I actually felt GOOD just watching and learning. I mean, like someone surprised me with a cupcake kinda GOOD. After the class I could immediately see improvements in my photography. The best part is that I learned enough to see the wrong in my setups. Knowing what's wrong is just as important as knowing what's right. She is funny, easy going, energetic and filled with knowledge. I would also highly recommend her Posing 101 class as a must have addition to this course. I feel like I have learned more than I could possibly use. I will be going through this course over and over again just to make sure it all sinks in. There's THAT MUCH she offers that you will always learn more with each time you watch. I hope this helps someone make the decision to up their game. That is exactly what it did for me.
Jason Ashley
I loved this course! Lindsay spent so much time with explaining each set-up in-depth that anyone picking up a camera could understand how to accomplish their lighting goals. This course covered so many unique (but, most likely to come across scenarios) and how one would approach the challenge and how to successfully accomplish with incredible results, not average-sub-standard or basic results, but above entry-level standards, high-level, money-generating lighting expertise! ZERO laziness in her explanations to the point where she is constantly refining her course in the middle of the 3 days. Her passion gleams throughout each days lessons with so much energy. You know she really wants her students both in-person and through the screen to be successful in whatever type of lighting they choose to dabble in. I am so happy, I have bookmarked, and i'm so happy and fortunate to have this course to reference for hopefully –everrrr. Thanks!
Beatrice Palma
Hi, I am Beatrice from Italy. I think this class is superb. I finally understood what are the guide lines to follow, I tried for years but never found such a good explanation. Lindsay is a wonderful teacher, she explains in a simple way, she shares a lot of knowledge and she shows in practice what are the results of every single choice. Thank you so much, it was really amazing and super interesting!!!!