Quality of Light and Modifiers
Lesson 7 from: Studio Lighting 101Lindsay Adler
Quality of Light and Modifiers
Lesson 7 from: Studio Lighting 101Lindsay Adler
Lesson Info
7. Quality of Light and Modifiers
Lessons
Day 1
1Studio Essentials: Shutter Speed
15:50 2Studio Essentials: Flash Exposure
22:26 3Studio Essentials: White Balance
21:15 4Light Principles: Inverse Square Law
26:46 5Lighting Patterns
15:29 6Shoot: Demo Lighting Patterns
28:06 7Quality of Light and Modifiers
09:59Shoot: Choosing a Modifier - Diffusion and Grid
13:40 9Shoot: Choosing a Modifier - Umbrellas
31:01 10Shoot: Choosing a Modifier - Softboxes
21:08 11Shoot: Choosing a Modifier - Extra Stuff
28:10 1210 One Light Set-ups: 1 and 2
17:07 1310 One Light Set-ups: 3 to 5
18:16 1410 One Light Set-ups: 6 to 10
15:57 15One Light Set-ups: Pop Quiz
21:21Day 2
16FAQ for Purchasing Studio Light Part 1
31:00 17FAQ for Purchasing Studio Light Part 2
25:36 18FAQ for Purchasing Studio Light Part 3
43:53 1910 Two Light Set-Ups: 1 and 2
24:29 2010 Two Light Set-Ups: 3 to 6
25:24 2110 Two Light Set-Ups: 7 to 10
22:30 225 Two Light Set-Ups: 1 & 2
13:27 235 Two Light Set-Ups: 3 to 5
33:37 245 Basic Three Light Set-Ups: 1 & 2
21:05 255 Basic Three Light Set-Ups: 3 to 5
25:52 265 Intermediate Three Light Set-Ups: 1 to 3
17:14 275 Intermediate Three Light Set-Ups: 4 & 5
12:58 2810 Common Lighting Mistakes
16:46Day 3
29Solving 12 Common Problems of Studio Lighting: 1
39:29 30Solving 12 Common Problems of Studio Lighting: 2 to 6
37:25 31Solving 12 Common Problems of Studio Lighting: 7
15:50 32Solving 12 Common Problems of Studio Lighting: 8
25:51 33Solving 12 Common Problems of Studio Lighting: 9
16:19 34Solving 12 Common Problems of Studio Lighting: 10 to 12
26:11 35Portrait Lighting: 1, 2, and 3 Lights
14:51 36Beauty Lighting: 1, 2, and 3 Lights
18:06 37Lighting Groups: 1, 2, and 3 Lights
15:53 38Lighting for Drama: 1, 2, and 3 Lights
24:19 39Your First Studio Lighting
38:46Lesson Info
Quality of Light and Modifiers
This is something that I did not in any way shape or form understand until maybe three years ago I didn't get it and so I hope that I help you get it ok here's the deal the larger the light sources relative to your subject the softer that it appears the smaller that light sources relative to the subject the harsher appears and the key word here is that relative thing relatives your subject so for example this son is huge but relative to us it is tiny in the sky so it looked harsh on our skin let's say that you have a small umbrella and you bring that umbrella really closed her relative to her it's pretty close it's going to be pretty soft but take that same umbrella and back it up fifteen seats relative to her it's pretty small and it's not going to be soft light anymore so this is when it becomes important to realize where you place your modifier is important even if you get a decent size soft box let's say a three size three foot doctor box but you put it ten feet away it's not big a...
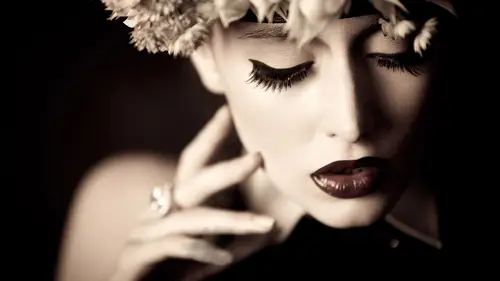
nymore you would have to have to make it equivalent to being here you'd have to have a five or six foot doctor box that far away so relative size makes a big difference but this is why I did not understand this when you bring a light closer it looks brighter right? We talked about the closer you bring your light to the subject the brighter at ihs and in my head bright didn't look soft but they're not the same thing one is intensity of light we brought it in so it looks more intense it's brighter but it's still softer it wraps around more it's not a point source of light when you bring it in so when you're practicing this and you're try bringing your light source in and you're trying to look to see if it's softer you have to try to divorce your brain from the intensity it'll look brighter which for some reason to me I thought was harsher but no the shadows still have that soft ingredient so over and over again these are the things that you want to repeat the larger the light source is relative to the subject the softer the light and then the smaller that that light sources to the subject the harsher the light so if you want soft light get a bigger light source and bring it closer if you want a harsher like a smaller light source and bring it further back so here's an illustration of this and I will illustrate it with her as well cases that girl raquel again she's she's an assistant of minds I've got a small lockbox and you can see the distance all right so look at the shadows very, very closely so she's got it's not soft, it's. Not harsh. Okay, it's like kind of an in between. All I do is a double the distance away from her for that for that small octo box and it gets more chris with light gets more contrast e so the shadow it kind of fades off in the first one. It's got a little bit of grady into it, and in the second it gets much more contracting. All I did is double that distance. So this will make a huge difference over what modifiers you choose could. What are you trying to achieve with your photographs? So remember, closer is brighter, but it's also also softer, bigger. The light source is relative. The subjects after the light. All right, there are about a jillion different types of modifiers of all sorts, and it really depends. You know the tool for the job. What are you trying to do? And so I'll recommend to you later the most commonly used like modifiers for portrait's, for example, and so there's kind of a hard medium in soft light sources. Keeping in mind that size is varying for all of these will make a difference because I could take an umbrella that's really small, and it makes it a little bit harsher. And I have taken a bill it's really big, and I'll make it softer as long as it's close. All right? So taking a look here left inside these type of light modifiers are more contrast and what they have in common is there small and their silver, the more contrast you want, pick modifiers that air, silver and smaller, which would be the general silver reflector that comes with a lot of lights. That is very, very contrast e the ones that I have here you don't need this is not like you don't need to know this future starting I'm just going to tell you this is the silver reflector. This is a long throw. This is a magnum reflector all of these small silver contrast e ok, then they on the other extreme you have soft boxes. Soft boxes tend to be one of the softer sources of light. We'll also talk about shoot through umbrellas being a soft option as well on dh for these they have something called diffusion it's basically trans lucien material. When the light hits it, the light spreads out and softened. It makes the light source larger that's basically, what a soft box does. You've got the head of the light, which is this big it's, maybe the size of your fist but as soon as it hits that diffusion panel in the front that light sources now the size of the diffusion panel so as I said the larger light source becomes softer a smaller soft box like an octo box in order to make it really soft got to bring it closer I have a four by six soft box you have a little bit further back a large that life sources it's going to be softer so you've got those two extremes and then you've got the ones that are like medium kind in the between I've got my beauty this year beauty dish would not be my first light modifier to tell a portrait photographer to get I'm still going to go more in the realm of a soft boxer umbrella but I will tell you it's a light modifier I use most often for fashion photography so when I break this down on day three I'll go in order of if you do portrait's what to get if you do groups what to get but a beauty dishes not up there but it's one of my like because it is in between it's got some of the soft qualities of light that are more flattering to the skin like a soft box because you saw in the beginning when I grab a contrast the light source the highlights get brighter in the shadows get darker what does that do to wrinkles shadows get darker, so wrinkle show up more or blemishes show up more or highlights get brighter somebody with an oily head now those highlights or that much brighter so generally for a portrait a soft blocks is the most forgiving because it is the softest it has. The less contrast is the less difference between shadow and highly so he looks best on the skin downside of the soft box or an umbrella and umbrella in particular is a little harder to control or tow have the type of shadows he want because there's a radiant so it's a little bit harder to get chris rembrandt, for example, of the soft box because it's a general gradual change between highlight in shadow, you can get an amazingly crisp, cool shadow from for rembrandt light from one of the more contrast the modifiers, but it looks like crap on the skin so it's back to that like decision making that we'll have the whole time so I want contrast to do I want soft do I want more dimension but it? Or is it too much to mention like it's, that constant balance? So that's why I use a bb dish a lot and this is something called a parabolic umbrella you don't need to know why I just put it on the screen kind of the range of what you might want so let's talk about some other things all right so what I want you to take a watch or what you want you to watch out for is to look at the shadows on her face the highlights on her face the grady in't of the shadows and overall contrast like how does this light look so I put through and I shot the's there's nine here different light modifiers and I have on my store on top of my law there's a link I just did a lighting guide that has sixty lighting set ups and one of the things that has in it are these images each one has its own page listing the modifier and then compares them side by side we're going to do that now but it also is a good reference to see all right so that is a small white umbrella kind of softer softer shadows there speedy dish still has a little bit of glow to the skin but you notice that shadow got a little bit harsher and we're going to bring some of these modifiers out for you to look at you got the beauty dish next one is an octo box it's softer it wraps but isn't wrapped too far shadows air still defined but still kind of a greedy in't there we'll talk about an octo box or a larger soft box the lights wrapping around more the grading of the shadows is a little softer on this isn't called a parabolic umbrella. This is getting fancy, but I'm showing some different ones that exists. Your small silver dish member, small and faraway. Look how contrast t that is, there's. Bigger silver dish contrast is a little less defined on the nose. Got a long throw that just more contrast and it's new. So if you look at all these when these all have something, a totally different effects to them, to the highlights, to the shadows, the shape of the face. But it just kind of depends on what you're going for.
Class Materials
bonus material with purchase
Ratings and Reviews
BolesMA
If you're on the fence about this class I can easily answer your concerns. BUY IT. Lindsay provides top notch professional education while keeping things interesting. Her words are precise and direct. I actually felt GOOD just watching and learning. I mean, like someone surprised me with a cupcake kinda GOOD. After the class I could immediately see improvements in my photography. The best part is that I learned enough to see the wrong in my setups. Knowing what's wrong is just as important as knowing what's right. She is funny, easy going, energetic and filled with knowledge. I would also highly recommend her Posing 101 class as a must have addition to this course. I feel like I have learned more than I could possibly use. I will be going through this course over and over again just to make sure it all sinks in. There's THAT MUCH she offers that you will always learn more with each time you watch. I hope this helps someone make the decision to up their game. That is exactly what it did for me.
Jason Ashley
I loved this course! Lindsay spent so much time with explaining each set-up in-depth that anyone picking up a camera could understand how to accomplish their lighting goals. This course covered so many unique (but, most likely to come across scenarios) and how one would approach the challenge and how to successfully accomplish with incredible results, not average-sub-standard or basic results, but above entry-level standards, high-level, money-generating lighting expertise! ZERO laziness in her explanations to the point where she is constantly refining her course in the middle of the 3 days. Her passion gleams throughout each days lessons with so much energy. You know she really wants her students both in-person and through the screen to be successful in whatever type of lighting they choose to dabble in. I am so happy, I have bookmarked, and i'm so happy and fortunate to have this course to reference for hopefully –everrrr. Thanks!
Beatrice Palma
Hi, I am Beatrice from Italy. I think this class is superb. I finally understood what are the guide lines to follow, I tried for years but never found such a good explanation. Lindsay is a wonderful teacher, she explains in a simple way, she shares a lot of knowledge and she shows in practice what are the results of every single choice. Thank you so much, it was really amazing and super interesting!!!!
Student Work
Related Classes
Lighting