10 One Light Set-ups: 1 and 2
Lesson 12 from: Studio Lighting 101Lindsay Adler
10 One Light Set-ups: 1 and 2
Lesson 12 from: Studio Lighting 101Lindsay Adler
Lesson Info
12. 10 One Light Set-ups: 1 and 2
Lessons
Day 1
1Studio Essentials: Shutter Speed
15:50 2Studio Essentials: Flash Exposure
22:26 3Studio Essentials: White Balance
21:15 4Light Principles: Inverse Square Law
26:46 5Lighting Patterns
15:29 6Shoot: Demo Lighting Patterns
28:06 7Quality of Light and Modifiers
09:59Shoot: Choosing a Modifier - Diffusion and Grid
13:40 9Shoot: Choosing a Modifier - Umbrellas
31:01 10Shoot: Choosing a Modifier - Softboxes
21:08 11Shoot: Choosing a Modifier - Extra Stuff
28:10 1210 One Light Set-ups: 1 and 2
17:07 1310 One Light Set-ups: 3 to 5
18:16 1410 One Light Set-ups: 6 to 10
15:57 15One Light Set-ups: Pop Quiz
21:21Day 2
16FAQ for Purchasing Studio Light Part 1
31:00 17FAQ for Purchasing Studio Light Part 2
25:36 18FAQ for Purchasing Studio Light Part 3
43:53 1910 Two Light Set-Ups: 1 and 2
24:29 2010 Two Light Set-Ups: 3 to 6
25:24 2110 Two Light Set-Ups: 7 to 10
22:30 225 Two Light Set-Ups: 1 & 2
13:27 235 Two Light Set-Ups: 3 to 5
33:37 245 Basic Three Light Set-Ups: 1 & 2
21:05 255 Basic Three Light Set-Ups: 3 to 5
25:52 265 Intermediate Three Light Set-Ups: 1 to 3
17:14 275 Intermediate Three Light Set-Ups: 4 & 5
12:58 2810 Common Lighting Mistakes
16:46Day 3
29Solving 12 Common Problems of Studio Lighting: 1
39:29 30Solving 12 Common Problems of Studio Lighting: 2 to 6
37:25 31Solving 12 Common Problems of Studio Lighting: 7
15:50 32Solving 12 Common Problems of Studio Lighting: 8
25:51 33Solving 12 Common Problems of Studio Lighting: 9
16:19 34Solving 12 Common Problems of Studio Lighting: 10 to 12
26:11 35Portrait Lighting: 1, 2, and 3 Lights
14:51 36Beauty Lighting: 1, 2, and 3 Lights
18:06 37Lighting Groups: 1, 2, and 3 Lights
15:53 38Lighting for Drama: 1, 2, and 3 Lights
24:19 39Your First Studio Lighting
38:46Lesson Info
10 One Light Set-ups: 1 and 2
We are going to jump into our ten white, one light set ups and everything that I'm going to demo is going to be with not the box, but here's the thing I showed you tons of different modifiers, you could do this with a larger saltbox, it would just be harder to control. You could do this with a small umbrella, but you might need to bring everything closer to make it soft as this you could use make more dramatic light with a silver reflector, so all of these can be modified. It'll just have a different end result. So I'm going to show you different ways that I would use an octo bach, and as we said, they'll be this final image with the actual pds and download of the class. So may I have my model out here, and I'll talk you through what my brain is thinking when I'm lighting her? Will this be a problem to have it from that way? Or do we need to rotate it? Okay, if you wantto flip it for me, okay, so have you take a seat, so I'm going to start off with her front and center, but keeping in ...
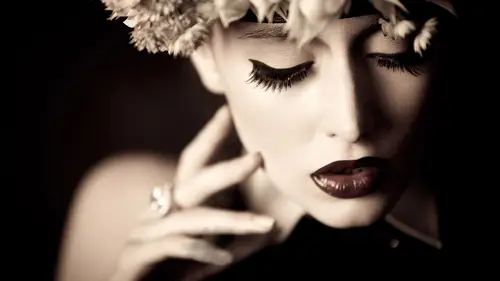
mind that I can move her closer further, the backer and all of that to change with the background looks like the very first set up would be just a plain old lovely paramount lighting or loop lighting and this looks good with an octo box honestly on pretty much anybody does it necessarily have flair and style to it? No it's just a nice functional portrait so if you're just starting off you can't go wrong here like it won't it won't look like a bad photograph it'll look like a nice portrait it just might not be profound, so I think it is a great place to start in the extra hand ok, perfect all right, so for me I know that I want the light center for paramount or slightly off to the side if I want a little bit more shadow to her face keeping in mind that let's say I'm looking at her and this is something I consider with portrait this is not the case with you, so don't worry but let's say I look at her and it's a subject that has a very uneven face where one I very much larger than the other a rule of thumb for portrait. If somebody has a very uneven face, you don't point them straight on towards camera because that invites you to compare left and right because you're looking at a still frame you're never looking at someone and staring and say, well, ok that's uneven but you do when it's captured photograph so when I talk about paramount in this case I am talking about the light on her face so if I did say you know what I don't want her straight on towards camera so I'll turn you a little bit it might be paramount that direction if I needed to turn her head it would just be minimal shadows and right now I have the soft box it's pretty little bit higher has more elevation to it on it will give you a little bit more definition to the shadows underneath her jaw line and in her cheekbones and let's take a quick meter test thank you and I'll show you if you are going to do this again I'm going to change the boom if you don't have a boom let's give this test and a little bit higher perfect nine o okay give this a test perfect in several straight and one of the things I'm looking for when photographing her is I am looking for in a portrait for her toe have catch lights in your eyes so that is a rule of thumb for studio letting and portrait lighting in general is you want some sort of highlight in her eyes if for some reason she leans forward or slouch is a little bit this light is up pretty high and so let me just have you slouch just a little bit look your eyes down I'm like looking like a little bit lower she is. She still has a little bit which will have really small catches and really, you want to have a little bit of sparkle so a couple things you might want to do is perhaps lower your light or have your son just sit up a little bit straighter. So a couple things I want to note is that my meter told me nine point oh, what she does you put an extra eye and pointed it towards the light in this case trying to catch the light at nine o I think it's a little dark for a portrait my general rules some is if you are using light meters I generally over exposed by two thirds toe stop two thirds of a stop to a full stop so I met nine oh, I think I might like it better it aito seven one like I'm going to open up the whole lot more light and make it a little bit brighter. Good. And I already know I like this like better. So just know the meter is a guideline but then you got outsmart your meter, outsmart your camera so we have that so that's a nice light on her face for her, this light looks great she has nice cheekbones, a nice john glenn, can I un boom this for a second can I have it loops not boomed like not the boom off but just turned ok, so this is for people that don't have a boom arm roughly where I would put it let's try like ok, perfect. So something like this and I'm gonna lower this good you got it ok, perfect so roughly the height that I would put it out if it's not boomed would be about like this. So the center of her life of the light is about nine to sixteen inches of overhead nine to twelve something like that. So if you look top of the light is about here from her eyes gives her a little bit of shape if there's too much shadow I lower it so this is going to be right about here I'm gonna have a little bit of loop underneath her nose it's not too low it's not too high and it'll be just a nice franklin portrayal on a need to meet her that looks good so if you don't have a boom this is what I would do and still look like a nice portrait. You want a little dittemore shadow you pull it off to the side, he want a little more shape, you raise it up, okay, so that looks great, so that would be my set of number one that is just a nice functional portrait either straight in front for minimal shadows or if you want a little more shape slightly off to the side with a three foot locked box. Is that like meaning? That picture. All right, it's. Cool. Okay, can I have the key note? Back up. Okay, so we had that boomed out over. We had a paramount, but the next thing I would dio would be a lighting set up called clamshell lighting. And yes, do that. Since we are using the same gear again for this entire segment, can you tell folks again with what this one is perfect. Okay, so this particular light modifier is the westcott rapid box, octo, octo excel and three foot. So if you have I mean pretty much any brand has some sort of free for octo box. I like using octo box, so I'd like to catch flights in the eyes. It wraps around nicely. You could do the same thing with a three foot soft box, for example, same concept I did want to address. There is not an inter baffle in case you were curious, it would make some difference. But it's not really large enough to make that draft pick of the difference where you'll really see it is a big, soft box that would want that extra diffusion panel. Also just to go over I have the pro photo d one airs that's what I'm using we'll talk about this tomorrow there five hundred watt second lights and for the power was tricking the camera see this when I'm talking about changing the output this is all I'm doing like I'm just changing out put up her down I'm not changing anything fancy and we'll talk about model blocks and things tomorrow but I didn't I don't didn't like working with pacs where I had to figure out ok, so if I plug it in and splits the power and then I got turned up and down like this pax and heads were much more popular in the past this is called ah mon alight and so this is what I tend to use a lot more often and will describe what that means in death tomorrow. Okay booming out again just a little bit, you know have to move it out as much. Okay, so lighting set up number two is called clamshell lighting and clamps relating is the most popular of beauty lighting for female portrait's for beauty and like fashion photography but it's also just reports in general what you do is you boom the late out over or not if you get as close to center it is possible usually and then you put a reflector underneath their chin and the reason it's called this it's basically two light sources your main light and then you feel like you're reflector underneath and the subject's head is the pearl in the clamshell it's clamshell waiting and so right now this direction of light looks nice but the problem that all run into it she'll have shadows in her eyes like I said it doesn't need to be boomed it could be slightly off to the left or right but you still want it pretty high up and what's nice is gonna carve out the features in her faith but it just gets too dark under her chin and underneath her eyes so you add that light source to fill in here uh hey uh meter passes off to you thank you all right and I think I think it's still on perfect hold that big button in perfect process once oh it's cause I was messing with it I was messing with it okay, well hypothetically if I turned this right she turned down okay? Okay right channel so I'm changing it from my trigger instead of having to have him bring that down and change it I'm just going to the energy and for this particular one if I hold it in it drops by like a full stop of power all right, so this should be lovely much better now yes perfect ok so here's what it looks like without the film nice chief to her face but it gets a little bit dark so what's to silver so clamshell lighting the beauty lighting is the silver reflector underneath remembering when I do this every thing makes a difference so a little bit lower and then right there and so what you'll see and if whoever's manning light room if you'll zoom into the eyes on this one what you'll see is you'll see to catch lights one high and centered and then one underneath from the reflector I have been asked many times about this if there's a problem with multiple catch lights and where they should be I heard like long ago I think people are more concerned about where the catch lights were but it's not really an issue the on ly time I don't like multiple catch lights is when they're like this to catch flights on the far left and right of the eye like that tends to look strange but this is what this is supposed to look like it's supposed to have one catch like below and one catch late above and one catch like blow so you can actually see in her eyes the light source we're using so that's something I want to invite everyone to do especially one o one photographer's for sure because what you'll see is you see the octagon shape in her eyes and so that tells you right away that it's an octo box if you see you can tell when it's an umbrella you can see what that umbrella looks like and so if you look at some of these images when you go back and look at what we shot you'll see the catch lights a beauty dish looks like a circle within a circle soft box will be a large square and you don't know what size it is because if they wanted to make it look bigger they just bring it closer so I will look at photos that I love and try to figure out how they were living by looking at the eyes and I can tell right now it's a knock to box above and it's more or less centered but maybe a tiny bit off to the left it's not a perfectly centered but it's pretty darn close okay and then I can see in her eye if I see any kind of reflection from below that's not a perfect shape it's not a dog it's not a rectangles not align I used to know it's a reflector if it's sparkly or bright I know that it's silver if it's flat and dull just like a little bit of reflection that I know it's white so catch lights a clam shell you khun do with silver you can do it with white and I had a question before about if you can use silver, gold or gold underneath um I avoid it because right now, the light that I have coming from above is daylight balance, and it is white. It is a white light source, so if I take a silver gold mixed reflector, they have ones that are just golden tones of silver gold a little bit. What ends up happening is you've got this night nice white light source from above, and then underneath their chin is gold, and it doesn't quite make sense, and it usually isn't very flattering, so I go with silver or white. I've seen silver gold used before in very few cases, so I would just say, stick with silver white, and if you do not have a reflector, no problem you can use to other things you could use a piece of white foam core, you can get it for, like five dollars at home craft store, so they're like two by three foot pieces and the few dollars you can use that or if you want to use silver and you don't have silver there, plenty of things you can use, but even larger cake pans or, like lasagna pans if you didn't have one or if you have one sit in your house, you could use that as well the kick light if you didn't have any reflectors at all. That was loving. Let me switch to white to show the difference, remembering that the higher up you bring the light, when you check the angle, it fills in more the lower down you bring the light, the less it feels and white is more subtle and less contrast, even silver. So if you look at the catch lights in this in her eyes, in this next one, if you want a human, it'll be much more subtle and hardly visible just like to see a little bit of catch late in the bottom. And so sometimes it's sneaky because you can't quite tell, but I try to break down with the light sources are all right, so I am ready to go on to number three and lessors questions on that let's see, this question had come in earlier from e fergie, when you were showing us the back of the light does does the scale on the back of the strobe relate directly to f stops? Okay, really good question so here's the thing, while technically it kind of does like you're putting out a stop of light, like each, each jump up on this particular one a stop of light would be twice as much light it doesn't relate to the stops you change on your camera. Because the distance is going to make a difference in the modifier is going to make a difference. So while it it does technically mean that in the head itself in reality it's not like I go oh, I went from seventy eight now I can change one stop on my camera it does it's not that simple unfortunately. And every single light is different and those numbers will not like this one is fourth or ten yeah, this one's four through ten other ones are like one one twenty eighth power up to full power other so the numbers just because it's a five point six doesn't mean that's what your temperature is going to be exactly. Yeah, definitely doesn't yeah, the point being once you do have a piece of gear, you need toe learn that particular piece of gear. Yeah, great. I do have another question for you from pixel candy and again, we we have been having a lot of people ask about small spaces and so with, say, an eight puts stealing what are you thinking about differently when you have that kind of smaller space and low ceiling, how does that affect what you do? Sure, and so I do have a segment on this, but I can touched on it briefly first of all, I think smaller modifiers and bring them closer in because I can't have a four by six off, fox isn't going to work, so this something like this would be ideal. A smaller light source closer to my subject. If I don't need full length, I have them sit down, and then also, I don't boom things out as much. It would be just trying to keep it more off to the side and over instead of, like boomed out and over, it takes up more space, about seven and a half feet high, so that what we're doing now could fit into an eight foot ceiling. Yeah, and, of course, if she's sitting on the stairs, you stand someone up. Then it runs into it. So if it's a head shot, for sure, just sit them down.
Class Materials
bonus material with purchase
Ratings and Reviews
BolesMA
If you're on the fence about this class I can easily answer your concerns. BUY IT. Lindsay provides top notch professional education while keeping things interesting. Her words are precise and direct. I actually felt GOOD just watching and learning. I mean, like someone surprised me with a cupcake kinda GOOD. After the class I could immediately see improvements in my photography. The best part is that I learned enough to see the wrong in my setups. Knowing what's wrong is just as important as knowing what's right. She is funny, easy going, energetic and filled with knowledge. I would also highly recommend her Posing 101 class as a must have addition to this course. I feel like I have learned more than I could possibly use. I will be going through this course over and over again just to make sure it all sinks in. There's THAT MUCH she offers that you will always learn more with each time you watch. I hope this helps someone make the decision to up their game. That is exactly what it did for me.
Jason Ashley
I loved this course! Lindsay spent so much time with explaining each set-up in-depth that anyone picking up a camera could understand how to accomplish their lighting goals. This course covered so many unique (but, most likely to come across scenarios) and how one would approach the challenge and how to successfully accomplish with incredible results, not average-sub-standard or basic results, but above entry-level standards, high-level, money-generating lighting expertise! ZERO laziness in her explanations to the point where she is constantly refining her course in the middle of the 3 days. Her passion gleams throughout each days lessons with so much energy. You know she really wants her students both in-person and through the screen to be successful in whatever type of lighting they choose to dabble in. I am so happy, I have bookmarked, and i'm so happy and fortunate to have this course to reference for hopefully –everrrr. Thanks!
Beatrice Palma
Hi, I am Beatrice from Italy. I think this class is superb. I finally understood what are the guide lines to follow, I tried for years but never found such a good explanation. Lindsay is a wonderful teacher, she explains in a simple way, she shares a lot of knowledge and she shows in practice what are the results of every single choice. Thank you so much, it was really amazing and super interesting!!!!