Lessons
Day 1
1Course Overview & Lighting Examples
22:53 2Mono Lights & Pack Lights
29:32 3Light Controls & Shaping
30:36 4Beauty Dishes, Soft Boxes & Reflectors
18:09 5Live Demos with Lighting Tools
31:41 6Tools of Light Q & A
13:59 7Shoot: Mixing Strobe with Ambient Light
41:49Shoot: Painting with Light
26:01 9Shoot: 4 Applications of Light
33:34 10Shoot: Using 7 Foot Silver Umbrella
17:52 11Shoot: Group Portrait
14:18Day 2
12Shadows, Highlights & Light Metering
39:04 13Shoot: Size Relative to Distance
35:17 14Shoot: Variations of Modifiers Part 1
40:43 15Shoot: Variations of Modifiers Part 2
27:41 16Shoot: Lighting Backdrops - Modeling Lights & Gels
38:24 17Shoot: Backdrops with Gradient & Draping Effects
19:16 18Shoot: White & Steel Door Backdrop Effects
23:37 19Shoot: Lighting Effects on Vintage Items
30:12 20Shoot: Lighting on Commercial Product
42:48Day 3
21Shoot: Sitting Casual Portrait
29:48 22Shoot: Classical, Traditional Portrait
27:44 23Shoot: Broad, Short & Profile Lighting
19:32 24Shoot: Full Length One Light Fashion
22:19 25Shoot: Two Light Fashion
15:53 26Lightroom: Retouching
18:27 27Shoot: One Light Appearing as Four
36:18 28Shoot: Two Light Profile Portrait
34:48 29Shoot: Classical Glamour
37:13 30Shoot: 40's Hollywood Glamour
21:54Lesson Info
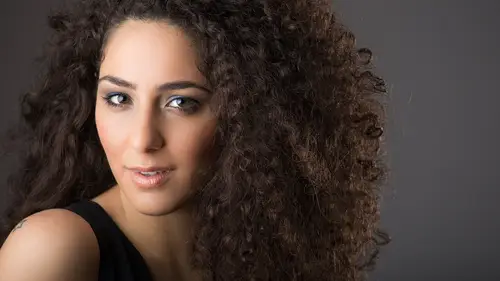
Shoot: Sitting Casual Portrait
As you guys don't know me well enough by now, you know that for me, creating predictable results is what this is all about. And I think if there's anything that has helped me in teaching and seemingly doing a pretty decent job of teaching it's because I'm real serious about getting predictable results, I hate not knowing what's gonna happen. I'm you know, dean collins used to always say he was he always called himself an art bark. And I said, is that because it's the first word in the dictionary, so you get to the head of the class and he says no, it's because an artwork was a mammal that dug and dug and dug until it gets what it wants, and I think that's kind of like, I think that dean instilled that in me, and that is you do have to work for this, and it is not going to come easy for some people, and it will not come to you by just sitting down and reading a book, you've got to get off the cast and go out and try this stuff, and you got to test the stuff and you've got a failed over ...
and over and over, and you have to take a whole lot of bad pictures before you take a whole lot of good pictures. You know it's kind of like learning learning to surf and I moved to san diego years ago asked a friend I said, so I want to learn to surf what's the first thing I need to know he says you're going to swallow a lot of salt water, you know? And I think that's what is in photography? You're going to mess up a lot of pictures if you're not messing up pictures, you're not trying and you're not going you're not learning anything much like scheme, you're not eating a lot of snow, you're not progressing, so you have to try stuff and the worst that can happen is you delayed and start over nobody gets hurt we fortunately are in an industry that if we screw up the biggest possible way, the worst that can happen is you have to re shoot something we're not surgeons, you know when we when we mess up it's not to earth shattering other career choices when they mess up it's a problem when we mess up reshoot that's about as bad as it gets for us and in most cases we get to see people at their best except except the forensic guy for the police depart but the rest of us get to see people at their best and what what a great way to spend your life, your working career you're waking moments dealing with people when they're on when they're smiling when they're happy with her dress good in their teeth are brushed in the hair looks great, you know, that's not a bad way to work, but again, I've never been a photojournalist, so I haven't seen and had to work too much in the other side, the bad side. So what we're going to try to accomplish today is I want to start this morning doing a kind of a casual portrait of of our model, its test that we have today this morning, yeah, okay, so, uh, jessica head over this way and what we're going to do, I've kind of get this thing organized in such a way, we're going to start with her on the floor and we're going to do a kind of ah kind of a unique shot that I tested a few years ago, and I like the way turned out and I don't do it very often, but I really like it, so I wanted to try it again and I think there's a lot to it, I think there's a lot we can learn from this, so I will get this thing underway. Does anybody have any questions before we before we jump into this okay, so everybody's caught up ok, so let's do this test, I want to get you off forward a little bit more like just off the edge of that come forward a little bit more there you go and let's, just spin your hips that way. There you go. Perfect. Perfect, perfect. And you're going to be a good and tall. And john, I think actually, you know what? That's, not bad. Where it is, I'm gonna take my camera off the tripod and get down on the ground, get her level here on I think what we'll see is not today. I'm working, by the way, with the seventy, two hundred er four on my old things. I'm working with a seventy, two hundred four on my five d mark three and I think what what happens here is oh, yeah, this is gonna be just the right height, john let's do a couple things if we could just move that line a little bit closer to her and maybe toward me about a half of foot test so I just need you to turn your head a little bit that way and your chin down right there that's going to be perfect right there. So what we'll do is they couldn't get a reading, john, that meters right behind you. Yeah, let's, get a quick reading of that and let's, just check and see where we are, I think. One of the things that I want to do here is create uh I want to create some shaping on that backdrop, create some ripples and create some some sort of depth and dimension back no potato great. We never get a toe. Okay, so we'll take that and this fire one off. Let me just check out her face here and see how that like qualities looking coming across her face, you can see position wise. Oh, that's, real nice that's that's about what I was hoping for. Okay, we're doing I love it when a plan I love it when a plan comes together. Yeah, this I don't like a lot of guess work, so when I can get one and and she looks like she's supposed to look that's what we're after so let's do this jonah just for fun. Let's take those from those props that we were something that really just put him back behind the fabric. What I want to do is just kind of create some some shades behind her and you can just put it right? Yeah, just like that. Just shove that under there and put it in and push it back in there about five feet or so, yeah, right in there is great, I'm just trying to create some some shapes and sizes and create more wrinkles and highlights and shadows and this is just going to create a little bit of depth maybe but that one in from this side over here john and maybe put it in and I can just kind of tell you where to go, place it there and push it back a little bit there you go that's great that's that's ideal and she's right in the trough there so so that looks really good. Let me just back out a little bit try that one time and show you what I'm talking about ok, so now you can start to see we've got some little miscellaneous shapes back there behind her that's all I was trying to do now now then let's introduce the rest of the picture let's let's bring in a little bit of color so let's, go ahead and turn on that background light we've put a full orange cto orange filter gel over the background light because I wanted to contrast when I saw her blue sweater this morning I thought what contrast with blue so let's go opposite on the color so I thought that orange and then just swivel it toward the back drop just a bit there you go I think this is probably going to do it right there and let's just get a quick reading of that we'll just get a quick reading of that and I'm shooting f eight so I wouldn't mind this being a little bit above after you even right there is gonna be great eating a third rate and if they go ahead and pop it up plus one just go plus one and that's good let's try right there I think we're going to like that look and let me just get in here and take a look here great great great good good good good okay so now we're starting to get some warmth coming up in the background and maybe even maybe even uh I'll scoot you forward a little bit more if I can't there you go yep that's good and john now can we just let me just get a horse all of this so I can see a little bit more great right there okay so now swivel it away from the background I had you go too far bring it back just a little bit but you can start to see what I'm talking about back there I'm just trying to get something that happened back there that's that's a little bit fun and kind of weird and the great news about all of this stuff you guys is that we it's all for fun and we can do whatever you want here I do want to bring your I want to make sure we bring your face into the light really solid there there you go great great great great great great now of course I'm going toe crop this differently than you're seeing on my screen I'm probably going to come in here like this and crop it vertically more like this great that's really pretty good great. So now let's do this I think I think john I want power that background down just maybe down yeah like a half would be great perfect and then let's go ahead and turn on that accent light and let's just sort of skim it right across her hair and probably about a one yeah that's that's going to be yeah so what we're seeing now is the idea here was to make the the hair light in the accent light almost look as though it's reflecting off of the background so to sort of make it look like it's part of the same sort of the same lighting if you will that make any sense and again if you'll notice in that background I mean the accent like that john's adjusting right now I've got a great spot and I've got about twenty or thirty degree grid in there and the idea for the grid pardon me is simply to keep that light from getting into the flare of my lens I'm just trying to prevent that from yeah that yeah, you go ahead and spin it back away from me a little bit right about there now, let's get a reading right of her head and we want to take that and we want it pretty low, so I think we're going to probably be so it's almost a four and I'm shooting at faa so it's at a minus two so it's two stops below what I'm shooting at watch what happens with dark hair I can get away with this with blond hair I think you have to have it at a little bit higher power, which is opposite of what your brain tells you and its opposite of what I've read in some photo books which is interesting for me uh, let's not e I test a lot of things that I read and photo books and there's enough a lot of really great information and then some places there's not, which is why we have to test but what I find is with dark hair, I can go with that accent like I can go on a minus two below from from whatever it is that I'm shooting yet and I can and I can do find a great results so let me try one here, let me just let me just take a quick peek, try not to pull out my tether cable great and let's just bring your head around just a little bit there you go right there, great and I'm going to zoom in just a little bit tighter on your face on this one one second great, great, great right there. Good. So now take a look and you can see how this warmth is popping up on this next one especially I've got it a little bit closer in and if we could just zoom in on that mike, if you're in the booth and can just and then and then dissipate back out just a little bit maybe go to that one third of you or something. Yeah, there you go. So you can see how this works there now for some people the ratio is just too high it's just it's just too dark on the shadow side of the line we can fill it easily enough. We can just fill it with a card here use use that strip card right there. Just doing that that's and that's even better because it won't block out the audience so you cannot block feelings. Go ahead and come forward and right there that's perfect that's perfect here's the same shot. Great here's the shame shot with the phil taking care of. So maybe we could put these two together, michael in this and pops up there we go ratio wise one of the things that I like about working with reflectors as opposed to fill lights on, and I started in a portrait studio where everybody at that time and the traditional portrait studios, everybody had a feel like and and that was just you had to have a film like, well, the problem with it is there's about four or five issues with the one one good issue is it does give a good overall base exposure based phil on your image, but the problem with it is if you want to very your contrast every time you would change your range of contrast, you were having to change your exposure because the film light was working together with the main light or key light, and so those two together married up and made the exposure that was a problem that was a real problem. It was a problem for me because I couldn't just quickly go heavy shadow no, no shadow, and I couldn't do that without having to re meter every single time, and I didn't want to do that. Now look at the background there grab background didn't move her highlight didn't move the color verse water didn't move, everything stayed the same. I just filled in the shadows a little bit that's the only difference, and I think for me, if I hadn't been testing and testing and testing this, I never would have stumbled into this and I think so, that's that's part of what we're talking about her, you really, really do need to test to see what's going on have to test it for yourself, let's do one more done with its back, about half way back so that we have all three variations and what I'm doing, you can see that by the wrinkles in the fabric, the folds in the fabric, you can see that I've got my camera not straight up and down. I'm purposely tipping my camera slightly just to introduce a little bit of a a kind of kind of an angle, if you will sort of azaz my friend mike marvin's called it dynamic symmetry, so I'm creating dynamic symmetry great your eyes right here, perfect, great! So it gives us that should give us three different levels of shadow density and which ones? Right? I don't know, but I do know that I can give my client three variations in about two seconds and any other way, working with any kind of a fixed phil, like in this building, I can't do that. This takes just seconds to do, and and then there are people to say, well, I could do that post you can't, you can't get a photo so you can go in open shadow density do you have time? That's my only question is do you have time and how many sessions did you shoot today and how many exposures on each session did you take today? So I just want us to be able to do the best that we can get the shot as close as we can get it to be in a final final at the time we pull the trigger and that's what I've been preaching all week and that's what I'll be preaching all next week that's kind of what I do I get on this little soapbox that I'm sitting on and priest on breach consistency and predictable results I talked yesterday about going to mcdonald's in japan you know, predictable results I knew exactly what was going to taste like no surprise I don't want any surprises I just want a burger that it wasn't dead fish you know and so what I did john, I want to do this I do want a tight I want to brighten up her accent just a little bit on that side and in fact bringing around to me just a little bit closer to me I start a step maybe maybe maybe a foot this way just a little bit there you go and then just pop up that power maybe maybe up a half something like that there we go here let me give you a model late there you go good okay so test listed it one more time right there good, good good. Now he's gonna want to I want to turn you the other way there you go and I want you to be just I just want to get good uncomfortable just like that but here's the trick yeah got to keep your back straight number one trick folks in the world there's two things and win tonys world of posing and I joked about this with the game yesterday the day before anything that will bend when photographing a woman just go ahead and bend it if it'll band let it bend and then the other then the only rule is straight up your back that's my rule straighten your back I say that all the time that I had a brother in law who who used to take his thumb move photograph high school seniors and he would poke the boys right in the ribs right back there straight up your back and boy, they would sit up straight and a heartbeat maybe never slapped again. You know? So this's great, I just wanna work your head of red in fact you're you're fine down let's can we just point that like this main light to me? Yeah, just slightly maybe five or six inches because I do like her looking right into the camera like this this is really good and maybe a little bit just a tiny bit further great and I just want to earn your shoulders that way just a bit yeah yeah now bring your head around just a little right there. Let me just let me just try this one right there and see if we like it I think we've got a nice portrait at their turn your head and just a tiny bit more right there great good so I think that that's a pretty usable image right there I think the highlight is just right in her hair she's got a lovely smile we got we got all the right stuff coming going on here just for fun let's just kill the background light just turn it off for just a second and I'm going to do one without it and I'm going back up and show a little bit more the setback there now that background is called vantage point and it's one of those that we talked about yesterday from white house here we go and I'm just going to come back in a little bit now good stand up just a little bit and let your head this roll over the side a little bit for me right there great great great great in fact let me do that again I like that nice and you can see we're not when I'm working I'm doing one more than one kind of perfect well that there we go I like that much better when I'm shooting like this you guys I tried to almost never have my camera straight my cameras always tipped a little bit one way or the other way it just seems toe for me just kind of something I stumbled into on I just sort of like it I don't know quite why but I like the look of it um let's do let's do one last thing let me do one more without the accent and let's turn on the background light again but pull the gel off of it this time and I just want I just want to get this nice great background can you move that way just like three four inches yeah right in there like that yeah that's it that's it and your perfect that's what you're saying but I just want your shoulders a little bit away from me right there folks the reason I'm doing that by the way when I'm turning your shoulders a little bit away from me all I'm trying to go and turn your shoulders flat right there if the cameras on her look how flat the light is across her chest watch the shadowing in the contouring of her shoulders and her chest and her tummy everything as I turned her shoulders away now I've got some contouring I've got highlights in shadows I can't show depth shape former texture with flat light, I've got to get her off access to the light source and that's all I'm doing, you know, that was one of the great tricks from the great monty zucker. You know, if you don't know where to start, then turn their head their shoulders away from the light and then bring your head back to the light and you can't hey that's assailable picture anywhere in the country in the world so it's a good place to start it's a really great beginning place. Ok, my dear, you look great right there on fire. That one off. I think that looks pretty darn good. I like that a lot, john. Just power that background light down. Can we go down like five or six tenths of one, two, three tents. Okay, well, let's, go down three tenths. In fact, just rotate it a little bit to me. That's it okay, must do that. I like that. I think I'm gonna like that even better. Great, great, great. Good. And just keep your shoulders that way a little bit more. And now, in fact, go ahead and scoot that way just a couple of inches that way sorry, yep, and now I'm just kind of lean over a little bit further that way and now just bring your head around a little bit more right there in fact looked just like you're doing look look like your eyes come right here right in my hand got it finds something right there to look at perfect nobody moves nobody moves ho ho ho this is good that's good that's going to skip that one again let me just back up and get one more horse on it like that jennifer tiny bit and now this time saying exact thing but your eyes right in here right down the barrel and one more with a smile great great great good so now we got the variety and I think that's one of the things that you might want to strive to do is get that variety for your client you know especially someone like this she's got a great smile she looks great small and big and she looks great smiling little and she looks great smiling none and so I think that's kind of what we're after here again this is just a fun little quick set that you can do it's why I like to use portable back ground holders so much to instead of having my backgrounds on a roller system on fixed in the ceiling and you know some people have electric rollers and they have four five backgrounds in their ceilings drop down that's all fine and it's and it's great for volume work but this gives me the ability I could just drop that the background stand down, you can see how low I have it, and this is only an eight foot backdrop. Well, I've got it pulled out quite a bit, and I've got weirdness stuff underneath it, just trying to give me some shapes. So this is something different, you know? Nothing too important, okay, so let's get you to go change clothes and we're going to rearrange the set a little bit and we are in fact, you guys, I can throw it to you guys, if you want, take a question or two while we re establish the set over here a little bit, we're going to start with the question online then, so we have a busy street guy, he says, tony, this has been an outstanding course, however there's an issue regarding incident, light meters that I just can't get my head around specifically, how can an incident reading on both the subject and the background produced perfect exposures on both at, say, f eight, when the background is two to three times farther away from the camera thing whatsoever to do with the distance of your life source to the camera exposure has nothing to do with distance at all other than the distance of the light source to the subject. Not anything to the distance of the camera in other words think about this now this is going to sound really silly and and I'm not sure if his answer the question exactly but do you know what the exposure is on a bright sunny day? The exposure on a bright sunny day is it is sunny sixteen f sixteen and I also shutter speed whatever that it's on a friendly subject guess what the exposure is of the full moon sunny sixteen exposure the moon is exactly the same exposure as bright sun on earth if you want to get a good deep exposed moon properly exposed so it has nothing to do with the distance of my subject to my camera as it has to do with how much light is reaching my subject and or my background and that's why I have to have the meter russ is because I've got to be able to know that my subject reads f eight and I'm shooting at faa and then I will power my background light up or down until it gets to whatever output I'm I'm looking for for the shot and if it reads f eight then I know that I'm shooting at the same value on my subject as the value reads on the backdrop that's the only way I know that I'm gonna get the true exposure of what the backdrop looks like so I just try to match up those numbers I hope that it covered it I hope that explained it it's great to make that was good s o a c m eighty three christina would like to know what are the things that you're using for phil light for instance the board that john has that reflector that handheld reflected he talked to us about you sort of your go to in a pinch and about handheld reflectors please s o so I use those those pop up six and one's a lot and those those are these round pop up collapsible tools that you can get white silver gold black translucent like these guys right here these guys come these guys come in these these round packages and and you know you to open him up you kind of let go over and stand back on they kind of do that but I've got him in every tone there is and that's what I usually go with and you don't always have to have an assistant I've got john doing all the work here today on lee because we're trying to move quickly through these sessions for the show but but for the most part all of this stuff they're little barrel stands and boom arms toe hold all this stuff and I can even just use a plain old a clamp from home depot or lowe's and it's a ninety nine cent clamp that can clamp down the top of a life stand like that china love john I can put this guy right there sitting on top of a light stand and work by myself a little rough outside and wind but it works fine, but then you can also use this an inexpensive, cheap piece of cardboard or piece of foam court I just need something to fill in the shadows and write their own least face I can go like this and all of a sudden I go from from a from a dark face with light hair teo beautiful exposed face it's just it's just an ambient thing and what's great about photography and what's great about this and specifically back to my statement a few minutes ago about not working with the phil light if I don't have a phil light than what I see is what I get if I do have a feel like what I see is not what I'm going to get so I love the concept of what you see is what you get and I used to work in the studio with phil light for portrait, but I turned it off in nineteen eighty seven I've never turned it back on you know, I've been a happy boy sense, so you know, this is my thirty fourth year doing this, so I've come I've kind of taken a few pictures with him without and I'm much happier without a feel light and I have just I just feel like I've got more control, you know? And I thought, I think my subjects faces ten toe have a little more richness without the flatness of a film like hit in the face cool thing you do you think you could teach a class here a creative live on how to fold up the reflecting on your every everybody the instructions always say fold it into a figure eight and it collapses down I never could figure it very well, but with the way I've always done it is I bring my hands together like that towards just the potato chip and then I push it against my leg and I grabbed that side and let that side go under like that cool that's why did everybody else kind of twist and makes a figure eight he's a twister? He's a lot of people are interested, but you know, for me, you know, half the time half the time you can get these things too we'll see he missed it it's already it's already tweaked out, but now that they're those things were really helpful and it doesn't really matter what brand of the tool you use you just but you've gotta have tools like that and widgets all around the studio you need those things and you use you use them every day you know, it's kind of why you walk into a commercial studio, you see these gigantic flats and translucent fabrics, and you see flying silks and you see gigantic black flags like this, these twos, eight foot phone course, the flying these I mean, all of those things are important to have because they're just tools that you've got to use toe help make that picture come to life, you know? Great. Fantastic present. Yeah, absolutely. We've got photography one one who says so? Tony always has his lights. It seems at ninety degrees rather than a forty five. Everyone else seems to show forty five degrees what's the difference. And why do you do that? It's not it's, not it's, not a normal or usual thing for me. It just kind of has a soda stumble into that sometimes. Um, in this case for us, for the one I just did, I wanted that like to appear more like a window light and window light. Traditionally, if you're doing a window like portrait of someone in their home traditionally their head hype is about the same as the window hyped. Rarely do you have a window like that's coming from above that's all with a big, soft source, I'll often do it at ninety degrees. But traditional portrait work like what we're about to do this next classical shot I'll have it up and I had forty five because that's what it calls for so for me, it's not a you know, I wanted a few guys I know that doesn't do everything the same way every single time except how using my meter on did use it the same way every single time. But yes, so the next time I will call for this going up because it's more of a classical look cool twenty we do have a few more questions do you want to do some set up now or do you want to take some questions? We'll take some questions. What was this changing clothes until she gets back? We'll be good until she gets back perfect. So bob from charlotte says been eleven this class I've taken on photographing large numbers of military school students that will always have their hats on how would you handle getting sufficient lighting under the bills of their hats to make good exposures that don't leave their upper torso over exposed? Yes, oh it's great question on this is this is going to have the question would be in maybe he you're probably seeing so many I don't know if you can get the answer, but the question would be, are they full length or head shots? If they are head shots, it's easy enough to get a reflector down below that can help you by bouncing light back under the bill of a hat or if they're full length, you can put a silver reflector on the ground in front of him, and the trick there is to let your main light, instead of having the main light where you would normally have it, just cheat a little bit and aim it almost done that the reflector you're still going to get a good pop from the main light, but in this case, you can have it down below so you can kind of get a little bit of help from underneath. You don't want to lower the light so much that you're completely underneath the hat, flat light in the face. But you do need obviously you gotta lighten up those eyes and get that get that live in there. I would have no problem putting a reflector or silver right on the ground and just cheat my light to it a little bit. Let some light bounced back up. Cool. Now, if they were doing a group shot yeah, if they were doing a group shot, what do you think in that case I would I would use twin forty five degree umbrellas grill or him down a little bit and, you know, in that case, you know, when you when you get a big group it's, kind like that u n picture that people always talk about because that's, one of few great things I got to be involved in with kodak, you've got a hundred eighty five people in the picture nobody cared about the light quality. What we cared about was getting on the eyes open the same time, you know? So sometimes it's not a bad the artistic beauty sometimes it's about being a functional picture and if everybody's eyes are closed where we lack function so, you know, so that's the big trick is with big group is you've got to be animated a little bit. You've got to get their energy level get everybody's attention. Okay, everybody, here we go. Good, good, good, good bam bam bam don't you closed your eyes bam bam bam! I'm watching you bam bam bam! And you're just you're just laughing, having a great time when I mean keeping their attention on you so they don't stop and go on the turn and look at the guy next to him you just can't have that, but lighting him flattening out with umbrellas and letem leter rip
Class Materials
Bonus Materials with Purchase
Ratings and Reviews
AJ Photography Ireland
Watching this Course from Ireland live, and at my leisure having purchased the course, I cannot praise Tony Corbell enough. I felt I was right there in the Classroom with him and gained so, so much from stunning course. He really does explain the techniques he uses so well and is one of the greatest Educators that I have seen in photography. Worth every Euro ( Dollar ) !.. Thank you Creative Live and Keep up the good work ! Andy Jay www.ajphotography.ie Cork Ireland.
Martin
I learned a lot from Tony´s class. Very experienced, talented, smart tips and funny comments. Generous on sharing his knowledge. I am passionate about learning portraiture since about a year or two, had bought a couple of flashlights, stands, modifiers and now the most difficult part, to have my wife and kids be patient and let me practice with them. John Cornicello did an excellent job helping with the lights and bringing his own comments too. They both did an excellent match. This is a class I will watch again from time to time. This is the second course I watch from Tony and about the 15th course I watched from Creative.
a Creativelive Student
This is just a tremendous class. I love Mr. Corbell's teaching style and appreciate his levity. Most of all, I value the expertise he brings to the subject matter. After watching the entire class, I have been able to make adjustments to my lighting that I love and feel like I have a better idea of what I am looking for with my lights. This is a terrific value at any price.
Student Work
Related Classes
Lighting