Lessons
Class Introduction
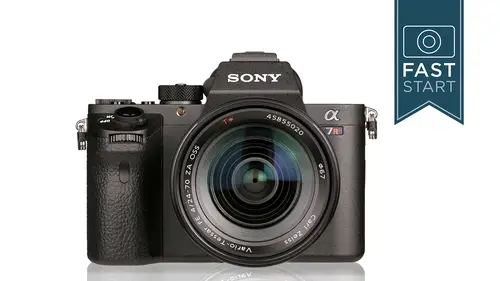
05:40 2Sony A7 Mark II: Overview
15:53 3Photography Basics
07:36 4Basic Controls
08:12 5Panorama Controls
04:44 6Mode Dial and Exposure Compensation
10:47 7Custom Key Settings
06:27 8Focus Area
08:45Multi Interface Shoe
02:31 10Back Side: Navigation
11:02 11Function Button: Modes
22:40 12Display Options
10:18 13Left and Right Side: Navigation
15:26 14Bottom and Front: Navigation
03:45 15Sony Lens Options
15:37 16Camera Menu: 1
09:29 17Camera Menu: 2
06:01 18Camera Menu: 3
02:42 19Camera Menu: 4
05:02 20Camera Menu: 5
08:31 21Camera Menu: 6
08:46 22Camera Menu: 7
11:32 23Camera Menu: 8
05:39 24Camera Menu: 9
07:16 25Custom Set-Up: 1
04:42 26Custom Set-Up: 2
05:33 27Custom Set-Up: 3
09:19 28Custom Set-Up: 4
04:24 29Custom Set-Up: 5
09:35 30Custom Set-Up: 6
03:53 31Custom Set-Up: 7
07:12 32Custom Set-Up: 8
02:41 33Wireless Options
03:44 34Application and Play Menus
17:42 35Set-Up Menu: 1-6
16:01 36Camera Operation
09:21Lesson Info
Camera Menu: 5
Camera settings eso hey we've got a button on this on the it's on the back of the camera we got it in the function menu but we got it again in here so that if we want to get in here we could make even more adjustments to it we also have an auto eso where we can set a minimum shutter speed on this and so I want to do a little demo on the camera with this so let me go ahead and get my camera set so we're going to go in and we're going to go to page am page five now page five s o auto minimum shutter speed and so now I can choose a minimum shutter speed that I will let the camera shoot at before it starts changing the sl so for instance let's say I was working with the fifty millimeter lands and I wanted to make sure that my cameras at one sixty eighth of a second faster I could put in sixty and it's going to be at one sixty and if the camera needs more light it's going to raise up the I s l but what if I have a zoom lands that zooms from twenty four to seventy and my ability to handhold ...
the camera changes with wide angle lens I could hold it at a thirtieth of a second on one in but a sixtieth on the other well that's where auto I s o minimum shutter speed comes in because now the camera will follow were you zoom and changed your center speed accordingly and you can go in and you can have it a little bit faster than normal, a little bit slower than normal and actually slow or slower than normal, faster, faster than normal. So tell you what we're going to d'oh, we're going toe take our camera and we're going to leave it at standard right now and we're going to make sure that we are in auto eso which we're not so let's, go change this to auto eso and let's take a look at our shutter speeds in the bottom left its at one eightieth of a second and his eye zoom the lens it allows me down with a slower shutter speed to one sixteenth of a second. Now let's, jump back in and we're going to change this to a really slow setting, the slower source setting. Now look at our shutter speed, it's down at a fifteenth of a second and goes to a twentieth of a second. So what it's doing is it's going down about to stop slower than it would normally choose let's, change this up to a faster shutter speed so let's say I was shooting action that I knew I needed a little bit faster than average shutter speed or let's just say I knew that I had a big lens and I wasn't able to hand hold it quite as easily here, it's choosing to fiftieth of a second and three twentieth of a second, so this is a great way for customizing using the auto is so because I'm not a big fan of using auto, so because it doesn't know much about how you are handling in the camera, and this is a way of you providing information to the camera so that it will give you better settings depending on the situation that you're shooting. And so normally I'd leave it at standard to start with, but adjusted as necessary according to how steady you can hold the camera in the action that you might be photographing. Okay, so that is the auto highest, so minimum shutter speed metering mode. We saw this in the function menu. How your camera reads light, multi works really good. Gonna go ahead and keep it there the white balance. We had a button that was programmed c one on the cameras currently programmed to do that. Right now we have the same options available here, and so no changes we really need to make here, but will also see that in the function setting as well. Now one of the things that you can do is you can photograph a white sheet of paper and under tungsten light and maybe we could we get a shot of russ because russ is sitting right in front of a bunks bunch of tungsten bulbs thes air all tungsten bulbs do they seem orange to you well they are orange because that is the color of tungsten and so if you were photographing russ under the sea tungsten lights you'd probably want to adjust the white balance in your camera so one of the things you could do is you can photograph a white sheet of paper and you need to select the custom set up in the camera in the white balance section and then you're going to press the control wheel and it's going to read that light and it is going to and then you're going to register that into the camera and let's just take a flyer here and see if I can actually do this in the camera right now for everyone here now this white wall behind me actually has some blue to it and so this might come out a little bit funny but I'm gonna go ahead and try to do this any boy so let's jump into this white balance and what I want to do is I want to go in to a custom set up mode and let's see where we got our customs set up and custom one custom to custom three customs set up finally here we go what does it do it's has set let's hit the set button and it's got gives us a little circle here in the middle and we're supposed to point that to capture data of central air of screen so we're going to say that that's white back there and I'm gonna press that and I'm going to calibrate it the camera takes a photo not a real photo but just kind of a test photo to see what the color temperature of that area as and it looks like it's giving us a color down here and what we can do now is we can register this to custom setting number one number two number three and we're going to go ahead and set it into custom number one so that when we are photographing here in studio b at creative live in seattle washington this camera is set it's custom setting tau automatically have the right color right there so when I'm changing the so I could have my camera set on automatic and it's pretty close daylight my camera clearly looks off here but if I come all the way down to custom setting number one it is spot on for this particular area so if you're working in a very particular environment all you need is something neutral it could be a white sheet of paper it could be a great card something that doesn't have color that you could take a test reading of and so that's how that worked out okay, that was white balance moving on alright, we saw the d r o and the auto hdr in the function menu settings and this is the same thing normally it's going to be turned off but this is where you can go in and either have the camera adjust the totality is for you or have it shoot multiple photos to photos and combine that information into one photo and so this is something that you can put on your assignment list of things to test out to see if they work for you I think for most people you're just gonna leave this turned off but there are a few situations where it may help you out and getting better quality images but mostly leaving it office probably going to be fine creative style we talked about this in the function menu this is where we can go in and control the look of r j pegs most of the time I would like a very consistent look for my images so I would just leave it on standard but if you do need to get you're j pegs out of the camera very quickly without any computer adjustments you might want to play around with this to see if there's a better setting that fits your needs a little bit better and one of the things that you can do here is that you can go in and make some changes to this. Let me see if I could do this in camera just to show you let me pop in the menu system, jump down to creative style, select the standard and you'll notice over here to the right we can go in and we can control the exact contrast saturation and sharpness of your images, and there is going to be a variety of reasons why you might or might not want to do this as we go back and forth. And so you could take any one of these, and you can increase it by a few steps or reduce it by a few steps to get the exact look you want. I think the average person isn't going to play with us at all, but for for instance, you know, if you were shooting, you know, pictures for your kid was in high school and you were shooting pictures for the high school all team, and they needed photos for their yearbook and their weekly newspaper, but they needed a particular look to him, and then you just wanted to get him a bunch of photos straight out of the camera. Right then, there, on the night of the game that you were shooting, this would be one way to kind of tweak it a little bit. If they came back, they said, your images were a little contrast. He can you make some changes in that? Yes, you can, and that is how you do it.
Class Materials
Bonus Materials with Purchase
Ratings and Reviews
Diane Schulman
INCREDIBLE Class! I couldn't find anything on the internet that truly explained this camera, explained what it can and can't do and what accessories would work with it. I have had my Sony A7II for awhile now, but was so overwhelmed by it, I rarely even took it out of its case. It was just easier to use my Canon 5D III. After this class, I am so excited to finally practice with and use my Sony. John is an incredible teacher. He is thorough, professional, fun and knowledgeable! Buying this class was the best investment!!! I feel like I just got the gift of a new camera because I can finally use my Sony!!! Thanks John and Thanks Creative Live!!!
Enrique Vega es
I stored my Sony A7II for more than a year since I've been Canon's user for 7 years and I felt unsure of taking this new camera which implied a different menu system, different functions, a little bit intimidating. Finally, I took a bit of valor, put my camera next to the computer monitor for then start watching this guide and I spent a great time actually. I'm amazed at how helpful and clear is the sequence of the chapters. It was enough to get to chapter ten to know all the basic controls and start taking pictures with an equivalent confidence of my good old Canon, or even better since in the chapter 8th I learned how accurate and easy to use is the focusing system, either, manual or auto (For stills I've always used manual focusing). Very informative, enjoyable and now I became a new fan of the mirrorless cameras, at the point that I'm considering to buy another two :D
Madgardener
Was so grateful to find this class introducing the operation of my first mirrorless camera. The Sony a7 series is quite different from my Canon DSLRs and I am confident that John gave me a good head start. Without this comprehensive intro it would have been VERY frustrating and I would not be making full use of the camera's many abilities! Thanks for a great course at a fair price.
Student Work
Related Classes
Camera Guides