Lessons
Class Introduction
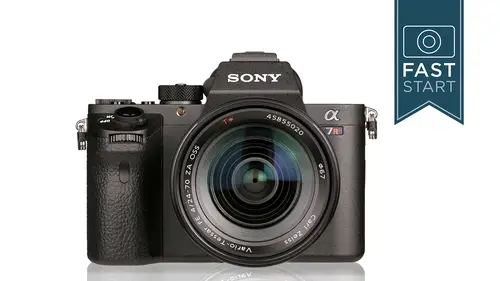
05:40 2Sony A7 Mark II: Overview
15:53 3Photography Basics
07:36 4Basic Controls
08:12 5Panorama Controls
04:44 6Mode Dial and Exposure Compensation
10:47 7Custom Key Settings
06:27 8Focus Area
08:45Multi Interface Shoe
02:31 10Back Side: Navigation
11:02 11Function Button: Modes
22:40 12Display Options
10:18 13Left and Right Side: Navigation
15:26 14Bottom and Front: Navigation
03:45 15Sony Lens Options
15:37 16Camera Menu: 1
09:29 17Camera Menu: 2
06:01 18Camera Menu: 3
02:42 19Camera Menu: 4
05:02 20Camera Menu: 5
08:31 21Camera Menu: 6
08:46 22Camera Menu: 7
11:32 23Camera Menu: 8
05:39 24Camera Menu: 9
07:16 25Custom Set-Up: 1
04:42 26Custom Set-Up: 2
05:33 27Custom Set-Up: 3
09:19 28Custom Set-Up: 4
04:24 29Custom Set-Up: 5
09:35 30Custom Set-Up: 6
03:53 31Custom Set-Up: 7
07:12 32Custom Set-Up: 8
02:41 33Wireless Options
03:44 34Application and Play Menus
17:42 35Set-Up Menu: 1-6
16:01 36Camera Operation
09:21Lesson Info
Camera Menu: 1
All right, folks, it is time to dive into the menu system of the camera so let's, go ahead and dive into the menu and we have one of them or extensive menus available on any camera available on the market today and we're going to go through this one by one is you hit the menu button, you're going to find different tabs or groupings of information and in general they make a fair bit of sense. We do have wireless settings in there and the applications in there I'll be honest with you. The camera settings and the custom settings are a myth mix match mismatch off a lot of features in that entire first to two groupings of settings, so we'll be going through all of these as two navigating you're going to be using the various dials on the camera to either go up down or left and right to page through the different tab systems on the camera. The camera that we're going to be using as an example is thie a seven are mark too, because it arguably has the most number of features in it. And so one o...
f the things to be aware of is what camera do you have and what are we looking at on screen and maybe different? And so here is the important thing is that the number of features and the exact the features that are available differ from camera to camera, but the order is almost exactly the right order. So we're going to go through things in a sequential order and at a certain point you are going to say, wait a minute, I don't have that feature in my camera that's okay, that camera just may not have that feature. You may need to look on the previous page or the following paige, depending on the order that we go in, and also no doubt hear that this's a great time to have the pdf that has the listing of the class so that you can mark your own settings. I've giving you some instructions and suggestions of how I I would recommend setting the camera, but you can start making your own settings in here, and by looking at this, I think it will help familiarize yourself with wear. Things are in the camera now as we get into the camera. One of the things that I've noticed, which is completely not indicated on any instruction manual from sony, is why're these symbols by some features and not all features in general. Still, images have that little mountain type icon by him, and the movie images are the movie setting features have a film strip by him it's not. Completely accurate in the sense that there are other features that deal with movie that do not have the movie symbol on it, but you can trust if you see a movie symbol, it has something to do with the movie, so we are ready to get started in this, and we're going to be navigating ourselves to the very top left of the camera and let's, just jump onto my camera real quickly with the a quick tutorial on navigating the system, so of course our cameras are on. We're going to hit the menu switch, and I typically used the back dial of the camera and the up down to navigate my system my way through the different system, you can use the back dial to go across, and this is a great way to jump from one tab to the next, because in this first tab, we have nine pages of information and so we can go up and down with the front dial or the back. We can also go around so there's a lot of different ways, and so we have our different tabs and we're going to be starting on the left at the top, page one and then just working our way forward through things. All right let's go back to the keynote so first item in here is image quality this is obviously going to be a little bit different between the different cameras that have the different numbers of mega pixels if you were going to shoot j pegs what size j pigsty want in general I'm going to recommend the largest size if you're shooting raw we're going to see that in just a moment aspect ratio this is an unusual way let's get this in here there we go we have the option of shooting three by two which is the native aspect ratio of the sensor in the camera or shooting the cropped aspect ratio of sixteen by nine which is the format of high definition television and most of the time I would think that you're probably gonna want to be in the three by two but if you knew you wanted to shoot something that had the sixteen by nine this will give you the crop aspect in the viewfinder so that you can actually see it equality setting this is where we get to change between j peg and raw so we have the option starting at the top of the list of raw raw plus a j peg ah high quality j peg a medium quality j peg and a lower quality ones and that quality difference has to do with the compression of that j peg they're all the same resolution which is what we picked up under image size but this is how much compression and for the most part this is where we're kind of throwing away color information when we shoot say, for instance, a standard size j pick and so if you are going to shoot j peg, I would recommend the extra fine j peg, but I think a lot of our users with these cameras are going to want to get the highest quality still images out of them that would be the raw image. Now, as we progress through this class, you're going to see my recommendations over on the right hand side in gray for the advance users I'm going to have those recommendations in red and just listen to what I also have to say about it because sometimes I'm going very back and forth between which ones I personally use or how I would recommend using those features and so you will see this mimic also in the pdf that comes with the class. All right, next up is the raw file type, so one of the first complaints that people had with this camera is that sony was giving us raw files that were compressed in file size, which means sony is taking the original information from the censor and then they're tweaking with it a little bit in order to say file size and there are some people who wanted access to the un compressed raw so the firmware update that came out which is why this is cameras at two point oh right now is they released an un compressed raw that you can shoot, so if you want the absolute most information possible, you could move your camera to a nun compressed raw if you do that, you will see that on your cameras display it'll change from a raw in white tow a raw in black and the size of those files are going to change tremendously they're going to nearly double are in fact they made more than double in size and so the ultimate question is should I set my camera to compressed raw or un compressed rock? And all I can say is that if you want them absolute most amount of data of course you go with un compressed rock but you were going to be hard pressed to take two images one at each setting and see any difference at all. There are some people who have done some testing and under extreme conditions of exposure white exposure latitude very bright, very dark they were ableto pull in a little bit better quality picture with an un compressed raw but it comes at a severe penalty in size and so I think for most people the compressed raw is going to be fine that is where I'm going to set my camera most of the time, I think there's just too heavy heading it's, tryingto it's like having a car that you can get two more miles on the top speed of the car if you cut your gas mileage and half and that's just too heavy of a price for me to pay in most situations, if I do feel like I might need it, I know that's the quote of one little extra thing that I can throw in there. And so if you're unsure about this, go out, take some photos that are identical between the two of them, shoot when it compressed, won it un compressed and see if you can see any difference in that. And I bet in most situations you will not see any difference at all and as a footnote and just pure speculation on this point, some people are asking and it's possible that sony in the future, either with the firmware update or on new cameras. Most likely they may come up with a compressed but lost list type raw, which is a bit, um, of a compromise between the two and so that's still a possibility of the future. All right, next up, we talked about panorama earlier in this class, and this is where you can come in and choose to shoot either your standard wide or you're very wide shot uh, the direction would be changed with the front dial on the camera will also see another place where we can set that right down here, so you can either change it here, or you can change it on the camera when you shoot. And just as a reference real quickly, we have our standard down, which is a relatively small panorama, working all the way to the wide right, which is going to be very wide angle from right from one side to the other. And I don't know that we had any questions on this, but you can use a variety of lenses. You can use telephoto lenses. You can use wide angle on land lenses on this. It doesn't really matter, and so we can dive in here and change those. Normally, I'm going to leave it on standard and right for most quick panorama situations.
Class Materials
Bonus Materials with Purchase
Ratings and Reviews
Diane Schulman
INCREDIBLE Class! I couldn't find anything on the internet that truly explained this camera, explained what it can and can't do and what accessories would work with it. I have had my Sony A7II for awhile now, but was so overwhelmed by it, I rarely even took it out of its case. It was just easier to use my Canon 5D III. After this class, I am so excited to finally practice with and use my Sony. John is an incredible teacher. He is thorough, professional, fun and knowledgeable! Buying this class was the best investment!!! I feel like I just got the gift of a new camera because I can finally use my Sony!!! Thanks John and Thanks Creative Live!!!
Enrique Vega es
I stored my Sony A7II for more than a year since I've been Canon's user for 7 years and I felt unsure of taking this new camera which implied a different menu system, different functions, a little bit intimidating. Finally, I took a bit of valor, put my camera next to the computer monitor for then start watching this guide and I spent a great time actually. I'm amazed at how helpful and clear is the sequence of the chapters. It was enough to get to chapter ten to know all the basic controls and start taking pictures with an equivalent confidence of my good old Canon, or even better since in the chapter 8th I learned how accurate and easy to use is the focusing system, either, manual or auto (For stills I've always used manual focusing). Very informative, enjoyable and now I became a new fan of the mirrorless cameras, at the point that I'm considering to buy another two :D
VeraInAlbania
John is an excellent teacher! In fact his Fundamentals of Digital Photography 2014 was the first ever class I watched on CreativeLive, and since then I'm in love with his teaching style as well as with CreativeLive! I bought my Sony A7II in March 2015 and when I found out that John is giving a class on it I was very excited! As I expected I learnt many secrets about my camera which I had been using for 9 months already. For example about the option of focusing on the eyes, setting the buttons, making panoramas etc. The camera is still smarter than me I must admit. I am enjoying my Sony even more now since after the class I feel much more confident. Thank you John and CreativeLive for such an opportunity! I would recommend to everyone who has a Sony a7II camera and the other cameras in this line to watch this class. It's a concentrate of useful information, very detailed and to the point. I spent two days just watching the class and practicing new knowledge with my camera straight away. I had to postpone all the other life chores. And I would be ready to watch the class again after some time as it's a professional camera which needs a lot of practice!
Student Work
Related Classes
Camera Guides