Optional Presser Feet
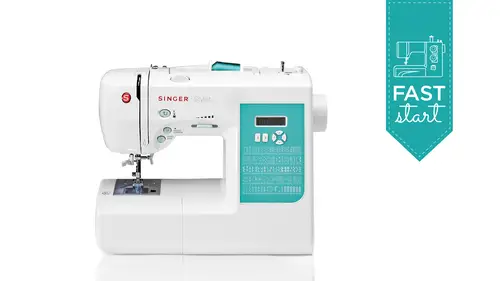
Lesson 6 from: Singer Stylist™ Sewing Machine Model 7258 - Fast StartBecky Hanson
Optional Presser Feet
Lesson 6 from: Singer Stylist™ Sewing Machine Model 7258 - Fast StartBecky Hanson
Lessons
Lesson Info
Optional Presser Feet
I mean, I just switched back to that kind of coat wait colored thread that I had this is the same fabric that I used to just kind of really trying to show you a lot of stuff in a short amount of time here I'm gonna put this up regular thread back on the top three thread the machine and to sew a button on it so it's a great great time saver you take up lever it's in um you can so a lot of buttons on it once we've got a trench coat here where it's even got four whole buttons you can do to whole or four whole buttons with, um with your button sewing foot now what you're going to need to do is if I drop this him eager I put it over here we're gonna have to cover our feet doug's so to cover the feed dogs this is your feed cover plate sometimes it's called a darning cover plate um there's on the back there's the way it goes on, you should have the bigger the whole it should be closer to the front than to the back. You don't want to put it on like this that would be upside down and so it goes...
on like this and there these two little prongs right here that fit into these two little holes and so that is like so so we've got those feed dogs covered so that they're not drawing the fabric through because I want to just so in one place with a zigzag stitch to attach a button so this is what a button sewing foot looks like and you would set your foot on the machine like so they just snap on like all the other ones we've worked with so far do and here's our button and we're going to line that up underneath the foot so that those holes are in the front of the foot kind like a little horseshoe around the two holes and not all buttons are the same I mean, there are buttons that have of a smaller amount of space in between the holes, so you're going to have to kind of try this kind of turn your hand well toward you slowly to make sure that the zigzag clears the holes so I'm gonna go back to my stitch number three and I'm going to just man I can tell already might my, um foot my needle is hitting those holes so I wanna widen this out just a little bit make a little bit wider zig zag so as I zigzagged back and forth that looks now like it's clearing the holes, I can actually just step on my foot controller ok? And then when you're finished you've got your up you've actually so in your button on and you could just trim these threads and stitch your button all by machine. Say I just pulled my cover plate off when I did that too. Sure. That's fine with casey's. Sure, sure, sure. The see the final product. We had a question. Yeah, we had a question. Thank you so much. We had a question yesterday when I was talking about button sewing. Someone asked, how do you do a four hole button? It's really? The same thing you just do the two, and then you slide this back and do the next two, but what I mean, just imagine sewing all of these buttons on here. We just kind of did a coach based off of a very popular style of trench coat on the market today, but it it has a very similar look of a trench. And with these contrasts buttons, just imagine doing those all by hand. It would take so long, and this is can all be done by machine in just a fraction of the time. But a four hole button would be done the same way where you just do the two and then you just push it back and do the next two. And I was telling the group this morning, one of one time I saw in a store where there was a four hole button and you can do it crosswise too you can do it sideways like these like the's look right here where they go from side to side like this or you can do that x you've seen that too and ready to wear and you would just turn your button sideways under your foot zigzag here and then turn your fabric ninety two ninety degrees and do the zigzag the other direction one of the things I saw that was really fun somebody had put was I think was the little girl's code or a little girl's dress and they actually sewed three times this way this way and this way and these two sides were in green and this way was like in a pink color and it looked like a little flower in the center of the button so you can even use that too so your buttons on creatively so just neat little tips and hints for you there okay, so another foot that I'd like to tell you about is your, um, nonstick foot this is not a foot that comes with the machine but it's a foot that you might really, really, really enjoy having if you're into sewing vinyl just reach over and grab one out of my tray here no, I can't seem to find people here this ok the non stick foot looks like this I just snapped this off the buttonhole foot and snapped this on and as compared to your standard at all purpose or general purpose foot the it's not just that it's white but when you turn it over the underside of the foot has a silicone type of backing to it so you can imagine when you're working on say, your oilcloth or your leather or even your clear vinyls I'm going to just take my, um just to show you this here's my regular press her foot and I'll just put a little pressure on it and try to move it along the oilcloth it doesn't even want to move it's sticking to the surface of this I put my tab bond or excuse me the nonstick foot on here press down on it and I am even pressing down you could probably see the pressure on my finger and pressing down really hard and it just slides along the final so that surface let's use so leathers vinyls even your clear vinyls with a lot of ease and that might be one if you like to work with these fabrics that might that might have actually solved some problems for some of you wondering why that's not working someone set this back for a straight stitch and one thing you'd let you should be mindful of when you so these fabrics is you want to use a a fairly long stitch length let me just go ahead and so but that underneath here and you'll notice that the side of my uh fabric I've paper clipped it together rather than pinning it because this is, um, leather vinyl if I was to pin this together when I remove the pins, I would leave holes in it permanent holes, same thing here with few so clear vinyl this's a piece of clear vinyl I if I open this up and you know, so it's pulled this over and I want to sew a scene and I start pinning and here I'm gonna leave holes in it so you want to instead of pinning your seem allowances, you want to actually clipped them and you would remove your clips just like you remove your pins as you go and we start sewing that little bit of a punching sound you hear is just the thickness of the weather and I'm just kind of straighten that out a little bit, but you notice I'm using a really long stitch like it's kind of going through here fairly quickly, I'd do the same thing with the oilcloth a little bit longer stitch lengthen just I would use on saved when I saw a skirt reason why I'll turn it over on the back side this which is a little bit lighter thread you can see it better if I use a really short stitch length on the leathers and pleasures because it makes as I said, permanent holes in the fabric you stitch is being too close together, the holes are too close together and you could actually perforate you're seems so and that wouldn't be cool kind of perforating it like I was saying earlier like like preparing a coupon out of out of ah magazine where it's got that perforated edge I mean, your fabric would just tear away like that because you're you put too many holes in the scene, so if you open up that stitch length a little bit there's distance between each hole and then that won't be a problem for you, so if you've had that happen no, I just hopefully that gave you a little tip their same thing true for your oilcloth you're clear vinyls anything with any of these kind of fabrics that you want to work with like that? So I'm put my, um, satin put back on the machine and I'm going to switch back to my white thread because I'd like to show you you have so many wonderful stitches on your machine and I know sometimes what do you do with all of those and there's a really neat to see if I can remember which one it is? I think it's twenty six yes it's number twenty six and that one's like an edge joining stitch put a white thread in the needle and I have like a light colored bob I just dropped my cover let me grab that oh, that wants to small use this medium one fits in a little better ok again take up lever highest position if anything you're definitely learning how to correctly thread your machine today and that's a good thing it'll in highest position to use that needle threat er we'll drop our bob and thread and continue so I just mean a loop with it. There we go. No, um that number twenty six is an edge joining stitch and here I have some header lace and I've got a piece of some nice linen that I folded the edge under and what I want to do is join these together and I dropped my piece of tissue paper something just reach down and ground that what you'll do with this stitch number twenty six is an edge joining stitch so it comes over to one side and then it makes a stitch in the center and it was already the other side and then comes over and then it goes over and then it goes over like that, and so well you're stitching this you can attach what say this is the bata, the edge of a tablecloth or a table runner or him of ah little heirloom dress or something on that order and you want to have that sort of delicate sort of, um, openwork look to this, you can place a rinse away stabilizer or in this case because I don't have that with me, um, a tissue paper and put that underneath there while you use that stitch number twenty six when you're done, you would simply remove your tissue paper and it gives you this wonderful little sort of heirloom feeling to your to your work. So let's, give that a try this's again is the women and I folded the edge under so it's more or less got a finished look to it it's not a raw edge and the lacy want to use for this, you'll notice I've got like a flat a flat header on it I wouldn't want like a scallop e something because as the stitch comes over to the right hand side, it wouldn't grab the stitch a grab the lace though I want something fairly smooth along this side, and sometimes these air really helped along as well if you give them a little bit of ah um fabric spray starch so they get a nice firm hand to them before you start sewing, and then that tissue paper just kind of helped hopes have to pick the stitch first number twenty six and it the optimum lengthened with for me I can of course change it if I want to but I can just choose it and so you can pull those apart a little more so it just catches sides hope that showing up okay it's white on white on white but I think you'll get the idea you stop right there just because of as many other things to get to but I think you'll see what I was doing stop that and then we've got this very open work will go on the back side and remove that tissue paper might have to pick some of it out that's why I kind of like to use a water soluble stabilizer for this because it's comes out better you can really rinse it out and you don't have to deal with picking all this paper but I think you'll start getting the idea there's still some paper cotton here but I think you'll see where we've got this open area where that stitch just caught the sides um between the lace and the header and would make a beautiful finish on numb kind of an heirloom looked here maybe some of your table linens and so on and that would be your stitch number twenty six okay um I think what I'd like to do is go on to twin needle sewing I really think you'll enjoy that um that the twin needle is an optional needle that's available for machines and what it looks like is here a laid on the table and I'm going to take the regular needle out of the machine using my screwdriver sometimes the first time you turned them screw the needle clamps screw it's really tight the first time you do it out of the box so just but it'll it'll loosen just just continue um there we go and remove the needle and we're going to replace here's I'll show you the regular needle next to a twin needle, so when we go to replace that into the machine, we still are putting just this single bar up into the needle needle clamp but this time there are two needles that come down on it, so we need to actually thread too spools of thread on the top and you'll have three threads going on at one time the bob and thread and to needle threads so let's go ahead and do that and as I mentioned earlier, I put the you're in your accessory trey was the spool pin felt and the auxiliary spool pin and there's a hole right up here at the top of your machine where this perfectly fits into toe hold your other spool of thread it's nice and secure and our other school of thread would look like thiss actually I'm going every threat both of these because I've got two that are identical the's too okay, so no two spools of thread and one goes on her machine regular school pin, and then your other school goes on your auxiliary spool pin, and you want to make sure that this one comes off the school like this don't put it on here like this because you don't want it coming down and maybe tangling with this one as its unreeling during the stitching process. So have this one come around from this outside and you should be just fine, and then you're going to take these like soul and you're going to treat them together as though they're one and go through the threading process town. I'm going to make sure that take up liver is up and, um and press the foot lifter is up and bring those into your thread guides you just pretend they're like one thread for most of the way of your thread path. And then when you get down here, this is where you're going to separate them because though the thread that's laying down on the spool pin will go on the left side when we put the needle in and the so this one goes is the right hand side and this one is the left hand side, but we got put that needle in now. So we're going to there's your needles all of them write your regular needles and your specialty needles have a flat side so you want to make sure that flat side is to the back and you put that up into your needle clamp make sure it's all the way up because if it isn't all the way up your machine won't so properly might make noise and hit something so make sure that's up all the way give that just a little tweak with the screwdriver and no and I pull this thread you can see this is my left hand one and this is my right hand one so I'm going to take this left hand thread and as normal put it behind my thread guide and in the case of a twin needle you can't use your automatic needle threat er it won't even work because the needle will come around and go actually right in between them because there is a needle on each side of center so this requires that you manually thread your needles so just bear with me here for just a moment okay, I got the left one threaded and that goes underneath the foot and then the right hand one I'm not going to put it behind this guide it just helps to keep them separated so you put one behind and one not this just goes threaded straight into the eye of the um, right hand needle so bear with me again for just a moment. There we go, it's handy to have a little tweezer handy to nearby didn't bring one. And so now the effect you're going to get. Let me just show you an example of why we would do this, and then we'll proceed with doing it here. This is a t shirt just ready to wear t shirt from, um just oh, department store. Um, and this is a little wider because this one was actually done with a surge er and overlook a machine that has a cover stitch in it. This stitch that you see on store bought garments is called cover stitch looks like two parallel rows of stitching. And on the back side, you can see this was a surgery that did this. You can get a similar effect with the home sewing machine by using a twin needle. It won't look like a surgery on the back side. What it'll look like is a zigzag it's going to be a zigzag on the back and two rows of straight stitching on the top. But it's a great way to him knits and I have a piece of knit here, this is just a sort of, um kind of ponting it and because I have white thread and here I think it will show up really nicely I think you'll see turn that up however deep you want your him to be and then when you stitch this again just a straight stitch and as we so find that foot controller there we are put the needle down and you just start stitching I might even lengthen my stitch length out just a tiny bit oh, that it is at its longest for this. Okay. Oh, on twenty six that's why let's go two zero zero zero zero that's too far zero, zero zero ok and great. Okay. And so let's just so along I bring that down because it said its maximum length from when we did the leather because remember, it saves whatever change I did until I would turn the machine off so we'll bring that down to um um just a medium stitch length and so will start selling just use a moderate speed on this, but it looks like two rows of top stitching. I mean, almost everything we wear today is stretching it t shirts, leggings, mitt skirts I have tons of minutes that I wear top on today I mean, this is a great way to him those and then when you're finished, when you turn this over and look at the back side it's a zigzag stitch it's not going to look like that other one because that was a special machine that did that. But then you can take a scissor and just trim away your access him here and you've got a state and it actually stretches because on the back side that was a zigzag stitch. So this has stretched to it it's a great great hemming technique in addition to a blind hemming and top stitch hemming um but you can also use that stitch decoratively and here is a case where we used a decorative stitch with the twin needle in it and what you want to do is when you so decorative stitches with the twin needle you wantto turn the hand well after you picked the stitch you want to do want to turn your hand well toward you slowly as you so on your fabric to make sure that the swing of the needle clears the sides of the foot because when you think about it this is if this is the opening of your presser foot here I just look at the top of the table here pretend this my fingers are the opening of the hole in the presser foot great right here when I have a regular needle and I picked my white a stitch with I can go the full length of that because it's a single needle and I could go back and forth no problem the maximum with the loud on my machine but when I have a twin needle in here like this I need to reduce the width of my stitches because if I do the full with the machine doesn't know I've put that twin needle in there so what can happen is it's just going to go ahead and do what it always does and it's going to go boom boom crash into your foot boom boom crash into your foot and it'll break your needles so all you have to do is make sure you keep the width of your selected stitch narrow enough so that you just stay clear of the sides of your foot as you sow so you'll need to reduce your stitch with and so you just turn your wheel manual and you can just watch and make sure it doesn't hit the side of the foot and once you realize you're clear you can just go ahead and so so we can go ahead and do that I'll just grab a piece of this here so just to start out with will use the basic cigs egg and so here's stitch number three and I'm going to turn my I can tell that's a little wide you know just bring my with down a little bit and I'm going to turn my hand well and make sure that I'm just going to check it looks like it's going to be okay. I'm gonna lengthen this isha it's a still on my on satin stitching um, length. So it was very dense too, so let's, just try that looks good. It looks like it's clearing so I think I'm actually going to even go one half mourning down. I feel a little better about that and now we can just sew and you're doing exactly the same thing with two needles at the same time for a completely new look for that stitch and if you wanted to, you could when you get to the end of your piece, you could turn this around and you could do another role right next to it and just go row after row after row and create your own fabric texture. If you really use those thirty weight decorative threads, you'd have been even more pronounced looking stitch I mean it's amazing the looks that you can create it with just a simple twenty oh, that looks like a extra wide stitch that I got on a really high end sewing machine and I just did that with a twin needle and two rows of stitching it's beautiful just imagine like rows and rows of that around a belt, a headband I mean, you can just go crazy with your stitches and that's just a simple zigzag if you picked like just a bit ago we had that stitch twenty six so let's pick that again that's the one we did the that and joining with but we want to bring our with way down so we're not hitting besides the foot so let's just try that well looks like we're going to be clear I just always check it to make sure it's not going to hit what the whole cycle complete that looks great and you can just proceed stitch it's funny you sometimes you're really surprised you pick a stitch you think that's not going to look good and like oh my goodness that just has the best designed to it when you did it with the twin needle and you can also look at that looks completely different and you can also do this where you put like put blue on the left and pink on the right and you know that could be a two color stitch there's no rules you could just experiment with your stitches but just make sure when you use anything other than a straight stitch that you bring that with down tested on a little scrap first and make sure that that swing you try it for the whole with the formation of that stitch to make sure that the twin needle clears there's different widths of twin needle available so what? You the with that you so with one twin needle might be different for the other with of the twenty because they're farther apart. So you always want to check it for the twin needle you're working with k. So let me go ahead and remove that needle and oh, and I have another sample. I wanted to show you here, here's an example now where we use the twin needle on this vinyl fabric to make this handbag. And, um, it was a combination of the twin needle with a nonstick foot so that we could stitch successfully with two rows to create this grid pattern on this final. And I was telling the group this morning that I think elizabeth here, the creative live is going to take this from me before I get out of here tomorrow on thursday because I know she likes rectangular shaped bags and here, especially clutches and but you could wear this one is a clutch or open it up, it's really fun, but it's, just twin needle and your nonstick foot, so you just have to I mean, you start looking at store about things different. You I could do that with my machine it's really, really fun, opens up all new world for you.
Ratings and Reviews
Judith jensant2
This is an outstanding course taught by a fantastic teacher, Becky Hanson. I just bought this machine and can now use it thanks to her. I would love more sewing classes taught by her. Very Excellent.
a Creativelive Student
I am a beginner, and this was an awesome course! I learned so much about my machine and some great sewing basics. I will definitely be referring to these videos as I continue to learn how to sew. She was very thorough and demonstrated everything nicely without going off course too much. Absolutely wonderful, I highly recommend!
a Creativelive Student
I am a newbie at sewing. This is my very first machine and I needed to learn everything from how to use the machine, threading etc this course taught me all I needed to know specifically for THIS machine and that was really what I needed. It's nice to see all what the machine can do...... even though I can't do them right now.....but hopefully in the near future :)