Thread and Buttons
Lesson 4 from: Singer Simple™ Sewing Machine Model 2263 - Fast StartBecky Hanson
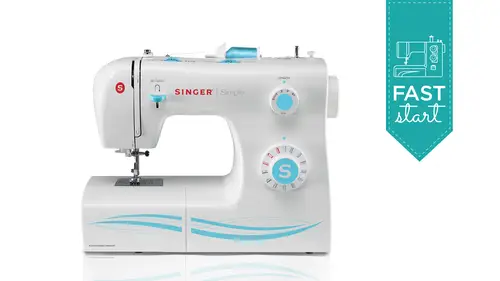
Thread and Buttons
Lesson 4 from: Singer Simple™ Sewing Machine Model 2263 - Fast StartBecky Hanson
Lessons
Lesson Info
Thread and Buttons
I showed you one type of threat here this heavy duty thread but there are a lot of different threads out there today we talked about differences and needles but you need to marry threads with needles just like I demonstrated here with heavy needle and the heavy thread so I'm gonna bring over here some of these different threads I don't know if you guys can see if I just have these over here in the front there's I've got these little groups of threads but they actually all have a different reason for being and I'm gonna talk about these just briefly and give you some little tips and hints for using these and what therefore so to start out with here we have all purpose thread and this is pretty much available everywhere you shop where they have thread this's particular one is from colton clark and this is kind of their new design of their schools if you've got some of these old ones like the older style they might look like this um there's been a redesign of this school uh, you know when...
the thread comes off it just tuck's very neatly into this little retainer that's in here, the older schools that had that little slit remember in here and you'd like kind of pull your threat out of there it was like a little catch we'll slip to hold the under the thread and the oh, here it is. Right here on the opposite and see that threat there. This is a brand new school and you would take this thread out of here and there. But there was always this little slipped on the end here and what you need to do if you still have some of these. No problem using them. But a little tip is just turn this school so that little slip is over on the right hand side so that as your threat is on reeling, it doesn't get caught in that little slip. Because if it gets caught in that little slit, it can start tugging on your threat. It can do ben, your needle. Break your needle. You like what is wrong? I threaded correctly, and it just got a little obstruction here, so just turn that around so that that's on the end and it's no problem. But you might have some of these. These are the new ones and that's all purpose thread for pretty much, you know, garment construction, any kind of home decor, construction projects, all purpose thread. Now, just a little bit ago we use the genes thread and they've got one here is called heavy thread one is called the genes thread the genes ones are more specifically like the genes colors but you could use any of these for your heavy sewing it's a much thicker thread you can almost see it a fight lay it here kind of next to the machine look look at look at this thread compared to a regular sewing thread almost seeing it right there on my machine you can see the difference in the thickness it's different definitely a heavier thread then you have these decorative threads and some of these are for example the's are a thirty wait this company here this is called sulky here's a couple sulky spools coats has their own version as well but these are uh thirty weight twelve and thirty weight fabric threads though smaller the number the thicker the thread when you're looking for that and this will say this one says it's a thirty wait right here and this is thirty wait here and this one on the school says twelve wait so the smaller number means it's thicker some of them come variegated some of them come solid but you khun dio beautiful decorative work with that but that will require a little bit bigger needle because it's a little heavier thread no here I have metallic thread and everybody loves metallic thread because it's so pretty on projects for example here's a little christmas stocking that we did where we mixed shiny ray on thread, which I'll show you in a moment and then we've got some metallic thread and here puts a nice little glitzy little sparkle on things but you got to know how to work with it. And sometimes the's threads are better when you work with at them standing vertically on the machines. So for example, we just reached down here next to me on light table. I have a cone stand that an external cone stand you can purchase and some of these threads, for example, um the's are kind of the sort of metallic look that you see here but some of these styles here, these sort of glitzy glitzy threads, they almost look if you look at him really close up, they kind of remind you a little bit of like christmas tree tensile where it looks like that flat filament member hanging out on if you remember hanging tinsel on your old christmas tree but that's what this thread sort of reminds you of and this tends to work better if it's feeding freely straight up rather than coming off of here and twisting as it goes. If it feeds a little flatter coming through the machine it's better to use a cone stand for something like that? You could pick those up fabric stores have them they're pretty much everywhere um, you might want to reduce your upper thread tension a little bit, and you definitely want to make sure that your needle is large, has a little bit larger, icy might step upto one larger size needle with the metallic thread. Sometimes I've had people say to me, what is wrong with my machine? It keeps shredding my thread, the machine doesn't shred thread a needle shreds thread, and that will tell you that you're not using the right size of needle. The eye of the needle isn't right for this size or type of thread that you're using. So it's, where I just want to call your attention to some of these different types of threads and how just how to work with them to have best results. One of the favorites for decorative machines sewing is the ray on, and you'll see the ray on here around the edge of this silk, and we did some applicator, and the ray on has a bit of a shine to it. You can see right on the spool, how different it looks from, for example, and all purpose read that has a more matt appearance. This is shiny er now ray on threat I love round thread so pretty, but the thing about rand thread is you see it's like, really weak so it's wonderful for decorative stitching, but the reason I point this out is you don't use this for construction like you wouldn't make your skirt, and so you're seems with this this is for embellishment. You can decorate or do construction with the all purpose threat, but ray on thread, you want to reserve that for your decorative machine stitching and there's different companies there's different brands, and again these have different weights to them this one from sulky as just an example. They all have different weights, but you can kind of see here on the sulky spools the's black, black colored one here it says on the spool of I can find it, but this is a thirty weight, and then the earth's gives me a forty wait and then the thicker one is the thirty weight either you can see it there sulky thirty and that's a heavier one so it give you denser looking stitches. More pronounced stitches. The bigger the thread, the kind of thicker the threat has a more filled in appearance on your project. So you always want experiment a little bit on a scrap. Just get the look kind of play with your stitches and get the look you want for your project, but again, you want to use the right sized needle for and then we have over here this is called bob and phil couple different brands here. This one is from sulky, this one's from robison anton in and bob and thread is obviously for the bobbin and the nice thing about it. We use it a lot of machine embroidery, but what I like about it for decorative machine stitching is that because it's much, much finer there's, a lot more of it goes on to the bobbin at one time. So you're you're not having to change your bobbins as often, but it also gives you a less dense back of the stitch. So they're really nice for the bobbin in your decorative machines sewing they come and basically white and black, and you do just use whichever is most appropriate for the fabric you're selling and we also have very fine. Fine wait thread. This is, like, almost like a lingerie. Wait. You might use this for sewing silks and very fine fabrics. Here we have outdoor fabric or excuse me, outdoor thread and this especially treated for being outside and getting weathered on. So that's wonderful for you like a patio furniture, and so on you can. From some of these companies, they sell a hand quilting thread. I want to be careful when you're at the fabric store and you're buying thread for your sewing machine you might just see the word quilting and go others quilting thread but its hand quilting thread and you don't want to use hand quilting thread for your machine because it's got special coatings on it that can come off inside your machine and give you some issues with your machine the reason it's different it's with hand sewing when you're needle goes in and it comes out the whole length of the threat is going in and out both times in the machine that's not the case so hand quilting thread is for hand sewing machine quilting thread is for machine sewing great thank you why don't we just talk a little bit about how to do some of these feat that you've got now for example the buttonhole foot's I'm gonna slide right into the buttonhole sewing and I'm going to change my thread back to ordinary thread and I'm going to put my, um regular size needle back in the machine and we're going to learn how to do a buttonhole all right? So just give that one little just one little tweak with the screwdriver to make sure it's nice and secure and we're going to make a buttonhole so here we have some nice when it was still a button and I'm going to do a buttonhole on the button hole the two of these one ready for each when I want to show you what I've done here is I've kind of created to plaque it's, you know, like placket of a code or a placket of address if you're not sure what I mean by that it's that that area down the front of a coat, for example in this area that the buttonholes air sewn on is called like the placket and whenever you do that, you want to put a interfacing in here and interfacing just makes this a little more stable gives it a little more body to support the heavy stitching that you're going to do, so make sure that has interfacing there they're available at your fabric stores pretty much every fabric store has thumb and then you might also want to use a stabilizer and I'll talk about that in just a moment but let's first set up to do our buttonhole, so I'm going to press on the back side to change your foot. This is called the presser foot this is your press afoot shankar the ankle, but to remove this foot because we want to put our buttonhole foot on the machines weaken so the button home what we're going to do is press this little button on the back and it releases the foot when you look kind of closely at the's feet there's a little pin here and you'll notice that the shape of this ankle it's kind of like a little claw and it comes down and it kind of clips onto that pin so that's, what happens when you want to replace the's youjust released like this and then to put it back on again, you would just kind of center it over there and just kind of move it around a little bit till you kind of get it toe click into place it'll just pick it up automatically you don't have to try to push it on, but we want the buttonhole foot on now, so we'll remove the regular foot and we're going to put on the buttonhole foot and when you do this you want thes red markings to be on the left hand side this would this would be putting it on backwards. I want to put it on to the little markings on the left and then we're going to snap that on how do you know how big to make your buttonhole? So what me grabbed my pencil here have a chalk pencils I think that will show up well on this fabric, so if you have your button let's say we want to put this button on our fabric you would decide kind of where you want that button to be and then mark just you just need to mark the bottom of it with a fabric marking tool of some kind you can use the rinse away markers the chalk pencils really kind of depends on the fabric you're working with some fabrics that you can't wash, you don't want to use a wash away marker so you would use maybe a chalk pencil on those so on dh then they come in different colors so this one I'm using white because if I use my blue one, it probably wouldn't show up on here so we're going to mark the top and bottom of the button and then I just want to draw a little line down the center can you guys see that? Okay, does that show up that showing up ok and so great so then this tells me right where I want to so and I'm gonna line this up under my foot appropriate accordingly, I might want to add a little bit of stabilizer underneath what that does just trim this down a little smaller stabilizer is a temporary in most cases of temporary there's some of them that stay in the garment are more permanent and I can talk about that a little bit later, but in this case we want to just have it be there to help stabilize our fabricas we so and then when we're finished you just remove it, but it gives a little extra stability so that your stitches stitches for a buttonhole tend to be very dense, and they can want a tunnel or parker the fabric a little bit in that interfacing along with the stabilizer will help prevent all of that if you just put your fabric in here and make a buttonhole and you're wondering why is it so slow? Kind of scrunchie looking scrunched up looking or puckering it's just because you didn't prepare your fabric properly before you started so a little interfacing before you get rolling and then a little additional stabilizer, some people even put a little bit of a rinse away type of stabilizer on the top to even give this a little support on the topside, but we're going to place our fabric underneath this foot now, and what I want to do is line up this this front uh, marking right here this front, red marking I want to line that up with the bottom sideways marking that I made here and I'll be able to see that through the hole in this foot, so we're going to line it up like so, okay? And then I'll put my presser foot lifter down what we also need to do is select our buttonhole stitch and if you look over here, we got to set our machine for buttonhole sewing to do that over here at the side on our pattern selector denial is what looks like three pictures of a buttonhole but if you look at a little more closely you'll notice that it's actually your steps of your buttonhole this machine has what we call a four step buttonhole so you are in control of the four steps for this so you're going to sew the side first it's going to go up the side and then so that's indicated by the number one so we would put that on number one then after we go up this side we'll go to number two it's going toe because you come down the side then do number two the bottom then go to number three to go up this side and then number four to finish it off and we also need to set our stitch length for a buttonhole setting and we need to put our with at you want to maybe started out with the kind of like an average setting in fact, what you probably want to do is even try it on a little scrap before you saw it right on your project so we're going to go to number one and we're going to start to so I'm sorry I misspoke we want to start at the top of the buttonhole, okay my mistake start to line up your red mark with the top of the button home and we're going to sew the come down the side I didn't but threat in the machine first wear we go let's put some threat in there and again the presser foot lifter is up even though that foot is on their snap it in here take up levers in its highest position, so we're all good to go civil threat it correctly and you can still use that auto needle threat or even though the buttonhole foot is on that's not a problem and so they're now we're all set okay, so we'll get that started again we're going to just turn that on the number one ok line that up so it's coming down the side way see that it's even with that marking that we made you want to turn it to the number two when you do this, make sure the needle is out of the fabric. It might be when you lifted your foot off the foot controller that the needle might have been down like that a little bit and you don't want to turn the pattern selector dia when the needles down in the fabric because it the needle position may move and you don't want the needle down in in the fabric when it moves if it moves, so raise that up and then you're going to select number two and it's going to give you your bartek on and then we're going to go up to number three to go up the other side and then we're going to go to number four to do the top. Now what I did here because my with I want to show you something. What I did here is I made a very, very, very narrow one. It's almost too narrow for this wool and show you what to do about that there's. Still a little slit in the middle there, but it's, way too narrow for this fabric because my with was on like a medium with it was from when I had it set for my straight stitching. I actually need to pick take my with and turn it out to a wider with to get the appropriate, um, buttonhole with so let's. Come back up here and we're going to do another one so you can see the difference. So we're going to bring that forward so it's level with the top. Put this back on your number one. We're gonna come down the side because you can control the with you know what? Like, you might like a really skinny buttonhole like this for maybe a batiste cotton for adult dress. Something lightweight like that. But for a well, like this that's not appropriate. So we'll raise the needle up, turn it to number two and we'll get our bar attack a front just six or eight stitches than to number three to do the left hand side on and you just keep so until you see that your level with where you started and then you'll raise the needle out of the fabric, return it to number four get that bar attack and one thing you can do that's kind of neat is go back to your straight stitch momentarily and then just do a couple stitches in place and it'll tie it off so the threads won't unravel. And then here you have you just trim your thread tails away and you have for the wool props, wool fabric get rid of those threads a really beautiful, beautifully executed buttonhole but you see the difference changing the with made when we went to the widest with setting that was great for wolf, then what you can do is take your seam ripper or your unsourced away we want to call it I don't have a straight pin with me, but what you would want to do is put a straight pin in here, right? Right about here just temporarily this I believe this is in your manual to you can look it up in there, but that will be like a little stop or so as use cut the buttonhole open. You can use your seat, you're seam ripper to cut your buttonhole open, then you won't accidentally push it too hard and cut open your end of your buttonhole and we'll slide that down all the way to the end and there you have your buttonhole. I know a lot of new sewers are scared to look at dress patterns that have button holes in them because they're afraid to do a buttonhole, but this is so easy. I mean, I think we just simplified button sewing, buttonhole, sewing with the simple and now we want to sew a button on, so I'll do on the same fabric, and what I'm going to do this time is changed to the button slip c button sewing foot, this foot looks kind of like a little horseshoe it's got this rubber gripper piece on the front to kind of hold your button in places you so and this time we're going to use on one of our accessories that comes with our machine and it's called a feed dawg cover plate will use this in our second segment when we're doing some free motion quilting. I wantto definitely get to that today, but what this does is it covers the feed dogs I remember I talked about those earlier, how they draw the fabric through, but when you're sewing a button on you really want to just so in one place, you want to go back and forth, back and forth over in one place, so you don't want those feed dogs pulling the fabric through, so we're going to cover them, and you want to put it on seton it's a little more one way than the other, this would be upside down. You want to make sure that the, um, hire part of he is the top side there and there's, too little prongs that fit into these two holes, and you'll just kind of jiggle till they feel that click into place, and then you snap on your button sewing foot. You want to make sure you feel that here, it click in place, and then all you need to do now is play your button here on your fabric. You want extra high lift that presser, foot lifter to get all that underneath there, and then just take a look at this and make sure that you can see those two holes inside that open area of the buttonhole. We're going to set the machine for a zigzag stitch, and we definitely want to start with the widest with you don't really have to worry about the stitch length, but I'm going to go ahead and set it at zero as well, so this absolutely no moving of anything as faras length is concerned and now what I want to do is manually turn that hand well toward me slowly just to make sure that the swing of that needle clears those holes if it's if it's not quite clearing it you might need to sort of just slightly adjust the placement of that button under there you want to make sure that you turn this hand will on ly toward you that it clears the holes looks great so now we can just step on the foot controller and give that a few stitches kate and then we can put that back to straight stitch sew a couple stitches to secure it in place and then you can remove that and you have sown your gifts on your button on and you just simply remove the's thread tales but what a big time saver from doing that by hand especially on a lot of home decor projects where maybe like you can see I've got a pillow over there I don't know if you can see that from where we are but the screen pillow that's in our first cubicle there has okay is several buttonholes on it and just imagine I mean you can do those in just moments instead of sitting there with a hand needle and thread sewing those on and that's how easy that wass thank you thank you all right let's, get one question in which is from ms steri my fred constantly bunches up in the machine, making sewing impossible. Is this attention issue? What am I doing wrong? It's bunching up in the machine? Yes, threat is constantly bunches up in the machine. Okay? I'm not really sure where it's bunching, but again, I would just go back to that making sure you're threading properly it's amazing the problems that fixes thread properly, and the other thing, too, is threat has a kind of a shelf life. It could be that we have. You might want to check your threat if it's a really old thread threat thread if it's not a good quality thread, it can have thick and thin spots in it, and I'm not going there. It makes irregularities in the flow of that when it's sowing in the isn't go through the tension evenly because there's thick and thin spots in it, it might be that the machine needs to even have ah, cleaning like there's, a thread leaves lint in a machine, and it leaves linton you're bob in area, it leaves lint in your tension assembly and kind of depending on how often you use your machine, it might need we usually say, I think if you use it every day, you should open it up and dust it out once a week if you're using it once a week, you should do that once a month if you're using it once a month, you should maybe do it every three months but you need to kind of keep your machine lint free on dh make sure using good quality threatened and then if you're threading properly, that should take care of it. We have a question that came in from christie grad and I don't know if we have time to the to do this but she was asking about sewing buttons that have four holes all the buttons have that something yeah, we have time to do yeah, I have time to do that right now let me put the foot right on I have a low for whole button right here and so let's do that real quick it's basically the same thing that we just did and you might have to change depending on the size of button. Just incidentally, you may have to change where the width setting is because that distance isn't standard for buttons so you might have to just play with that slave that's. Why I said at the beginning turned the hand will toward you slowly to make sure it clears the holes now one thing with the four hole buttons is you can do it really kind of three different ways you could do where you're stitching so that the two sides are parallel or you could do it where you make it like an x or I saw one time where somebody did it like they did one like this and they did one like this and they did one like this and it kind of looked like a little flower like they did these two sides and green and did this one in pink and it looked like a little kind like a little flower in the middle of the button, so that was kind of a decorative option, but we'll just do one where we do two parallel sides, but you would, um I explain after we get the first one done in my threaded yeah throat so don't do that again and we're going to put this underneath and this button happens to be a little smaller, so I'm gonna bring my wigs down just a little bit and once again I'm going to turn that hand well on ly toward me put it on zigzag go on ly toward me slowly to make sure it clears it does also a few stitches and then you can put it on straight stitch straight the stitch to secure it in place, then raise the needle out of the fabric, put it back on your zigzag and then this time you can just move this forward to the next set of holes if you were doing a crisscross one, you would have done the first one this way and then go back and go the other way. I think pretty clear, but we'll just go and head and just move this back and press turn the hand. We'll make sure we're clear, it seems saying. And then, after we've done a few stitches, will put it on straight stitch to tie it off and then here's our four whole button. And you just trim your little threads there when you're done.