Using Blind Hem and Nonstick Foot
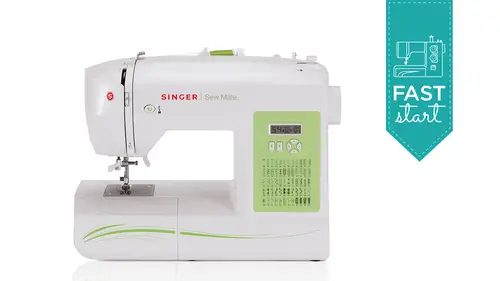
Lesson 6 from: Singer Sew Mate™ Sewing Machine Model 5400 - Fast StartBecky Hanson
Using Blind Hem and Nonstick Foot
Lesson 6 from: Singer Sew Mate™ Sewing Machine Model 5400 - Fast StartBecky Hanson
Lessons
Lesson Info
Using Blind Hem and Nonstick Foot
Why don't I show you how to do a blind hamli had someone asked that earlier today and that for that you need you a blind him foot which looks like this now blind hemming um like the name says it's it's really that it's it's not the stitching isn't seen from the top side of the fabric um so I'm going to use my oh here it is put it my lap instead of the satin foot will use the blind stitch foot and so this always seems to confuse folks a lot and it is a little counterintuitive but once you understand it you'll just fall in love with blind hemming and it's especially great when you're just picking some the lint off here big long projects like you're doing draperies or bed skirts and something that the hymns are really along it would just take for ever to do by hand and you know because you can you can do top stitching hamming you could you could use a a top stitch but sometimes in doing so it gives you what if you've got really beautiful elegant fabrics and then it's got more of a casual ...
look because you did top stitching the blind stitch would be the way to go and then you can do them really fast so here I hope you can see this okay? Because it is a little dark colored but this is some leftover from a pencil skirt that I made uh and so what you would do is turn your him up however deep this is the wrong side of the fabric and you would turn your him up however deep it needs to be and then you're going to just temporarily fold it back like this so you're still on the wrong side of the fabric you just turn that back on, you just kind of turned that him under a little bit let me do that again for you so you can see that so here's your ham, you press it up and then we're going we want to we want to have our hamby on this side so that on this side we we just see little tiny pics of a stitch so we want to turn this like so and we're going to feed this into the foot so that when this foot is on the machine, we're going to actually use this white extension on this foot which this is an optional foot for you but they're available. You could just go on our website and see where to buy and and get yourself a blind him foot and when you're sewing you can guide this fold along the edge of this white extension while the stitches sewing and what happens a blind hem stitch cells like this it does like a few stitches and then it juts over it goes over and just that one stitch just grabs a bite into this fold so you're going boom boom boom boom over boom boom boom boom boom at stitching over on the hem part but then it goes boom into the fold so what happens is tio stitch student a stitch todo stitch and that little stitch each time will look on the right side like just a little tiny pick stitch here and I'm going to be doing it with thread that's really high contrast so that you can see it for what we're doing today, you would obviously when you're doing this, if this was really your skirt, you would use a dark brown thread and not see it at all ok? So we're going toe press this button back here to release the foot, the satin foot that we just had on there and we're going to snap on the blind him foot same way we've been snapping on all the other ones we've been using today. Okay, now your machine has, um, the blind him stitches over here, it's number seven, so I went to select kasich number seven, okay, and we'll just give that a test because you might actually want to test it on a scrap of the same fabric if you're making your skirt or your garment, you might want to try because you might make some minor adjustments to the width of the stitch you might make some adjustments to the setting because there's an adjusting adjustment screw on this foot so if you need to move it close, move the foot closer to this fold to catch more of the fold or less of the full depending on how it's because the thickness of the fabric will affect that if you were doing a blind him on, you know, a very fine cotton versus, you know, a nice well like this or, you know, their fabric thicknesses air different, so how the, how the swing of the needle bites into the fold will be affected by that so you might need to either adjust the width of the stitch or you can adjust how this fold is being guided and you can actually use both and get the look you want. So it's kind of neat to be ableto test that on a swatch of fabric first, if you can, and so we'll just lay this in here like so and I'm going to sew a few stitches to see what we've got here cause I'm not sure how it is set for this fabric and well, so along see my controller there, I can reach it way that's a little narrow, so I'm gonna widen this out um to a wider with bs put it at maximum and see where that takes us that looks a lot better it's swinging over and grabbing a stitch in that fold just so a couple more inches here just take a look at the goods to the right side on see if if that's the look we want so the needle down is kind of a placeholder and flip it over to the right side and I can see that that's pretty good I'm stitching and I'm not seeing any steps great we got it just in the right spot because you really kind of want those stitches to be invisible just grabbing that into that hole that little punch here going over those sicknesses that's what we're doing here so then we'll turn her hand well to release that released the threats and will pull that out of there came and then here's our him here's where we had done some adjusting so here's or him and it looks like on the back side and then when you turn it over you don't see any stitching on the right side so that's like one and we even had white thread in there and it perfectly caught caught our our fold it's definitely caught the fold it's not that it missed it it actually caught that fold and then when you're all done what she wanted that it's invisible on the right side and then you've got a perfect blind him I'm just going to put another bob and because I think that one's running low okay right so drop this in again turning that so it turns freely clockwise great. Okay, um so next I want to show you the, um nonstick foot drop by bob and thread nonstick foot I have that one right over here and what she would use that but for is whenever you're sewing things like vinyl, whether it's clear vinyl thiss oilcloth kind of fabric or some other finals leathers this this's your general purpose foot your regular foot this is your nonstick foot and the difference here is that the bottom of your nonstick foot has, like, a sort of silicone sort of bottom to it so it it flows smoothly over your leathers. Ok, so even here on the oilcloth when I when I run my regular foot on here and I just put a little pressure on it like the machine would do, I can already feel it sticking and not wanting to move and it's going to make my fabrics shift and just make a mess and you take your teflon footing. It just slides right over. I mean, I'm putting down the same amount of pressure with my finger as I did on this one and look at it just slides right over it, so what you want to use is the weather needle and then your nonstick foot to sew these now, because leathers and vinyls when you so these, um with, uh, just because of the nature of what they are when you stitch into these, the holes are permanent. So I say that to say you want to probably use something like paper clips or those there's like these little fabric clamps that you can get now that they use them a lot for quilting, but it can work for this to I like to just use paper clips, but that way you're holding your pieces together, especially if it's a long piece you're doing a belt or something, and you don't want your layers shifting on you. Um, use paper clips to hold those together, and then you snap on your nonstick foot and that just clips on like all the others do, and then when you start sewing, oh, but the machine on straight stitch and probably we would really use a leather needle if I was really doing this, but for right now, I'll just leave my regular size fourteen, and here it'll it'll sell it. I will leave a bigger hole in like a wedge point would, but for for real, you would use a wedge point. But you might even lengthen out your stitch length a little bit but then instead of like how normally you don't you know you don't so over pins well here you know because you remove pins before you come to them in the case of this where we use paper clips you would just so up to the clip and then remove the clip when you come to it just like just like removing pins but you see how it just that foot just glides right over the top of that with no obstruction sometimes just having the right tool for the job makes all the difference is in the world whether it's your needle or your threat or your foot I mean there they all have a reason for being and there you have a nice leather seem with without any frustration so oilcloth israel popular today I'd like to make little cosmetic bags out of them people make I've seen like lunch bags for children's you know back to school and so on so those air really popular right now so I thought you might enjoy seeing a nonstick foot ok, I'm going to go back for a moment to my satin foot and I want to show you the um edge joining that is a really really meet technique where you can actually join laces to fabric and I'm going to use a stitch number twenty six which is here twenty six and we've got white thread in the needle white thread in the bob, and we're all good to go. You can use a tissue paper for this you can use um, what happens that you put, I think this is in your book to put a little piece of tissue paper underneath, I'm just going toe go with a piece of I'll take a piece of stabilizer here and we can pretend this is tissue paper for now, but it kind of gives us something to grip while you're sewing. So what I've done here, this is like a really nice linen fabric, and I've turned the edge under impressed it, and this is a lace like, and I'm using a lace that has a nice straight header on it, those air usually the nicest to work with with this technique because the stitches go back and forth like this and you wanted to be able to grab if it's something skele p it might miss it because of just where the stitch falls relative to the lace. So these laces with us a straight header. That's what this is called here are a little easier to work with. You can use a rinse away stabilizer a wash away, rinse away one which would just wash away when you were done or you could use it I think that your book says to use a tissue paper there's a lot of different ways to do that, but we'll run this under here with our stitch twenty six and what we're what we're after is that that that that stitch when it so's on it is the stitch kind of goals like this on one side and then to the other and then to the other and it's going to just grab those edges but leave a little gap in between I'm going even a wide net out a little more because I can, but this is a wonderful little way to, uh maybe put a pretty little seven in romantic kind of heirloom me looking edge on table linens or maybe guests tolls for a guess that bedroom, maybe a little heirloom dress for a little girl um, there's a lot of you know, practical applications for a little technique like this and it's so easy to do, you just see these two straight edges and there's a little gap in between and that stitches suppose from side to side and grabbing, grabbing those edges as you go and I'll stop right there and pull this out and I'll try to tear away that stabilizer without tugging at the stitches too much, but you get a get a look, a glimpse of it on the wrong side, what it looks like we'll just tryto here's some of this away thiss tearaway stabilizer that's what you do with it you just tear it away probably where I really wanted to come out is in that gap in between but this is a little a little stiff for it but I think you'll get the idea is I would just rinse that this was a rinse away or a real light tissue paper can you see the stitching in between here I'll try to get some of this out and and you call that like lace insertion or a j c here where my stitches are can you does that show up enough and then that paper would just disappear and you'd have this gap in between and you'd have this wonderful little kind of air let me look to this and so that would be your stitch twenty six to give you that okay you know another thing with airlines sewing is there's this trim that you can buy by the yard it's called on trudeau entre does a french word that means between two and normally for heirlooms sewing you purchases by the yard it can start getting a little pricey when you need yards and yards and yards of it but sometimes you can uh get the same look with your sewing machine using the on trudeau stitch and a wing needle we talked earlier today about how there are wing needles available or hem stitch and needles they're sometimes called and what you would do to get that effect I have here I'll just demonstrate for a credible piece of this off so I can show you what to do but this is a linen fabric that I haven't I pulled I've pulled threads it helps to enhance what the ham stitching needle does but what to do to pull a thread you would just kind of snip into here down at the bottom of your piece and you'll just grab one or two of those threads and just usually one at a time works the best and just take your time with it but when you draw those out not only does that help enhance the holes as your sewing with the twin needle or excuse me with the hand stitching needle but it helps you stay right on green because if you so the entre don't not on grain it just doesn't have the same effect you definitely want the hem stitching needle when it comes down into the um the holes here that were sewing thread in the needle kind of push that push those away because it so's the way that it so's it pushes the threads away to give you that sort of open heirloom look that you get on purchased on trudeau and you can use make your own you can attach a lace while you do the on trudeau there's a lot of different ways to do it but that for your machine is it's the stitch, right? It's number sixteen on your machines? I mean, I just got to number sixteen and we have to switch to a ham stitching needle, so I'm going to take this needle out, all right? And then we're going to switch to the wing needle and I have those ham one right here, piece of fabric ready to go. So the him stitching needle what's different about that all they had on this white fabric, so you can sort of hope you can see it well enough, but you see how wide it is on the sides compared to a regular needle. I really wanted to see some air. Let me kind of stitches because your machines really got a lot of a lot of heirloom type of stitches in it, but on a regular needle, you know, you just have your straight needle here's the eye, but on the hem stitching needle, it looks like it has he sort of blades or kind of protrusions air wings on each side, and that is what helps create these holes as your stitching so you can use zigzag stitches and things like that for and heirloom type of look, but it doesn't give you the same effect as are a stitch that's designed to kind of look like contra deal, so when you use a ahem stitching needle, we don't use the automatic needle threat or with that, we always thread that manually it just because that needle is wider and fatter, you don't want that little device that comes around into the eye of the needle to get damaged by hitting those wings, so you always do your wing needle manually, so we'll take this out of here and we've got our piece ready to go. This is usually also really helped a lot. If you do put some spray starch on this like some fabric, spray starch and iron it before you start that will also help enhance and hold the holes open, and we got our stitch selected, and so now we're just going to sow right down the middle of this thread pull area that way that I won't go down the whole piece way when I'm going to get to some free motion sewing entries and fun things there, but if you like a really delicate feminine look, this this has a lot of options and he doesn't have to be white and waste you can do it with any color pastels usually look the most kind of old fashioned and traditional you can do whatever you want, so let's just stop right there and then when you pull it up, you start getting you start seeing those little holes in your linen just like what we saw in the store bought piece. You see how that we needed help make those holes. Ok, so that is your own trudeau stitching. Okay, yeah. Sounds fancy pants that he as a prop for the next one. I'm wondering a couple of folks, including web two, four five o a swell as noah be are wondering if you're going to have time to show and edge finishing stitch. Oh, sure, I can do that right now. Sure. Fantastic. Yeah, let's do that right now. They're talking about this surging. Okay? Okay. No problem. Let's do that right now before I move on. That's no problem. Let me just get threaded up again. I got my regular needle in there so I can use my naval threat her again. Yeah, just those you just want to hit those wings and damage because once that little, that little thing and that hook got bent, then you have to replace that little mechanism. So if you can avoid that that's the best way. So here we have here's some fabric right here that would be perfect to show you that I've got a wool. I've got some cotton. And you probably want to try this on a scrap, but what this would be for us, like let's say, this was your you're going to make a scene here and before you. So you're saying you want to have your seem finishes done so that there, um, nice and finished and what you want to do there er is used an over edge foot, the reason I recommend that is it's different from your standard presser foot, and this is how at a glance they look quite similar, but here's how they're different is when you look inside the hole for the swing of the needle happens back and forth in your general purpose foot it's just a hole, but you're over edge are over over casting foot sometimes it's called it's got this sort of prongs or protrusion here in the center, and what happens? There is there's extra thread that is put into your stitch each time that the needle swings back and forth so that you don't get puckering or tunnelling on the edge of the fabric. If I was to use an over edge stitch right with with my regular presser foot right on the edge of this, because this stitch is designed to kind of wrap around the fabric it contend to wantto. Scrunchie and her tuck like this or pull and you get this kind of kind of ridge e lumpy edge and you don't want that you want that to be nice and flat and so by using your over edge foot not only do you get this wonderful little edge to guide this along but because that's putting a little extra threat in the stitches you go when once you pass over this the everything relaxes to the edge and this is all nice and flat it also has a little bit more of a cut away on the back side so that that you can see that little protrusion right there on the underside how it's just enough to give that stitch a little more thread that it needs so will snap this foot on okay, I'll use the white thread then you'll see it a little better and then we'll just let's see there's a number of stitches but you can use number ten you can use number fourteen you can use number twenty two twenty two is a slant over edge twenty for is a slight over age it takes extra stitches number ten is a kind of a standard overlooks did you have you have several choices actually so you confined may be the one that you like or that suits your, um your fabric so let's pick number ten to start with and then if you wantto just kind of I like to turn the hand well a little bit make sure I like the swing of the stitch and I don't think I need that to be a little wider so it clears the what looks great so see let me let me I think I need to re threat my machine everything looks great there I think I just got something caught down here okay way alright drop the bomb and threatened way pick up there we go wait all right so now we're going to try on this little piece here goodness a threat everywhere well sure that's clearing looks great so well so I don't know what is happening here might not have the needle up all the way from last time I changed it let me just make sure okay right why don't I try stitch twenty maybe it doesn't like ten why don't I try number twenty two way go and widen that out to weigh want is that that sorry I don't know why that's not working for me today it is good to see trouble ship that is for sure yeah, but the idea here is that um I just don't just just try to troubleshoot this a little bit I'm your dominion threat is that you check? Yeah just I'm going to just re thread can actually that's the first thing to do maybe something came out of a thread path I usually just went in, don't re thread it's, like rebooting your phone or your computer way, and then don't below. I'll just check this to, like, make sure I didn't put that in wrong, like, did I do something wrong, like, put it in back words. Is this too tight doesn't feel too tight, but maybe just a little tiny bit, so I'll just loosen it, just a hair. You know what I'll do. I'll change, too. I'm going toe, go ahead and swap this out. I'll put the general purpose foot on and, um, stitch a little bit away from the edge, because you can always do that, um, and just trim it down a little bit and let's, give that it let's, give that a go, so we can just kind of keep moving on here, but there's a whole variety of those stitches that work really well for scene finishing it may not I might I might have the wrong style of over edge foot with me for this machine that also could be what happened there is it just doesn't fit this machine because it come in different styles so what you want to do is get you could go to like the parts and on our website you show you the model that model of slick that you need for a specific model of machine and it could be that I just grabbed the wrong one they look very very similar because it I've done it a hundred times but what you can do here is then um do your seem finish and just trim this up to the edge or do it I'll do it right on the edge but that's one option is to just use your general purpose foot and trim that down if you've got enough c malone's to do that but you might not have enough c malone's to do that so you want to you go a little closer to the edge and maybe even the little fabric spree starch will help that so it doesn't want a tunnel again but there's there's this slant over edge another stitch that that when I was starting with was that number ten that's the one I think they call like an overall over locker over over over locked type of stitch its number sorry number ten and then we want to bring the there it is it's at a good with for that and so that one when you so it it does like it was like this when it's sos and it makes almost like an over edgy looking still try to get near that ends but I won't go right over the edge like I would with foot like like that that would put enough threat in the stitch that I can let it swing right off the edge like a surgery does but you get the idea what this stitch does is it it completely and closes the edge if I were to go right up to the edge with the wrong and they're put it more threat in there and I console right on the very edge with the over edge but that's the stitch that they call it and over like there's another one that has like another seem on the side. Number fourteen think this is all in your book too, and that gives you a little bit more of a straight stitch on the outside edge need to widen it out, go to look the way we want it to weigh on this even kind of has the look of an over lock stitch even you know it's funny but there's no sewing machine that is a surge er I mean the surgeries so is differently it's luke needle threads from the top in these loop er's on the underside and itn it's like a four thread or five threads stitch, but you can get it is a scene in a scene finish simultaneously. But using stitches like this, you can get a very similar effect going over and edge. It almost has that look of a surgery stitch, and that one here, that one was number fourteen on your machine. And then you can go right off the edge if he used the correct over edge foot. Ok?