Lessons
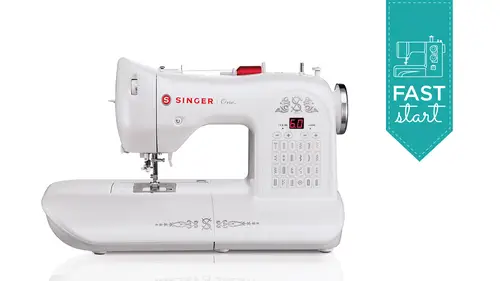
Machine Overview
09:44 2Threading a Bobbin and Sewing a Stitch
23:12 3Basic Needle Styles and Threads
20:00 4Stitches Examples and Button Holes
14:39 5Ribbing and Elastic Insertion
16:29 6Blind Hem Stitch and Applique
26:37 7Hemming Techniques
18:01 8Free Motion Techniques and Flower Stitcher
26:05Lesson Info
Ribbing and Elastic Insertion
Some of this stitches that you have on here are decorative stitches as I talked about zigzag and the little star stitch and so on, but some of these are stretched stitches, so for example, you've got one in here that is a asked, ah, ah, slant over edge stitch, and that would be down here on the bottom role and when you so that one here I've got a stretch knit fabric as I so probably even get a little closer over the edge. There you've got one like this, you've also got one that looks like it's in the third row. Is that like an over edge over la kind of stitch? And this one makes what looks like a seaman a scene finish simultaneously. Now it's not like what a surgery does, but the effect is like what a surgery does where when you're finished with those, both of these have stretched. So for this stretchy fabric that I'm sewing, this one has stretched to it here's your over lockie one and that will stretch as well. It's got the seam and the finnish simultaneously, so you've got stretch st...
itches built in okay, you've also got as I talked about various deck stitches and let's just experiment let's try just for example, I was talking earlier about take this is a little bit big for what I need I'm going to show you some some of the differences that some of those decorative threads make on your stitching, so we'll just put a piece of stabilizer behind our cotton and now this is just what I've been working with here is I'll just pick my zigzag stitch, and this is my regular just kind of average all purpose thread. Now, if I wanted to use a heavier weight thread, I would take this and remove the remove the needle and replace it with a larger needle that would accommodate one of those may be heavier thirty weight threads, so to do that, I'm going to use my screwdriver and over here on the side of your machine, this is your needle. This is your needle clamp, and this is your needle clamps screw and put the screwdriver in here, and sometimes when the if these air new, when these air new out of the box, they might feel a little tight to turn, it'll go just give it a little tweak and a little tip. You might want to put a piece of fabric or a piece of paper underneath here when you're removing a needle so that if you were to drop the needle, it won't drop down into your sewing machine it's just a little, just a little tip k and then to replace that with a heavier weight needle it's a little bit sicker wait thicker it's got a bigger eye so we want it'll accommodate thicker thread and when you put when you change your needle and put put that in you want to make sure that needle goes all the way up if you can see it it's a little hard I guess from our camera angles but you can see it in here you can watch it go up and hit the top there um when you're sitting right in front of your machine so we'll change this to maybe one of those pretty sulky sulky threads to do some decorative stitching this is the thirty wait we'll start with that one and probably use my bigger school cap it's this one seems to fit this spool better and then again just bring this around and if you don't want to use your um you don't have to use the swift smart threating if you prefer to thread your machine manually you can I showed that to you earlier but you certainly can thread your machine the traditional way there's nothing at all wrong with that and here now we'll do this threat is a little little heavier so it'll look a little different do the same stitch I don't know if it'll translate on cameras well but when you look at it in person it definitely has more of a presence to it it's it's it's ah it's definitely thicker we can even go to a twelve wait twelve wait is even thicker yet you might be easier for you to just see the threads if I lay them on the fabric here's the twelve wait just looking at them side by side I don't know if you don't if you can see it and you can tell really in person the bigger the number on the thread the thicker it gets um some of your other dick let's all just threat up with this twelve waiting let's try some of those because you've got a lot of wonderful stitches here on your machine that they're really a lot of fun to work with. I was telling I was telling the group yesterday that sometimes folks go I don't know what to do with all those stitches and then these heavier threads you you need to throw them manually um once you start getting familiar with your stitches, I just twisted it around the needle let me re thread that when you're out shopping and looking at things like, um pillows or clothing maybe that has decoratively decoratively stitched borders on them different kinds of things like that you start seeing them differently because you'll start going I have stitches like that on my machine and you'll become inspired to dio with ideas from from the stitches that you have so here's an example then they'll see I'm I'm seeing a little hand of my bob and threads showing on the top side like I was talking earlier this is where you'd want to go in and you want to loosen that up or threat tension to drop that down so you're not seeing that on the topside and see how that just went away by just turning that little dial so this tension nihilists is your friend but now can you tell you can probably see it now how this threat is thicker than the regular weight thread so feel free to experiment with those ok so some other basic techniques will take you through I put our regular like it's I can just leave this on here be okay let's do a um I'm going to show you how to put a ribbing into a collar so let's, talk about this a little bit. This is one of your stretch stitches built in your machine and they're different ridings that are available on the market today some of them are hundred percent cotton. Some of them have a little stretchy lycra spandex to them which means that they have more or less memory depending on the amount of that memory fiber that's in them. This is a really nice one that has a lot of memory. Some of these are a little more loose the ones that are one hundred percent cotton tend to kind of stretch out a little faster than maybe you want them to so you might want to look for one that's got that nice memory fiber content to it sometimes they cost a little more but they're definitely worth it because your garment will look the way you want it to and then here what I'm going to do to show you this is just trim this little neck band out of here kind of cut a little sort of like a nick neckline like this would be your around your neck and let's put in our ribs and so our goal here is we're going to insert this rib so that it's in our garment like this and so when you do this you want to so so that all of your raw edges are meeting you've got your rib folded in half lengthwise and your raw edges meet the edge of your shirt part when I guide this through the machine, I'm going to stretch the ribas I so but I'm going to just guide this straight into the machine I'm not going to stretch this one I'm going to stretch this one but not this one as I so and you know, I think I will I've got this heavy duty needle in here I'm going to switch back to our regular needle and our regular thread since I'm going to be doing that kind of technique so here we go take this out again, if you feel like you want that safety net, just put that little piece of paper that fabric underneath the presser foot before you do this, if you drop your needle, it doesn't go down into your machine. Tighten that up and I like to give this screw just one little tweak with my screwdriver before I proceed and here's our see that's white so let me pick a color that's going to show that white doesn't going to show up on the white white fabric it's all threat up with this blue, and I think this spool cap is going to fit this better than the bigger one. So that looks good press on foot lifter is up for threading its over here on the inside of your machine. Sometimes they're in the back here, this one's on the inside right there. We're going to snap our threat in here like that, bring it straight down the thread path to put my tension backto auto where it was previously we had been doing some decorative stitching and it was a little looser, so I've got it back to regular now, and we're going to put the just put down now and we can hook it around our little thread guides. And needle is in its highest position, put on straight stitch and its highest position to use our needle threat or for us. So that was that's. What that threat or a lever is there's a thread your needle for you. And now to do this let's do that slant over edge stitch again, that's a really good one for ribbing get a couple choices and they're like I just showed you a bit of go on the net piece, moving my chair just a little bit okay, you can make this wider if you want to to it comes up five millimeters wide, but if you want to really have wide cut wider coverage, just widen it out to seven, which is the maximum on this machine. You see, what I'm doing is I'm just guiding this in here straight and stretching this as I go, I'm not stretching both and by stretching the top one. What happens then is it will stay. It will pull back against my skin because of the memory in the in the fabric and the stretching motion that I'm doing with okay, and then when we're finished, it's a nice, neat stitch you turn this right side, you've and you've inserted a neck bound you to have that like for a cuff on a sleeve if you were there was a sweatshirt um and it's it's solidly in there because you've got a seam and a finish at the same time and it stretches and having a good quality rib it has good memory toe stay up against your skin so that's how you would do a ribbing insertion and I can show you also how to you know really quick question yes becky first of all that was awesome thank you yes on dh then curio so had asked if you can really easily change the with wilder like seamlessly changed the with while you're selling or on the fly the stitch with you would have to just momentarily take your foot off the foot control change it and then step on the foot control again but yes you can do that huh no to insert elastic you've got a wonderful feather stitch in here which is a stretch stitch and I like to use my presser foot to do this today to help me do this on the front of your machine it's a feather stitch right here I'm going to touch that and my optimum with is it's chose six millimeters for me if I wanted to maybe do that decoratively that is the maximum with for it you can see I can bring it narrow if I want but I'm going to probably use it mostly at its widest with because you see the full effect of the feather look of the stitch now for a last a concession um you might do this for dull closed through popular too, so for dolls and little girls put sewing elastic and and um maybe some lingerie like a slip something like that and you could press this down and stretch your elastic here along top edge stretching as you go or you can do it along the raw edge it's up to you depends on your project, but what I like to dio for the's fine, thinner elastics like this is a three eighths inch wide elastic is to trim the two tip of the elastic at a bit of an angle, I'm going to actually use my presser foot as a helper to guide the elastic this fits beautifully in here you see it's not resisting at all if you have fatter elastic than this and it doesn't just feed smoothly like this and you'll need to sew with it underneath the presser foot but the's thinner ones like this it's great to use your presser foot is sort of like that extra hand you sometimes wish you had when you're trying to guide elastic and stretch it and guide your fabric all at the same time so let's do that put our fabric underneath here we've chosen are feather stitch and then what you're going to do is stretch your elastic from behind, stretch it in front and then start to so wait, I'm not pulling excessively hard in the back. I'm just putting a tautness in the back at the same amount that I'm doing in the front. I'm not just pulling like this without giving it some equal amount in the front just keep the elastic stretched, but keep it taught in the back with try to keep my arm out of the way have enough there for you to see what we've what we've done, so I'll just finish that right there. If you were really doing this on a project, your pattern instructions would tell you cut your fabric so big, cut your elastic so long and you would pin it in and put pins in every so often and just stretch from pinned up in. Of course, here we're just demonstrating, so we just stretched as we went. But your project would tell you how big to cut them. And then there you have in the last two concession and it's actually really pretty on the topside to hear I have white thread in the bombing blue in the needle. But you see it it's a it's. A pretty stitch too. So when it's stretched opens its it's lovely stitch, okay, so that's your elastic insertion.
Ratings and Reviews
Zahulie
Great Class and fantastic to learn all the awesome things this Machine can do. Becky explains everything very clearly and was a very enjoyable class.
Kelly_H
I'm not an expert at sewing, but I feel like I could sew anything after watching Becky Hanson's class. Another great class, another great instructor brought to us by Creative Live!
WilliamM
I was watching the course free and was so impressed with what I was learning that I purchased it at the break. I like it very much. Now I would like to know what "extras" will be provided and what "student work" will be asked for.