Threads and Button Presser Foot
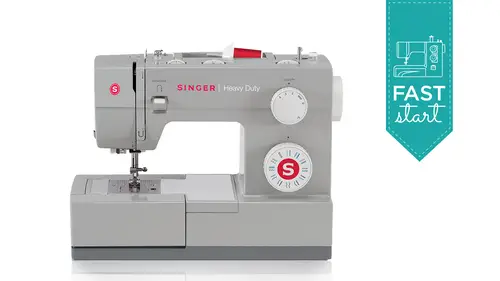
Lesson 4 from: Singer Heavy Duty™ Sewing Machine Model 4423 - Fast StartBecky Hanson
Threads and Button Presser Foot
Lesson 4 from: Singer Heavy Duty™ Sewing Machine Model 4423 - Fast StartBecky Hanson
Lessons
Lesson Info
Threads and Button Presser Foot
Over here on the side of the table, I've got some different types of threads that I want to show you, because even threat isn't, you know, threat isn't just thread there. There are a lot of differences between them, and they have different functions, different uses, and I want just explain a little bit about some of these common ones to you, there's. One more. Over here. I want to grab. And what are these? Four? She goes to one ground. Okay, so these air all actually different kinds of threat. Believe it or not, and they all have different applications, so you're kind of general purpose. All purpose thread looks like this. And this is this one is from coats and clark. There, of course. Different brands of threat out there. Just a all purpose thread. There are different types of spoon me. Just grab this over here to show you something. This is also a quotes and clark threat. I've had for a little while, obviously, comptel. The papers were coming off. But what reason? I wanted to show yo...
u the difference between these is just to give you a little tip about something. This is their older style school in this is a newer style spool, and the difference is the thread used to on these older schools, if you remember, if you've had some of these there's, a little slipped at the top, or the thread kind of tucks into in it, when you first take it new, take the label off, and you pull that thread out there's a little notch there, and sometimes when you thread your machine with these, if you didn't have your spread spool on here correctly, as the threat is unreeling, it would get stuck in that notch and your sewing in your neil was breaking your threat is breaking like what is happening because your threads getting caught in that little notch and it's not the threat, isn't passing through, so if you still have some of these to use, just make sure that little not just turned over to the right hand side, and you won't have any problems at all, but they're newer styles now have these sort of retaining slits in them that you can just kind of help with your fingernail to just slide that in there, and those little notches are gone, so you shouldn't have that problem anymore when you get the newer styles, but you can still use these just make sure that little slip is over to the right side and you will help it will help you avoid any needle or thread breakages, so you're all purpose threat is for pretty much garment construction just construction threat is what that's for you can embellish with it as well, but its construction thread now ray on thread which here's some here's, some examples here of some different brands, this is ray on threat is is ray on, and you'll notice that compared to an all purpose thread it's much shiny er and it has a really pretty sheen to it. So when you do your decorative stitching like I was talking about earlier, I don't want to see any of that bob and thread on the fabric it all I want that all to be real pretty decorative threat on the topside the's also have those kind of retaining, um slips a recon tuck the end of the threat, and when you're finished, but is is beautiful sheen and come, but as compared to all purpose, thread this's, weaker thread, and so the reason I say that it's perfectly wonderful for your decorative stitching, but you wouldn't want to use this for construction it's strictly for decorative work, so some they're different weights of this is well, this is the quotes and clark a version of it this is the sulky version here's, a couple smaller spools of sulky what I wanted to show you here too is that the's also have an indication on them of their their weight some are thinner and some are thicker than others this one from coats if you can see on if you can see there it says forty weight the's air to from sulky it's indicated on the spool this one says thirty this one says, I think it's up here to have been upset on forty so the the larger the bigger number is the thinner thread so where this might make a difference to you is the thicker threads would give you a more pronounced looking stitch if you're doing satin stitching and you want it to look really filled in on dh not have your stitches b you know you stitch like this getting close to where it's not even feeding at all you could go to a thicker thread so you can have your stitch length a little more open but those air you're ray on threads this is your this is called like they call this genes top stitching thread and these are come there they're thicker threads as you can see here and these are available pretty much anywhere they sell all the other threads it's very common people like to, you know, cut jeans off and re hem them and have them look just like store bought so these common very popular store bought jeans colors I've seen blues and grays and this is the gold that you see on denim a lot there's um there's quilting thread hundred percent cotton quilting thread and there's also hand quilting thread in the store and I just wanted to point out that what if you are shopping for the quilting thread make sure that you don't grab the hand quilting thread for your sewing machine because hand quilting thread has uh it's treated with a kind of coding for for hand sewing and that if you use that in your machine it can leave residue in your tension area so it really is strictly for hand sewing so watch that when you grab those at the store this is bob and thread the's air two different brands or a robison anton and a sulky bob and thread we would use for decorative work when you so with your ray owens and the needle you're ray on threads in the needle you would put say bob and thread in the bob in and what this does it's a much finer weight of thread so you can get a lot more on your bob in before you have to rewind it but it also makes your dense stitching less bulky on the back side so this is a good way you don't have to for construction you would have the same in the needle as you do in the bobbin but for decorative work you can use the lighter weight threads in the bottom and then your decorative on the top side metallic threads are a little difference I've heard sometimes heard people say my machine doesn't like metallic thread and I think sometime in most cases that's justcause, you're not setting up properly for it. We talked earlier today about the fact that you your machine, comes with an auxiliary spool pin on dh there's, a little spool pin felt we call this in a spool pin and just put that at the bottom here and there's a hole at the top of your machine right up here, it's right behind your bob and minders stop right at the top of your machine, and this just sets in there, it's grooved, so it'll fit perfectly and it won't twist around on you, and we use this for twin needle sewing when we're getting ready to so with a double needle, and hopefully I'll have time to get there today, but you can also use this for threads that maybe are better feeding vertically and in the case of metallic, that is the case for metallic thread. This one here is kind of like a hologram e flat this this song I'm seeing the classes yesterday is when almost reminds me of, like christmas tree, tensile it's, a flat filament thread, and if I was to lay that on my horizontal spool pin, this is true of any sewing machine it's just how these threads are but when you lay this horizontally it starts to un riel and twist as it before it goes into the sewing thread threading path so to help feed help that feed flatter into the machine if you stand this up on your heart vertical spoken this feeds straight into your thread path and you avoid that twisting and they will give you better success and that's the case two of these metallics that those might be better sitting vertically on the top of your machine if you've got a real big school like this, you might want to get an auxiliary spool stand to stand behind your machine and let those feeds straight up because these might be a little heavy especially when they're new to sit up here you can try them and see if they work but you don't want that fighting the have the machine working to pull it off this spool so you might wantto get in auxiliary spools stand for that one so knowing how to use these properly and which ones to use for what fabric is this is really important and then we also have this there's I think just outdoor threat don't remember if I mentioned this one outdoor thread is treated so that it can be on your projects and remain outside and get weathered on and the still be ok and we also have here transparent thread this is a monofilament thread one is a darker there's, two different brands here, but they both make the lighter color and the darker color. Sometimes this is called smoke. The color is called smoke, and this is called clear. You would use these for let's if I also have ah, open toe foot that I want to show you for doing surface embellishment today, and maybe I'm laying a piece of decorative trim on top of my fabric, and I want to just stitch over it and teach put that trim down in place, I might opt for a monofilament thread so that I don't see the thread. I just see the the trim that I'm stitching down on the top of the fabric you would use the lighter or the clear color for the lighter color fabrics, and this the darker color or the smoke for the darker colored fabrics, trims, et cetera. So it basically kind of disappears into the fabric so that's about our thread. And so why don't we get started with a little s'more stitching? So while I'm resetting for that deserve any question her? Yeah, we do have some questions, and this is from said duty who? How do you know when attention which tension to use for which fabric or doesn't matter? Did you already cover that? I think, well, we kind of talked about it, but just to clarify, just try sowing with the thread you want to use and the needle you're planning to use for that fabric and just try on a little swatch and take a look at it and you can tell like it should look nice and balanced and if it doesn't it make sure your machine is threaded properly if it's all threaded properly and you so on the little swatch and it still looks a little if, but look, it should look great if it if it doesn't look right, then you can start just turning your wheel a little bit one way or the other, depending on that one slide. I showed you words too tight on top or drink, but on bottom and that's all in your manual to what this is all in the instruction, and then just you don't need drastic turns on this. You just sometimes just need a little bit of a tweak and just experiment till you get that looking the way you want, and that should take care of it. Thank you and one more what needle do use for netting or tool um, that e I would probably just use a real light weight one about that yeah, I think I mean, it has a lot of holes in it yeah, way don't want a big needle may be snagging one of them that makes sense thank you. So let me show you let's go ahead and we'll do a buttonhole next so I'm going toe removed my press her foot and I mean, I've got my accessories I would already here's our one step buttonhole foot and you'll notice that on this foot there's a slider and this is where you place your button so I've got a little button here I'm going to use set that button in there and then you just slide this closed onto your button and that's going to tell the machine how big to make the buttonhole for for that button so we need to change the presser foot and on the back of art me just get my fabric for that get that handy here okay, so here's ah address wait. Well, I showed me a piece of that earlier and we're going to stitch a buttonhole onto this and when you do a plaque it on a garment usually there's some kind of interfacing applied to the inside of this that gives thie fabric a little more stability a firmer hand you would never just do a buttonhole on just fabric with no state assistance with with the stability of the fabric you would probably cause the buttonhole is very the dense the stitches are very dense and what can happen is your your buttonhole fabric can just get all puckering so you definitely want and interfacing applied to your placket or wherever you know if it's up pillow like over here on our set would you mind just grabbing that cannot over there on the set up that rain pillow for example here even though this isn't this isn't a garment thank you this isn't a garment, but this is still an area where this is a placket where you would want to add some of this interfacing to give stability to this area as well. So when you do buttonholes here a great little home deck project adding ribbon and stitches like I mean just the cutest little thing and it's just stitches ribbon and buttonholes and buttons so we're going to sow about non and we're gonna make buttonholes, but you definitely want to stabilize that area to keep keep the fabric from bunching and puckering you may even add, I'm just going to reach behind me here and grab a piece of tearaway stabilizer tearaway stabilizer is what this does is it it's a it gives you a little extra stability under the fabric when you're sewing you do this for decorative stitching which will do again and again here in our session today on dh, then when you're all done sewing it simply tears away. It's just gives a firm phone just tears away when you're done, but it gives a firm foundation so that when you so it eliminates the puckering. All right, so we don't we don't need a big hole piece like that will just turn that down and save that for something else, and so you would put your stabilizer underneath, and I would I would usually practice if you have if you're constructing something, maybe what? Practice a buttonhole on another piece of fabric to make sure that you want to maybe want to adjust your stitch length a little bit, so I'll show you how to set up for the buttonhole. Just a moment. We need to get our foot on here. So there's lever here at the back of the machine, when I press this lever, the foot drops off. I'll show you that the gun just in case you missed that. Your press, their foot, all of your presser feet have this little clubs presser, foot pin here and this presser foot holder or this ankle right here, it's like a little claw that snaps right over this presser foot pin. So whenever you're putting any of these feet down here, you don't, you don't have to get under here and try to push these on and make them go on. You just need to lay this underneath that little pin and bring your press afoot, lifter down, and you might have to jiggle this around just a little bit to find the right spot, but then just let that snap on automatically for you, but we're going to put the buttonhole foot on next, so I'm going to take this off again and release that, and we're going to put the buttonhole foot on so there's there's, that little pin there's, just a little drop a little bit of dust or something in there. There's there's the presser foot pin for this, so we're going to just line that up and snap it on like I like, I just showed you on the regular one, just jiggle it around a little bit till it till it gets on. Very good, and then the only other thing we have left to do is thiss there's underneath here we had earlier, I showed you the automatic needle threat, or that's under here, but there's, another lever and back here, when you pull this one down, this is your buttonhole lever you can see right here is a picture of a buttonhole on it and it says push because as you start each buttonhole, you want to push this down and push it back as you begin each button. Holy mountain one of the things I noticed people do is they don't get that all the way down they bring it about so far but it actually needs that one more kind of push to come all the way down and then you push it back to reads to start a buttonhole. Now we have to go over here to our front of our machine to select the buttonhole and there's a stitch indicator right on the pattern selector dialled gonna turn this so that I see the picture of the buttonhole. So then I come up to my stitch length dial and there's a buttonhole picture here as well, and I can put this anywhere in that range of that button hole and that's twice said earlier you might want to test on a scrap fabric first because it might depend on the thickness of the threat you're using. If that was one of those heavier weight threads or one of those finer wait threads you know, for like maybe colder outerwear, you might use a little heavier weight thread you seen that on store bought a ready to wear garments where the the thread feels a little thicker on those buttonholes you might use a heavier way through it you might not need your stitch length quite so short for those, but if you're using kind of an all purpose thread for your buttonhole, you might need that a little shorter so you want a practice one first to get this stitch length right where you want it for the look you're after, okay? And then I'm going to set my buttonhole to excuse me my with to the widest with two just give this a start to try the my first one and we'll go ahead and do a test here on one end and see how that looks so we're going to bring that down bring this down that's down and that's pushed back find my foot controller under the table here I can't still with my shoes on, so how barefoot at home so it feels funny, okay to have my shoes on all right and then press a foot down levers back and we'll just give this a go thiss thread to probably get trimmed, so I don't have to determine when to turn around from the other direction this is an automatic process, I just let it finish ok? And so when I'm finished there is my perfectly sewn buttonhole all I have to do is trim my threads and my buttonhole is those is finished okay so now um if I want to open up that buttonhole you would just take a straight pin this is all in your book too, right before these these air here are called the legs of the button hole and these air called the bar tax what I would do is just you could just set a pin right before that final bartek and what that will do for you is just be sort of like a little bumper to prevent you from cutting this too far you can use your in your accessory trade there was a brush and a seam ripper and use place this in the whole the center area of your buttonhole pushed this little blade in here and you could just slide that across but see how that pin just kept me from going too far I won't accidentally cut through that bartek and ruin my buttonhole and then you remove the pin and you have this beautiful buttonhole and then go on the back side and just remove your excess stabilizer from behind and trim your threads and you're all done now if you look at this and you think g I think I would like those stitches to be a little closer together you can come over here to your stitch length dial and just bring that down to just a little tiny bit shorter length and that will make the stitches a little denser so you can control that with your stitch length I was using a heavier weight thread I might find that maybe wasn't even feeding it might have been just stuck in one place because my thread was too thick for where I had put this then you might open that up a little bit and so you have to experiment on a scrap if you can but easy easy easy to sew a button hole if you wanted if you're ready to do another one what you would do is put your fabric back underneath here press their foot down and you push that lever back for your second one each time you started fresh buttonhole you push that button hole ever back and then you saw your next but you can have the thread contrast your fabric you can have it match perfectly it's totally up to you and then when you're all done just raised that needle up to its highest position and confront and they're perfectly the beauty of one step buttonhole is that everyone is exactly the same length because it's measuring that button that you placed in the foot so you don't have to know there's no guesswork it's great so speaking of button let's go ahead and so a button on okay, so what I wanted to show you I'm slight the reason I'm sliding this off is that over here at the back of your machine there is a little lever called our feed dog dropping, and I'm just going to stand up for a second so I can show you that. But right back here on the back of the machine is a little switch, and when it's in this position, it means my feed dogs air operating when I push it over this way, my feed dogs dropped down out of the way. No, the machines I was using yesterday didn't have the drop feed feature they to do sewing a button on I had to cover the feed dogs u s o it's, we're going to go through the same process, it just some machines have where you cover them and some machines have where you drop them out of the way. The nice thing about being able to drop them is that you won't lose some of the clearance that the cover would take up, so if you're going to be doing a lot of work with drop feed, you might with free motion or sewing with the feed dogs out of the way in most cases is free motion or in this case, sewing a button on you might like that drop feed. Now what happens is I'm just a little tip about your drop feed too is like now do you see like when I turn my wheel you notice that the feed dogs didn't come up normally when I saw they dropped down they come up, they grab some fabric you saw them up above the needle plate they carried my fabric through and then they drop down out of the way then they came over forward again they came up to grab some fabric you actually saw them up over sticking up over the top of the needle plate carried the fabric through and then they dropped on are the way to come and get the next stitch well when they're dropped they're not doing any feeding and that's what we want for sewing a button on so we're going to know put the button sewing foot on and that just clicks on like like what we've been doing with the other feet and then you put your fabric you can put this once you've dropped your feed then you can put this back on if you want that doesn't have to stay off and then you put your fabric underneath the foot and you want to make sure that you know different buttons air different see how it's like this one has the holes are closer together these air further apart so you're going to want to set your stitch with according to the um the space between the holes on the button that you're you're doing so to do that, I'm going to just select my zigzag stitch on my pattern selector dial and then I'm going to come up here to my stitch with and let's say, we're going to do this blue button, those holes are kind of close together we put the button underneath that foot and it's kind of like a little horseshoe that just goes around the holes and put the presser foot lifter down and now I'm going to put my with down maybe about a four I'll try that and before I really step on the foot control the lead it's do it zigs egg, I'm going to just give this a little test now I can tell my needle is hitting my button, so I'm not going to sew yet I'm going to reposition my my butt needs to move back a little bit, not quite in the right place and now I cleared that hole and I'm going to swing it over and it's clearing that whole, I'm in good shape, so now I can just step on my foot controller give that a few stitches, you only need about six eight stitches or so and then when you're all finished, you can put this back over on straight stitch and then we're going to just so a couple the stitches to let that tack off that's what secures it in place and then when you're finished you can remove your work from the machine just trim these threads and you've sown a button on in just a moment so it's great for especially like when you have garments like I've got a coat here a little trench coat that we had like twelve buttons on it maybe someone can grab that for us and we can have a look or even here I mean you can even just imagine do they covers oh that's great thank you lacey way have here's a case even where we have four whole buttons and so someone asked yesterday when we were demonstrating this how would you do a four hole button? You actually do it the exact looking here we've just got so many just imagine doing those all by hand how long that would take because it's they're on both sides of the code so with a four hole button what you would do is this is kind of fun but you can do it actually three different ways you can sew it where you you do your zigzag like we just did on this one and then just push the button back and do the next two holes or you could do it sideways like this where you, when you're finished you have where you stitch this way and then turn your fabric and so like this so you get, like the cross type of stitching on the button home and that s o s so he would so sideways or this way to get that x in the case of the coat we just had them parallel one fun thing I saw on a thing with the little girl's coat or something can't rember exactly what it was, but it was some kind of child garment someone had sown the button hole where this thread here going this direction was green then they did it this way where this one was green and they did this one in pink so they actually had three and it looked like a little flower in the center of the button, so I thought that was really sweet, so you actually have three different ways you could do that? You could do that all by the by machine. Okay, so that's your button sewing so well, why don't I just I'll start out with the multi stitches exactly. We could do a couple of things with that and then I can do one of them and then we can come back to do the other. I've got just a piece of denim here, let me switch back to my regular press, her foot, my my general purpose presser foot and I'm going to put my machine on a multiple stitch zigzag so rather than a zig zag zig zag zig zag like that it's going to go stitch stitch stitch stitch stitch stitch stitch like this back and forth and I'm going to set my stitch length fairly short and what we're going to be doing on this piece of denim is a little bit of darning or mending or repair whatever you want to call that so if this was maybe one of your child's garments or something that you want to do a simple repair on not ready to quite quite ready to throw it away yet on and you have a hole in it and you want to repair that if you can get a similar type of fabric to the outer fabric to put behind it as a stabilizer that's ideal but you can substitute anything maybe you want to match the color so if any of it happens to show through and I would use if I was doing this for riel on something I was patching I would have my thread match so it kind of disappears into the fabric but I'm doing it in a high contrast here so that you can see the difference so you would line this up underneath the foot and what I'm going to do then is with a fairly short stitch length and that multiple stitching zigzag going to do a pretty wide with on the with setting and we're going to just let that so back. Good little tip here. I forgot to put my feet dogs back up. This is a perfectly this is exactly what will happen to you at home. I do this all the time because I just forget to put him back up. I'm not sewing at all. My fabric isn't advancing because my feet dogs are down out of the way from when we just sold the button on. I didn't want it feeding, so I'm essentially just sowing in one place. So what I need to do is bring those feed dogs back up, so to do that, we'll just remove our work from our machine. This happens to me all. I did this all the time, but there's a neat little chip I want to bring up here is when I do this, I'm gonna take the foot off so you can really see this on the back is where this little switches that I'm going to push back over here to re engage my feed dogs. And when I do that reach behind here, you'll notice that it looks like nothing happened. That doesn't mean that something's wrong or something's broken. When you flip that back, all you need to do is turn your hand wheel one full revolution, and they re engage, ok that's just totally, totally common that is absolutely normal but we sometimes get calls from folks saying I did like you see them drop out of the way when you push it to the right to drop them they go out of the way but when you re engage them everyone expects that they're going to pop back up like the way they dropped but in order for them to get re engaged, you need to turn your hand wheel when revolution and they're back in business good little tip ok, so let's put that um press it put back on so our feed dogs are engaged put the cover back on and let's so I'll go back to where I was and will resume sewing that little patch in place so we're going to a multi state zigzag there we go and then step on your controller and just like that do those looks like little stitches going back and forth like this? If you want the stitches closer together, you could bring your stitch length dialled down you can leave the needle down, lift this up pivot and turn around and come the other direction and stitch right over it again to reinforce it again, I would recommend that the thread match your fabric I'm just doing it in a high contrast you can see and then when you're when we're done you pull that out and you've got your whole repaired just like that
Ratings and Reviews
Hilary Larson
WOW what a great little class! I finally bought a Singer HD 4432 without even knowing my Creator Pass included sewing classes, and was thrilled to find everything I need to get started right here! Becky is obviously very experienced and breaks things down clearly so even beginners like me can understand. My only qualm is that sometimes it was hard to see what she was doing because her left hand was in the way when zooming in from over her shoulder; it may have been nice to have a 2nd close-up view from the front angle. But her verbal descriptions of the processes are very precise. Overall, this is an excellent addition to the user manual, and has given me a boost of confidence in getting started.
a Creativelive Student
I watched the entire three hour class of Singer Heavy Duty™ Sewing Machine Model 4423 - Fast Start with Becky Hanson. It was very outstanding. I was doing some things incorrectly on the machine, which I had purchased for my granddaughter. She is only 7 years old, so it is important for her to be told correctly. There were accessories in the box attached to the machine that I could not identify, but now I do know ! Also, Ms. Hanson explained some additional items that could be purchased, such as the quilting twin needle, the blind hem foot and the free motion quilting foot. My granddaughter wanted to try the free motion foot so I have ordered that for her. I went ahead and purchased the program after it was finished so that I would be able to refer to it later. Thank you ! Sincerely, Darlene
Elle
These 'fast start' sessions are awesome. I am definitely motivated to give sewing a try!