Lessons
Lesson Info
Sewing a Seam
So I have here some just some kind of quilting cotton thread and when you put your fabric under the presser foot too so you need to lower your press or foot to begin sewing I've done a lot of beginners sewing classes and especially if you're watching and you're very new to sewing sometimes you just don't know what you don't know. So if you've been sewing a while of course you do know this but underneath your presser foot of these little things that look like teeth as it turned the hand wheel you'll see these little right underneath the presser foot they look like little rows of teeth that stick up and what happens is when I put my fabric in here too so I lower the presser foot and now what's happening is there's pressure on the fabric on dh the feed dogs and the foot helped pull the fabric threw out to advance the fabric is I so I very often see new sewers just put their fabric here and step on the foot controller and start sewing and nothing's happening and they're wondering why is th...
is making a mess of threat and it's because you haven't put the tension got the tension engaged and there's no there's, no pressure between the foot and the feed dogs to advance the fabric through so the first thing you do before you start stitching is make sure you lower the presser foot on to the top of the fabric the feed dogs move like in the side of motions so they'll drop down come around and then they'll come up to grab the fabric and push it to the back and then come down again to get some more fabric and that whole happens very very fast but that's what advances the fabric underneath the presser foot? Um I often see new sewers not understanding that they sometimes pull their fabric or did they try to push from in front and pull it from the back because they think they have to be making the fabric advance and you don't the feed dogs do all that work for you all you need to do is steer it or guided so now that we have our press if it lowered will step on the foot controller and we're set first let me put it on straight stitch and I'll talk about this in just a moment but looks like we're all good to go and well do a little sewing so you just lift your press two foot lifter when you're finished and again you can trim your threat over here on the side and there's your nice seem with nice tensions that looks great now when you're making a scene on fabric let's say that I'll just go over to the other side of this swatch that I have and your sewing a seam for riel on a garment there's a couple things there's seem allowance that you wantto follow because you want this is this is if you're new to sewing this is your seem and this area over here to the right of the stitch is your seem allowance and some projects some patterns some guide sheets that maybe you have that for different projects will say use a quarter inch see malone's or use a half inch see malone's or use a five eight since you seem alone so they'll always tell you what kind of symbol and you're like what is that? And you have guide guide guide markings on the needle plate of your machine there these lines that kind of give you a kn eyeball place to guide the edge of your fabric when you so but these are you still sometimes wondering, well, how do I know which one to follow what you can do is use if this is brand new to you and you don't know kind of how which one is it? Half inch and five eighths and so on you can use a little hem gauge and you would go from like center needle position and you could use the edge of your ruler here and when this is lined up with the center needle position you can see well five eighths is this one here and a half inch is this one here so then you'll know and sometimes what folks like to do is even take like a piece of tape, like a masking tape or a painter tape, and even mark that on their needle plate if you're not used to following seem guideline until you get accustomed to it. If you're if you're new, you can leave that tape on there so that you've got a nice little guide to follow and you keep the edge of the fabric lined up with the edge of the tape. That's sometimes a neat little tip if you have a hard time watching the scene guidelines, so once you've determined your seem allowance and your you know what seem allowance you need for your fabric, you put your press if it lifter down, and if you're doing a really seem, you also need to lock the stitches at the beginning and end of a scene so you'd so forward a couple of stitches to three stitches is really all you need and appeared. The front is your reverse lever, and you press that all the way down as you step on the controller and it will so in reverse two or three stitches when I let loose of it, it also forward again, so you would so you're seen on when you come to the end of your scene way, just stop near the end. And then press press reverse lever again couple three stitches come forward again and now what you've done you raise the needle to take complete the stitch cycle come over here trim your threat but now what you've done is you've you can see the difference between my first one where I just started sewing but my second one where I've locked the stitches so now this is nice and secure for a seam you want to do that for your government construction and all your projects you don't want to just start sewing cause those stitches khun start coming undone and use the reverse lever to do that ok, so let's just talk about tension just a little bit so I know it's a little hard to see on a swatch that small like this but I've got to slide that I wanted to show you on the monitor that shows thread tension and what a good balance stitch should look like and how to tell if it's not looking quite right so I'm gonna walk up to the monitor and I just want to point out something to you so you know what? What to be looking at this is a picture of what a balanced ditch looks like this would be the top side of your fabric and this is the underside of your fabric so when a stitch is really balanced you see nice stitches on the top nice stitches on the bottom that's what's happening is your needle thread and you're bob and thread there kind of locking right here so you almost see like just a hand of the bob and thread on the top and a hand of the needle three times a threat on the bottom but basically they it just looks like a nice neat stitch it should look the same on top and bottom and if you want to experiment with that on your machine, what sometimes it's kind of helpful when you're just getting to know your machine is to try using maybe one color of threading the needle and another color in the bob and so you can really see how they play against one another that's sometimes a helpful tip if your fabric is looking like this where on the topside the needle thread looks almost like a straight line but you're seeing this these loops from the bottom side on the top the bottom side might look like a normal stitch, but on the top side it looks like this and you can almost run your finger over that you'll feel it like it almost feels like little beads that's an indication that your needle thread tension is too tight and here is kind of the opposite scenario where it looks like the inverse where those loops from the bottom or for the needle thread are appearing on the bottom side like this and it looks almost normal on the top but you see those sort of beads I wanna sometimes it's kind of they feel you could when you run your thumb over them they feel like that that's an indication that your needle thread is too loose and so over at our sewing machine we have attention wheel up at the top and it's right here and there's a range on it tonight don't be afraid of your tension doll you actually will use this quite a bit depending on the threads you're using the sewing technique that you're doing the type of needle and thread and fabric your sewing all of that can require that maybe you need to adjust this slightly for whatever you're doing so don't be afraid of it but it has a a range from zero to nine um but when you look here in the center area between about three and five there's a range where it's kind of indicated with a black line and that's sort of your average normal range think it comes out of the box just set right there at four right in the middle and that's a good starting place when you start sowing your stitch and then you can adjust from there a cz you as you go depending like I said on the thread and the fabric and the needle that you're working with them to talk about all that in just a moment when you do decorative machine stitching, I'll just go to the next slide. This is an indication of an example where you would loosen your upper thread tension deliberately, and when you do a decorative stitch, you actually the top side of what you're looking at. There is the needle thread. You want to see nothing but the needle thread on the top side of that zigzag on the underside. What you want to see is a little tiny bit of the needle thread you did. This is a case where you do want to see a little bit of that needle thread because you only want the deck stitches on top. They don't need to lock into the middle of the scene. You want the decorative stitches, some kind of threat to relax a little bit. So all you see is that pretty decorative thread when you d'oh, maybe machine basting where you're going to sew a loose thread deliberately to do gathering you might actually take your tension really loose down to a one or two so that your needle thread is really loose so that you can pull that thread to do gathering. A manual gathering like pulling the thread to gather something up to create gathers so there are reasons it depends on two, like I said, didn't technique, thread, fabric and so on. Tha tension does actually your friend to help you get your stitch toe look the way you want it, too, so don't be afraid of that. I know sometimes the word tension. It causes tension, but it shouldn't. Ok, so let's move on and talk a little bit. A boat needle? Yes, he could. I just act as a quick question, and we've already got people asking questions on the live page, which is fantastic, and one was just for getting started from made watts who says, why is it called a heavy duty machine? Is it because it can so heavy fabric and similar to other industry machines? Or is it because it's of its body, if you could just explain shares heavy, you just a step ahead of me? Because I was getting there, so I'll just do that. Now the heavy duties line of machines has a little bit heavier duty, your heavier duty motor than a standard machine, and what that does for you is it gives you a little bit greater piercing power through thicker fabrics, and it also sos faster so for example let's just show you that right now I've got like a long strip of fabric here and I'll just put it under the machine and a normal sewing machine runs about like um well I mean, this is a normal machine too but I mean a standard the standard motors on machines the machine will run about seven hundred fifty, eight hundred fifty stitches a minute depending on the model this one will go at about eleven hundred stitches a minute. So what that's nice for is maybe if you do a lot of sewing curtains and draperies and do they covers and you like those bigger kind of home to core kind of projects where you have those big long seems and you want to so fast that might be a nice feature for you to have so we'll just go him a circus for a straight stitch and you can see that this goes really, really fast so a normal machine would run about three quarters of that speed and so that would be your two reasons what makes that heavy duty? Ok, thank you. Uh, so thie other thing I wanted to talk about with tensions will go back to that for just a moment was if your upper threat is threaded incorrectly we address this just a little bit ago but if you've ever this is the best picture I had of this for the for the diagram, but if you've ever been sowing your fabric and it looks just perfect on the top side and then you turn the fabric over and it looks like you have this big nest of thread on the bottom and you're like, what am I doing wrong? And you think, oh, something's wrong with my bob intention? Because it's all loose on the bobbin that's actually an indication that your upper thread was threaded incorrectly. It just seems counterintuitive that why would that be my upper thread? But it's, just how it works. So what? I'm going to show you a little test that you can do on your machines so that you can make sure that your thread detention is threaded correctly. So when after you threaded your machine and you threaded the eye of the needle, I'm just gonna pull this needle thread out of unfold from under the presser foot so I can show you this. You don't need to do anything to your bob intention it's a little different from front loading style bobbins, where those had a little screw on them in a case and the top drop in bob in style machine tensions priest said at the factory, you don't have to do any adjusting to that your upper thread here, how you know this is threaded correctly is once I've threaded the needle and I pull this thread this thread should feel like it's just moving my bombing threat out of the way there it should just be feel like it's moving really freely through my thread path and then when I put the presser foot lifter down and I do that same poll on this thread I should feel resistance on the needle do you see how one I'm pulling this the needle is even really resisting my poll I know that my tension is grabbing my thread and I'm gonna have good stitch quality when I so if my presser foot lifter was down like it is right now and I could still pull that thread really freely like I did when the foot was up that's a really good indication that you did not get your machine threaded right you either missed your take up lever you didn't get it in the tension and just cut your thread pull that thread out lift your press afoot lifter get that take up lever in the highest position and re thread your machine and that will pretty much in every case take care of that but that is when you see these thread loops on the underside like that that is what you should do first to check for that and that should take care of your issue pronto ok so let's talk a little bit about needles were there any other questions or should I just move on I think there are some questions coming in eso let's maybe if it's okay, take a minute one if you could just clarify when adjusting tension should the presser foot be up or down when you adjust attention that's what should be down? Okay, great. And then let's sit down. Okay? Yeah, right. And then another question is you're talking about the machine might be a noisy while stitching one percent had asked if they need to oil the machine at any point you really don't need to oil the internal parts of the machine the only place really where you oil a machine I can talk about that right now is, um sometimes I like to use a q tip or a cotton swab and you want to use sewing machine oil you can buy it pretty much any place where sewing notions air sold. I just have this little vial that I keep some in for because I like the little drop around with tip on the end, but I'll put a little drop on the end and you can go up above on your needle bar. This is your needle bar right here and sometimes that gets that needs to be lubricated and you could just put a little drop on your q tip and then just kind of rub that on your needle bar up here toe oil here the only other place you really ever would oil your machine is down inside in your bob in area, and, um, you would take this and just put one drop right down in your in the book, and I mean one drop, I don't mean one and a half, I don't mean to I mean, one drop and just one drop in there and then let it run. I would even so on a scrap a little bit to let some of that you know what? That to come out on your fabric and just let it run on is so on the scrap a little bit toe work it through into the mechanism, but how often toilet, if you you can contact our customer service department, they can talk you through that kind of depends on how often you're using your machine and how much you're running at how often you oil and they can guide you through that. Give them a call they are available at yes, you can reach them at you can email at, talk to us, talk to us at singer ceo like singer company singer, ceo, dot com or you can call one, eight hundred the number four and then singer so one, eight hundred for singer, right?
Ratings and Reviews
Hilary Larson
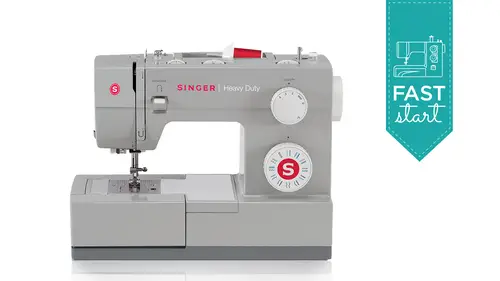
WOW what a great little class! I finally bought a Singer HD 4432 without even knowing my Creator Pass included sewing classes, and was thrilled to find everything I need to get started right here! Becky is obviously very experienced and breaks things down clearly so even beginners like me can understand. My only qualm is that sometimes it was hard to see what she was doing because her left hand was in the way when zooming in from over her shoulder; it may have been nice to have a 2nd close-up view from the front angle. But her verbal descriptions of the processes are very precise. Overall, this is an excellent addition to the user manual, and has given me a boost of confidence in getting started.
a Creativelive Student
I watched the entire three hour class of Singer Heavy Duty™ Sewing Machine Model 4423 - Fast Start with Becky Hanson. It was very outstanding. I was doing some things incorrectly on the machine, which I had purchased for my granddaughter. She is only 7 years old, so it is important for her to be told correctly. There were accessories in the box attached to the machine that I could not identify, but now I do know ! Also, Ms. Hanson explained some additional items that could be purchased, such as the quilting twin needle, the blind hem foot and the free motion quilting foot. My granddaughter wanted to try the free motion foot so I have ordered that for her. I went ahead and purchased the program after it was finished so that I would be able to refer to it later. Thank you ! Sincerely, Darlene
Elle
These 'fast start' sessions are awesome. I am definitely motivated to give sewing a try!