Basic Sewing Techniques Part 2
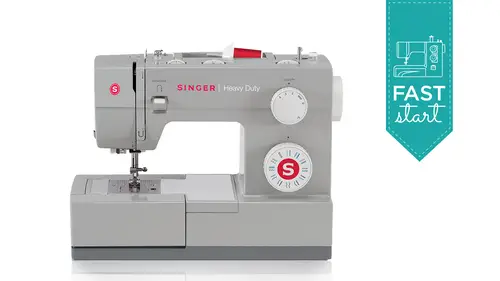
Lesson 6 from: Singer Heavy Duty™ Sewing Machine Model 4423 - Fast StartBecky Hanson
Basic Sewing Techniques Part 2
Lesson 6 from: Singer Heavy Duty™ Sewing Machine Model 4423 - Fast StartBecky Hanson
Lessons
Lesson Info
Basic Sewing Techniques Part 2
For the satin stitch pillow that we did, what you would do there is use a founder marking pen or pencil. It depends on the fabric that you're the fabric color and the fabric type that you're stitching with their fabric pencils there fabric marking pens. Obviously I wouldn't use this white pencil on here because I wouldn't see it I would use something that will show up, and in the case of that we had the kind of the swirly designs you would just simply draw on here so you don't have to free motion it and kind of eyeball it, you can draw your lines, draw your parallel lines and use those for stitching. Now this particular pen is one that you wash away with water, so if you had a fabric you couldn't wash, you would probably want to use maybe a chalk pencil that was in a color if it was something like this. So you kind of think about that you want to have a kind of a variety of marking tools at home, depending on the colors and the types of fabric you're working with, but just like we did ...
on that pillow here, what will do instead is raised, I raised my press herbal iftar it is and I'm going to re thread my machine I'm going to make sure that take up levers up all the way and in this case, will just meander back and forth on our silk to do that satin stitch. And maybe in this case, I wanted a little wider because, uh, it was wider on that pillow sample that I showed you for the applicator. Being smaller, we wanted a little bit smaller zigzag and make sure that threat is in the take up lever. Put it around the thread guide around the thread guide again. Use that automatic needle threat. Er it comes in, it pulls that loop through the eye of the needle for me. I don't have to strain my eyes to see the thread, the needle, wonderful little invention, and then here we can simply just start following are stitching guideline, there's, even a neat little slit in the front of the foot that you can use to watch that marking that you did on the fabric and use that as kind of like your compass for guiding that through. And maybe I'll lengthen. It's actually just a little bit and just take your time because the stitches are so close together it seems like it takes longer to seoul but it's justcause stitch length is so short so just take your time with it. I'm not pushing. I'm not pulling the fabric. I'm just guiding and I'm using that marking line. A zoo guide just along, faster or slower as you get beginners like so a little slower, they feel like they have more control. And as you get more confidence, you can sew faster. It's ok, it doesn't change the way the sketch looks at all. And then when you're finished, there's your beautiful, beautiful satin stitch. And you could just give that little press to your next role, draw the draw down there. It could make that near or wider would ever look you like. So hopefully I know we had some questions about satin stitching, so I hope that I answered those in the process of doing that, I think that's great. Okay, so next? Yes, yes. Can you say again? What is the best pen to use for this fire? Non know what pain it. Some of them are like chalk pencils, there's thiss different brands out there, and the fabric stores have these there were pretty much where sewing notions air sold. You confined these. But there are chock pencils. There are fabric marking pens. This one, this blue one that I have happens to be one that disappears with water. So after I drawn here, it requires water to remove it. So I need to have, like, a damp cloth and kind of prestes to get get it out. There's some that are kind of a lavender, a purple color and they disappear with air. So the thing you have to remember about using those is if you make your marks on your fabric and it's late at night you think I'm going to sew this in the morning? When you come back in the morning, your lines will be gone. Eso then you might want to think about that and wait till morning to draw the lines because they're more temporary. They dissolve in air, so just the the labels on the pens and pencils tell you what therefore, but I like to have a variety. Because again, it depends on the fabric. If it's washable or not, and then the color you want to be able to see it chalk. I want a nice tio I want a point you know so I like that there are chock wheels they're nice for straight lines and things like that they're bigger but if you need to do some detail work you might like to have a pencil but it should be nice and sharp if you want to do precise work that's great. Thank you so I talked earlier about showing you twin needle sewing so why don't I go ahead and do that next and twin needle sewing you just grab a couple of samples here a twin needle is two needles that are attached to one needle chef and so we have to set up our machine with two spools of thread and the effect that that will give you is this now this is a purchase t shirt that was done with a oh verloc machine that has a what's called a cover stitch. This was not done by a standard sewing machine but you can get this effect with your selling machine so this was a little wider too because this is a surgery cover stitch but the point is we can do a hymn that looks like two parallel rows of stitching and in this case because it was a cover stitch on a surgery it looks like a surgery what will get on a sewing machine is a zigzag on the back side with parallel straight rows on the top outside the thing that's neat about doing the twin needle a cz well on the sewing machine is that you can use your decorative stitches to with the twin needle and you can play with them to get these effects to do wonderful like decorative borders I think this is really fun it kind of opens up a whole new universe for you so it's not just a functional hemming application but you can use it decorative leah's well here's an example of where actually used a twin needle on some like pleather fabric and use the nonstick foot which I hope to have time to show you in a little bit because it doesn't stick to the final and we did parallel rows and then again this direction and we created this little tote that you can actually, um I know it's a rectangular shape clutch, so it probably elizabeth will take this before I leave. I know she likes triangular shaped clutch purses, but you can carry this is a clutch or as tote bag like this, but the point is that this was done with a twin needle. Sometimes you hear people call that a double needle, but we'll set up and show you how to do that so we're going to remove the needle and to do that over here on your needle clamp put this on straight stitch first of all we're all set for straight stitch over here this is our needle this is our needle clamp and this is our needle clamp screw so to remove a needle we're going to put the screwdriver into that slot on the needle clamps crew and hold your needle. A little tip I was giving the folks yesterday was you might want to take a piece of fabric or a piece of paper and just place that under your foot temporarily while you're removing a needle so you don't drop it if you drop it, it might go down into your machines so that's kind of a neat little habit to get into in case you drop your needle, so turn your screw toward you to lower than drop the needle out and just lower that out of the way and now we're ready to replace it with our double needle so you can see the difference between your regular needle and your double needle. We still put the single, um, shaft up into the needle clamp, but in this case two needles will come down so let's get to put that one aside and we'll insert are that under there just in case I drop it and there's a flat side to your needle, you want the flat side to the back push that up into the, uh the needle clamp tighten the screw manually and then I like to just give it one little tweak with my screw, whoever you don't have to over tighten it, but I just like to, you know, secure it better than what my hands can do. Okay, then we have to thread with two threads, so how do you do that? So I've got a couple of threads here that we're gonna put on the machine and one is going to go on the top thiss we'll put our school cap on and then the other one is going to go remember earlier we put this, we have this spool pin felt and the spool pin are auxiliary school pin, and they go here in the top of the machine and then we're going to put the other school of thread up here and you want this one to come unreeling off this off like this, some threads coming off this way to keep them from possibly tangling, and then we're going to take them and treat them as one as we go through the thread path, so just get get a little slack on there, you treat them as one, hold them together, snap it in here, bring them down again, take up lever is up press afoot lifter is up, and we're going to bring this down up. Over the top. Make sure they go into that take up lever. Life is great. They both are. Now, when we come down here normally put our threat behind the, uh, thread guide that's down here. What we're going to do is take put one of them behind it and one of them in front of it. It just helps keep them separated. So pull on these a little bit and I confined. Okay, this one here is my right hand one this one here is my left hand one I want the left one to go behind the thread guide and the right hand one to just remain in front of it now. Because thie automatic needle threat er comes into the center um, we actually have needles on both side of center. No, you do not use your automatic needle threat or with this it won't even work because it doesn't even come in alignment with them. You, khun trialled a long it won't happen. So the's get threaded manually so you'll just have to, uh and hopefully me without my glasses on I can get this still you have to bear with me here for just a moment. Well, a thread, these ok, there's one and here's the other one um you can use decorative threat for this as well it doesn't have to be the standard wait kind of thread that I'm using you can use your crayons when you do this metallics doesn't matter so now I have two needles threated so you'll see three threads here you're bob and threatened to upper threads totally normal now as I so let me just I've got just a cotton here that I've stabilized and I'll just so my straight stitch to start we'll give this a little test so here we go you can drop my spoken I want ground that real quick and as we so what you'll see are two parallel rows of still chain it's really a lot of fun opens up a lot of new possibilities and you can with your need a lot of your fabric you can lengthen out your stitch length for a little bit different do you see the difference when I lengthened off the stitch length versus a little shorter okay now where you would where you would use this um is you could actually use this for hemming on your t shirts member that blue t shirt I showed you a little bit ago you can take your liken it like this and you could just turn that up I would press it and pin it in place but for demonstration purposes I'll just go ahead and so right now because because of our time but what you can do and I would you can have your thread contrast or you can have it match I just like when I'm doing this kind of class, I like to have the threat really be high contrast so you can see what we're trying to accomplish here and then just so along I'll show you what the back side looks like then you'll really see it well, because I have white thread in the baba and on this blue unit so when you're done turn the hand well to raise the threads out raised re raise the needle to its highest position until it just starts to come down and then you know, your stitches completed its cycle and then you control all those threads on your cutter and then you have this beautiful him on the top side that looks just like store bought you wouldn't even know the difference and when you turn it over it looks like a zigzag stitch so it's got that stretch to it so it's wonderful for hemming and then what you could do is take your scissor and come back here and then just trim away that excess from the top of your ham if you don't want that in there and you've got a perfectly stitched stretchy him looks just like store bought, you really can get professional looking result from your home sewing machine that you'll be proud to wear now, besides doing the straight stitching, I talked about doing decorative stitching with it and there's a couple things, there are a couple things you wantto keep in mind. There is she was a stitch when you choose your stitch like let's just say we go to his exact to start with and you pick a with you've got to be really careful with your width of your stitch because, um, your standard with them, you're presser foot let's just say this is the opening on your presser foot, and your regular needle was in center, so when you do the full width of a zig zag stitch, you feel it in the whole area on the front of the foot, but with a double needle, you're like this, and if you go to a really wide stitch with your needle will come over and it will hit the sides of your foot and you'll break your needle. That just makes sense because you've got that needle in there and the the needle bar is still the same, it doesn't know it has a twin needle in it, so to avoid hitting the sides of the foot, you want to make sure that when you choose a wig for one of your decorative stitch, is that you? Turn your hand wheel slowly after you choose it and make sure that it clears the sides of the foot if it comes down and it taps the edge of the foot, you've set your with too wide so you want to bring it back down again so I'm still ok I've got a pretty narrow with that because I'm going to go a little bit wider and just keep turning so you try this on a little scrap to make sure I still look like I'm in good shape so I'm gonna go even a little wider but I just want to make sure I don't hit the sides of the foot I still look good so let's get it out a little bit of a try and look at the effect we got and that is so fun you can just go row after row after row of this you can use this to create border effects like just imagine doing row after row of this even with thicker decorative threads like some of those thirty weight crayons you get a really great I mean this look this is really fun I mean the possibilities are really kind of unlimited what you can do with that yeah, very cool thank you feel like that I d'oh d'oh I'm wondering if that answers a question that came in from said beatty, who asked do the twin needles come in different wittes. Yes, they dio you, you, khun, get four millimeter, two millimeter, three millimeter. This one that I'm using happens to be a three millimeter, so that's, the kind of the most common one, okay, smaller ones are like for pin tucks and other kinds of techniques like that. But the general size is like a three millimeter and that's the most popular and task, which is why I used it. Thank you, uh huh.
Ratings and Reviews
Hilary Larson
WOW what a great little class! I finally bought a Singer HD 4432 without even knowing my Creator Pass included sewing classes, and was thrilled to find everything I need to get started right here! Becky is obviously very experienced and breaks things down clearly so even beginners like me can understand. My only qualm is that sometimes it was hard to see what she was doing because her left hand was in the way when zooming in from over her shoulder; it may have been nice to have a 2nd close-up view from the front angle. But her verbal descriptions of the processes are very precise. Overall, this is an excellent addition to the user manual, and has given me a boost of confidence in getting started.
a Creativelive Student
I watched the entire three hour class of Singer Heavy Duty™ Sewing Machine Model 4423 - Fast Start with Becky Hanson. It was very outstanding. I was doing some things incorrectly on the machine, which I had purchased for my granddaughter. She is only 7 years old, so it is important for her to be told correctly. There were accessories in the box attached to the machine that I could not identify, but now I do know ! Also, Ms. Hanson explained some additional items that could be purchased, such as the quilting twin needle, the blind hem foot and the free motion quilting foot. My granddaughter wanted to try the free motion foot so I have ordered that for her. I went ahead and purchased the program after it was finished so that I would be able to refer to it later. Thank you ! Sincerely, Darlene
Elle
These 'fast start' sessions are awesome. I am definitely motivated to give sewing a try!