Intense Editing - Giraffe in Reflection
Lesson 10 from: Shooting and Editing for Mobile PhotographyElise Swopes
Intense Editing - Giraffe in Reflection
Lesson 10 from: Shooting and Editing for Mobile PhotographyElise Swopes
Lesson Info
10. Intense Editing - Giraffe in Reflection
Lessons
Class Introduction
00:49 2Settings
02:36 3Scouting Locations
07:36 4Shooting Reflections
06:26 5Shooting Leading Lines
03:05 6Shooting Skylines
09:26 7Organizing
03:32 8Removing Billboards
10:05Lesson Info
Intense Editing - Giraffe in Reflection
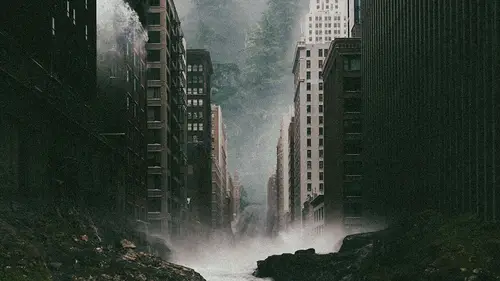
so we've gone over a little bit of the basic editing, but I'd like to go into the intense editing, and I'm pretty well known for my draft edits. So I'll definitely have to throw direct in this reflection shot that I caught earlier. So let's go ahead and go back to that photo album that I titled Reflection, which is nice, because I could go back and know where all those photos are and I'll be able to pick the best one that I like that I'll be able to kind of work with. So let's see what kind of photos I have with the least amount of variables in the way looks pretty good. So I like choosing it from the photo album. That's easier to go through because if I'm choosing from say for us, is how I'm going into this go right now. If I was to choose and Visco, it wouldn't feel as if I could zoom in and see the picture as well. So what I'm gonna do is actually upload it to Visco from the photo album. So go down here and import to Visco, and then it will ask that, and you just click the check mar...
k and it will bring the photo into Visco. So photo get it open and we'll go ahead and resize the image. Be a just straightening a little bit and then after that, maybe adjust the skew a tad bit. So let's just see if we can actually, I do that. Why? They noticed the top is a bit skewed, so that seems a little bit more straight to me. So now I've got that. I'm gonna go ahead and save that image and tap on those dots on the top, saved camera with actual size. And then that will allow the image to save as the most recent, which will help me in going into art studio and going to file import from photos recently added, And I'll be able to pick that image right back up because if I was to edit in the native camera app, it would only have that image back where it was. And it might be a little difficult to scroll through all of the album to see which one I've edited, So it's nice to have that that option. So now I'm going to do is place my draft in the image. What I like to do is I like to use stock images for giraffes. I've never showed a picture of a draft myself in the wild. I don't really like zoos very much, so we're definitely going to keep it simple and straight with stock images. The nice thing about the stock images to is that they do have a nice white border around them and you'll notice I like to keep my albums organized. So once I insert as a new layer, I'll be able to go into the albums and find that giraffe album. And now you see, I've got a few of my favorite giraffe cut out, so I'll go ahead and tap that one. That's there that will fit in this one, and you'll notice that it's got that white background night. But we wanna erase that so that we only have the draft. So we're gonna go ahead and tap the selection, and tapping the selection will give us more options within that so the select settings will have square circle lasso, a straight line selection or a magic tool, or select all of that same color. You don't want to select all the same color because there's white inside the giraffe. So what we want to do is do the magic wand. I want to make sure that we're doing adding to instead of just one because we're adding in between the legs of the drafters white outside the draft, there's a few spaces that won't all collect at the same time. So we want to keep adding selections and then also the threshold. So I'll show you how the threshold works. So with threshold, I'll bring it up a bunch. I'll just show you how it works. Bringing it up a time and what happened is because the threshold is a little too high. What I'll do is out tap. It'll actually actually select all the white within the direction. We don't want to select all the white within the draft, so let's bring that threshold down to about 10 or so and then within that 10 it will allow us to tap right back into that white way easier. So now it's not selecting any of the white of the Giraffe and then like I said before, because we at we're doing an ad of the selection that will allow us to tap inside the legs here and not get rid of the selection that's on the outside. So let's go ahead. Keep that not minding this right here, but we don't need it. So let's just get rid of those and what you could do. Also, instead of using a magic wand, go ahead and maybe get the square. Or maybe if you want to do last. So let's go ahead and lasso around those spots that don't need to be there. So select those Keep going around. It doesn't need to be to perfect, but so also, notice this a little bit here. That might be a little too hard to capture. But get inside there and I'll let you know how we'll figure that out after. So when you zoom in, you'll notice that there's a few pixels outside of the draft that that weren't selected. When you're selecting that white background, so what I'm gonna go ahead and do is actually do file, Select and expand and expand is going to do is expand that selection that will select those extra little pixels that I don't want to be included. So I'll expand by maybe one or two pixels within with this specific edit. I noticed that it's about two pixels off, so I'm gonna do expand by two pixels. I'm gonna go ahead and expand. You'll notice that right there. It it's now past all the little extra way. And then it's selected a little bit of the draft, but not entirely enough to make it look weird or anything. And that's exactly what you want. So ahead and edit clear selection. And now we've cleared that white background. And now we've got our draft. So I'm gonna go ahead and edit, transform, layer, move, scale and rotate. And now I'll be able to move this draft wherever I see fit. It kind of looks like it should be placed there, to be quite honest with you. So I'm gonna go ahead and apply that. But what I'd like to do first because I've got that size, Correct. I've got the giraffe already cut out. I'm gonna go ahead and duplicate it because I already know that that is gonna be a reflection within the water. So I'll go ahead and tap that layer. Make sure you're always tapping and selecting that specifically or if you're on another layer, that will affect that specific layers. Always make sure you're on that correct layer that you're trying to adjust. So I'm on That's correct, Layer. I'm gonna go ahead and just that layer. I'm gonna go ahead and flip it. And when I flip it vertical and that will allow that draft just flip nice for me. I'm gonna go ahead at it, transform layer and move, and I'll go back and do that again. But there's an option. So you go edit, transform layer. They've got a bunch of options here. Move, scale rotate. But you only want to do for this one because we want to keep the draft the same size. Keep it in the same everything like that. All you want to do is move it so that you're not scaling it. You're not rotating it, and you're just gonna move it straight right where? That right where they connect. So I hit, apply, and from there I actually do the erase tool, and what you want to do is select that edge. That's not soft, because you want to make sure that when you're cutting that from the giraffe that it looks not soft, but it, like, really ends right where that water starts. So I'll just go ahead and race a little bit where it starts. And then I'll also adjust that layer because you'll notice that everything in the reflection is a tad darker than what's on the other side. So I'm gonna go ahead and bring the exposure down, and then I'm also gonna apply that. And then what I'll do is to a filter blur and a motion blur. And sometimes the water's got a little tiny, tiny bit of motion for it within it. So what I'm gonna do is tap preview and just see how much that distance of it and you'll notice. Now it's a big difference between how this motion is and how still the seams and how much motion now that reflection has. So it does seem like the reflection is now in the water. If you want to play with the distance, if you want to play with the angle, you definitely can. But I like to keep it a little bit more to the side, which looks really, really cool for me, and I'm gonna go ahead and apply that also, I can I would love to give the giraffe kind of like a radiant of some sort. Just Teoh make it look like it's really in the scene. So I'm just gonna go ahead. And one thing that we've run into at this point is that I'm not able to duplicate these layers anymore because now we found ourselves in a place where the actual image size is too large to continue adding any more layers. Sometimes when it comes to creating with your phone, you're locked into a certain type of you're locked into a certain amount of megabytes that you can use in. At this point, what I'll do is actually go to image and then resize. And then I haven't talked about this quite a bit, but within my notes, I actually have a bunch of sizes already for Instagram. So I've got square image sizes. I got landscaping exercises, I've got vertical image sizes and I've got story image sizes. So for me, what I know is that the vertical images by the 45 are always at 2160 times 21 or 2700. So go ahead and type that 2160 within their 2160 and that it's already changed the high for me to 2700 which is awesome, because that makes me believe and know for a fact that it is at 45 So go ahead and re size and I just put none because I'm not really entirely sure what that means. But I'm gonna hit resize. And now it's resized my documents so that now, at this point, I will be able to duplicate another layer. So go ahead and duplicate that draft layer, and then I'm gonna go ahead and adjust and bring down the contrast are bring down the exposure. Now apply. Now, I'm gonna add a mask to this. So what I'll do is tap this little square with little circle inside of it. Show all and then I'll go back. Two ingredients. Make sure when you tap the greedy in options that is going color to color. You don't want to color the transparent because it's not going to give you a Grady in, so make sure it's color to color. Make sure it's going regular. Greedy it from one color to the next night from one color next, and then back to that same color or a circle. What not so just make sure your settings are correct. Have the Grady come up to draft and just give it a little, so it may not necessarily need it. But even in the bottom, a little bit dark feet, and we'll also add some shadows underneath. So let's add a new layer so the new layer will just be blank, which is nice in what I'd like to do is also pick a color that would work well for shadow. So I see that maybe this brown color here might work a little better for a shadow color. And I don't want to do black, because black would just seem to hearts for this. I don't think there's many blacks and actual image, so there's no blacks and actual image. Don't use black as a shadows. Pick a color that's the darkest in that image, and use that as the shadow or whatever. So oh, good, I'll use the pencil tool. I find a nice soft edge. Change the size up a little bit at the end. We're definitely into it. A Goshen blur on this so that it won't be so obvious that you've drawn it on. So I'm gonna go ahead and actually change the size. That's way too big. I'm just gonna go underneath that breath, just give it a little bit of something and let's just see if when I blur it, it actually doesn't look as absurd. And then I can also bring down the opacity within that if you wanted it to be a bit more specific, but on, just do that for now. Cool. So I feel like this isn't entirely exactly what I post right away. Because what I do is I probably actually file export. And I don't know if it makes quite a difference, but I always like to save my images in PNG. Maybe I'll do J peg, but I always saving in PNG. And then I export two photos. And then what I do is I'll bring it into Visco. Give it a nice filter, play around with all the filters. It's nice. You just tap him, see what will work. See what won't these this since systems on who I like this one. So I'm gonna go ahead with e three. And I actually don't want to do any of the color editing or anything like that because I actually like White Room a lot more for Hugh Change and and adding grains and stuff like that. So I'll definitely go ahead and save this camera roll. And then I will go into light room and go ahead and open that image of so within light room. You have all these really amazing options there. So so many really basic tools. But my favorite tools within the APP are actually mixing up the colors, so I always like to boost the saturation orbit, boost the vibrance because sometimes what I notice is when you're posting the instagram, sometimes the color and the saturation gets a little depleted. So I like to just add a little extra boost just for good measure. I'll hit mix, and maybe I want a boost saturation of the giraffe of the color of the draft. Or maybe I want to bring it down a tad because maybe it's a little too much to be quite honest. It looked a little too much to me, so I might bring down saturation a bit just to make it more realistic. And then I'll also hit Done. See? That even looks even better to me right now. Maybe you'll play with the light a little bit. The background seems a little too blown out, so maybe bring down the highlights a tad on. Maybe we'll bring down the shadows a bit and then maybe play with the details, sharpen it up a tag. But my final thing that I always love to do is to add a grain to the image. What I like about grain is that it kind of just brings the image altogether. So if I've got different images, all composited with one another, once I add that grain, it just almost looks like it's one little film shot or something. So what I like to do is just go down to the grain who sit up to the grain, play around with size, play around with the roughness. I really can't see it all entirely. When you zoom in, you'll be able to see really that nice green consistency. This is something I would go ahead and post for. Sure, definitely. Say yes so that go ahead and save it. Save the camera roll you can also save files here, gives you a bunch of options. It's really nice to because the light room APP allows you to be able to export it into the other abs with Photoshopped, Mixed Photoshopped fix and all those other adobe app. So they work really well together. Saved Kim Ruehl. They did that in that image is vital and finished.
Class Materials
Bonus Materials with Purchase
Ratings and Reviews
Kate Crossley
Found it very interesting how Elise translated Photshop style art composition onto her mobile and how she scouted for images. It would have been good to have had a list of the apps she uses in the class information page. I had to go to her website to find them. I appreciate she mentioned them in her tutorial but a list would have been helpful too. Having been doing composite work on my iphone recently it was great to see another artist at work and their approach. All in all, very enjoyable class.
Jennifer Pinter
I think the class could have been longer with more detail about the editing. I am glad I purchased the class and can go back to watch again because she goes through the editing process very fast. Overall some good tips about shooting with your phone and worth $25 to me.
Ken Hattie
I cannot attest to the course content as I tuned out after and left after the 10the use of the irritatingly over-used word, by videomakers, "super". By god, get a thesaurus, people.