Live Shoot: In-Studio Lighting
Lesson 14 from: Editorial Portrait Photography for High School SeniorsDan Brouillette
Live Shoot: In-Studio Lighting
Lesson 14 from: Editorial Portrait Photography for High School SeniorsDan Brouillette
Lessons
Class Introduction
15:18 2How to Make Senior Photos Stand Out
05:48 3What is Lighting in Layers?
16:49 4Build a Lighting Foundation
18:28 5Layer One: Main Light
06:17 6Layer Two: Fill Light
08:29 7Layer Three: Accent Light
04:29 8Layer Four: Additional Light
11:46Outdoor Lighting Examples
15:56 10Outdoor Lighting Equipment
03:34 11Outdoor Lighting Camera Settings
09:31 12Outdoor Camera Settings Examples
14:32 13Outdoor Lighting Q&A
12:44 14Live Shoot: In-Studio Lighting
20:52 15Live Shoot: Metering
04:17 16Live Shoot: Large Soft Light Setups
12:13 17Live Shoot: On Camera Flash
14:07 18Live Shoot: 2 Light Set-up
16:29 19Live Shoot: Accent Light
05:06 20Live Shoot: Hard Light
11:30 21Live Shoot: Create White Backdrop
08:32 22Introduction to Direction
28:42 23Live Shoot: Photo Booth Direction
11:13 24Live Shoot: Basics of Direction
19:34 25Live Shoot: Beauty Dish Close Up
08:22 26Live Shoot: Subtle Cues through Direction
19:33 27Location Shoot: Senior Introduction to Shoot
11:33 28Location Shoot: Use Location to Your Advantage
29:43 29Location Shoot: Create Scenarios
19:50 30Location Shoot: The Walk Plus Variations
10:50 31Location Shoot: Outdoor Lighting
15:18 32Pre-Session Consultation
12:35 33Prep Clients for Purchase
06:47 34Get to Know the Client before Session
08:04 35Decide Clothing Options Prior to Session
13:14 36Client Interaction
09:14 37Pre Session Consult Q&A
12:35 38Image Workflow Overview
15:41 39RAW Editing Workflow
27:29 40Basic Photoshop Editing
13:58 41AlienSkin Exposure Color Toning
26:27 42Marketing to Seniors Overview
05:18 43Marketing to Seniors
16:24 44Alternative Income in Any Market
03:57 45High School Posters as Marketing
10:38 46Seeing Moments Differently
17:27Lesson Info
Live Shoot: In-Studio Lighting
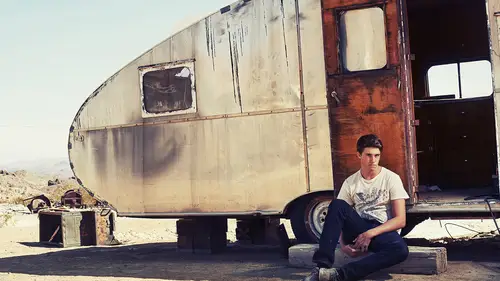
We have a white seamless setup. We have a bunch of lighting options we'll go over. And how I wanna start this segment is we're gonna go over the key note. Here is just a few samples of studio images that were shot, you know, basically on a white background, whether we made it white or gray or black, and that's what I wanna do here in studio. So these were different lighting setups to create different scenarios, different effects, different moods, all that type of stuff. And what we're gonna do is recreate a lot of this stuff with Cooper. And so I wanna first go through everything that we have that we're gonna go over, and then we'll actually put it to use. So in-studio lighting, we're gonna cover our lighting goals. We're gonna go over metering. We're gonna go over one-light setups, multi-light setups. And let's start with our goals. So again, determining the light we want and then selecting the proper equipment, that's the first thing we're gonna do. We're gonna start with a neutral s...
etup. We're just gonna use one Softlighter umbrella, a 36-inch that just gives us a nice medium soft light. And I wanna use that to show, earlier, I showed you a lighting radius of where I move my light around from something that's really dramatic with a lot of shadow to something that's more neutral. We're gonna start off just kind of doing that. You'll see how the light changes on Cooper's face. I also wanna show you a little bit about fall off. And with that, I mean how the light will affect the white background. So the closer we get the light to him, the darker the background will go and vice versa. I also wanna talk about framing and getting your shot framed up. We're gonna use different lenses, try different things depending on what light we're using. And then lastly, yeah, the contrast and mood. So here's our senior, Cooper. And what we're gonna do first, with any senior session I have or any session in general, one of the most important things is styling. So he brought in different clothes. We kind of talked about this beforehand. That's one thing I like to do with any shoot is go over the general things that I want them to bring in and not bring in. So you can see he brought in nice, not a lot of patterns, neutral tones, things like that, arranged from what he's wearing, something darker, to even black, to white, in between, different levels of casual to more formal. He also is a lifeguard and plays water polo, so we kinda wanna implement that in there. So he brought his lifeguarding shorts and a water polo ball. So when we start adding our accent lights and doing a little more creative lighting, we'll use some of those. But I wanna keep him in something neutral to start because what we're gonna do there is go over just those layers. And having him in something that's neutral will let you guys see how the light's affecting the shot without clothes being too distracting. So what I'm gonna do is, if you wanna wait over there for a second, I'm gonna go through the rest of the slides. If you wanna grab this clothing rack, we'll get that outta here. And we'll just put that in the back so that way, he can grab and change. Yeah, just grab a seat. And I'm gonna go through and go over everything we're gonna cover, and then we'll go back through and actually do it. Thank you. Let me grab (mumbles). All right, so we're gonna skip this because we're gonna come back to it again. It's just about metering, making sure your ISO and shutter speed and everything's correct on your meter because if you have the one I do with that touch screen, things aren't always as you remember. Sometimes you pocket dial your meter and change your ISO. The other things we're gonna go over with the one-light setups, I wanna go over an umbrella setup. So that's just your basic lighting setup, how we move it to change everything. A large soft setup, so we're gonna use the big Profoto umbrella with the diffusion panel on it. So it's gonna be really soft. It's about as soft of a light as I'll ever use, and you'll see how that affects the image quality. On the exact opposite side of that, we're gonna do a little on-camera flash, slash that bare bulb look. And we're gonna have him in a white t-shirt just so we can do a real high contrast white on white type of look that will be a lot more edgy than the soft light. The next thing we're gonna do is start adding fill. We're gonna start with using a V-flat or a reflector as fill. Then this is just kind of more explanations on what we're gonna do with that foundation. We're gonna cover those angles, like our height, feathering, tilting the light, and distance. We're gonna go over the inverse square law basics. So that's when we'll try and make the background lighter or darker. And we'll also talk about fall off on using the same light source to light just his face or light him from a three-quarter length portrait. With the large soft setup, we're gonna use that Profoto deep white XL umbrella. We have it down here. It's pretty big, so I'm not gonna set it up till we're gonna use it, or you won't be able to see me anymore. And then again with the on-camera flash, one important thing to remember with that is lens choice. And a lot of times, with that type of photography as you'll see when we do it, lens choice is important because when you're holding a flash above your lens, you can't get too far away or weird things start to happen with fall off, even distortion and things like that, and the light just getting out of control. So I tend to shoot with my 50-millimeter or even the so I can stay close and more intimate with the subject and get that on-camera flash look. And you'll see why. We'll shoot one with the 7, so you can see why not to do it. And then again, how that creates the shadow on the wall. By handholding your light over your camera, as you move it from side to side, you'll see how that shadow shifts. So if you wanna eliminate the shadow completely, holding it directly over your camera versus if you wanna add a little bit of shadow and shape to the face, you can move it from side to side. We'll talk about the reflector fill, using the white reflector as fill. That's generally what we're gonna do. We have some V-flats over here, so we'll set those up. I'm not gonna do this here, but occasionally, we wanna kill fill, especially if you're in a room like this where if we had a light on this side of the room going back here, this is an old white wall. We're already gonna get a decent amount of bounce. But sometimes if you want that dramatic look, you need to introduce something like the black side of a V-flat to soak up all that light and really kill any reflection. But for this, we're gonna use it more as a reflector. We'll then move in to two-light setups, so umbrella plus fill, whether it's the reflector or not, lighting rations, and your accent light. With the umbrella plus fill, like I said, we're gonna use that V-flat. We'll then use the on-axis fill. I know that was a question earlier, placing that fill light directly above the camera. I'll show you a couple of options you can do with using an umbrella as a fill light and the quality of, you know, hard light versus soft light as a fill. We'll then move into the lighting ratios, measuring our main light versus the fill light using your meter. Again, those ratios of one to one, two to one, four to one, and eight to one, we'll do a sample of each one of those, and I'll show you how they meter out using two lights. And then the accent light, accent light placement, the power settings. So that's pretty much all the things we're gonna go over with Cooper. There's not gonna be a whole lot of direction. I'm gonna give him general direction for, you know, where to look and things like that. But as far as the more posing side of interaction, we're gonna save that for its own segment later on because when you're trying to learn some of these things, it's not ideal to combine them only because it gets confusing. So for this part, we're just gonna hone in on all the things that we learned this morning, and we'll work strictly on the lighting. So I'm gonna go back through those slides if we can get those back up, and then I'll start setting up. So Cooper, if you wanna come over here, we'll find a good spot for you to sit. We are gonna shoot tethered, so everything's gonna pop up on the screen. I'm gonna have Cooper, we're gonna put him just right here, right in the middle. Oops, I didn't mean it to be that tall. Grab a seat there. So you know, we're about four feet from the background. We're gonna move him back and forth, but for now, you can just sit right here. Generally, I'm gonna place my lights on this side. That way, you guys can see him and see where the lights are going. We're going to be lighting with the Profoto B1s. We have several over here to choose from. So we're just gonna stick with the one-light setup to start. I'm gonna use the Softlighter umbrella. So for that, it's a reflective umbrella, so we're gonna be pointing the light away from him. And we're gonna start with, I have the 46-inch and the 36-inch. We're gonna start off with the 46-inch, and we are gonna put the diffusion sock on it. So I'll show you guys how that works. And the one thing that's kinda handy when you have it set up with the Photek is the umbrella rod. When it comes from the factory, it's a lot longer, but there's a segment in the middle that you can unscrew. And where that's handy is when you have a light like the B2. You don't want all of this sticking out because for one, you can either lose an eye, or two, it's in your frame and you have to Photoshop it out. So I always unscrew it on these larger umbrellas so it's not in the frame. The next thing I wanna do is put the diffusion sock actually on, oh, yeah, there's the other half, is put the diffusion sock on the umbrella itself. So to do that, and this will really soften up the light. To do that, you just open it up, set your umbrella on to your sock. So you just pull the rod of the umbrella through. Place it through the umbrella holder on your light, pull the sock over the light. And this thing's pretty stretchy. It'll fit over most lights. Alien Bees are a larger square type light. These are obviously small and more round. The B2 is even smaller. It's stretchy, so it'll fit over most lights with a little effort. And then how it works is there's just grommets built into the diffusion panel. And they go over the end of each rib on the umbrella, so like so. And again, this is how every shoot goes because I generally don't have an assistant. So I'm just kinda talking through it as I go. Once we get this set up, we'll go into feathering, the tilt, the angles, and all of that good stuff. All right, so that's that. That's our general setup. So you can see I've already started to tilt the light in a way. I wanna make sure that the sock is not over the end of the light or you won't be getting all the light you think you're getting. So a lot of times, I like to pull that on there tight and then cinch it up like so. So basically, what we have here is a reflective umbrella where the light's going into the umbrella. It's then reflecting back this way through the diffusion so it's really soft. And I've seen photographers make it even softer by putting two of these on there and just really diffusing the light. I haven't personally done that but it is a technique that's used. So we'll turn our light on. Again, the first thing I wanna do is do the height. So again, we talked about the height of our light, kinda mimicking that seven p.m. June sunset, golden hour light. I'm gonna leave the modeling light on for now. And again, he's sitting on his chair. Right now, he's about a little under five foot tall. So I'm just giving that like 35-degree angle. Again, I said feathering the light. We don't want the hot spot, so the middle of this, right at his forehead like that. I wanna feather it in front. And the other thing I wanna do is I wanna start with the back edge of this umbrella about even with his face. So that way, we're getting that nice wraparound effect. Even though this light will be placed 45 or more degrees this side, we're gonna get a nice wraparound soft light because of the light source. So Cooper, I'm actually gonna have you turn a quarter turn this way. Yup, right, like that. That's perfect. And you're gonna end up looKing at camera out there. So the whole purpose of these shots, you don't need to smile or do anything. You can just look at the camera. And so that way, we can see how the light changes as I move it around. So we'll actually start out with it almost directly out this way. So it's gonna be fairly dramatic looking. We will be shooting tethered. Let me get this up here. So we'll be shooting tethered to Capture One. You can tether to Lightroom. I've been using Capture One since I started, and that was just kind of a personal preference. And now that I've been using it for years, it's what I know. I have worked on sets where we've used Lightroom. I don't think there's a right or wrong answer, but it's just kinda your personal preference. So what we're gonna do is a lot of times, when I start, I wanna meter. So we're gonna shoot, it doesn't, again, we're in studio. Some people have a preferred f-stop to shoot in studio. We're just gonna go with 5. because that's what we're gonna go with. And so we're gonna set our camera to ISO 100, which it is. I'm gonna set my shutter speed to 200th of a second. It's there. And I'm gonna make sure on here ISO 100, shutter speed, 200th of a second. I'm also gonna make sure my white balance is where I want it. It's at 5560, which is the standard 5500-ish for Nikon. And now, knowing that we're at 5.6 here, we wanna meter to make sure that he's properly exposed. So I'm gonna take the light trigger here. This has a test button so it'll fire. And we're gonna make sure that our meter reads 5.6. So it's at 3.5 right now, which is just the power setting. It goes up to 10. We'll hold this right in front of Connor's forehead. You don't have to do anything. Make sure the light dome is out, facing towards the light. And boom, take a reading. What does that tell you? 1.8. We need more power. So we'll go up about here. We'll give it another pop. So hit the measure button again on the side. Hold it to where you want the exposure to be. We're still a little low. Keep going up till we hit 5.6. So this is always, you know, just a little bit bright. We're at seven. Getting closer. This is always the testing portion of any shoot. And once you're there, then you can just leave it, especially if you keep your light about the same relative distance from your subject the whole time. So there we are. We are now, one more test, at 5.6, so we're good to go. Shut that off. And what I'm gonna do is take a test shot just to make sure everything is squared away. For these shots, yeah, you can just sit just like that. You can look right at camera. You don't need to smile. You can just stare at the camera. That's fine because we're gonna do the same shot over and over. So if you just wanna look right here. It's gonna be from here to here, so don't worry about your hands. Don't even worry about sitting up too straight. It's gonna be pretty laid back. So just look right at the camera. I'll give a three count just so everybody knows. One, two, three. What also helps is when you put the trigger on your camera. Kinda like leaving the lens cap on, you know. Again, that's why I check and talk through everything with ISO and all that. This is pretty obvious because it just doesn't work. But other things like when your ISO is still at on your camera and you're like, "Why is it so bright," yeah, those are things that happen to me on a daily basis. All right, one, two, three. And I'm shooting with a 50-millimeter lens. So here we are. It looks a little darker on there, but I promise you that it's exposed properly. Let me turn up everything. Another thing I do, so a lot of times, when I'm shooting for, you know, a client where I'm shooting tethered, especially if it's a whole bunch of business portraits, is I know that they're gonna look a little rougher on the screen because I shoot, generally, a little bit underexposed because I don't like to lose highlights with the way I process. And I also like to shoot with things a little more flat. So I'm going to do some of my general workflow right now. So within Capture One for tethering, I'm gonna hop in here. I'm gonna go to, I use the high dynamic range. Basically, it's highlight and shadow recovery. And I'm gonna bring up the shadows a little bit. I'm gonna bring up the exposure a tiny bit knowing that I'm shooting under. When I'm gonna show clients onset, they might think, "Oh, it looks so dark." Well, I'm gonna raise it up so I don't have to hear that. And I'm gonna turn down the highlights just a little bit. So basically, we're creating an image that's a little more flat. That's also not sharp, so then we'll take one more. And you can see how there's quite a bit of shadow here because this would be, on our light radius, this would be almost on that line. The light's about as far back there as I would put it because any further back, we're gonna lose light behind his head. So we'll take one more test shot. I'm gonna try and keep a consistent crop here. There we go. One, two, three. All right, see how that looks. All right, so we're losing catch light just a little bit. So one thing I'm watching with the modeling light is catch light. So that either tells me, one, I need to move his chin up a little bit, or I need to move the light lower. I kinda like where the light is, so I'll have you raise your chin just a little bit. Yup. And I'm gonna move this just a tiny bit because what I'm seeing is I could use a little bit more wraparound. So we're still gonna get that shadow. Looking right here, yup. One, two, three. All right, there we go. So that's better. So this is just kind of a standard, pretty dramatic lighting. It's definitely a purpose for that. Now I'm gonna move the light just a little bit around to this radius. So if this is at, you know, almost straight out this way, we're gonna move it more frontal. So we're gonna wrap the light even more around, eliminate some of that shadow. Again, I'm making sure that this back edge is even with him, it's feathered in front, and we should be getting quite a bit less shadow on this one than we did on the previous. And we'll be able to go back and forth there. All right, one, two, three. And my focus point, I shoot with just one point of focus, and I'm putting it on his close eye. So that's what I'm looking through. I can move the rectangles around within the viewfinder, so I'm focusing on the eye that's closest to the camera. So here you can kinda see the shadow on the right side of his face on the right. You see how that opens up just a little bit. You can also see how your light, by moving it more angled to it, affects the background ever so slightly. It's a tiny bit brighter. And again, this would be something where if I were to show a client, we'd open it up just a little bit. So this is kind of the start of what I would do for a lot of the corporate headshots, and this is where I would add in that fill light, but we'll get there. The last lighting position with this is, a lot of times, I'll use a C-stand with an arm on it. I didn't wanna do it today because I'm moving it around and not having to deal with sandbags. But this is one where you can't feather it as much because the light's almost aimed directly at him. So this is one where I'll angle it more downward. So with this, we'll loosen it up, angle it more downwards. So we still have the same height, but now I'll have some room to shoot. The hotspot of the light is not going below his forehead. But other than that, we're gonna get pretty neutral light. So we'll set that there, hop in here. So this should eliminate quite a bit of the shadow. It still won't be totally flat because there's a tiny bit of an angle here, but you'll get the general idea. So one, two, three. All right, there you go. So if you're looking at his cheek, a lot of shadow, not as much shadow, and barely any shadow comparatively. And that's just basic one-light setup, and that's kinda how I start a lot of the shoots, especially for things like simple business portraits and that type of stuff on white seamless. And again, you can see just how the angle, the light affects the general mood of the shot and kind of the drama within the shadows. All right, so we're doing the umbrella setup, so that's where our angles are. Inverse square law basics, I wanna show you how either moving him further or closer to the background or the light will affect your background. So right now, we're on white seamless, but it's a little bit gray. What I'm gonna do is, Cooper, I'm gonna have you move back here. So we'll just move a little bit closer. That's good right there. I'm gonna put this light pretty close to him. We're gonna have to re-meter. I'm gonna move it down because as I got closer, we lost some of that angle. Go down here, angle it just in front. And we want some of it to hit the background so we can see for effect. There we go.
Class Materials
Bonus Materials
Bonus Materials with Purchase
Ratings and Reviews
pete hopkins
awesome teacher and awesome technique. after soooo many webinars, it's really great to see someone break it down to the bare bones of lighting with exceptional quality results. i can listen to Dan all day. no pretense, no over the top emotional pleas, no drama! did i say awesome!!!! Plus, I'm a huge fan of the B! and B2 systems. Freedom is key. Now I can shoot anywhere, anytime. Thanks Dan.
user-2f7caa
This is by far the best class on senior photography I have found on creativelive. Dan explains the technical aspects in an easy to understand format. He does a great job going through studio shots, outdoor shots, editing and marketing. He's given me some great ideas and inspired me to be more creative. I am going to rewatch the lighting set up for the "hero shot". It's super cool!
Tristanne Endrina
Dan was great. His class was very comprehensive but easy to follow. The slides he used weren't flashy. Instead, they were simple and he went at a good pace. I left feeling like I could really pull off the lighting techniques he taught. I'm excited to put what I learned into my photography. :) Thanks, Dan.
Student Work
Related Classes
Portrait Photography