The Basics of Drone / Aerial Photography for Real Estate Photography
Lesson 61 from: Real Estate PhotographyPhilip Ebiner
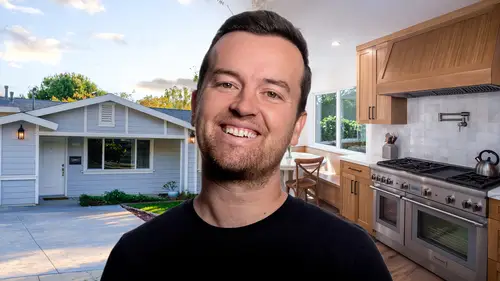
The Basics of Drone / Aerial Photography for Real Estate Photography
Lesson 61 from: Real Estate PhotographyPhilip Ebiner
Lesson Info
61. The Basics of Drone / Aerial Photography for Real Estate Photography
Lessons
Introduction to Real Estate Photography
1Welcome to Class! What Will You Learn? Who is this Course For?
03:48Real Estate Photography Basics
2What Gear Do You Need as a Real Estate Photographer?
09:36 3Camera Settings & Modes to Use for Real Estate Photography
07:54 4Can You Use a Smartphone for Real Estate Photography? Pros & Cons
03:13 5How to Compose Real Estate Photos - The Basics
04:58 6Lighting Basics for Real Estate Photography
07:43The Window Pull: How to Make the Exteriors Pop
02:01 8RAW vs. JPEG Photos - Which Should You Shoot?
00:51 9Key Lesson: What Photos Do You Need to Capture?
15:04How to Take a Real Estate Photo
10Basic Room Photo Demonstration with Flambient Technique, Natural, and Flash
10:54Real Estate Photography Demonstration I - Full House Demo
11Introduction to this Demo
00:54 12What Equipment is in my Real Estate Photography Kit?
02:58 13Walkthrough of the House - Let's See What We're Working With
07:20 14The Kitchen - Part 1
12:08 15The Kitchen - Part 2
04:20 16The Kitchen - Part 3
03:16 17The Kitchen - Part 4
02:41 18The Kitchen - Part 5
02:34 19The Primary Bathroom
09:48 20The Primary Bedroom
07:15 21The Laundry Room
06:03 22The Living Room
10:28 23A Small Space Bathroom
05:19Real Estate Photography Demonstration II - Full House Demo
24Introduction to this Demo
05:00 25The Living Room
07:48 26The Kitchen
06:35 27Bathroom 1
06:12 28The Primary Bedroom
07:20 29Bathroom 2
05:46 30Front Exterior
03:19 31Back Yard & Exteriors
06:09Editing Real Estate Photos
32Introduction & Basic Editing Process for Real Estate Photography
04:31Adobe Lightroom for Real Estate Photography - The Basics
33Adobe Lightroom Introduction for Real Estate Photographers
06:36 34Organizing Photos for Efficient Editing in Lightroom
07:12 35Basic Editing Process in Lightroom for Real Estate Photographers
21:12 36Combining Bracketed Photos in Lightroom + a Comparison of RAW vs Bracketed Photo
04:43 37Natural Light Kitchen Edit
04:06 38Exporting Photos from Lightroom
06:23Photo Editing Skills You Should Know
39Copy and Paste Settings from One Photo to Another in Lightroom
02:58 40Create & Use Presets in Lightroom
02:26 41Sky Replacements in Photoshop
06:50Flambient Editing Process
42Step-by-Step Flambient Editing Process
20:56Full Editing Demonstrations
43Editing the Kitchen Dining Nook
18:48 44Editing the Primary Bedroom 1
12:04 45Editing the Primary Bedroom 2 + Removing Objects in a Photo
17:04 46Editing an Exterior Photo with Sky Replacement
06:36 47Editing a Kitchen Photo with a Natural Designer Style Look
05:30 48Quick Bathroom Edit
05:13Advanced Editing Tips & Tricks
49Speed Up Your Flambient Workflow with Photoshop Actions
05:18 50Replacing Photos, Wall Art, and TV Images in Photoshop
05:04 51Darken TVs in Lightroom
01:11 52Clean Up Smudges on Stainless Steel Appliances in Lightroom
02:03 53Editing iPhone photos vs. Professional Camera Photos
04:41Virtual Staging
54What is Virtual Staging? What Tools Should I Use?
02:14 55Virtual Staging in Photoshop with Generative AI Features
10:56The Business of Real Estate Photography
56How to Deliver Photo Files to Clients
03:50 57Tips for Creating a Real Estate Photography Portfolio
03:50 58Creating a Quick Portfolio Website with Adobe Portfolio
06:01 59How to Find Your First Clients
04:06 60How Much to Charge for Real Estate Photography Services
02:32Aerial Photography
61The Basics of Drone / Aerial Photography for Real Estate Photography
06:27Conclusion
62Conclusion
01:23Lesson Info
The Basics of Drone / Aerial Photography for Real Estate Photography
Let's talk a little bit more about aerial or drone photography. If you want to take your photography up to that next level, literally, first off recommended tools, you're gonna need a drone, an app. And then also you're going to need to practice, practice, practice. It's so important as a drone photographer doing it professionally to get license. This is going to look different in every location around the world. So you're going to need to do a little bit of research into what it takes to become a professional licensed drone flyer. It's gonna make you a safer pilot though and you're going to be doing it um legally, if you have a license, if you don't have a license, then taking photos professionally in some areas depending on the location and selling that service is not legal. So in the United States, this is called the part license. So definitely look that up. You'll also want to register your drone. So in case it gets lost in case anything happens and and also when you're getting pe...
rmission to fly your drone, you have it registered and it's actually not that hard to get permission to fly a drone in different locations. You'll also want to have liability insurance. It's important to have insurance. No matter what. If you're a photographer going into different people's homes, you'll wanna have some sort of business insurance to cover you, but especially if you're flying a drone, you don't wanna get stuck with a lawsuit or a bill with any sort of, hello, kitty, any sort of damage to anyone's property. Then also check your local laws depending on the location you can fly at under certain heights within certain distances from airports and things like that. So you wanna make sure you're following the law now, in terms of which drone I recommend there's so many brands out there that make great quality drones now, but I can only speak to DJ. I drones. Those are the ones that I've, they have the Mavic, the air and the mini. They even have more professional drones too. But these are great for anyone getting started and probably with the budget of a real estate photographer. Now the mini is cool because it's under the typical weight limit that requires licensing or permission to fly. If you're flying a bigger drone, even the air or the mavic, sometimes it's not allowed in locations or to be done professionally. And I want you to make sure that you're looking this up for your specific location, what the, the weight limit is, but that DJ I mini was made so that it's under the limit currently as of the time of recording this video to be able to fly without getting a license, which is something you can do and the quality of the photos is still really good apps that I recommend you check out are the before you fly app by Aloft and the air map app that we both do similar things you can see on a map where there's restrictions if you're close to an airport. And with the before you fly app, you can actually go in there and request permission to fly in areas. And depending on what your flight is, depending on the time of day, you might be able to get permission in locations that are close to those restricted zones in my area. I know for a fact that there are airports in a lot of places and you're not supposed to fly within five miles of airports or, or, or three miles depending on the location. But if you request permission at a specific time, if you say you're going to stay below 50 ft or 100 ft, oftentimes you get permission and a lot of times it's completely automated. It's just an algorithm that says, OK. Well, it's at this time, it's at this location. It's at this height, you're good to go. So check out that one before you fly by a loft. All right. So now in terms terms of composing your images start low, go from there. So don't just jump up to the top of the world start low. Potentially, you're just going to use these photos for your exterior shots rather than ones you take from eye level. Although I would still recommend taking those similarly left, right center from the front of the house, show that side of the house to get that depth. You can also see the depth of the property quite well when you're starting to go back and up higher with those angled shots. And that's what you're gonna do just back up and get those whole property shots as much as possible. A couple tips, hide yourself, go across the street, go and you know, in your, your car that's parked down the street, you don't wanna get your car in the shot. So definitely park your car far enough away, hide under a tree, maybe under the porch or even inside the house so that you can get those shots without you in them. Generally, you wanna keep your house centered in the middle of the frame. There's also a very, very cool shots where the house is centered at the bottom of the frame showing the location. We talked earlier about that shot, showing like the location in the neighborhood of the house. So that's a cool shot. And then also a straight down shot, just sort of like a Google maps perspective of the property is another one to get same for the backyard left right center for the backyard. And then if there's any detail shots that look good from the aerial perspective, get those, the deck patios, gardens, pools, anything like that. It's super important when you're shooting with a drone to plan for weather, high wind, bad weather, rain, that stuff is going to make much more of a difference with the exterior drone shots than the interior shots of your your photos. Also planning to shoot like right the hour after or around sunrise and the hour before and after sunset, those are great times to take exterior shots to give your photos a little bit more style. That being said, sometimes it's better to just get a nice bright daylight shot of the property. And you're not trying to go for that stylistic golden hour. Look for the outside shots, clouds can be great. So if it's a cloudy day, don't shy away from taking photos on a cloudy day because it creates a nice even lighting of the entire property. But as I mentioned that late afternoon moonlight can make it look epic. Then a couple settings to pay attention to shoot in raw, always raw, shoot raw with your drone and then also set on automatic focus. You don't want to be manually focusing your photos on a drone and generally the focus of a drone is pretty solid for being so far away from whatever the subject is. So those are just some quick tips for shooting aerial photos and I'm gonna be putting it into practice coming up in the demonstration next.
Class Materials
Bonus Downloads
Ratings and Reviews
Michael A. Gruich Jr.
Purchased last week to help get my skills up, I have taken a handfull of property photos already and the clients loved them. I wanted to understand the process and standards used with most properties in order to improve my work and this course DELIVERED ! Grat value for investing in yourself and future clients . Philip goes into detail telling you setting, how to take the photo and why , also goes into editing with a few trick to help deliver amazing results.
Chris
The course is a comprehensive learning experience and Philip's passion and expertise in photography and teaching are evident throughout the course. Key highlights for me included mastering lighting techniques, photo blending for high-quality interiors, and advanced strategies like the 'Flambient' process. This was straight forward, and easy to understand. I live in Australia an grateful that you kept the information relevant to any country.
TONY BARNES JR
Hey Philip, Just want to thank you for putting in the time and effort putting this course together. I’ve been shooting for 20 years but never really spent enough time on PS. This course really focuses on what you really need to know. Everything is really straight to the point. Philip provides images so you can follow along and really get a good work flow going. I personally enjoyed the