Lessons
Class Introduction
07:51 2Step One: Getting The Clients
06:54 3Step Two: Convincing Clients To Hire You
05:30 4Step Three: Successfully Bidding On Jobs
10:48 5Step Four When Shooting
15:58 6On Shoot Day
06:30 7After The Shoot
05:05 8When Things Go Wrong
06:40Portfolio Pictures
07:11 10Image Composition Overview
13:37 11Gear Used To Create Images
12:36 12Edit Lighting In Photoshop
10:15 13Clone Out Problems In Photoshop
06:18 14Fix Moire Effect In Photoshop
03:37 15Finishing Touches In Photoshop
03:05 16Contrast And Clarity In Lightroom
01:25 17Q & A
17:37Lesson Info
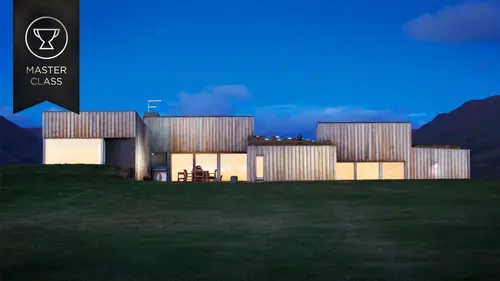
Fix Moire Effect In Photoshop
I wanted to show you how to fix, this is something that we encounter pretty much more than most other photographers, is moire. It's a little phenomenon where the pattern that is being collected by the sensor, the frequency kind of matches that of the Bayer pattern on a filter, I believe. If anyone wants to correct that I'm wrong and you get this funky, weird kind of alternating bands of color over textured pieces, like this grate, for example. And, in order to fix that, it's pretty simple, but I'll show you exactly what I did. I'm going to turn these layers off, so we get this ugly pattern again. I'll make a new layer and I'm gonna go again to my color sampling tool, which is Alt right here. And I knew from just being there that the grates were gray. I saw them with my own eyes. Believe me, they were gray. So, I'm gonna sample the handle right here and get a nice gray and I'm gonna take my, I'll use a lasso tool and I'll lasso around this entire grate. Kind of being quick and dirty and...
make a selection out of that. And now I'm gonna take my paintbrush, again, over here, just hit undo to get to it. And I'm going to make a new layer, as I just did, and fill it with that single color. And I actually put that pretty low. And, let's see. The opacity's at 10%, my mistake. So, make sure your opacity is at 100%. Dump that color right in there. And then what we're gonna do is, you're gonna change the blend mode on this layer to Color. And what that leaves you with is a solid gray over our grate and I think that's, obviously, too much. So, I'm gonna kind of clean it up. First, I'm gonna add a layer mask and I'm gonna use a black brush here to kind of brush out the gray on the seats. And then I'm gonna dial back the opacity until it looks good. And, I mean, I think that's all it really needs. We can play with this color a bit too. I'm not have it exactly. I'll go to more of like like this gray here and I'll dump that and see how that looks. And again, blend mode to Color and I'm gonna play with the opacity of the layer until it kind of minimizes that awful banding phenomenon. And then again, make a layer mask and just kind of brush out again. If I was doing this on a job, I'd be extremely detailed with this, but I'm just trying to show you exactly how I do it the quick and dirty way. So, I can get rid of that and there's what we're left with after a little bit of experimenting, but it's the same concept and I'll show you what the layer looks like without any adjustments on it. Let's see. There you go, so we see the layer as it was before. That's why it ended up finished on. And that just kind of cleans those up. Pretty quick and easy.
Class Materials
bonus material with purchase
Ratings and Reviews
a Creativelive Student
Mike Kelley is fabulous, so many aspects of his work would make for great classes! I hope Creative Live brings Mike back for many more classes. He's a great communicator with lots of info presented in his class with understandable instructions. . . not that you'll leave the class being able to recreate his amazing images! Although he is very generous in the knowledge he shares on his great techniques. Only issue was not being able to hear/view most of the class as the "live feed" kept cutting out, which was so frustrating. So, I'm purchasing the video. Hope to see Mike in more courses! Excellent!
Victor Zubakin
Firstly this course should be renamed to just Architectural Photography. There's very little information here about shooting real estate photography. Mike Kelley is more of a fine art architecture photographer and the techniques he shows are not really relevant for real estate photography. Kelley's well-known for his blue hour shots and with these he often sets his camera up for a few hours and documents the changing light to later blend into one image. His work is very Photoshop intensive and each photo could require a few hours post-processing in PS. Real estate photography generally requires a complete house to be shot in less than an hour and delivered to the realtor in 24-48hrs. The course is more of interest to those wanting to shoot high-end architecture or interior design projects. Kelley gives some great tips on the business side - how to do marketing, attracting new clientele, how to maintain a healthy relationship with your clients, what to do when things go wrong. Kelley also discusses what gear he uses including the very useful tilt-shift lenses, geared head on his tripod for fine control, shooting tethered, and also some of the lighting he uses. The course features a photoshoot that Kelley did of a historic theatre, and he discusses the techniques he used to capture the images as well as how he processed them in Photoshop. The course was enjoyable & informative, and Mike Kelley is an engaging & fun presenter, with a laid-back style.
a Creativelive Student
Enjoyed this class. Took it to learn more about architectural photography because I know little to nothing about that area of photography. I feel Mike gave a solid introduction in the how-to's of getting into this business, offered some good outside sources, gave good supporting personal stories. Would have liked to lean more about balancing light color and to be referred to some outside sources on learning more about that. Overall, I feel this was a solid intro to architectural photography.
Student Work
Related Classes
Commercial