Lessons
Class Introduction
08:03 2Making your First Catalog
03:30 3Importing your First Images
11:25 4Capture One Interface Terminology
04:56 5Customizing your Workspace & Keyboard Shortcuts
26:11 6How to Locate your Images After Import
11:24 7Virtual Organization
08:28 8Basic Tool Behavior
08:28Basic Workflow Operations
11:39 10Essential Tools Overview: Exposure and Curves
09:36 11Adjustment Tools Overview: Levels, Clarity, and HDR
14:44 12Color Tools Overview
14:42 13Lens Corrections
06:59 14Exporting
05:55 15Overview of Process Recipes
10:44 16Adding Keywords to One or Multiple Images
06:59 17Managing a Keyword Library
08:40 18Adding Keywords and Metadata on Import
04:16 19Overview of Filtering and Searching
08:55 20Importing your Existing Application's Library
06:07Lesson Info
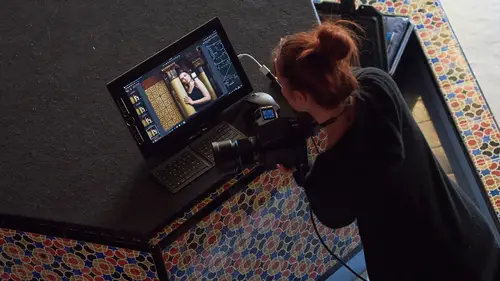
Importing your First Images
So, let's go ahead and start by importing your first images. So, let's say File, Import Images like so. And this will bring up the Import Images dialog. It's a bit hard to see but that is actually a separate, floating window, as you can see. So this dialog is really where you control where images are coming from, where images are going to, and is there anything else you want to do during that import process. So, typically, when you import into a catalog, you're getting them from memory cards, so you've just gone out on a shoot, you bring back your fistful of memory cards, eagerly ready to put them into Capture One. They could already exist on your system somewhere, like on hard drives, whether that's internal or external. So, pretty much anywhere that you can see on your system, Capture One is then capable of importing that into the catalog. So today, I'm gonna show you, if I choose the folder right here, where do we want to get images from? Then I've got a small external hard drive at...
tached. It's called Traveler SSD and I've got a folder here called Creative Live, and I made a folder yesterday called Import Collection. So this is just a bunch of images we're gonna import into Capture One. I could've done it from memory card, but obviously that takes a bit more time. But let's just assume we're importing from a memory card and then we'll go through that process. We're gonna open this folder, which is the one you saw here. Images courtesy of a good friend, Zach Sutton, in LA, so I promised to give him a shout-out. So, we've got a few different headshots here that could've come from a session or memory card as such. So, IMPORT FROM, where we're getting our images from. IMPORT TO, what do we want to do with these images, and we've got a few different choices here. Now, if you want to make this process as simple as possible, the only two options you really need to concentrate on is IMPORT FROM and IMPORT TO. Everything else is bonus stuff. So, anything below IMPORT TO is all bonus things. So, if you want to keep everything simple at the start when you're first learning, you can close all of those and only concern yourself with the first two windows. So, what do we want to do with these fantastic images that we're bringing into our brand new Capture One catalog? So, we can say, leave them in their Current Location. That means they stay wherever they are. They don't get copied, they don't get moved. They stay exactly where they are, on their hard drive, for example. Now, if we're importing from a memory card, that doesn't make sense cuz we don't want to leave images on a memory card, we want to put them somewhere safe on your computer or external hard drives, or whatever. So, we need to then choose a folder, choose a location where these are gonna go. So, right away, Capture One pops up with this dialog: Select where to store the imported files. By default, it'll go to your Pictures folder on your Mac or on your PC. But I'm gonna make a new folder here, and this is gonna be, if you like, the root folder or the master folder of where all my other imports are gonna go from this day forwards, as such. So obviously, if I'm being clever, I don't want to scatter images all over my hard drive. I want to put them in one kind of centralized place, or external hard drive, but in one place so that they're not scattered all over. It makes it easier to back up, and manage, and so on. So I'm gonna make a master folder called My Catalog Images like so, and create that. And say, set that as import folder. Now, I can do something quite nice here, is that in Sub Folder, I can actually make a sub folder here without ever having to go into my Finder or Windows Explorer. And the next time I come into this import dialog, Capture One's gonna remember that I'm gonna send images to My Catalog Images. But what I'm gonna do is put a sub folder in here called Headshots, like so. So Capture One's gonna make me that folder, and put all of those headshots into that sub folder. Later on, or I should say, not later on, but in my class, Creating a Workflow, we actually talk about this, which I just bring you up an example, which instead of actually physically typing in a folder, we can use something called a token in Capture One, which will automate creating those sub folders. As I said, this is a quick start, so we keep it nice and simple. But if you can see an option where that could be useful to automate sub folders, like splitting up images based on the serial number of the camera, if you shot with two cameras, it could be dividing the images into the date that they were shot into different folders, then the Creating a Workflow class would be definitely worth catching. So, I'm gonna make this manual folder called Headshots like so, and then we're ready to import. As I said, the other options here: BACK UP, NAMING, METADATA, ADJUSTMENTS, FILE INFO, is all bonus stuff. You don't really have to get into this if you don't want to. But very simply explained, if we back up, we can take a back up of the raw files, and place them anywhere we like. We can do some renaming if we wish. We can add some basic metadata like copyrights. We can put Zach's name in here, for example, always a good thing to do. We can apply some adjustments as we import too, if we wish, and finally the last category is just simply some information about the files if we want to click through the files and see certain data about them. So, let's keep it nice and simple. Remember, we're importing from our hard drive. We're gonna copy them to My Catalog Images. If you wanna verify where that is, we can just click on the arrow and it shows you exactly where it's gonna go, and Capture One's gonna kindly make me a sub folder called Headshots, and place all the images in there. So, let's do that now. So you'll see the images populating quite quickly. Activities window comes up, giving you an idea of how long that's taking. So, that's the first progress bar you see. That was the physical copy process from this hard drive to my laptop as such. And then the second activity you see is the previews being generated, and you might know that, if you're used to Lightroom, for example, that it's exactly the same principle that, when we're browsing images in Capture One, if we just open up the first shot, is that we don't actually look at the raw file when we're browsing, it's just a representation as a smaller, lighter file, so we can browse nice and quickly through images, as you can see, without any lag, delay, or pause as such. And you see that process has finished already. But if we go to Preferences, and under Image, then you'll see you can determine how big those preview sizes should be. Now, it's very important that you actually make a conscious decision about what to choose there. If we go back five years or so, the biggest monitor you could buy was probably 2560 pixels across, and this kind of conversation never really came up. But now, we can buy 4k monitors. We can buy 5k monitors, which have tons of pixels across them. And if we kept our preview image size to 2560 pixels, it's too small to fit on that enormous 5k monitor. So, if you have a 4k iMac, or a 5k iMac, or a 4k monitor, or even a 5k monitor, then it's really important that you bump up your preview size to either 3840 for a 4k monitor, or 5120 for a 5k monitor. That means that in Capture One, if we just look at these images again, when we're scrolling through images at high speed like this, Capture One has enough pixels to show it on the screen. If the preview is too small, let's say we have this hooked up to a 5k monitor, then every time we advance to a new picture, Capture One would have to go and read the raw data to create the preview on screen. Now, it's still pretty fast if I zoom into 100%, you can see it's almost instantaneous, but it's not as quick as scrolling through, as you can see like so. So now, we've got some images into Capture One. We can then start to explore different bits about the interface. Any questions on importing? Yup, we definitely do. Okay. So, one of our students wanted to know about whether Lightroom libraries can copy over to Capture One? Yes. Okay. Yes, and that's actually something we're gonna do further on in the course. Great. At the end of segment two, I believe. So we can import a Lightroom library, and we can import an Aperture library as well. The process is the same for both, so whether you're an Aperture user or a Lightroom user, et cetera, then the process is exactly the same. So, we didn't talk about Aperture users earlier. But again, if you're on Aperture, then same process, and again, I'll refer to some of the terminology in Capture One as well, vis a vis Aperture. Great, and then one more question before we move on, a question from Marv wanting to know about Sony. You now have a version for Sony. Yes. And is it pretty much identical to what we're viewing today? Absolutely, but very important to differentiate between Capture One Pro for Sony, Capture One Express for Sony. So, everything you see in here, Capture One Pro, Capture One Pro for Sony is completely the same. The only difference with Capture One Pro for Sony is that it only works with Sony cameras, so ARW RAW files, for example. Capture One Express, again is only for Sony cameras, but it has a smaller feature set. So, you don't have some of the color tools, you can't shoot tethered directly to Capture One with Express, and there's a few other sort of restrictions and limitations as well. But otherwise, Capture One Pro, Capture One Pro for Sony, entirely identical.
Ratings and Reviews
Juan Sebastián Echeverri
This class is a great introduction to Capture One. David covers the CO environment including the basics of tools, tool tabs, toolbar, cursor tools, action buttons, the viewer, and the browser. It includes some useful shortcuts and best practices for an efficient workflow.
user-940746
David is extremely well versed in CaptureOne Pro and he has the ability to share his knowledge in a way that is easy to follow and understand. My time in the audience was well spent, increasing my knowledge of CaptureOne basics. I would particularly recommend this class to anyone who is relatively new to CaptureOne or who is considering making CaptureOne part of their photo editing process.
Dan Donovan
A comprehensive overview of Capture One. David does a FANTASTIC job of getting you started with Capture One!