Lessons
Day 1
1Workflow Overview
26:55 2Shooting Tips for Ideal Post-Processing
19:57 3Backing Up and Importing to Lightroom
42:57 4Lightroom Interface Overview Part 1
21:58 5Lightroom Interface Overview Part 2
23:33 6Culling Images
26:45 7Filtering and Stacking Images
27:33Cropping
20:12 9Dust Spot Removal
13:59 10Processing Images: Basic Adjustments
16:50 11Collections
21:50 12Processing Images: Image Optimization
30:30 13Catalog and Metadata Settings
28:41Day 2
14Folder Status Plug-in
17:33 15Keywording Part 1
39:06 16Keywording Part 2
33:41 17Keywording Part 3
19:58 18Adjustment Brush Part 1
23:57 19Adjustment Brush Part 2
26:41 20Adjustment Brush Part 3
30:05 21Graduated and Radial Tools
15:15 22Photoshop Essentials: Set-Up
45:22 23Adjusting In Photoshop
25:09 24Panoramas
17:29 25Adaptive Wide Angle Filter
25:08Day 3
26Export Presets
25:21 27Watermarks
22:34 28Publish Services with Facebook and HD
11:39 29Lightroom Mobile
35:41 30Map Module and Geotag from iPhone
23:41 31Editing HDR in Photoshop
31:33 32Timelapse in Photoshop
23:37 33File Formats
19:15 34Lens Corrections Tab
17:14 35Split Toning
34:32 36Detail Tab
17:27 37Simple Retouching Techniques
42:48 38Printing in Lightroom
14:53Lesson Info
Workflow Overview
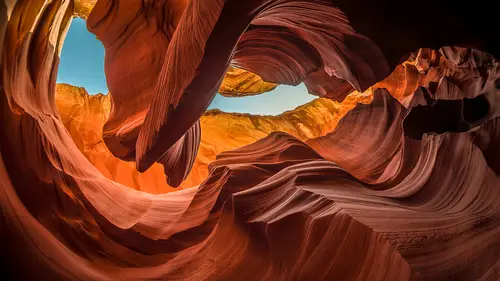
so post processing for outdoor and travel which is what I'm really excited about because that's the main thing that I do in case you're not aware most of the time I don't have a fixed home right now I'm in a unique kind of in between time where actually I'm based in one location but otherwise other than a few months that's happening right now usually for the last I think it's been eight or nine years I live on the road where I visit between fifteen and thirty states in the u s each year and then also go on usually few international trips is well earlier this year I visited about ten countries in southeast asia and I often go teo iceland africa and many other places so I do a lot of travel both domestically here and internationally and whenever I'm not teaching I'm pretty much out shooting and that's what I love to do have been using photo shop since before it was available is a product it started out as a college project of two brothers and I happened to get a hold of it back then back...
then you couldn't really do much that was serious with because they're just weren't all that many features but I've used it ever since and I started teaching photo shop is a full time kind of career over twenty years ago and so written many books on it that kind of thing and I've also used light room since it was introduced and so I'm really familiar with the tools but the main thing is I find my brain has a ability that I didn't wasn't aware anybody else doesn't have which is just narrow everything down to the core essence of what's most important in try to start with that and then slowly build the more detailed stuff on top of that in by doing so if you get the core essence of a concept first it's much easier to deal with the details that you have to kind of go along with it so in this class what we're going to dio is use light room and photoshopped to do all of our host processing and what I'd like you to be able to do is be able to fix just about any kind of image that you have an issue with in take images that you don't have an issue with an add some polish to them to make them look even better possibly better than you could imagine they could look and not only that not just the processing but I want you to be able to access your image is very easily like if you want every photo we've ever taken of a monk at the temple it should take you less than three seconds to find them I mean everyone you've shot if you want to find every picture you took on cinco demayo in the last ten years it should take you about maybe four seconds to find it out of all the shots you've ever taken if you want to find every shot you've ever taken with a fifteen millimeter lens at eleven you should be able to find it in a matter of seconds and in order to be able to do that you think about it ahead of time in when you're importing your images and managing them just think about being able to access them in the future and make that as easy as possible and that's part of the process will talk about so what we're going to be doing is we'll talk about importing your pictures in the light room organizing your pictures editing down shoots so you don't end up processing absolutely everything instead you can really get down to only what you need and then really polishing those images so let me show you a few examples eso here I just have a bunch of before and after images I actually just made this up last night I figured you'd want to see a little bit of potential and so here's just a serious of images where the smaller version is the original larger version is the end result although they're all the larger versions will be square so they're not in there like perfectly cropped aspect ratio but you'll get a sense for what kind of transformation we can make using in this case on lee light room for the vast majority of these I don't know if any of these made it into photo shop and then will also end up going into photo shop for things that light room can't do and so with these we're going to be dealing with how to make your image is more dramatic how to fix underexposed overexposed howto fix problems your lens might have introduced with lynch distortion how to really learn to understand the concept of contrast if you need more of it or even less of it how to work with color issues how to just take a bland dimension make it more interesting and really just learn how to focus somebody's eye where you wanted it to go instead of it randomly going through the scene and going to where it wanted to go I want to influence it try to get it to go where I was thinking and that's part of the process this just gives you a sense for some of the types of images we might work with in this case all of these images were only enhanced using light room and so if we go beyond light roman into federal shop we can do even more so let's take a look at a bit of how we're going to think about this so right now you have probably a photo archive meaning you shot a bunch of photos they're sitting on hard drive somewhere and then you're also going to be capturing mohr images so you're gonna have your compact flash cards you're gonna come to your computer you need to know what do with them and then you might even hook your camera to your computer and shoot that way on occasion but for travel and in landscape that's a little less common but on occasion it might be nice maybe it's the middle of night you're trying to shoot the stars you don't want to bump your camera at all so why not connected to your computer and do some other things but you're starting with those kinds of originals and then we're going to end up trying to use them for all sorts of different uses we need to be able to just have digital files to email to other people or to upload to a stock photography site or a magazine or anything else make prince websites slide shows even books and everything else that's what we want to do to it but in the end light room is going to be our hub are a place where all of this activity happens in the light blue arrows there talk about importing that's the first step we're going to have to do I'll talk a lot more about that in a few minutes in the dark blue areas talk about exporting but in essence our entire catalogue and library is going to be in light room that's we're going to be able to preview in the images that we've shot we're going to edit and organize them and just adjust them and optimize them all in light room and let's think about why are we picking light room as kind of our hub for where we do this because there are some special things about light room and a lot of people that useful I really have no idea that these things are special and so let's just take a quick look at them so with light room you can manage your hard drive however you'd like it doesn't dictate how you structure your files in the folder structure you make on your hard drive you can organize them however you want if you want to have a sloppy hard drive you can do so if you want to have an overly organized when you khun do so in light room is simply going to reflect how you've chosen to organize your drive now I'll show you how I organize my drive and why I do it that way and if it makes sense to you you're welcome to adopt the way I do it but you're not stuck to doing that you can organize your drive however if you'd like then light room is only going to show us the images that we've imported into it and what that means is we're not going to see any pictures or any files that have nothing to do with her photographs you're not going to see your microsoft word files or anything else so it's gonna be a nice real clean experience in there where we're gonna concentrate just on the images we've told light room tau deal with in in in light room it never modifies the original picture there's no need to work on a copy of a picture ever in light room because it never changes the original file that's stored on your hard drive instead anything that you do in light room is stored justus text it's what's known as metadata metadata is a term that simply means information that is about the picture but is not the picture itself your camera adds a lot of that to your files automatically it takes your file with what lens you shot with the camera model serial number the date all that kind of stuff that's all meta data and it's also if it's not actually affecting the picture itself it's just included in the same file is text in all the edits we making light room our ad in the same way it's just gonna be added to your file is a serious of text entries where it's going to say you move this slider where started in zero you moved it toe five and if we removed that tax the image would go back to its original state so there's no need to ever work on a duplicate image in light room your original is always maintained you also have a full history of every thing you ever do in light room which means you can experiment to your heart's content because you can always get back to a previous stage of your image with literally one click of your mouse there'll be a list of all the steps that you've done and if you click on a previous step within that list it brings your image back to the way it used to look at that stage and so therefore we can experiment as much as you want when you think your image looks perfect you don't have to be overly critical about better not mess with the adjustments and try anything else because all you have to do is make one click too take away any of those future steps that you've done and so it's a very nice way of being able to work and then on lee when you export something out of light room do the changes get permanently applied and those changes air only applied to the image that was exported the image that was exported is a copy of the original original you still have that's been untouched it just has some text instructions added to it to say what you've told light room to do to it and it's only that copy that you export it's a jpeg file that email to your friend tiff file you sent to a magazine it's whatever it happens to be that file has the change is what I call baked in whereas before it it's like we could change the ingredients of what makes up our image in any time we want on lee when we export it does it bacon and to make it permanent on ly permanent to the copy you exported not to the original so therefore it's great I'd love to be able to think and work in that way other things the act order of the edits that you make in light room are not critical in photo shop they are if you're working in photo shop and you decide to turn your image to black and white and then after that you decide to do something else well whatever it is that you did next is only going to be able to look at the black and white version of the picture that you had created a moment earlier in it what the order of the adjustments you do in photo shop is much more important in light room since the changes air on lee made when you export a picture the actual order you do them in doesn't really matter because you're going to get the exact same end result regardless of what order you moved the sliders in to adjust your picture so it makes it so it's much more free flowing when you make adjustments you don't have to be thinking as much about the order you do anything in you do whatever is coming in for you then all of the edits that you make will take advantage of all the data that your camera captured that is if you shot in raw file format instead of what that means is if your camera can capture a certain number of brightness levels light room will always use all of them that your camera captured if your cameras capturing a certain range of color light room will always be able to use the entire range of color your camera was capable of capturing that's not true when you open something in photo shop when you open something in a photo shop there's a bunch of settings you can try to change to try to get the most out of your images there's something known as sixteen bit which would let you have more brightness levels than a lot of people would work with and there's something called yur color space which determines what range of colors you can deal with what you don't have to deal with those things in light room light room always works with the full brightness ranger camera captured the full color range your camera captured you don't have to deal with a bunch of technical settings like you would in photo shop and even if you optimize the technical settings and photoshopped it still couldn't get to us much information is like like room can get everything your camera captured and get the most out of it then you can edit your photos even when the hard drive that contains them is not attached to your computer which means when I'm on a flight and my hard drive is either at home or it's in my bag underneath the seat of the plane then I can still go on my laptop and edit my photos I can still organize my photos I khun still tagged them with information like key words that describe the contents of the photo so I can easily search them later if I set up light room properly and by doing so it's great because that means anytime I have any time with just my laptop I don't have to think about keeping all these images with me and as you'll see later on when I show you how to do this it just makes it so any time you have an open moment with your laptop you could be working with your images also we can have multiple versions of our images without increasing the amount of space it takes up on her hard drive if we use something other than light room in most other programs like in photo shop for instance if I want a vertical version of my photo and I want to crop it to be horizontal and then I want a black and white version of both of those as well I would end up with four files on my hard drive two verticals once that's color ones black and white to the horizontal one color one black and white and it take up four times the amount of space in light room that's not the case there's something known as a virtual copy in a virtual copy is just that it's virtual it's not riel and it is just like when I mentioned that light room saves its settings is text the task your image well just imagine that saved two copies of the text and one copy had different settings in it the amount of space it will take up on your hard drive is so small that it's unnoticeable it's you know eight k let's say that's try to make a text document that small in a word processor it's like the smallest value can create so in essence it takes up no extra space and I could have ten versions of the picture and experiment maybe I needed for different sized prints maybe I need one for a magazine cover that's cropped a very specific way that type of thing that's fine and light room there's only one master file and then it'll look like they're some extras even though they're not taking up extra space on your hard drive so virtual copies will be something very interesting when we get into it then remember that on ly the exported copies of your image have the change is baked in the original files are always sitting there untouched was just text attached to him and we can very easily remove the text that's been added to bring the image back to its original pristine state in so we can experiment as much as we want and we'll have a full history of everything we've done we could always get back so hopefully that gives you some sense of light room but there's a teeny bit more so there's no color management to think about in light room if you've ever worked in photo shop have you ever had when you open a picture a dialog box comes up in warns you about some overly technical color issue profile mismatches and things like that and you don't know exactly what to do with it you get all concerned with are you going to mess up your images you'll find none of that in light room like room keeps color management simple and it's only when you export your images that you have to think about it and it's just one setting you have to think about and it's really easy to deal with I'll show you how to deal then when we end up printing printing is simple if I want to come back to the same image and get the exact same end result three years from now I can do it because light room can easily save my prince settings as equipment to a preset attached to my picture and when I want to come back to that image and printed again in the future I can easily get the same sightings without having to have a sheet of paper with prince settings written down to remember what I did and so it's going to be really nice for printing sharpening is overly easy it's going to sharpen your image twice for you once you sharpen it when you import the picture to compensate for your camera and once you sharpened when you print it to compensate for your printer because you're both of those things will make your image feel little soft who will talk about that stuff and then we have a mobile version of light room and what it allowed me to do is if I just have my ipad with me I khun edit my photos and I can show slide shows of them into a little bit of organization so even with my ipad I can end up doing that which is really nice all right so those are some of the wives of why we picking light room why are we going to spend a good amount of time within light room in ideally I would love to finish every picture I shoot in light room but there's a limit to how much you can do when all the changes you ever make are just recorded this text on your picture and they don't actually change the content of your picture until you explore it there's a limitation and what you can do there so any time there's something we can't do in light room that's when we'll pop over to photo shop because photoshopped could do just about anything but it's a lot more involved in it's going to be where changes we make in light room are much more permanent I'm sorry photo shop for a much more permanent and so we're going to try to only go there when we really really have to so here's the general workflow and we're going to this is in essence what we're going to be doing over the next three days we're just going to be going back to this concept over and over again and exploring it more detail in different areas so first we're gonna talk about shooting well you've already talked about shooting when it comes to this asshole classes you've had like there are wolf class some of you guys were in all that all I'm going to do when it comes to shooting is talking about a couple details that make processing easier and if you simply think about him when you're in the field be great to know about him just in case they weren't covered in the other classes or you didn't know how to think about him I'll just cover a few items that will help us out there so after you shoot them we're going to talk just a little bit about transferring your images and backups I'll show you what I do and if what I do makes sense to you you can adopt that same mindset if it doesn't you can come up with it one that does fit your workflow once we've transferred our images off our memory cards and on the hard drives then we need to get him imported in the light room and in general I import all my pictures in light room that I shoot but the problem is when I import them all in the light room I have in my light room catalog right now over two hundred thousand pictures do you think I processed two hundred thousand images no so the next thing we're gonna have to do after importing them is review them and edit down our shoot we only want to spend time processing those images that are really of the quality and have potential to be used and so I'll show you my method for revealing in editing down a chute so we only get to the good pictures and in the process of doing that I'll show you how if I have a limited amount of time that I make sure the best images are processed first so when I get back from a shoot if I've had any time at all the process I got my per folio quality images done first and then if I get additional time in the future I'll know how to very easily go back to those folders and know exactly what the process so I don't have to look at a folder of a thousand images I'll be able to click on something that says here are only the ones that are worth processing and very easily be able to get to that so then after we were headed down our shoot so only know which images air good then of course we're going to process them and we're going to spend the largest amount of time on that little central portion there processing because there's just so much we can do and there's so much potential even an image that you probably right now think is a throwaway image you can probably resuscitate a dramatic number of those and make them very usable images and so we're going to spend a good amount of time processing images both in light room and in photo shop and we'll just be coming back to that over and over again throughout the next three days once we're done processing it though doesn't mean that we're done then we need to organize our images if we skipped that step and I find a lot of photographers do the only way they're able to find their pictures is to look in their hard drive folder structure and just go in there and say okay what month did I go too antarctica you probably remember that once I'd be a memorable trip but months did I go tio I don't know someplace that's normal for you in then you click on that folder and you're randomly kind of scroll through your image is trying to find what you want I don't want you guys to have to do that instead I want you to very easily be able to find your images and so part of that is organizing them and also what I called tagging them with tagging we're gonna add extra information to our images that tell you exactly where were the photos taken when were they taken in what's in the photograph and I'll show you my system for doing that and I'll show you how to organize it so it becomes overly useful and when we tagged the location of where we shot it we're going to be able to see all of her images on a map so if you don't remember what month it was you shot it or even the name of the place if you just remember it's on the left side of the u s and it's somewhere in the middle you'll be able to zoom up on a map to the left side of the u s to whatever area you want and be able to find your images that way as well once we're done tagging will move on to exporting how do we get our images out of light room and in the email facebook printing books whatever it is you want to use him for and then the final step is managing your archive you're gonna have a hard drive full images and if you just let him sit there then that those hard drives can easily get out of date and most of time you want to have a backup of those images and the problem that I find with backups is they're rarely updated yes you add new images as you shoot mohr but what happened to the images that you shot ten years ago that you happen to have edited in light room or in photo shop did your backup get updated to include those or do they only have the original files you shot we got to talk about managing that archive to make sure it's always up to date so if your main hard drive ever dies you always could get to every image you've ever made every change you've ever made so this is the essence of what we're doing for the next three days and you'll find that we simply come back again and again to the middle because that's where you spend most of your time is processing your images because it's what helps them the most so well it's the place almost your time as long as you've said everything up correctly and doing the process every time because that's one of things that I know is one of my issues is like I set up the thing and I'm like wow this is beautiful and then I go to import a session I'm like I'm lazy I'll take it later you know that making sure that it actually is done and that's part of what we'll talk about is I'll show you how to change light room so it has features that doesn't usually have there's ways to add features the light room where it's easy to keep track of what you just mentioned the problem with it is if you shoot a lot that you come back to light room you're like what if I process and what have a knife and you don't really know you go back and look at your past folders and you're like I think I got some images done here but you don't really know if you got all the good ones and I'll show you a system where you can easily look at your list of folders and go ok I know that these processed all of them the's have only done the best ones these needs something else so I'll show you whole system well and just on topic to what you know this course is about like I was thinking that tagging and making sure that being able to find things based on locations is really essential if you're shooting a lot of outdoor especially travel photography you're going from state to state or country the country of being able to find the images that you have shot there that's pretty important I'm really excited to see that a cz we go through well now you know just really quick I know that there are a lot of questions coming in yeah a lot of what you are asking about stuff that I know ben is planning to cover so I'll be watching the questions is you guys ask them and we'll make sure that everything gets gets covered and then we'll ask questions later if we don't talk about it yeah and that's one thing it when it comes to this diagram of my overall work low this is just in essence how I'm going to divide things up and how I'm thinking overall if you find that anything is missing from this grid if you think there should be a couple other blocks in it please let us know about it and I'm not stuck in what I'm teaching over the next three days I can adapt to us his needs so I want to make sure I cover whatever is most important if I happen to have not thought of a particular area that you think is important not just to you though but to the majority the audience here please let us know I'm more than happy to adapt so that's our overall thing I'm going to spend most of our time on processing simply because I find it's what helps my image is the most if I don't process them then they can look dull and boring and I just don't and abusing him as much in these other pieces I try to make it so it takes up his little time is possible because it's all the things that are easy to skip and on lee concentrate on processing we're going to make sure that all these other things air thought about on a regular basis so I've been developing a system of how I think about it where I want to be able to go to any folder I've ever shot and be able to tell you have I processed all the good ones that are in here or not have I added information to this stuff or not so ana have any time and I don't feel like processing my pictures I know exactly where to go and spend my time to refine things so I think it'll be helpful
Class Materials
bonus material with purchase
Ratings and Reviews
Photoracer
After catching parts of each of the three days, I knew that I would need to have access to this wealth of information. What is great about the program is the ability to stop and go back over something that is not fully understood...and be able to do that until confident enough to move on. I saw no "fluff" in the course, just great information imparted with a style that is makes it easy to understand. CreativeLive scored a big hit with this course! The bonus material is SO valuable, especially the presets. That saves an enormous amount of time for me. My appreciation of the power behind the software is becoming ever clearer. Thanks, Ben, for another outstanding presentation!
Shannon Beelman Photography
Ben has been amazing! He is a wealth of information on organizing images as well as great tips to make your travel images pop just a little more. I came into this class feeling like I had a good handle on lightroom and have come out with a better understanding of the power of the software to make artistic life easier. He covers tips, tricks and little known options that help make workflow smother. I have sat here watching as much of the free broadcast as I can and in this last week I have gotten control over years of images in my lightroom. This is one I know I will be buying soon.
johninblackhawk
Great class! Somehow, it was enjoyable not having Ben default to "curves for everything"! I don't think the title for this course did it justice, tho. This class was 90% Light Room and 10% Photoshop. I was very happy to discover that dynamic and equally as happy to purchase this course! If you are new to Light Room, this class is a MUST. Creative Live offers several LR classes but this is the one to own. Ben is working on his new book about Light Room Mastery - can't wait! In the meanwhile, I'll be watching Ben's thorough approach to LR in this video. So, don't let the title throw you a curve ball, if you are new to Light Room or a seasoned user, there's plenty of great information - delivered as only Ben can! Thanks CL for this great class!