Non-Destructive Editing Techniques
Lesson 28 from: Photoshop for Beginners: Essential TrainingMark Wallace
Non-Destructive Editing Techniques
Lesson 28 from: Photoshop for Beginners: Essential TrainingMark Wallace
Lesson Info
28. Non-Destructive Editing Techniques
Lessons
Class Introduction
00:52 2Introducing Photoshop
02:37 3The Class Materials
01:36 4How To Open Files
01:42 5Using The Home Screen
02:35 6Exploring The Interface
03:30 7Getting Additional Help
01:36 8Understanding Workspaces
05:11Tools and The Options Bar
03:50 10Why You Should Use a Tablet
04:31 11Finding Hidden Tools
04:23 12How to See What You’re Working On
08:12 13Selecting Things
08:01 14More Selection Tools
12:25 15Testing the Magic Wand and Quick Selection Tools
07:25 16The History Palette – Undoing Things
05:24 17Resolution and Bit Depth
07:03 18Photoshop Preferences
01:31 19Menu and Item Shortcut Keys
02:39 20Non-Destructive Editing
02:57 21Working with Layers
12:19 22Groovy 3 Exercise
11:43 23Layer Effects and Styles
05:38 24Layer Masks – Karen on Beans
08:33 25Using Adjustment Layers
05:38 26Martian Karen
03:37 27Advanced Compositing Using Layers
08:43 28Non-Destructive Editing Techniques
05:22 29Understanding Smart Objects
07:28 30Smart Sharpen
06:42 31Understanding Histogram
06:24 32Adjusting Curves
03:48 33The Healing Brush Tools
10:26 34The Clone Stamp Tool
07:47 35The Burn and Dodge Tools
05:55 36Understanding RAW Files
01:44 37Adobe Camera Raw
04:18 38XMP Sidecar Files
02:14 39Camera Raw: Edit
12:24 40Camera Raw: Crop & Rotate
03:13 41Camera Raw: Spot Removal
04:56 42Camera Raw: Adjustment Brush
08:17 43Camera Raw: Graduated Filter
05:40 44Camera Raw: Radial Filter
05:11 45Camera Raw: Red-Eye Removal
02:04 46Camera Raw: Snapshots and Presets
09:39 47Neural Filters
10:09 48Portrait Retouching Session
36:53 49Scenic Retouching Session
11:25Lesson Info
Non-Destructive Editing Techniques
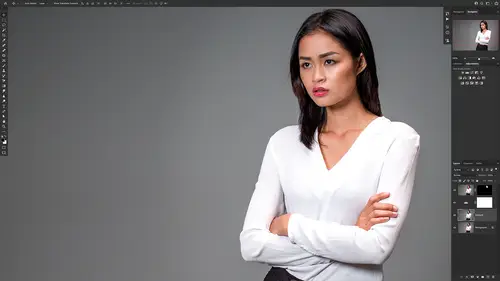
Let's talk about the best practices for nondestructive editing. We're gonna talk about seven things that you can do to make sure you get the best use of Photoshop and you preserve all of those pixels and color information for future editing. And so the first one we've already learned about that is adjustment layers. Now I've opened an image here, this is concha, she's a fantastic model I met in cambodia, we're going to do these seven things on this image here. So the first thing is an adjustment layer to change things. So we've got this background layer. Let me unlock that. I want to d saturate this a little bit. So all I have to do is just add an adjustment layer. We're gonna do let's say black and white And that's I'll just take the default. They're almost take the opacity down to about 21%. So what that does is it removes a little bit of color, it's nondestructive, I can change that at it, I can increase the opacity, I can change the adjustment layer that I'm using. It doesn't matte...
r. It's totally non destructive. Now, the other thing that we can do if we zoom in here, so I'm gonna go at 100%. We can look and see that. Well conda has a fantastic skin but she's just got a few blemishes that need to be cleared up. Now what I can do here is I can go to this layer here. The original layer and start doing some skin retouching. But if I do that original image data is lost. So the better thing to do is to take this layer and then I'm gonna drag it down to the plus here, I'm gonna make a copy. Then I can rename this layer. I'm gonna say skin skin retouch. So I'm labeling all these different layers because as we said before you might have a bunch of layers, then I can go in here and then I can get my healing brush, we're gonna talk about this a little bit later and I can go in and start retouching her skin and if I make some kind of mistake or do something that I didn't want to do, I can always go back and get the data from the lower image and then I can compare and see what I did. And so it's a much better thing when you're doing retouching to an image to just create a different layer. To do that retouching, it's totally non destructive. The other thing that we can do is we can do nondestructive cropping. So let's say that I want to take this image and I want to make make it a 16x9. I want to take some of this headroom away. If I go to the crop tool And I'm gonna go and change this ratio to a 16 x nine ratio and I can crop in a little bit. That looks pretty good. Maybe I'll bring this up a little bit, I'll move her over to about right there. I think that's pretty good. Okay that's really good. Now we have two options up here. I can delete the cropped pixels or I can d select that and not delete the cropped pixels. I don't want to delete the cropped pixels. I want to keep them. So if I ever go and crop again in the future I can bring that data back. Let me show you exactly what I'm talking about. I'm gonna crop off half of concha so I'm gonna take and just do that. So it's not a very good crop. I'll do that. Okay. Whoa I wish I had more of concha there. Well the good news is I can go into my crop tool and now I can drag this out and because I didn't delete those cropped areas I can bring that back. I didn't delete that image data. So you want to make sure you don't delete those cropped pixels, do it non destructively. So you can have all the options in the future. The other thing that we can do here perhaps we want to change some of this background. Now what we could have done is I could go and select a part of the background and then I can delete that and if I go to this bottom layer I'll select that and delete that. Well guess what we've deleted chunks of our image that we can never get back. We don't want to do that. What we learned already before I'm gonna undo all that stuff as we can just add a layer mask. And so I could go in here, I could add a layer mask and the thing that I want to brush out, perhaps I want to brush out this left hand side. I'll just turn off this lower layer. I can get a big brush and then I can brush out what I don't want or I can select what I don't want. And then I can use my paintbrush tool right here to fill that with black. That gets rid of that if I ever want it back, it's on a mask. So I just go to the layer mask, select white. And then I can get a big brush, I can paint that stuff back in. So all those masks that we learned about earlier are totally non destructive. That's a better way to do this. Now we still have three more things to talk about. The first one is to open your images and Adobe camera raw. That assumes that you know what raw images are. And we're gonna get to that in a future session. We're gonna talk a lot about adobe camera. Raw. We've got almost an entire section on that. So we're gonna put a pin in that and save that for later. The other two items that we want to use for non destructive editing are using smart objects and smart filters and that is what we're going to do next.
Class Materials
Bonus Materials with Purchase
Ratings and Reviews
Katie
Mark did a great job at explaining things and going over them multiple times throughout the lessons. My only issue was that sometimes it went a little faster than I could keep up and I needed to rewind it a bit and start again. But from someone who has never worked in photoshop before I 100% recommend this class to anyone trying to learn.