Lesson Info
47. Neural Filters
Lessons
Class Introduction
00:52 2Introducing Photoshop
02:37 3The Class Materials
01:36 4How To Open Files
01:42 5Using The Home Screen
02:35 6Exploring The Interface
03:30 7Getting Additional Help
01:36 8Understanding Workspaces
05:11Tools and The Options Bar
03:50 10Why You Should Use a Tablet
04:31 11Finding Hidden Tools
04:23 12How to See What You’re Working On
08:12 13Selecting Things
08:01 14More Selection Tools
12:25 15Testing the Magic Wand and Quick Selection Tools
07:25 16The History Palette – Undoing Things
05:24 17Resolution and Bit Depth
07:03 18Photoshop Preferences
01:31 19Menu and Item Shortcut Keys
02:39 20Non-Destructive Editing
02:57 21Working with Layers
12:19 22Groovy 3 Exercise
11:43 23Layer Effects and Styles
05:38 24Layer Masks – Karen on Beans
08:33 25Using Adjustment Layers
05:38 26Martian Karen
03:37 27Advanced Compositing Using Layers
08:43 28Non-Destructive Editing Techniques
05:22 29Understanding Smart Objects
07:28 30Smart Sharpen
06:42 31Understanding Histogram
06:24 32Adjusting Curves
03:48 33The Healing Brush Tools
10:26 34The Clone Stamp Tool
07:47 35The Burn and Dodge Tools
05:55 36Understanding RAW Files
01:44 37Adobe Camera Raw
04:18 38XMP Sidecar Files
02:14 39Camera Raw: Edit
12:24 40Camera Raw: Crop & Rotate
03:13 41Camera Raw: Spot Removal
04:56 42Camera Raw: Adjustment Brush
08:17 43Camera Raw: Graduated Filter
05:40 44Camera Raw: Radial Filter
05:11 45Camera Raw: Red-Eye Removal
02:04 46Camera Raw: Snapshots and Presets
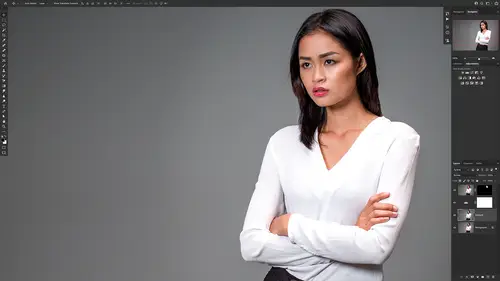
09:39 47Neural Filters
10:09 48Portrait Retouching Session
36:53 49Scenic Retouching Session
11:25Lesson Info
Neural Filters
Let's talk about one of my favorite new features of adobe Photoshop. Those are neural filters. So adobe and their engineers have created machine learning and artificial intelligence to use cloud computing to do some really interesting things to portraits in Photoshop. You have to have an active internet connection to download these new filters and you have to be connected to the internet for some of them to work, but they are amazing. And so let me show you how you can do some skin retouching using neural filters. We're gonna do this with three different portraits. So let's hop over into Photoshop. We're gonna open up our portraits here. So the first portrait we're going to open up, we're gonna click file and then open and then we have cami skin. Let's open that. It's gonna open adobe camera raw. What we're gonna do is we're just going to open this. So we're not gonna do anything in camera here, we're just gonna take this as it is. Then let's go and click open. And then we want to go a...
nd open another image here. It's called Fannie Fanny belladonna, a very popular model in paris and we're going to open this without making any adjustments. And then last but not least. Let's go in and open wanna dot DMG Again, we're not gonna make any adjustments. We're just gonna open this from adobe camera rock. Okay, the goal of this session is to do some skin retouching to fix some issues with skin. So the very first thing I want to do is go over to Cami skin, going to unlock this layer zoom into 100% and we can look at her face. She's got fantastic skin. And so my preference is to show freckles on models because that's how skin looks. But in this instance, what we want to do is demonstrate the filter. So we're gonna remove the freckles and then make her skin sort of instagram porcelain. Good. So what we want to do first here is let's create a separate layer. So I'm gonna hit control J and click retouch. So we're going to go in with our healing brush tool here, and we're just gonna use the spot healing brush tool. And then I'm gonna go in very, very quickly and I'm just going to brush out some of these little freckles here and there you go. So we've just done that very, very quickly. Alright, so now what we wanna do is we want to maybe take her skin and fix some of the blotchy nous of the skin. Her skin looks really good, but we can make it look artificially good. The way that we would do that in the past is really time consuming. We don't want to do that now, we want our computer to fix this for us. So we're gonna use neural filters. So what we're gonna do is going to go up to filter. Then click on neural filters. Remember you have to have an internet connection for this to work. Okay, so I'm gonna disappear from the screen so you can see what's going on here, you can see that we have a bunch of different filters that are available. So some of these, you might not see in your on your computer, you might have a little icon like this, a little cloud with an arrow, that means you have to download it. So just click on that, it will download and install that neural filter. We want to work with skin smoothing and so all you have to do is turn on skin smoothing. This filter is going to automatically detect where the faces and it has already fixed her skin, It's already done. So you're gonna see if I go down here to the lower left hand corner, I can click on that and see the before and click on it again and see after. So it's sort of taken away some of the inconsistencies in her skin. I can add some blur to blur out her skin a little bit more. That's gonna make it a little bit a little less blotchy. I can increase the smoothness way up, give her skin some more barbie kinda looking instagram skin, I can take that smoothness down to make it look a little bit more realistic but there's only two sliders here, there's only two sliders here to work with and you can see the before and after and it's very amazing. And so this is something that used to take a lot of time. Let's talk about how we save these changes. So we can save these to a new layer. But the thing that I think is the best thing to do is to do a duplicate layer masked. Let me show you why. So I'm going to click duplicate layer masks and okay, so now we're going to come back into normal Photoshop, I'll check this out if I turn off these lower layers. This is what the neural filter did for us. So this is these are the changes that it made the artificial skin that it applied. Also noticed that we have this mask over here. If we click on the mask we can get a normal brush. I'm going to hit b. I'm gonna make this brush size much smaller, something like that. And now what I can do is if I see something here that I don't want, I can brush that out using black is my foreground color. So I'm gonna hit d to get my default black and white colors and X. To get black to be my foreground color and I can see here on her eyes, we don't need a filter in her pupils. So I can just brush that out, I can remove that, I can come over here and remove it from this. I if I see an area where I think you know what I could use a little bit more skin retouching, I can change my foreground color to white instead of black. And then I can start painting this in. So maybe over here on her lips, I can start painting a little bit more. So when you save this as a duplicate layer with a mask, you have all the flexibility of painting in or out. Whatever changes you might want using that mask, it's really awesome. Okay, let's see how well this does on some different skin. So we have want to hear who's got flawless skin. Let's unlock this layer. Go in. We're gonna double click and we have a full resolution version of her skin. So we're gonna go here to filter and we're gonna click neural filters. This is going to once again open up the neuro filter. It detects where her face is automatically and so we can do skin smoothing. I can click on that and it does the retouching. I can maybe make this a little bit smoother. It's very, very fast. Let's look at a different filter here. Smart portrait. When I click on this again, it figures out where all the faces are. You can have more than one face here. Maybe I think that wanna needs to be a little angrier. I'm gonna move this over to the right. I don't think I can make want to angry. Let's see. So this is a spinning around. So what's happening is this is taking data to the cloud and the servers at adobe are processing on his face and it's gonna send back the results. So this kind of stuff you need, you need to have a connection to the internet. So this is Adobes version of Angry Wanna, which is horrible, but it's really funny, you can sort of see the before and then angry wanna after. I'm sorry, wanna if you see this, so that's smart portrait, you can do all kinds of stuff here, you can explore these things. Okay, let's cancel this. Let's take a look at one more image here. This is Fannie and when we look at this image, Fannie, I lit this from the side and so it really did not do her justice to her face, but we can see we've got some um skin that needs to be retouched. So what I'm gonna do here is I'm going to click on the background layer, so I'm unlocking that. And the first thing I'm gonna do is I'm gonna remove this little mole right here. So I'm going to create a new layer and I'm gonna call that retouch. So we know that I've done some things there. I'm going to go get my spot healing brush. I'm gonna brush right here and that is, it's gone. I've got this little blemish right here. I've got this little guy right here. Okay, so that looks pretty cool. But let's take this one step further by going into filter and I noticed that we have neural filters here and neural filters here. This top neuro filter. Let me just show you what this is going to do. Let me just do a different kind of filter. So I'm going to do um oh let's say the lens correction filter and it doesn't really matter what I do. I'm just going to say, okay, so I've applied a filter to this. If I now go to this filter, notice that it says lens correction at the top and not neural filters, what this always is is the top uh filter, there is the last one you applied. So if you click this, it's just gonna apply the last filter that you used with all the settings that you used. And so that's why it had neural filters twice. I'm gonna undo that lens correction filter. Now let's go into filter neural filters here and let's see how well this neuro filter does with a difficult retouching job. So I'm going to turn on skin smoothing blink just like that. And so I might make this a little bit smoother. I like that to blur a little bit more and there we have and totally retouched image. So here is before and that's after. I can click. Ok now, this one I didn't say duplicate layer with the mask and the reason I like to have the mask is if you just do a new layer, it just applies the changes. But now you can't paint on or paint off any of those changes. So this is a destructive edit instead of a nondestructive edit. That's why the new layer with the mask, in my opinion, is a better way to apply that filter. But there you have it, neural filters are an amazing way to take something that used to be very time consuming and do it with just a couple of clicks, explore those and have a lot of fun.
Class Materials
Bonus Materials with Purchase
Ratings and Reviews
Katie
Mark did a great job at explaining things and going over them multiple times throughout the lessons. My only issue was that sometimes it went a little faster than I could keep up and I needed to rewind it a bit and start again. But from someone who has never worked in photoshop before I 100% recommend this class to anyone trying to learn.