Lesson Info
39. Camera Raw: Edit
Lessons
Class Introduction
00:52 2Introducing Photoshop
02:37 3The Class Materials
01:36 4How To Open Files
01:42 5Using The Home Screen
02:35 6Exploring The Interface
03:30 7Getting Additional Help
01:36 8Understanding Workspaces
05:11Tools and The Options Bar
03:50 10Why You Should Use a Tablet
04:31 11Finding Hidden Tools
04:23 12How to See What You’re Working On
08:12 13Selecting Things
08:01 14More Selection Tools
12:25 15Testing the Magic Wand and Quick Selection Tools
07:25 16The History Palette – Undoing Things
05:24 17Resolution and Bit Depth
07:03 18Photoshop Preferences
01:31 19Menu and Item Shortcut Keys
02:39 20Non-Destructive Editing
02:57 21Working with Layers
12:19 22Groovy 3 Exercise
11:43 23Layer Effects and Styles
05:38 24Layer Masks – Karen on Beans
08:33 25Using Adjustment Layers
05:38 26Martian Karen
03:37 27Advanced Compositing Using Layers
08:43 28Non-Destructive Editing Techniques
05:22 29Understanding Smart Objects
07:28 30Smart Sharpen
06:42 31Understanding Histogram
06:24 32Adjusting Curves
03:48 33The Healing Brush Tools
10:26 34The Clone Stamp Tool
07:47 35The Burn and Dodge Tools
05:55 36Understanding RAW Files
01:44 37Adobe Camera Raw
04:18 38XMP Sidecar Files
02:14 39Camera Raw: Edit
12:24 40Camera Raw: Crop & Rotate
03:13 41Camera Raw: Spot Removal
04:56 42Camera Raw: Adjustment Brush
08:17 43Camera Raw: Graduated Filter
05:40 44Camera Raw: Radial Filter
05:11 45Camera Raw: Red-Eye Removal
02:04 46Camera Raw: Snapshots and Presets
09:39 47Neural Filters
10:09 48Portrait Retouching Session
36:53 49Scenic Retouching Session
11:25Lesson Info
Camera Raw: Edit
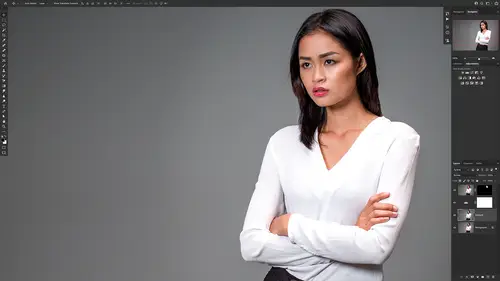
let's understand the concept global and local. And so when you're making changes in adobe camera Raw, some of those are global changes. They are adjustments that maybe you'll make to exposure or color or color temperature that affect the entire image, everything in the image. Those are global adjustments. Then there are local adjustments. Those are things that you make to a very specific part of an image. Maybe you're changing the color of just the eyes or you're changing the tonal range of just the hair or sharpening just one little spot in a scenic photo. Those are local adjustments. And so what we want to do is we want to walk through adobe camera section by section and we're going to start with global changes and then we will understand local changes. So to do that, let's go over to Photoshop and let's open a raw file. So we're gonna click file and then we're going to go to gonna go to Photoshop and click file and then open and then we are going to go to wanna dot D N G, make sure ...
you choose D N G, not jpeg or PSD, we want the raw file and then we're going to click open. Now immediately what Photoshop is going to do is it's going to open adobe camera raw and this 13.2 is the version. And so you always want the latest version of camera raw And so by default adobe creative cloud is going to keep things updated. So I'm using version 13.2 that is the most current version right now. Okay, as I mentioned earlier we have different sections over here on the right hand side. We're gonna start with the very top section. This is the edit section. All of the changes in the edit section. Our global changes, they affect everything in the entire image. That's where we want to start. We want to get the global situation all settled and then go in and make local adjustments. Okay so let's just start from the very top what we have here in the edit menu. So if we click that at the very top, you're going to see your hissed a gram. We're going to use that to judge the the corrections that we make in our image and then we have this auto button. If you click that then Photoshop is going to automatically fix your image according to what it thinks is best. I will never use that. And then we have a black and white button that allows you to remove the color and make it a black and white image. There are better ways to do it than clicking that button and then we have this profile that is a color profile and so that determines the look of the colors in your image and so you can change those to whatever you want. And so we can start let's say adobe portrait. These are good for portrait photos so it looks a little green to me. The white balance can be adjusted here. Now one thing I want to mention is inside each of these sections here we have disclosure triangles. So if I close this basic, we can see that we have sections inside the edit menu, we have the basic adjustments, we have the curves. Remember we talked about curves earlier, we have detail which is sharpening, we have the color mixer, color grading, we have optics and geometry and effects and calibration, there's all kinds of things, we're not going to go through every single one of these things. I'm just gonna give you a look at the things that you're going to use most of the time and then I'll describe the other ones to you. And the other thing you can see here is the little eyeball next to each one of these. So if you click and hold that you can turn off the adjustments that you've made to see where you started from and let go and see the adjustments that you've made so before and after. So it's sort of a cool thing to, to look at. Okay, so what we're going to do here Is we're gonna change our profile maybe to like em 10. This was shot with a like a camera. So I'm gonna use the built in camera profile. Your profiles are probably not gonna match what I have here because they're dependent on the cameras that you're shooting with. So when you shoot with the camera and bringing that raw file, some new profiles will show up there. Okay, so what we want to do, generally the first thing I do is I'll set my color temperature and adjust my color. And so to do that we can set the white balance and with the raw file, the great thing is that's setting the white balance in adobe camera raw is exactly the same as setting the white balance in the camera, there is no difference. So it gives you all the forgiveness in the world, you know in a jpeg image. If you forget to set the white balance when you shoot an image is difficult to correct that in post production, but that is not true of a raw image. And so it gives you maximum post production flexibility. So to do this, I can choose a white balance that was used when I shot the image. So that's as shot that looks pretty good. Or I can choose this little white balance tool, this little eyedropper. If I click that and come over here I can try to find something that's white so her top should be white. If I click on that, look at that, it fixes all the color. So it figures out the color temperature and the tent. And so it adjusts the color for me. It's a great way to do white balance, You can do that, you can do it manually, that's how that works. The next thing we want to do is we need to change the exposure and the exposure is going to change all of the exposure to the entire image. And you can see our history graham moving left and right brighter and darker. So I want to get that somewhere. That looks pretty good. We don't have anything that's way overexposed here to the right, we don't have anything that's way under exposed here to the left. You can also see there are these little triangles here. If I click on that, what that will do is it will now show me blue on my image of anything that is absolutely underexposed so much that there's no detail. I've lost detail in anywhere, There's blue, it's just solid black. And so I can change this and say, you know, I don't want it to be anything solid black, I want details and everything so I can sort of see where to adjust that. And then the other thing on the other side of the instagram is the opposite. And so if I turn on that little triangle and move to the right, it's gonna show me read where anything is absolutely blown out and no detail. So these are great little tools to help you understand where your exposure is. So I'm gonna eyeball this and say it should be about right there a little bit brighter than I started with the other slider that's very common to use is the contrast to make this more or less contrast. E we're gonna talk in more detail about each of these controls in the final sessions of this workshop and I do a report portrait retouching session. Um So I'm not gonna spend too much time on all of these right now, but you can see what you can do, you can change your your exposure and the shadows and the highlights and change the levels of the blacks and texture and all that kind of stuff. You can make this really vibrant and not so vibrant. These are global changes. A couple of the things I just want to show you in the edit section, so I've collapsed the basic section. I'm gonna open the curves here are the curves that we talked about earlier. So you can do curves adjustments here in camera. And the nice thing is this has sort of safeties built in. So notice that it adjusts just different sections of the curves. So it's a little bit more mature um tool to use than the original curves. It's made for people that maybe don't have such a great grasp on using all the different points on the curve and it's the curves that I prefer to use instead of the old fashioned curves that are in the adjustment layers. So these curves are built in so you can do that like we described earlier. The other thing that is fantastic in adobe camera raw is you can sharpen in adobe camera raw. So instead of using smart sharpen, like we talked about a few sessions ago, you can use the sharpening here in camera to do all of your sharpening, you can click these disclosure triangles here to set the radius that we discussed discussed earlier, you can see how much sharpening is there, you can do masking in detail. These are some more advanced topics that we're not going to cover in this workshop, but they are there, you can see all of these different things. So noise reduction, you can do color noise reduction, make sure you click on each of these triangles to see what is hidden there. Remember there are all kinds of hidden tools in Photoshop, if you see a triangle, click it to see what is hidden there, you can do some color mixing. This is really a fantastic tool to change specific colors in an image. So let's say for example, I have wanda's lips here, maybe I don't like the shade of her lips, I want to change maybe that or maybe it's too orange on her face. So I can go into the reds and I can change either the hue or the saturation or the luminous or all of those things all at once, but let's change the saturation. So I'm gonna go into the reds and I can drag that to the left, I can take some of the read out, this is a global change, it does this to the entire image. So I'm gonna take some stuff out of her lips but I'm gonna take it out of her face and everything is the same. So we can do that. It's a good way to sort of adjust our colors. The other thing is you might not know what the color is. So maybe I want to d saturate her skin tones, but I don't know is that a red or an orange? I'm not so sure. The nice thing is you have this little uh target adjustment tool right over here. If I click that and go over here, you see I've got this little these little star little circle things following me. But I can say I'm gonna adjust this color and then I can go left and right by holding the mouse and it's just adjusting the color that I clicked on so it's going to show you exactly where in the image that color is. So you might want to dive in and do some other things for advanced retouching. There are color grading wheels here. So if you're an advanced color science person, you can do all of that stuff, We're not going to be touching color grading in this class. And then there are also things that you can do this is built in. So if you have a modern camera and you have a lens attached to that camera, most cameras know what lens is used. Adobe camera raw can say, you know what I know what lens you have used and I can fix the imperfection in that lens automatically. And so you can use the camera profile corrections. So this is saying, hey, I know you used the suma lux 50 millimeter lens. I know it has these issues. I'll fix that for you or you can say leave it alone. I don't want you to fix it. And so you can do all of that stuff again, that's an advanced topic. We also have geometry here. So this is mainly for architectural photographers. If you have a building that's your shot and it looks like it's falling backwards or forward, you can correct that. Um you also have some effects. A couple of these. I use quite a bit. One is grain, it's sort of like film grain so I can add some grain. They're gonna way overdo it. You can see this is very grainy or not or I can go and fit this image and you can see this vignette and if I bring this in or bring this out, you can see that I can add or subtract of vignettes and these are all uh applied at the end of the processing. So if I crop this, I'm not going to crop out the vignette. It's gonna reapply the vignette to the crop diversion. It's really cool. The same is true of the sharpening. It always does all of these things at the end so you don't have to mess anything up and then calibration is an advanced topic. But that helps you calibrate um your screen or your files to make sure that the color is all right. Um If you don't know much about that, just use the current version for calibration and you'll be just fine. Okay. Those are the basic adjustments. There's a ton of adjustments there. You can do all kinds of things. And so next we're gonna go into the crop tool.
Class Materials
Bonus Materials with Purchase
Ratings and Reviews
Katie
Mark did a great job at explaining things and going over them multiple times throughout the lessons. My only issue was that sometimes it went a little faster than I could keep up and I needed to rewind it a bit and start again. But from someone who has never worked in photoshop before I 100% recommend this class to anyone trying to learn.