Intro & Basics: Exposure, Shadows, Highlights, Tone
Lesson 1 from: Basic Post Processing for Landscape PhotographersMatt Kloskowski
Intro & Basics: Exposure, Shadows, Highlights, Tone
Lesson 1 from: Basic Post Processing for Landscape PhotographersMatt Kloskowski
Lesson Info
1. Intro & Basics: Exposure, Shadows, Highlights, Tone
Lessons
Lesson Info
Intro & Basics: Exposure, Shadows, Highlights, Tone
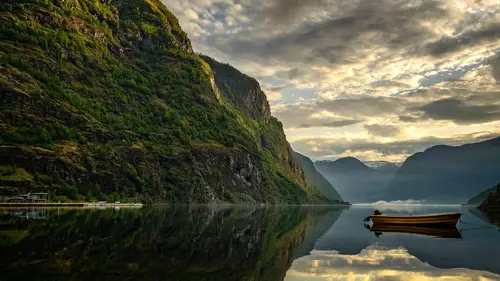
This my work, my work flow as a landscape photographer I do I do a couple of different types of photography and do some portrait work but if you if you give me a camera and say go out and shoot anything you want I go on shoot landscapes that's what everybody's kind of got that thing that gets him and that's that's kind of what gets me it's going to start the class and we were kind of talking before to me landscape photography is is a lot about the story behind the photo to and getting to the place, but just to show you like sometimes there's a different plan for your photography that was on a trip that I took to norway and I, uh I was in a small town called flam and with that you know you have you been there? Oh god, beautiful, isn't it? So it's I got there the night before and I rented a car and it's this tiny little car because there's a tiny little road you're scared to drive anywhere literally if another car comes from the other direction, which actually didn't happen. But if anoth...
er car comes from the other direction, I can't tell you how far one of you would have to back up to be able to pass each other in these tiny little roads tight little car I got shooting the night before this is in june the golden hour is like four hours long because you know the sun is so low in the sky and the way that you know, I live in florida I live almost on the equator it's like the sun just goes like this to us, you know? And so I've never been that far north four but the sun sets so slowly and so the golden hour last forever got some great pictures the night before the next day sunrises at like three thirty I get oppa to thirty I'm going to go get in the car to go so I never saw the sign that said the parking lot doesn't open till seven so here I am I got all my gear and I'm like man, this beautiful sunrise my only sunrise I could really get out shooting and and I can't I can't go shooting and so I just started to walk turns out that that picture was like four minutes from my hotel I never would have found it had I not had to get up and walk that morning I walk around taking pictures of people still in the bar the night before and uh but this was this was like right at my hotel and if I got in the car I probably would have just driven and where I went the night before because I don't know my way around so that was just a gn interesting story about how I got some of my favorite photos from that trip that morning and it never would've happened if if I'd seen the sign if I've looked so let's talk, we're going to start off here inside a late room most of my work starts inside a light room give you my work flow, which is I do as much as I can inside of light room from there I either becomes one of two things if I've done my work in light room, I have my my finishing touches that I put on which most people use some type of a pocket for effects and stylization, so I'll start in like room if I don't have to do any photo shop work, I go straight to finish it if I do have to do photo shop work, then I'll jump in the photo shop usually it's cloning healing on the rare occasion, replacing a sky and I'm not above it but it's uh it's yeah that's pretty much the workflow, but it all prima starts from leg room, so we've got here a photo I'm goingto jump into the basic panel that's that's the hub of everything that we're going to do here the basic panel is mentioned it to you guys in the last class, but the basic panel is eighty ninety percent of the work so let's talk a little bit about we have exposure ueno you know exposure drag it to the left it's going to make it dark drag it to the right is gonna make a brighter um with landscapes sometimes it's hard to start on exposure because if I drag it to the left I love that I can get all that detail back in the sky by drag it to the right I love that I can get all that detail in the foreground but neither one of them gets me to where I need to pay so that's when I go straight down it highlights and shadows for a lot of my landscape work because the highlights I can pull back the shadows I can open up okay and then from here I'll go into whites and blacks I have a little bit of a formula used for my whites and blacks if if you hold down the option cheon mac or they all canopy see you click on white see everything goes black if you drag it to the right you start to see all these little specks appear that that means you got a white point okay if I do the same thing on black everything goes white if I drag it to the left now I have a black point that's all those little specks so what does that do for us? Um kind of gives us a good baseline so imagine you know your computer, your computer screen, your computer screen, your computer screen, any anybody's computer screen they're all different you know, I've got mine maybe near light years is near window years is in a dark room whatever happens to be and it's going to change how we see our images ok? This gives us a good baseline because that white point is a white point no matter what no matter if my computer screens near bright light and I'm seeing the photo differently or it's in a dark room that way point doesn't change so it gives us a good enough baseline to kind of make sure that we have on overall good tone and exposure for the photo um all right clarity clarity is it's kind of it's extra contrast all right? It differs from the contrast slider up here because it's going to go kind of attack areas that are not really bright a really dark kind of everything in between so would work okay for this photo works create on photos with mountains and trees and clouds and things like that we can really bring out a lot of detail vibrance pretty much leave vibrant alone for landscapes because vibrance is great for portrait ce but saturation if I want to boost the color I'll go too saturation you little moves here guys I mean you crank this thing up it's a radioactive sky so tiny little movements in the saturation don't forget white balance you know when it comes to when it comes to landscapes white balance is very much a personal choice personal taste when it comes to portrait's and things wei don't want a lot because we don't want someone skin looking yellow or we don't want some skin looking blue so white balance is is more of a cut and dry type of a thing unless your style izing when it comes to landscapes it's it's a lot of it is really about a personal preference what kind? What kind of mood with type of feeling? I like my stuff warm so you're gonna always see me warming up over on the white balance side uh all right, so from there I pretty much we'll jump down into the detail panel and I'll zoom and you gotta be zoomed into one hundred percent so zoom into one hundred percent and just take a look at some sharpening here I can crank up the amount slider good deal radius pretty much living at one point for you don't we don't want that glow that you'll see around the edges, so we sharpen our photos we don't want him to have halos around him, so I leave in about one point for and then detail detail just finds more things too sharp, so if I start cranking up my detail on this photo I've got a lot of blank areas like this, not necessarily something I'd have to do. You know, if I had a photo with a lot of trees, a lot of rocks, things like that, I can crank up my detail, but in a photo like this, I don't really have a need for on that. If you do start to see noise and crane in those areas, you just increase your masking because it'll hide it from those spots, all right? And you could turn our, uh, our detail off and then back on so you can get a feel for what it's doing from here. Pretty much my finishing step is always going to be a vignette. I'm inside a light room if I don't have a need a lot of those guys is how important is the photo if you're just kind of developing a photo? Maybe it's, not the killer portfolio photo, but you're just developing a photo sometimes I just stay inside a light room. I'll go inside labour mlada vignette kind of finish things off just to darken the edges a little bit. But I'll finish things often, like if I think this photo is going to go to the next level, I think I might put it in my portfolio, then I'll start to move on to style izing and I might even go and try to look into removing wires and things like that. But to me, this photo is just more of ah, remembering a trip that I was on, and I don't know that I would go that far, but it serves a good, good way for us to kind of jump into our workflow. Uh, you want to see the before and after easy way to do it is inside a light room just hit the back slash so backslash before backslash after all, right, that's, one example thiss this example is actually very close to where the photo that I was talking about earlier was it just doesn't have the canoe in it. So let's, go to work on this one same thing come over here to my basic panel exposure doesn't really work for us either way, so I'll go to my highlights could pull those back open up the shadows, I have to open up to much whites and blacks option or all click again, drag it to the right to get my white point to the left, get a good black point uh, I'm gonna warm this photo up a bit here, so I'm gonna bring the temperature slider over towards the right uh as I look at the sky, I think I think the sky could be darker there's still detail up there if I bring down the exposure slider, you can see there's still a ton of detail up there, so I think we could do a little bit more work in the sky. What I'm going to do here is I'm going to use a selective tool that we have, so this just goes to the next life double the graduated filter. So the grad filter is landscape photographers, you know, from way back when a best friend, right? That it's you graduated neutral density filter, which essentially goes from dark to clear we'd hold it up so that way our skies wouldn't show up so bright holed up in front of the camera to me the filters that we have here of replace that so I don't even take those with me anymore. I use neutral density filters to get long exposures I'd use those all the time. There's there's really no tool in photo shop some that help us but there's really no telling photos up that gets us there, but to me the grads I've taken, um out of my bag, I don't need him anymore so we'll go over here will bring our exposure to the left and I'm just going to drag from the top down and kind of position that wherever I want the closer you bring it the harder the line is and the more you separated out the more of a transition there is between the two uh if you put your cursor close to it you could see you can even rotate it so it doesn't have to be straight khun little plane try to get it back straight again good luck uh hold the shifty all right so we got it there and you could see there's a little toggle switch I can see the before and then the after okay uh let's go down here to detail again I will zoom in gonna hide my left panels to just give me a little bit more space to work with crank up my amount setting sharpening right about one point for detail I'd get away with a lot of detail in this I don't have too many smooth areas in fact even the clouds you know there's no sky so I can't go in there and crank up that detail slider and get quite a bit and then we can see before and then after I'm private go a bit higher and then from there we will go back to the trustee opinion I usually bring the amount to the left the midpoint controls how much it encroaches in toward the center and then the feather just kind of hide your tracks keeps that feather that edge feathered as I look at it kind of looking a little bit dark I might boost the exposure just a little bit more maybe some of the shadows okay all right, so let's take a look here again backslash key before backs lasky after okay big changes we're not we're not doing a lot of work I'm not doing hdr yeah I'm not in fact I'm going to see if you're going to talk about that in a second here but I'm not blending images together. We've got a lot of powerful tools in here for just one image. Okay um I'm gonna move on any any, any questions out there when you're using the graduated filter and you pretty much have a straight line where it's going to start affecting it and when you put it over your green it obviously makes that darker as well soften times, I'll go up in the little, uh brush one to increase the exposure, but I get a lot of ghosting along the edges how do I avoid that? So so basically you're saying, you know, you take the grad filter and it does exactly what it would do in the field back when we used one too, if if there's a line there it's going dark in the trees is going dark and everything so basically how do we stop that from happening essentially because you're getting ghosting but you don't want ghosting you just want the trees to be brighter yeah I want the trees back to where they look before you put the filter over so let me show you a trick here I'll just count jump forward to my next example that's what I was going to show you how to do that how is that all right so so the next example I'm going to do exactly what she said this was uh this was mountain mount rainier um yes you guys all live in seattle so beat up the matter in here but you know what it's like when you when you go to mount rainier one of the places that everybody goes to is reflections lake and so I'm like I'm gonna find someplace else after being there I can tell you I should just read the things online just go to reflections like that is the best shot amount in here this was taken some place else that you know I got no points for hiking a mile and a half into it and then I get there and there's absolutely no shoreline so I got it like just because I like foreground in my photos and reflections like has foreground there's wildflowers there's a shoreline there you go we'll hope to it, I get to this like there is no short like it is just it's brush and then water. And so I had to take my shoes off and get into the water just like find this dead piece of wood so that I had some level of of foreground in the image. God, I just don't like just reflection and then think so. Anyway, point being is if you go to mount rainier just goto everybody says you should go there, right? So, uh so here's, our photo here, same thing, you know, we're let's go back down to our basic panel exposures a tough one. We do have a lot of detail up there in the sky. We've got a lot of detail in the foreground, so let's hit it with some of the highlights. You see, it works on the sky a little bit. Um shadows. I don't really have. They have too much lost in the shadows, so we don't have to worry too much about it. Whites and blacks option. I'll click get away point black point. Ah, little bit of clarity. Never heard anybody got some clarity to it and then I can boost the colors with some saturation. Overall I want I want a warmer feeling for it so I'm gonna crank up the temperature quite a bit here uh, what are some other things we've got to do to it? To me it needs just a tiny bit of straightening when you don't have a horizon line and this is this is common for landscaped unless you're at a beach sometimes you don't have a horizon line and and I can tell you you know it's when I see photos I do a lot of photo critiques and I see so many photos that look crooked and because it's hard you got to figure out like what? Oh, I straighten this by if I have a shoreline in the different the distance if it's a lake that's going to be a strong point two straight from because if that's crooked even though you might have had your camera on a level and it might show that it's straight but if that shoreline looks kind of curved in the background there it's going to look crooked so all straight and based on that I was going to drag the street in tool right along it so I'm not too much but get rid of that part um let's see here so we got that working this is gonna be when I go to the grad filter, so bring the exposure negative click and drag all right and now we get that problem that your question wass which is I get this hard line across the image here so what I found works out really good is that we have a shadow slider is part of the grad filter and if I adjust the shadow slider see what it does all the trees because it doesn't mess with the sky because of the sky is not in shadows so it's on ly working on the shadowy parts of the photo rather than taking a brush and going in there and painstakingly try to get in and you get that halo everything try the shadow slider open up the shadows in that area so you're you're actually darkening it but then you're opening it back up for just a certain part of it works out really good another thing that I do is I want like you noticed before when I kind of moved the temperature slider made everything yellow and when you get into the sky sometimes you get a little bit of a muddy type of a yellow look well same thing here we have the grad filter it's affecting the sky I can move this to the left get a little bit I'll crank it up too so you see what happens but we obviously wouldn't go that high but I can move it to the left just to get a little bit more blue it's just working on the sky all right from there, come down here detail paddle I'll usually just zoom in all right back here looks good radius one point four crank up my detail just make sure I don't really there's no noticeable texture up there in the sky it's looking pretty good and then finish it up with what a vineyard because everything needs have been yet this might also be a good photo to try the spot removal tool you guys remember from the last class there's a visualized spots buttoned down here so wow, it's a lot worse than I thought. Fine, you know what? We're not going to do all of them because you guys would want to kill me by the end of that, but there's one there's wine and you can even kind of affect how much you see it, but they're all over the place. Apparently I've got a messy sensor you have when you change lenses you're supposed to like, be careful about it. When I changed mine, I sneeze into the camera just to make sure all right and close that bar so before after four after okay, I see a hand for a question. Yes when you're doing the black and white to find the black point in the white point is that similar to what we were doing over there in in light room where you move the history graham to the left, into the right. Correct. So in another example, I showed you the history ram you got that mountain in the history of, and you take your white slider and moving, and you take your backslider. Remove it, and you get to the edges of that mountain it's. Exactly the same thing. Just a visual way of doing it without having a mess with history.
Class Materials
bonus material with purchase
Ratings and Reviews
Scott H
The course description led me to buy into the class. Like a lot of people I had some reservation as to how it would be presented. I've taken other types of online course before. And I have say the presenter may have knew his material. But it was delivered in such a manor I retained far to little to be of any real benefit. But in this case. I can't tell you how impressed I am with CreativeLive and Matt Kloskowski. Matt breaks this information down into basic functions. And gives you real world scenarios as to how to best utilize the techniques. All the while reaffirming the notion that these rules and techniques can be varied for each users individual style and needs. The fact I can go back online and review this material from time to time, big bonus. As a result I've signed up for two more classes. Matt's personable and engaging personality makes this a winning combo for novice photographers like myself. I couldn't be happier with CreativeLive and Matt !
Steve61861
Terrific Class! One of the best I have taken from Matt. Mostly good, basic material, but there are some real gems that Matt shares here. Highly recommended.
Tracy Layton Peterson
Loved it!!! Great information that was very USEABLE to me. Matt was is a great instructor, throwing in some humor as well as bits of information that may not be dead on point but really helpful just the same. I was able to bring the quality of my editing up considerable just from this class alone. Thank you