Waterfall Landscapes in Lightroom and Photoshop
Lesson 5 from: Photoshop and Lightroom for Landscape PhotographersMatt Kloskowski
Waterfall Landscapes in Lightroom and Photoshop
Lesson 5 from: Photoshop and Lightroom for Landscape PhotographersMatt Kloskowski
Lesson Info
5. Waterfall Landscapes in Lightroom and Photoshop
Lessons
Intro and The Basic Lightroom Formula
40:42 2Exposure Tips for Landscape Photographers
09:51 3HDR Demo for Landscape Photographers
16:09 4Things Landscape Photographers Stress Too Much Over
07:04 5Waterfall Landscapes in Lightroom and Photoshop
38:01 6Landscape Panoramas in Photoshop and Lightroom
19:30 7Mountain Landscapes in Lightroom and Photoshop
14:07 8Why I Don't Use Graduated ND Filters
03:37Making Your Skies Look Great
10:27 10Enhancing Clouds and Contrast
08:21 11Polarizers and the Sky
16:45 12Replacing the Sky in Landscape Photography
29:06 13iPhone Timelapse for Landscape Photography
08:07 14Organizing and Selecting Your Landscape Photos
15:43 15Editing the Selected Landscape Photos
12:30 16Editing the "Hero" Landscape Shots
08:17 17Lightroom Mobile and Landscape Photography
11:00 18Landscape Printing Presets and Tips
11:44 19Landscape Printing Q&A
10:39Lesson Info
Waterfall Landscapes in Lightroom and Photoshop
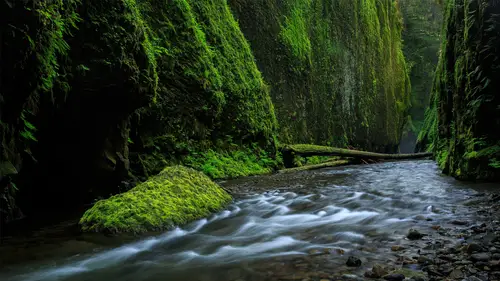
Let's take a look at a photo here. We're gonna jump in. Somebody was talking to me about the class graphic that is up between the sessions. Somebody had asked me about that before and it's a place called Oneonta Gorge. It's in the Columbia River, just outside of Portland. But one of my favorite photos, one of my favorite photo trip experiences that I've been on and this was one that took a little bit of extra work to get to where I want it to. So let's go ahead and look at. I'm going to show you the raw photos here. So the raw photos, remember I'm on a tripod and I was bracketing. So the raw photo is I have this one and this is a little bit of brighter one and I had one and I did the three-shot bracketing and I had one that was way overexposed but I didn't need it. So I've got that photo, I've got that photo, what are some of the differences between these two? Well as I go to the develop module, you remember, one of the things that I said is I'll tweak the exposure just to see. One of ...
the differences is I didn't quite get all the movement that I was looking for from the water in this shot. But I knew, just from looking at the blinkies in the camera, I knew that this is pretty hot back here. The sun was going in and out of clouds. It was constantly changing and it was kind of cold. So could I have played around with? I have class on long exposure tomorrow. Could I have played around with neutral density filters to try to tweak this to get the way I want it? I probably could have but I probably would have missed a lot of shots too. So what I did is I just bracketed and I took this photo knowing that the brighter photo would have a longer exposure but also this was blinking like crazy back here. If you look at it, see how it degrades? It's gone, that detail's gone. So there's no amount of only Lightroom work that I can do to this. So this is gonna be a time where we kind of have to take that next level. So I thought this would be a good photo for it because I think it speaks to lights changing, lots going on, lots going different, and I don't want to spend too much time being technical in the field so I did what I had to to get the shot. So we've got these two photos. What we're gonna do here is I'm gonna edit the first photo for what I want it for which honestly guys is really, I mean, there's not much to it. All I want this first photo for is the detail back here. I'll probably warm it up a little bit, open up that exposure a little bit, and pull back on the highlights. But I don't really want anymore from that. I just need it for this. This photo's really gonna be the star. This photo has got the nice smooth water. Everything else up here looks good so I'm gonna edit this photo for everything in the foreground here. Let's bring our exposure down a little bit, open up our shadows just a hair. Highlights, if you start to see too much white here, see how you can pull back on some of those highlights? The other thing you could always do is grab your adjustment brush and some of my brush presets, so I've got darker foregrounds. What else do I got here? Darker foreground's probably gonna be one of the good ones here. Darker foreground and I can paint in some of those areas just to pull it down a little bit, probably add a little bit of warmth to it, I think that's what the brush does. So I can pull some of that back a little bit if it starts to get too bright. I'm gonna click new over here because what I want to do is stack another brush adjustment on it. I want to start to work a little bit on the wall over here so I've got a couple of brushes. One of my favorites for these waterfalls and these canyon type photos if you have photos where, I mean, if you live around here in Seattle, this stuff is all around where you've got these canopy of trees and sometimes light coming through. I've got some sun glow brushes here. So what I do is... You can paint a little bit of that on some of these walls. And if it's too much, just pull back. You'll see, once you start painting, you'll see what settings the brush uses and then you can just pull back on some of those settings if it starts to get too much. But that's a nice one. It just kind of gives a little bit of a glow onto some of the parts of the photo there. And then I'll do one more new and again we'll go ahead and let's just add a little bit of gritty effect just on the rocks. It's gonna kind of bring out some detail in those. Alright. So now I've got the photo pretty close to what I want it to be. Now we need to get this to a place where we can merge these two together 'cause I need layers to be able to do this. I can't layer them on top of each other inside of Lightroom so I need to be able to stack them. Easiest way to do that is shift-click on both photos. So we're down here in Lightroom, we click on one, we shift-click on the other photo, and then you go up here to photo, edit in, and there's an option down there to open as layers inside of Photoshop. So we could easily open each one of them in Photoshop individually but we'd have to manually combine them. If I open as layers in Photoshop, what's it's gonna do is it's gonna stack them on top of each other into the same document. So let's jump over to Photoshop. By the way, this works with Photoshop CC, CS6, whatever version of Photoshop you have, chances are has layers. It will work with Photoshop elements so that's how common the layering effect is. Okay so now, we've got that photo and we've got that photo and then what I want to do here is I have to bring these two together. So how do you do that? You do that with a layer mask. Little layer mask icon right down here at the bottom. You add a layer mask to it and the best way to think of the layer mask is that when it's white, the only way that you can adjust that layer mask is to paint on it with the opposite color. So if the layer mask is white, the only thing I can do is paint with black. If the layer mask was black, what color do I paint with it on? There you go. It's a 50/50 shot so if you're ever not sure, try black and if it doesn't work, try white. One of those two is gonna be it. So I know that the layer mask is white so I've got to paint on this with black. What I'll do here is I'll go and I'll just start to. The other thing that you can do is also reduce your opacity. Anybody use a Wocam pen and tablet here? So that's what I'm using, Wocam, W-O-C-A-M. They make these pen, tablets here. The reason I use it number one is the tactical control that I get. The best way to explain it is try signing your name with your mouse. You know how weird that would look? But when you do it here, with a pen, that's what you're used to. So I get a better control. The other thing is when I reduce the opacity of my brush, as I start to paint, if there's an area I want to add to, I paint again. So it lets me build it up with pressure. The harder I press, the harder the effect's going to be. The more I press over it, the more I build up the effects so it just kind of helps me get a better feel with the photo. As I zoom in, I probably got a little bit too heavy handed over here so remember I painted with black, I'll switch it to white, use the left bracket key, make my brush a little bit smaller and just make sure I paint all that back. So from here, we've really done a bulk of the work. As I look at it, I could be being picky. Do you guys see that? So I think that was like some fog or water or water drop that I smudged or something on my lens. So again, I'm probably being kind of picky here but we're inside of Photoshop. This is a great time to go and do any cloning and healing. You want to remove a tree. Whatever happens to be. This is a good time to do it. Easiest way to get that done, add a layer. We can go to our clone stamp tool and all we have to do is just sample. Option or alt-click to sample and just paint over it. I think that's repeated just sample somewhere else. So option or alt-click on something and then paint. Alright. So that takes care of that. While I'm here, I'll look for any other little distractions. Everything's looking pretty good though. Yeah, we're good. Alright. Let's do a couple of finishing effects. This is gonna sound weird because I work for the company but I did use their plugins before I went to work for the company. I work full-time for On One but I used perfect effects as my finishing plugin. I can't take the audience but I'm sure it's going to be very similar. How many people out here have plugins? It doesn't have to be On One, it could be anything. How many people, show of hands. So it's like 90% of you and if we could do a show of hands of the internet, it'd be pretty darn close. Plugins, they do the finishing work. So the best way that I can explain it is I'm gonna do all my white balance and my exposure work inside of Lightroom. Anything that I can get done inside of Lightroom, I'm gonna do. To me, the plugin is the style. Everybody starts to develop a style, even if your style looks like somebody else's in the beginning, chances are you start to develop a style. So to me, the plugin is the style so that's what I'm gonna do. So I'm gonna jump into On One. I'm gonna do one quick thing here because the more Photoshop work we do, the longer things take. So just to keep things moving along quickly, everybody close their eyes. You didn't see me just reduce the size of that photo. But the more Photoshop work we do here, the more layers we add to things, the longer Photoshop and everything that we do takes. So I don't want you guys siting there, watching a progress bar. Let's go ahead and let's go add some style to this. What I'm gonna do here and I'm gonna put it all on one layer. It's like a secret handshake shortcut in Photoshop and it takes the whole left side of the keyboard but if you press command option shift, again whole left side of the keyboard, just like go down. Command option shift or control alt shit on a PC, so all three of your keyboard modifiers and the letter E, Photoshop merges it all onto a new layer. So it keeps everything below but it merges, kind of punches everything up to a new layer for you. So what that does is that kind of gives me some layers below that if I want to go back and work with I can but I get everything up here. And I'm going to go jump into perfect effects which is the one that I used to kind of finish things off with. The good news is I used most of the default presets. So if you go under the presets tab, there's a landscape section. Go figure. And I'll use a lot of those presets inside of there so golden hour enhancer is a nice one for warming. Could probably be a little bit too warm for this one. So summer is another pretty cool one. Summer gives a little bit of a glow. It's my favorite one for waterfalls because it gives a little bit of a glow and a little bit of warmth. So I don't know if you guys can see. Give it a second to render but it layers, it stacks everything over here, too. So if you're used to using Photoshop, it's the same. But that's before. That's after. I can't explain what it does. It kind of gives it a little bit of a softness but I don't say softness in a bad way because we paid a lot of money for a tripod and all that stuff. It's still a sharp photo but it kind of just gives it a nice glow to it so I like the feel of it. So we're gonna go ahead and I think we'll stick with summer. What I will do is it's just like, again, Photoshop layers, I can add a layer to it, add an empty layer, and I'm gonna finish it off because I'm inside of here. I'm gonna finish it off with really my favorite vignette which is called big softy. It just has a nice little vignette. And everyone of the presets that you stack has opacity so if it's too heavy handed, you can just pull it back. Okay. I hit apply. So all this does is just bring us right back over into Photoshop. And we have everything on a layer there. Now, we're done. Remember, we haven't talked much about the workflow between Lightroom and Photoshop. When we were in Lightroom, we went photo, edit in, and we came in to edit in Photoshop. In order to get back to Lightroom with this photo, all we want to do is go file save. I don't want to change the name. I don't want to change the location. I don't want to do anything like that because I want Lightroom and Photoshop to keep that connection alive. So I don't change anything and then just close it. So when I jump back over here to Lightroom, what you're gonna see is now there's another photo over here. It's got a new name to it. It's a tif file so it's actually a layered file that came from Photoshop. It's got a new name to it and this is now my working combined version of this photo. The other thing, I didn't put this in my list of things people stress too much about. Don't stress over re-editing the photo back here. Just because it's not a raw photo doesn't mean you can't edit it. It will hold up just fine. Anybody ever heard like oh God, don't edit like a file that you've already saved or anything like that? It can degrade? So a lot of that stuff came from years ago. 10 years ago, if you shot digital 10 years ago, those files were touchy. So if you saved it and then went to reopen it and like re-edit a JPEG that you'd saved, the images were a little bit more touchy, you could degrade it there but not anymore. You're fine. So you can re-edit this thing if you want to. So if I come over here and I notice I didn't add much sharpening to it so I can go to the detail panel. We can zoom in over here. Let's zoom in on the rocks up front. I could add sharpening. We talked about what sharpening is too much. That's too much. But I could add a little bit of sharpening. What I'll probably do is because I really do want this area to be sharp up front, I'm okay that this kind of got that glow effect to it so what I'd probably do is just go grab my brush and I've got a brush called sharp and I've got one called pack sharp. So we'll try sharp. Notice it brightens it a little bit too because I just kind of figure when I'm sharpening something, I probably want to draw attention to it a little bit. So it makes just a hair, I mean barely, barely brighter. So it'll just paint it right on there. Make those areas a little bit sharper. Maybe even this one over here. But that's about it, guys. I don't think I'll do anything else to it. This one's a tough one to do a before and after of so what I'll do is I'll go to the one that was closest and I'll hit reset because we had two photos so I can't really do a before and after. But let's take a look. So that was the photo that we spent the most time on as a before image and that's our after. So before and after. Looking a little flat. It looks a little flat on that screen. Not sure if it does on here but if it looks okay here, what you could do if it ever does start to look a little flat, I might just increase the exposure. You could always just paint a little on there, too. But again, I'm just kind of going off of that monitor. I'm here, actually, it looks just fine. Alright so that is the Oneonta, Oneonta Gorge. Fun, fun place to visit if you ever get the chance. Let's see here. So I know we did a lot. Can you elaborate more on the gritty effect you used on the rocks and what other situations you might use it? The gritty effect. So the gritty effect is one of my brushes. And I'll show you, I mean, you can recreate it. You don't even have to buy the presets. The gritty effect is 100% clarity. And then the ultra gritty effect is clarity on top of clarity. So I added 100% clarity and then I added it on top of each other. What's cool about these brush presets is there's the added benefit that when you go to the radial filter, they're there. Any preset you save for the brush shows up under radial and shows up under graduated filter. So if you create a preset, it shows up under all three so it's not just under brushes. But the gritty effect, it adds that clarity contrast to things so I paint it on things that I want to look sharper and things that I want to become more apparent. Those rocks in the foreground were important to me in the photo, I want you to see them. By adding clarity, you make it look sharper but at the same time, clarity makes it look a little bit brighter so it kind of draws attention to it. So people can get those brushes on your site, right? Yeah, Mac K photo, there's a nine dollar pack of all the brushes if you don't want to create them. So let's take a look. We're working on waterfall photos. We'll transition toward beaches and mountains and stuff later. But let's take a look at another one here. So this is a fun one. This is one that when I was there, it felt so different and I came home and I looked at the photo and I'm like it's not doing it for me the way like does that ever happen? You get home and it doesn't have the same feeling for you? I was determined to make that feeling happen in this photo and there's some fun stuff you can do to it. So basic adjustments inside of Lightroom here. Basic adjustments, I want it warmer so we're gonna go a little bit warmer on it and exposure-wise, I'm inside the trees here, my exposure's pretty good because it's pretty evenly lit. It's an overcast day, there's not too much going on with the exposure so we don't have to tweak that too much. Even highlights and shadows. I could bring back the highlights a little bit. A lot of people ask questions about water like what should you do to water? For starters, we have a long exposure class tomorrow where we're gonna talk about how to get that streakyness to the water but there is a little bit of an art to editing it because you could let it go close to white or you could pull it back. All I can tell you is my personal preference. I like texture. I like the lines in the water so I don't necessarily want that going to white. I like to see some of those lines because it conveys movement to me and when it goes all white, all that movement's gone. So at least that's a personal preference. Shadows, not too much we've got to worry about here. Whites and blacks, option or alt-click on whites, drag to the right, set the white point. We talked about that before. And option or alt-click on black, drag to the left, set the black point. Just get a couple little specs on the screen there. Clarity. We can add a little bit but we don't want to make it too contrasty at this point because it will darken too many things in the background. Saturation, I can saturate it but really what I want to do here is I want to add a little bit more, I want to add a little bit more warmth to the photo. And we're gonna do that using the brush because I think I can get the warmth where I want it and this kind of speaks to what I was talking about about the feeling of the photo. There was some light coming in up here. In fact, that's what drew me as I'm walking down the stream, I turn around and I kind of see this foggy type of light coming in through those trees and it doesn't grab me the way that it did there. It just felt this warm light coming in. So we're gonna take our brush and I've got sun glow light, yeah, that's going to be plenty. All that brush did was increase the exposure, reduce the clarity, and increase the warmth. So what I do is rather than paint it, I just get a big, big brush. I'm hitting the right bracket key, get a big brush, and I just drop it right on the top there. Maybe a little bit here. Remember I talked about pressure sensitivity? It's pressure sensitive in Lightroom, too. So the less I press, the less of the effect that I get onto it. Maybe I'll make it a little bit warmer but to me, that starts to give a little bit more the effect and I can tweak, pull back the highlights a little bit, maybe. Reduced clarity, what's that do? We saw clarity adds a little bit of edge to things? Remember I was trying to add a gritty effect? Reduced clarity blurs. So the further back I go on clarity, it actually blurs so I'm trying to just give that more of a glowing type of a feel. Let's go here so we've got our brushing down. I think cropping-wise, we should probably just rotate this little bit. What am I looking at? I'm looking at the trees. I know you've got trees going off in just about every direction here. But I'm kind of trying to get an average of most of them. I'm also looking at that little ledge there. So we'll crop that over. Let's see here. Go to our sharpening. I'll zoom in on the foreground-ish area. Add a little bit of sharpening. So that's looking pretty good. And then honestly, to me, I'm pretty much ready for the finishing touches on this one. Again, I have a style for my waterfall photos. I don't really need to go to Photoshop for this. This is actually a great time to show this, too. Distractions. See all these little guys here? I would like them to go away. To me, they're distractions. So I want them to go away. Lightroom has a cloning and healing tool and Lightroom's cloning and healing tool works, it's incredibly powerful. Like when you think of what your doing is all non-destructive on the photo, right. So I can clone and I can heal inside of Lightroom. The problem with it is is it needs something in the photo to pull from so that's the way Lightroom's cloning and healing works is it pulls from a very specific part of the photo. So if I go grab the spot healing brush which is where our cloning and healing is and I go and try to paint over something like right here, what's gonna happen is Lightroom needs to find something in the photo to fix it with and because of the water, it's actually not that bad, but I do know because I tried this before. I do know it's eventually gonna fall apart on us so here's another one. Is there an elephant in it? So there's a good one. You can start to see a little bit of a repeating pattern there, especially if I start to paint over here. You can start to see repeating patterns. So that's where Lightroom's gonna fall apart a little bit. If it doesn't, if you can get away with it, do it here. It's the easiest place to do it by all means. So if you can get away with doing it here, do it here. But what we're gonna do is I'm gonna jump in and finish the photo off in perfect effects. One of the things that perfect effects has if you have the suites for On One is layers. So if I jump into layers, it's got Photoshop-like cloning and healing so whatever your workflow is, if you don't have the suite, you jump into Photoshop, use your cloning and healing in Photoshop just like you normally would. But if you do have it, you don't even have to make the move to Photoshop. So I'll jump in here and I'll just use the cloning and healing tools really quick and then I'll jump into effects just to add the finishing style to it. Alright so they have the tool here. They've got the healing tool. They've got the cloning stamp tool. Their version, On One's version of content aware is called the magic eraser and so the way it works is you literally just paint over something and it magically erases it. And it uses the same stuff that, not the same stuff, but the same idea of what content aware does in Photoshop. So the difference between Photoshop and Lightroom and even this in Lightroom is content aware and the magic eraser and those things, they will look in the photo and make up their own area to fix it with where Lightroom needed to find something in the photo to pull from, these other tools will make up their own. So they look at what you're fixing, they look at what you're painting over, and they come up with a fix for it. So we're just going to keep going. I'm not gonna go through every one because it will probably take me a few minutes and I get pretty, ah, what's it doing there? Go away. Take that. Get rid of that one. I could be here all day. It's like spots like I keep finding them. If you ever do get a little repeating pattern, easy thing to do. Just grab your clone stamp tool, option or alt-click just like you would in Photoshop, and paint over the waterfall. There you go. One more over here and I can't stop, I gotta do it. One more last one here. And that'll take of that. Nice part about it is once that's done, we can jump over into effects and I'm just gonna go to, I'm probably gonna use the same preset that I did before. Let's go presets, landscape, and I'm gonna try, I'll try golden hour even though it's not the golden hour. It's kind of fake warm for me so I'm going to go to summer. Yeah, I like summer. Let's click the plus and add that vignette one more time. Big softy. Who names these things? I should ask. I work there. (audience laughs) Who named big softy? See that looks good. I like that a lot. It's even got a little preview. Same keyboard shortcut as Lightroom so that's before and after. So I'll hit apply. Since I didn't go to Photoshop first this time, it's just gonna bring me right back over into Lightroom with a copy of the photo. So that is our before photo and there is our after photo. So before, after. Definitely feels a little bit more like it did when I was there. Sometimes when I do cloning in a landscape photo like this and I go and have it printed, there's pixel degradation in the print. So I'm wondering if you have any hints or comments about that? There's pixel degradation in the print. It can be from a couple of things. Sometimes if you use a harder brush when you're cloning. You know how you have a hard edge brush and a soft edge brush, I try to use the softer edge brush to let the edges kind of blend and fade a little bit. So that could be it. I'm looking here because we know we cloned here and there's a little bit there I could probably clicked on it again and run over it but yeah I mean the brushes probably would be the bigger one that I would go to. If you use a harder edge brush, sometimes it will leave more tracks behind it versus the soft edge. After editing a file in Photoshop, why save as a tif? I was waiting for somebody to ask that. I was gonna say it and then I was like well, somebody's gonna ask it so good question. Why does Photoshop, remember when I went with the Oneonta Gorge photo, here it is. Remember when I went to Photoshop and back and it came back here as a tif file? It does that because that's Lightroom's default. Lightroom's default, preferences are set up to go to Photoshop and come back as a tif file. Tifs support layers, everything's good. But that's Lightroom's default for it. So if you go up here to the Lightroom preferences and you go to external editing, over here see edit in Photoshop, file format TIFF. So the question is why do that instead of PSD? Because PSD is you think Photoshop's happy place like this is the format that was created for Photoshop, a Photoshop document. Why do it? I have a very, very simple answer. Because when I click on tif which is the default says is the recommended choice. When I clicked on PSD, it gives me this big scary message that talks about big scary things. So there's no other reason. I just take Lightroom's default. I figure that's how they want it. If you click on PSD, there's that scary message there. Printers actually prefer tif to PSD. Well you know, and if anybody didn't hear what she said, prints actually prefer tif to PSDs. In a different print world, yes. In a photography print world, no. Go to M pics, go to nations, go to bay photo, go to any of those places and try to send them tif files. The first thing you do when you go to their FAQ, SRGB JPEGs. So I thought that, too. Maybe it's a print thing. It just depends. In the photography print world, depending on who's doing the printing but most of your labs want SRGB JPEGs. A lot of them won't take tifs or recommend against it so I just go with a big scary message. Alright, anybody else? Oh yeah. So quick question. On the waterfall photo that you're doing, before you saved it, it didn't have all of your edits and things like that on it from On One, whatever, you alluded to that you're gonna have to start over. So if you had brought that tif over, when you need to go and re-edit it back, let's say you forgot something and you need to go back into it. Does it open it all back up into layers again from Lightroom or does it bring it over just as an individual photo and then you have to just build on top of it again? Good question, I can show you. So in a nutshell, I think what you're asking is if I ever want to re-edit this and I want access to the layers, what happens? So here we go. If I go up here to the photo menu, go down here to edit, and I try to open it back up into Photoshop, what it's gonna do is it's gonna give me a dialog box and it's gonna say do you want to edit a copy of it with the Lightroom adjustments. Remember, I didn't see that dialog box the first time because it was a raw photo and it's not gonna give me the option. A raw photo has to convert the file into a format that Photoshop can read. So automatically makes a copy, okay. You can't edit the raw photo in Photoshop. Now it's gonna ask me to make a copy because it's a tif photo. It'll let me the original if I want to. So edit a copy with the Lightroom adjustments and it'll even tell you about what it does here. It'll apply the Lightroom adjustments to another version of the file and it'll let you edit that one. The downside is that it bakes everything together and flattens your document because remember, I think I added a little bit of sharpening or something to the photo here so it would bake all that stuff together here inside of Lightroom. I wouldn't worry too much about the middle option. You never just want to edit a copy. The one that you want is edit the original because when I do that, I come back over here into Photoshop. I have all the layers so I can go back here and do whatever I want to it. And interestingly enough, I went into On One. On One has smart filters so you could even get like really smart with this. You could use smart objects in Photoshop, you could use smart filters inside of On One and you're re-editable all the way through. I can go back and change any setting that I want in this entire thing so there's a lot of powerful stuff with re-editability going on.
Class Materials
Bonus Materials with Purchase
Ratings and Reviews
Barry Walsh
Great class Matt! I am about two-thirds the way through the class and have learned a lot about Lightroom and the objective of this course. I must admit I was over-whelmed by the amount of material covered and that was probably due to not having prior knowledge about Lightroom. I have since signed up for the 7 day trial of Adobe Creative Cloud Photography plan and then went through their "beginner's" tutorial. If you are contemplating taking this course, I would highly recommend taking the Adobe Lightroom tutorials first. They cleared up a lot of confusion on my part and I now have a better understanding of the concepts Matt covered. I'm actually going to go back and retake what I viewed to help reinforce both what Matt initially covered and the basic concepts tutorials offered by Adobe. Again, great job Matt and thanks for all the useful information!
a Creativelive Student
Matt is the best and he his the same in person. I had the fortunate opportunity to run into Matt on the side of the road at Dallas Divide in Colorado a couple of years ago.... he is the real deal. I have learned almost all my LR post processing from him when he was with Kelby and have continued to follow him over to On1 as he is the best teacher out there when it comes to Post. Great class and bring him back again. Another great CL class ....... bravo!........ Johnny Boyd @ natureimaging.com